はじめに
はじめまして、amaebiと申します。
今回は「個人アカウントにTerraform環境を構築してみた」ということで、Terraformの実行環境を構築したことがなかったので、これを機に作ってみようかなと思い本ブログを書いております。
その上で、AdministratorAccess権限を付与したIAMユーザーのアクセスキーを発行して使用しても...怖すぎるのでAssumeRoleを利用してTerraform環境を構築します。
自分用の軽いメモ書き程度なので少し見づらかったりしますが、気楽に見ていただけますと幸いです。
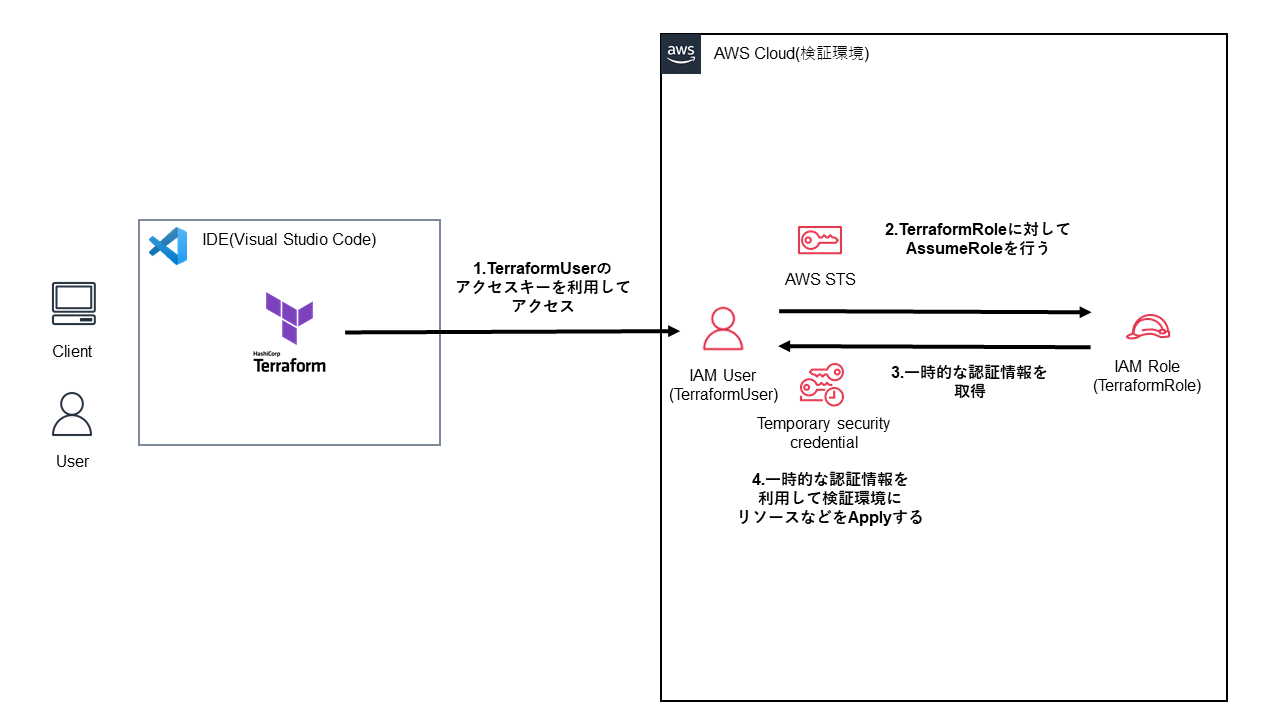
構成図
| 名称 | アタッチされているポリシー |
|---|---|
| TerraformUser | TerraformRole用のインラインポリシー |
| TerraformRole | AdministratorAccess |
※今回のブログでは、IAM RoleにAdministratorAccessを付与しておりますが、セキュリティ上、必要最小限の権限を付与してください。
手順
- IAMユーザー作成
- インラインポリシー作成
- IAMロール作成
- Terraformインストール、設定
- Visual Studio Codeインストール、設定
- Terraformファイル作成
- 動作確認
IAMユーザー作成
マネジメントコンソール > IAM > ユーザー からIAMユーザーを作成します。
ユーザー名以外は特に設定せずそのまま作成します。

インラインポリシー作成
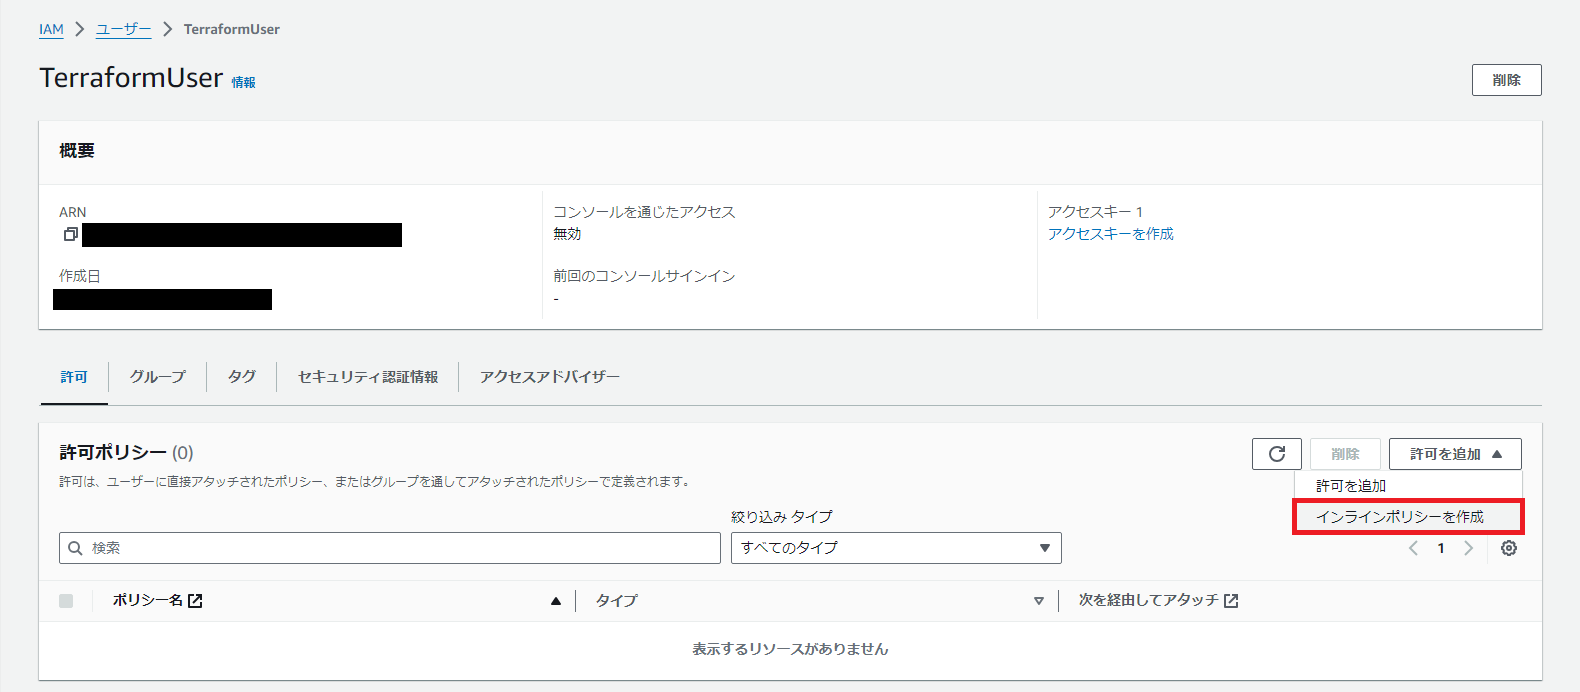
先ほど作成したTerraformUserをクリックし、許可タブから許可ポリシーの 許可を追加 > インラインポリシーを作成 を選択します。

こちらのポリシーを付与します。
{
	"Version": "2012-10-17",
	"Statement": [
		{
			"Effect": "Allow",
			"Action": "sts:AssumeRole",
			"Resource": "arn:aws:iam::<AWSアカウントID>:role/TerraformRole"
		}
	]
}
ポリシー名を入力し、各項目の設定内容が間違っていないか確認し、問題がなければ作成します。

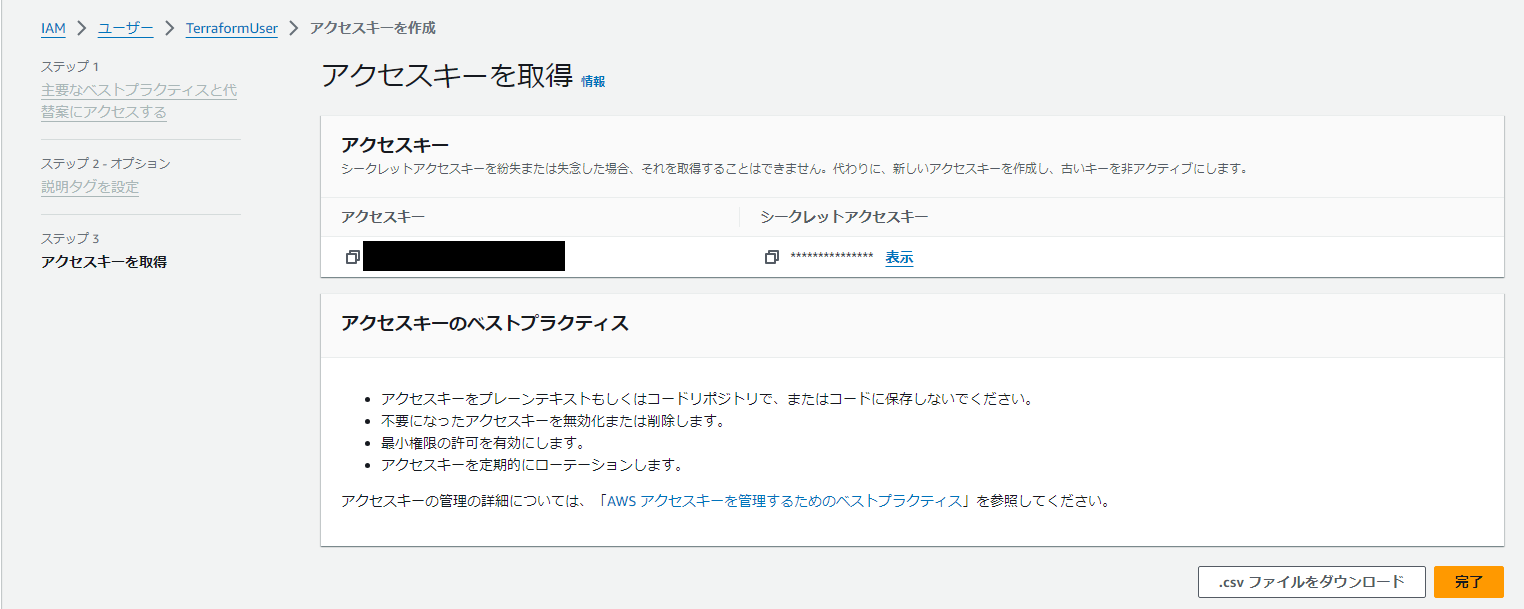
その後、Terraformに接続するためのアクセスキーも発行します。

アクセスキーを作成し、アクセスキーとシークレットアクセスキーをメモしておきます。

IAMロール作成
マネジメントコンソール > IAM > ロール からIAMロールを作成します。
信頼されたエンティティタイプをカスタム信頼ポリシーを選択します。

こちらのポリシーを付与して、次へ
※ExternalIdで指定したIDと一致した場合のみ、AssumeRoleを行うようにします。
{
	"Version": "2012-10-17",
	"Statement": [
		{
			"Effect": "Allow",
			"Principal": {
			    "AWS": "arn:aws:iam::<AWSアカウントID>:user/TerraformUser"
			},
			"Action": "sts:AssumeRole",
   			"Condition": {
			    "StringEquals": {
			        "sts:ExternalId": "<任意の文字列>"
			    }
			}
		}
	]
}
IAMロール名を入力し、各項目の設定内容が間違っていないか確認し、問題がなければ作成します。

Terraformインストール、設定
今回、ローカルPC(Windows)でTerraform環境を構築していきます。
それではまず、Terraformからインストールしていきます。
※公式のインストール方法はこちらです。
▼まずはじめに、Terraformの公式サイトから最新バージョンをダウンロードします。
https://developer.hashicorp.com/terraform/install#windows
ダウンロードしたファイルをC:\Terraform配下へ解凍します。

次に環境変数PATHにC:\Terraformを追加し、環境変数の永続設定まで行います。
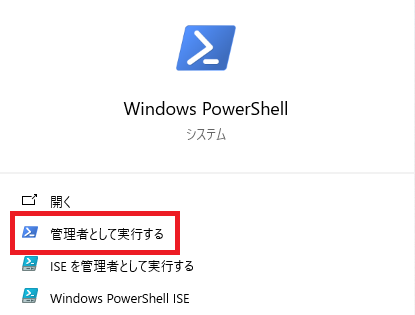
PowerShellを管理者権限で実行します。
PowerShellに以下コマンドを入力します。
PS C:\xxxx> # 現在の環境変数PATHの設定確認
PS C:\xxxx> $Env:Path
PS C:\xxxx>
PS C:\xxxx> # 環境変数PATHにパス追加
PS C:\xxxx> $Env:Path += ";C:\Terraform"
PS C:\xxxx>
PS C:\xxxx> # 環境変数に設定されているか確認
PS C:\xxxx> $Env:Path
PS C:\xxxx>
PS C:\xxxx> # システム変数PATHの設定確認
PS C:\xxxx> [System.Environment]::GetEnvironmentVariable('PATH' , 'Machine')
PS C:\xxxx>
PS C:\xxxx> # 環境変数の永続設定
PS C:\xxxx> [Environment]::SetEnvironmentVariable('PATH', $Env:Path, 'Machine')
PS C:\xxxx>
PS C:\xxxx> # システム変数に設定されているか確認
PS C:\xxxx> [System.Environment]::GetEnvironmentVariable('PATH' , 'Machine')
PS C:\xxxx>
パスが通ったか確認します。
以下のような実行結果が出力されれば成功です。
PS C:\xxxx> # パスが通ったか確認する
PS C:\xxxx> terraform -v
Terraform v1.9.2
on windows_amd64
PS C:\xxxx>
Visual Studio Codeインストール、設定
▼Visual Studio Codeの公式サイトから最新バージョンをダウンロードし、セットアップを行います。
https://code.visualstudio.com/
Visual Studio Codeを起動し、拡張機能からTerraformと検索します。
検索欄から以下の拡張機能が表示されるので、こちらをインストールします。

Visual Studio Codeの フォルダを開く からC:\Terraformを選択します。

CTRL + SHIFT + @ でターミナルを起動します。

これで、Visual Studio Codeの設定は完了です。
動作確認
実際にTerraform apllyを実行して検証環境上にVPCが作成できるか確認していきます。
C:\Terraform配下に以下ファイルを作成します。
variable "region" {}
variable "access_key" {}
variable "secret_key" {}
variable "role_arn" {}
variable "external_id" {}

terraform {
  required_providers {
    aws = {
      source  = "hashicorp/aws"
      version = "~> 5.0"
    }
  }
}

provider "aws" {
  region     = var.region
  access_key = var.access_key
  secret_key = var.secret_key

  assume_role {
    session_name = "Terraform"
    role_arn     = var.role_arn
    external_id  = var.external_id
  }
}
resource "aws_vpc" "vpc" {
  cidr_block = "10.0.0.0/16"

  tags = {
    Name = "test-vpc"
  }
}
region      = "ap-northeast-1"
access_key  = "<アクセスキー>"
secret_key  = "<シークレットアクセスキー>"
role_arn    = "arn:aws:iam::<AWSアカウントID>:role/TerraformRole"
external_id = "<任意の文字列>"
それでは、ターミナルからTerraformを実行していきます。
PS C:\Terraform> terraform init
Initializing the backend...
Initializing provider plugins...
- Finding hashicorp/aws versions matching "~> 5.0"...
- Installing hashicorp/aws v5.57.0...
- Installed hashicorp/aws v5.57.0 (signed by HashiCorp)
Terraform has created a lock file .terraform.lock.hcl to record the provider
selections it made above. Include this file in your version control repository
so that Terraform can guarantee to make the same selections by default when
you run "terraform init" in the future.

Terraform has been successfully initialized!

You may now begin working with Terraform. Try running "terraform plan" to see
any changes that are required for your infrastructure. All Terraform commands
should now work.

If you ever set or change modules or backend configuration for Terraform,
rerun this command to reinitialize your working directory. If you forget, other
commands will detect it and remind you to do so if necessary.
PS C:\Terraform>
PS C:\Terraform> terraform plan

Terraform used the selected providers to generate the following execution plan. Resource actions are indicated with the following symbols:
  + create

Terraform will perform the following actions:

  # aws_vpc.vpc will be created
  + resource "aws_vpc" "vpc" {

    省略

    }

Plan: 1 to add, 0 to change, 0 to destroy.

───────────────────────────────────────────────────────────────────────────────────────────────────────────────────────────────────────────────────────────────────────────────────────────────────────────────

Note: You didn't use the -out option to save this plan, so Terraform can't guarantee to take exactly these actions if you run "terraform apply" now.
PS C:\Terraform>
PS C:\Terraform> terraform apply

Terraform used the selected providers to generate the following execution plan. Resource actions are indicated with the following symbols:

 省略

Do you want to perform these actions?
  Terraform will perform the actions described above.
  Only 'yes' will be accepted to approve.

  Enter a value: yes

aws_vpc.vpc: Creating...
aws_vpc.vpc: Creation complete after 2s [id=vpc-0c9a908c5a2ee2de9]

Apply complete! Resources: 1 added, 0 changed, 0 destroyed.
PS C:\Terraform>
無事applyができたため、VPCが作成された確認します。
さいごに
以上、「Visual Studio Code にAssumeRoleを利用してTerraform環境を構築してみた」でした。
HCP Vaultなどを利用すればよりセキュアなTerraform実行環境を構築できると思いますが、とりあえず実行する環境がほしかったのでこのような形になりました(汗)
今後、よりセキュアにしていこうかなと考えていますので、その際にブログを更新します。


