現在仕事の中でAWSを利用したIoTプラットフォームの構築を始めています。
そのような中でIaC(Infrastructure as Code)を実現するために
TerraFormでS3の作成までをトライしてみました。
実行環境
- Windows 10 pro 64bit
- VisualStudioCode: 1.26.1
- Terraform: 0.11.13
環境の構築
それでは早速導入してみましょう
手順は基本的に公式ページを参考にしています
https://learn.hashicorp.com/terraform/getting-started/install.html
AWS構築
初めにAWS側の設定をしておきます
IAMユーザを作成し、credentialをメモしておきます
今回私はpoweruserのロールをアタッチしたIAMユーザを作成しました
- ACCESS_KEY
- SECRET_KEY
端末へのTerraform&tflint環境設定
Terraformとtflintをダウンロードし、実行できる環境を構築します。
今回はこんな構成で配置します
C:\Users\my_user\terraform
│  terraform.exe
│  tflint.exe
Terraformの設定
Archiveダウンロード
Terraform公式サイトから最新版のArchiveをダウンロードします
https://www.terraform.io/downloads.html
解凍
C:\Users\my_user\terraformに解凍します
tflintの設定
Archiveダウンロード
Terraform用のLint機能であるtflintをインストールします
tflint公式サイトからlatestタグのtflintのAssetsの中からtflint_windows_amd64.zipをダウンロードします
https://github.com/wata727/tflint/releases/
解凍
C:\Users\my_user\terraformに解凍します
環境変数設定
以下のコマンドを実行し、環境変数にterraform/tflintのパスを通します
この時管理者権限でPowerShellを実行してください
>$env:Path += ";C:\Users\my_user\terraform"
>[Environment]::SetEnvironmentVariable('PATH', $Env:Path, 'Machine')
動作確認
以下のようにTerraform/tflintそれぞれのバージョンが表示されればOKです
> terraform -v
Terraform v0.11.13

> tflint -v
TFLint version 0.7.5
VSCodeの設定
Terraform拡張機能のインストール
拡張機能にてTerraformをインストールします。
一番上のやつです
再起動はいりません!
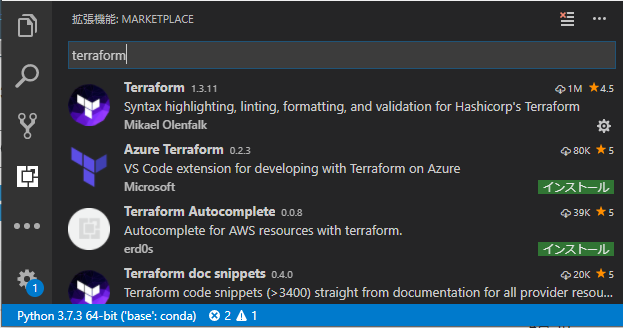
インストールが完了するとこんな感じのアイコンがサイドバーの下のほうに表示されます

作業ディレクトリの作成
>mkdir C:\Users\my_user\terraform
>cd C:\Users\my_user\terraform
tfファイルの作成
今回はこんな感じでファイル作成していきます。
同じ階層内のtfファイルはすべて実行されますので、管理単位で分けています
C:\Users\my_user\terraform
│  terraform.exe
│  tflint.exe
│  main.tf           #   メインの設定
│  s3.tf             #   S3の設定
│  terraform.tfvars  #   クレデンシャルの設定
variable "access_key" {}
variable "secret_key" {}
variable "region" {}

# AWS プロバイダの設定
provider "aws" {
  access_key = "${var.access_key}"
  secret_key = "${var.secret_key}"
  region = "${var.region}"
}
access_key = "YOUR_ACCESS_KEY"
secret_key = "YOUR_SECRET_KEY"
region = "ap-northeast-1"
resource "aws_s3_bucket" "bucket" {
  bucket = "garakutayama-terraform-test"
  acl    = "private"

  lifecycle_rule {
    id      = "log"
    enabled = true

    prefix = "log/"

    tags = {
      "rule"      = "log"
      "autoclean" = "true"
    }

    transition {
      days          = 30
      storage_class = "STANDARD_IA" # or "ONEZONE_IA"
    }

    transition {
      days          = 60
      storage_class = "GLACIER"
    }

    expiration {
      days = 90
    }
  }
}
Terraform Initの実行
Initコマンドは作業ディレクトリのTerraform設定ファイルの初期化を行います
例えばproviderでawsを使用した場合はawsのpluginのダウンロード処理などが走ります
> terraform init

Initializing provider plugins...


・・・

* provider.aws: version = "~> 2.9"

Terraform has been successfully initialized!

You may now begin working with Terraform. Try running "terraform plan" to see
any changes that are required for your infrastructure. All Terraform commands
should now work.

If you ever set or change modules or backend configuration for Terraform,
rerun this command to reinitialize your working directory. If you forget, other
commands will detect it and remind you to do so if necessary.
Terraform planの実行
設定内容のplanを行います
-outコマンドでplanの結果をアウトプットしておき、この後実行するapplyコマンドで参照します
>terraform plan -out=mainplan
Refreshing Terraform state in-memory prior to plan...
The refreshed state will be used to calculate this plan, but will not be
persisted to local or remote state storage.


------------------------------------------------------------------------

An execution plan has been generated and is shown below.
Resource actions are indicated with the following symbols:
  + create

Terraform will perform the following actions:

・・・


Plan: 1 to add, 0 to change, 0 to destroy.

------------------------------------------------------------------------

This plan was saved to: main_plan

To perform exactly these actions, run the following command to apply:
    terraform apply "main_plan"
Terraform applyの実行
最後にapplyを実行して作成します
> terraform apply main_plan
aws_s3_bucket.bucket: Creating...
・・・
aws_s3_bucket.bucket: Creation complete after 4s (ID: garakutayama-terraform-test)

Apply complete! Resources: 1 added, 0 changed, 0 destroyed.
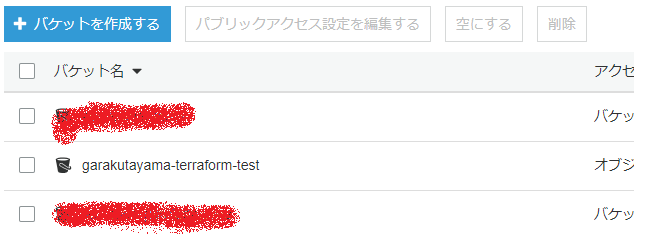
完成!
無事S3を作成することができました。
お片付け
作成したS3を削除しておきます
削除はdestroyコマンドです
> terraform destroy
aws_s3_bucket.bucket: Refreshing state... (ID: garakutayama-terraform-test)

An execution plan has been generated and is shown below.
Resource actions are indicated with the following symbols:
  - destroy

Terraform will perform the following actions:

  - aws_s3_bucket.bucket


Plan: 0 to add, 0 to change, 1 to destroy.

Do you really want to destroy all resources?
  Terraform will destroy all your managed infrastructure, as shown above.
  There is no undo. Only 'yes' will be accepted to confirm.

  Enter a value: yes

aws_s3_bucket.bucket: Destroying... (ID: garakutayama-terraform-test)
aws_s3_bucket.bucket: Destruction complete after 0s

Destroy complete! Resources: 1 destroyed.
おわり
残り課題
- credentialをaws cliのUserProfileから参照するように変更
- credentialを間違ってgitにあげちゃうなどしないようにtfファイルとは別ディレクトリで管理したい
- statusファイルをどう管理するか
- 中にはクレデンシャル情報も含まれてたりする
- またstatusファイルはdeploy先のインスタンスとtfファイルの差異があるとエラーになる
- 外部ベンダーとの共有方法はどうするか
次の回でこの点について解決していきます