はじめに
マルチユーザプラットフォームを作れるJupyterhubを試してみたときの自分用メモ。
やること
- Jupyterhub起動
- jupyterhub_config.pyの設定
- NativeAuthenticatorの導入とお試し
環境
$sw_vers
ProductName:	Mac OS X
ProductVersion:	10.13.6
BuildVersion:	17G14042
$docker --version
Docker version 20.10.0, build 7287ab3
やったこと
Jupyterhubの起動
公式のドキュメントに記載されているように、次のdockerのコマンドでJupyterhubを起動できます。
docker run -d -p 8000:8000 --name jupyterhub jupyterhub/jupyterhub jupyterhub
ただ、このままだと何も設定もできていないし、ログインしてもほとんど何もできない状態なので、コンテナ内で設定をしていく必要があります。
jupyterhub_config.pyの設定
先ほど作ったコンテナは一度削除して改めてコンテナを起動して中に入ります。
docker run -it -p 8000:8000 --name jupyterhub jupyterhub/jupyterhub bash
必要なライブラリなどをインストールしていきます。
apt update
apt upgrade
apt install python3 python3-pip npm nodejs libnode64 vim git
npm install -g configurable-http-proxy
次のコマンドでjupyterhub_config.pyを作成します。
jupyterhub --generate-config
作成されたjupyterhub_config.pyに以下の行を追加します。
# ログイン後に http://...:8000/user/<username>/lab? へ遷移する設定(Jupyterlabが起動)
c.Spawner.default_url = '/lab'
# Jupyterlabで作成されたノートブックファイルなどが格納されるディレクトリ
c.Spawner.notebook_dir = '~/notebook'
# adminユーザのユーザ名
c.Authenticator.admin_users = {'testadmin'}
# ログインが許可されているユーザ名
c.Authenticator.allowed_users = {'testuser01'}
デフォルトだと認証にはPAMAuthenticatorを使用するようになっていて、OSのユーザ&パスワードでログインするようになっています。
動作確認用に testadmin と testuser01 というユーザを作成しておきます。
adduser testuser01
mkdir -p -m 777 /home/testuser01/notebook
chown testuser01: /home/testuser01/notebook

adduser testadmin
mkdir -p -m 777 /home/testadmin/notebook
chown testadmin: /home/testadmin/notebook
設定ファイルを指定してJupyterhubを起動します。
jupyterhub jupyterhub_config.py
デフォルトだとhttp://localhost:8000でJupyterhubが起動するので、ブラウザでアクセスします。
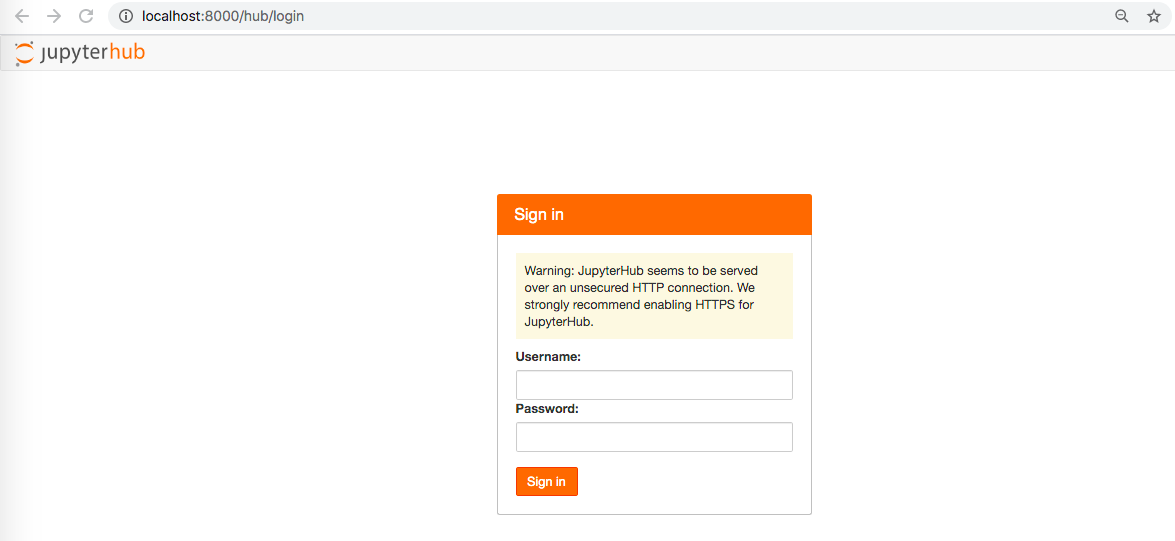
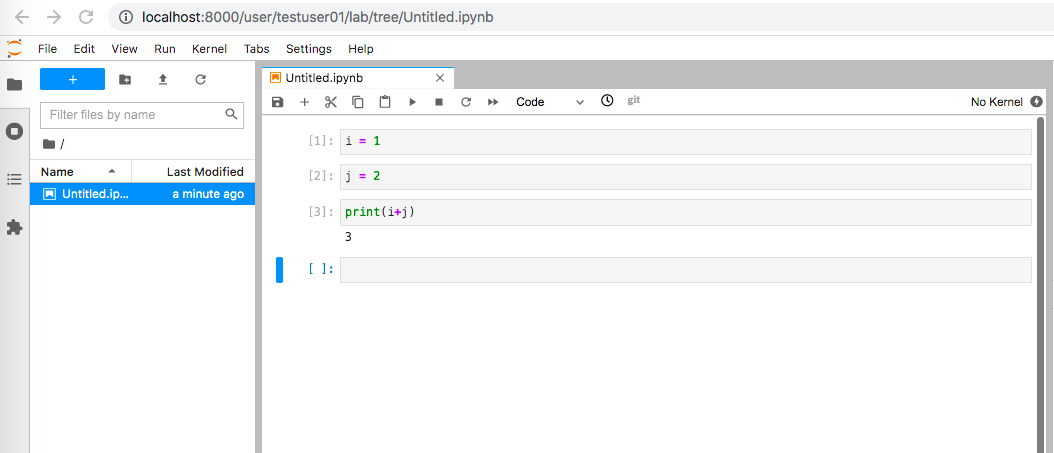
先ほど作ったtestuser01でログインするとJupterlabの画面が表示されて、Pythonが動くと思います。
Jupyterhubの「Add Users」の特徴
次にadminユーザとして作ったtestadminとしてログインしてみます。
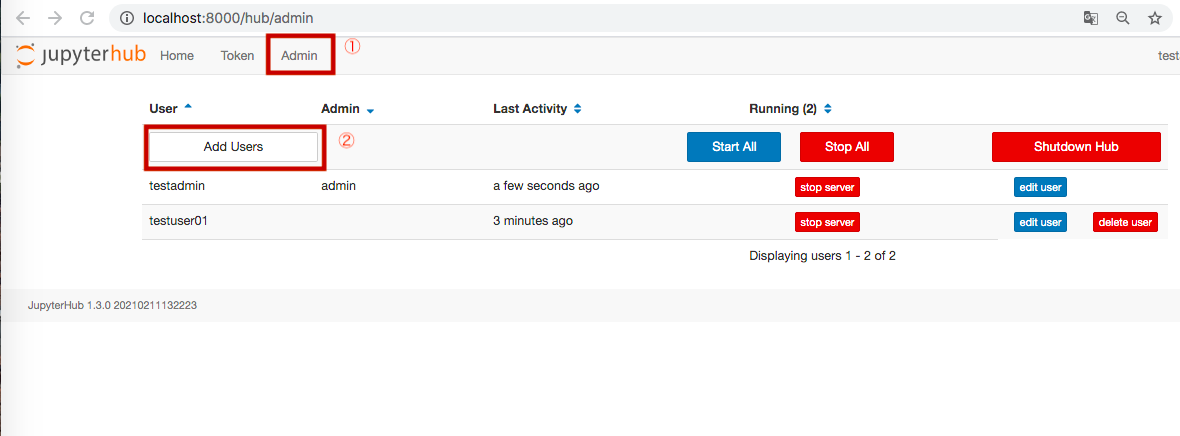
testadminとしてログイン後、Jupyterlabの「File」→ 「Hub Control Panel」でJupyterhubの管理画面に遷移できます。
ここで、「Admin」 → 「Add Users」を押すとユーザを追加する画面が出てきます。
ただ、パスワードを設定できるようなところもなく、新しく作ったユーザ名+空のパスワードでもログインできません。
「あれ?」と思って、サーバーのログを見てみると、
[I 2021-02-11 13:39:09.631 JupyterHub auth:897] Creating user: adduser -q --gecos '""' --disabled-password testuser02
と表示されていて、AuthenticatorがOSのユーザを作成しているものの、パスワードで認証できないようになっています。
デフォルトのままだと、管理者はOSのコマンドでいちいちユーザを作らないといけない感じになります。
NativeAuthenticatorの導入
管理者ユーザであってもGUIでユーザの追加などを行いたいなと思ったので、
NativeAuthenticatorを導入します。
mkdir native_authenticator
cd native_authenticator/
git clone https://github.com/jupyterhub/nativeauthenticator.git
cd nativeauthenticator/
pip3 install -e .
インストールは以上で終わりです。
あとはjupyterhub_config.pyに設定するために下の行を追加します。
c.JupyterHub.authenticator_class = 'nativeauthenticator.NativeAuthenticator'
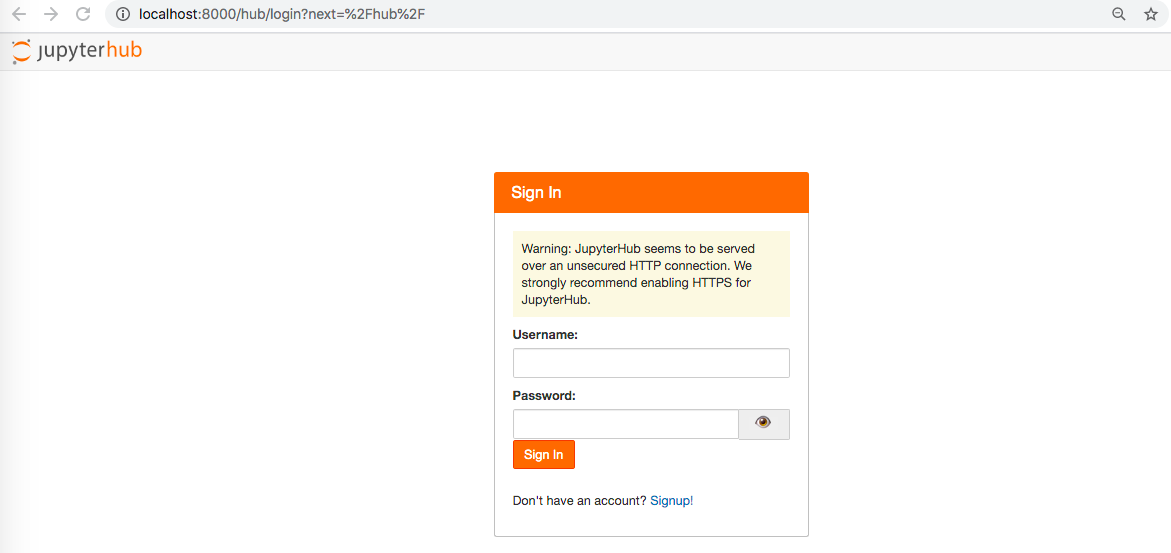
再びJupyterhubを起動すると最初のログイン画面にSingupへのリンクが現れて、
自分でユーザ名とパスワードを入力できるようになります。
NativeAuthenticatorで最初にログインするとき
NativeAuthenticatorだとユーザ名&パスワード情報はOSのユーザ情報を見に行かないです。
デフォルトだとユーザ登録時に管理者の許可が必要なので、管理者としてユーザ登録しようとしても許可が必要になるのでは?最初にどうやってログインするの?って話なのですが、
jupyterhub_config.pyのc.Authenticator.admin_usersに記載したユーザ名であれば、許可のフローをスキップしてログインできます。
ということで
-
jupyterhub_config.pyのc.Authenticator.admin_usersにユーザ名を追加する。(今回はtestadmin) - Jupyterhubのサインアップ画面でユーザ名testadmin、適当なパスワードで登録
- Jupyterhubのログイン画面に行き、ユーザ名testadmin、入力したパスワードでログイン
という手順を踏むと管理者でログインできます。
NativeAuthenticatorのユーザ追加時の特徴
あるユーザでSignupしようとユーザ名とパスワードを入力すると、管理者の許可待ちになります。
(なお、NativeAuthenticatorのopen_signupをTrueに設定していれば(デフォルトはFalse)、誰でもユーザを作成してログインできます。)
違うブラウザで管理者としてログインし、http:localhost:8000/hub/authorizeにアクセスします。(ボタンなどがないので、URLを直打ちします。不便...)
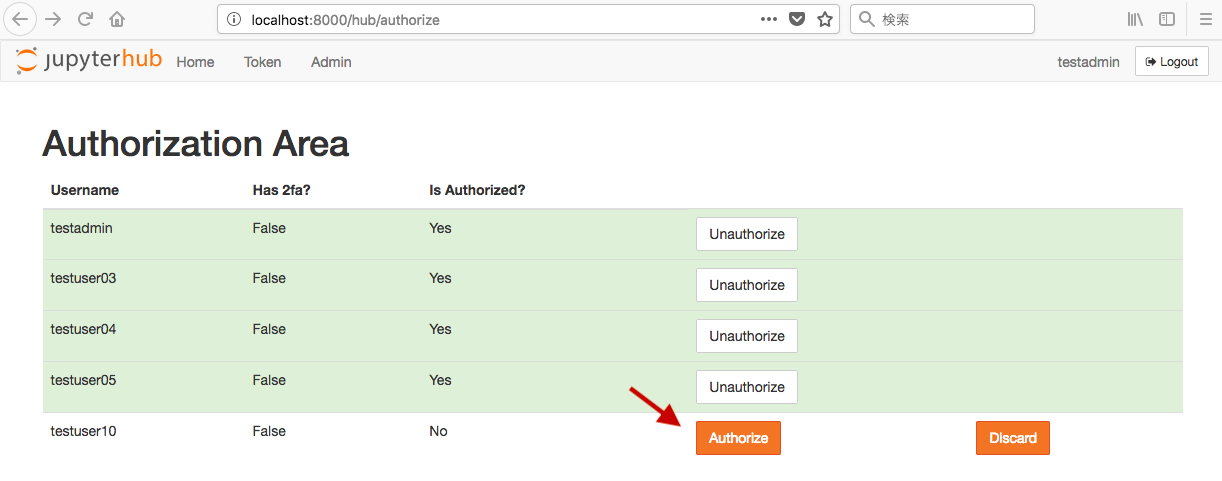
ここで新しいユーザに対して「Authorize」をクリックします。
他のブラウザでtestuser10としてログインしようとすると...エラー。
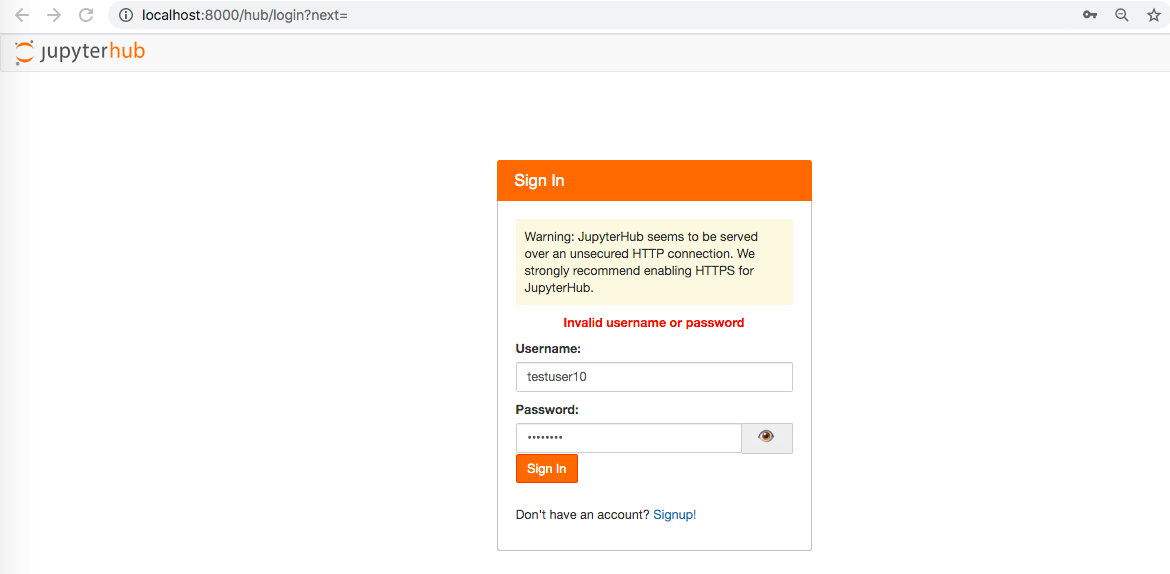
このときのサーバーのログは次の通り。
[W 2021-02-12 12:50:41.671 JupyterHub auth:503] User 'testuser10' not allowed.
[W 2021-02-12 12:50:41.673 JupyterHub base:763] Failed login for testuser10
NativeAuthenticatorのソースコードをよく見てみると最初にユーザを作成する際に、ユーザ名がjupyterhub_config.pyのc.Authenticator.allowed_usersに含まれているかチェックしていて、Falseの状態のままだとログイン時にはじかれてしまうロジックになっています。
https://github.com/jupyterhub/nativeauthenticator/blob/b0d9f9e678af08ae36b50be96e533b7a98d227bf/nativeauthenticator/nativeauthenticator.py#L202
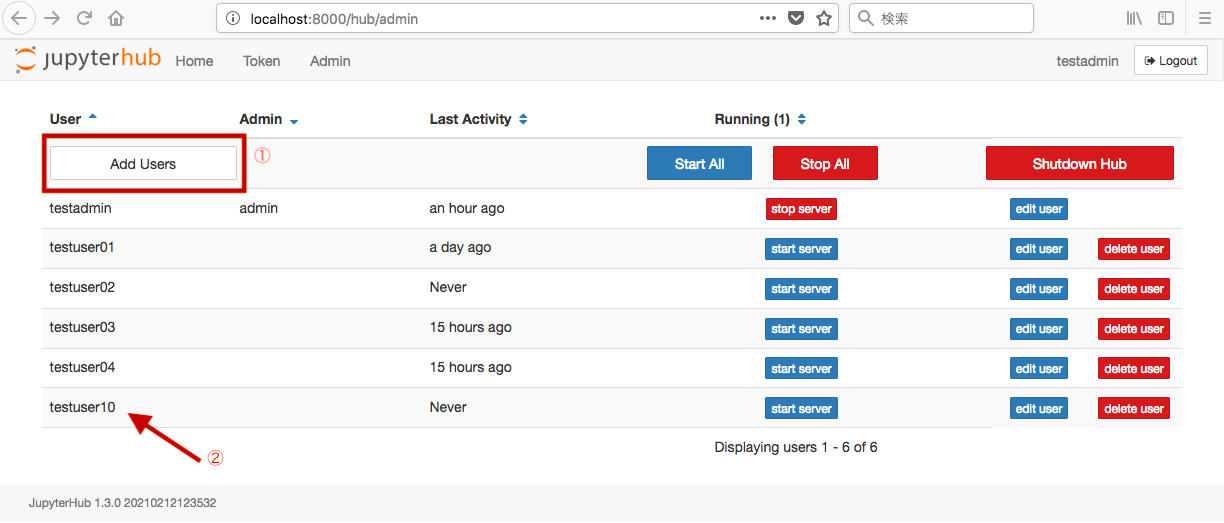
これを解消するには、「Authorize」した後に、「Admin」 → 「Add Users」でユーザを追加すればよいです。
pre_spawn_hookの設定
上記の操作でログインはできますが、ログイン後にエラーになります。
というのも、Jupyterlabで~/notebookのディレクトリを見に行きますが、それが存在しないからです。
また、NativeAuthenticatorではOSのユーザを作成しないです。
念のため、/etc/passwdを確認すると、
cat /etc/passwd
root:x:0:0:root:/root:/bin/bash
daemon:x:1:1:daemon:/usr/sbin:/usr/sbin/nologin
bin:x:2:2:bin:/bin:/usr/sbin/nologin
sys:x:3:3:sys:/dev:/usr/sbin/nologin
sync:x:4:65534:sync:/bin:/bin/sync
games:x:5:60:games:/usr/games:/usr/sbin/nologin
man:x:6:12:man:/var/cache/man:/usr/sbin/nologin
lp:x:7:7:lp:/var/spool/lpd:/usr/sbin/nologin
mail:x:8:8:mail:/var/mail:/usr/sbin/nologin
news:x:9:9:news:/var/spool/news:/usr/sbin/nologin
uucp:x:10:10:uucp:/var/spool/uucp:/usr/sbin/nologin
proxy:x:13:13:proxy:/bin:/usr/sbin/nologin
www-data:x:33:33:www-data:/var/www:/usr/sbin/nologin
backup:x:34:34:backup:/var/backups:/usr/sbin/nologin
list:x:38:38:Mailing List Manager:/var/list:/usr/sbin/nologin
irc:x:39:39:ircd:/var/run/ircd:/usr/sbin/nologin
gnats:x:41:41:Gnats Bug-Reporting System (admin):/var/lib/gnats:/usr/sbin/nologin
nobody:x:65534:65534:nobody:/nonexistent:/usr/sbin/nologin
_apt:x:100:65534::/nonexistent:/usr/sbin/nologin
testuser01:x:1000:1000:,,,:/home/testuser01:/bin/bash
testadmin:x:1001:1001:,,,:/home/testadmin:/bin/bash
testuser02:x:1002:1002:"",,,:/home/testuser02:/bin/bash
hoge:x:1003:1003:"",,,:/home/hoge:/bin/bash
testuser03:x:1004:1004:"",,,:/home/testuser03:/bin/bash
testuser04:x:1005:1005:"",,,:/home/testuser04:/bin/bash
こちらの通り、testuser10が存在しないです。
ということで、Jupyterlabを開始する前(Spawnの前)に
- OSにユーザを作っておく
- ディレクトリを作っておく
という操作が必要ですので、pre_spawn_hookを設定します。
jupyterhub_config.pyに以下を追加します。
import pwd, subprocess
def pre_spawn_hook(spawner):
    username = spawner.user.name
    try:
        pwd.getpwnam(username)
    except KeyError:
        subprocess.check_call(['sh', '/srv/jupyterhub/bootstrap-script/bootstrap.sh', username])

c.Spawner.pre_spawn_hook = pre_spawn_hook
また、上記の操作を実行するためのシェルスクリプトを作成します。
# adding user and making the user directory
adduser -q --gecos '""' --disabled-password $1
mkdir -p -m 777 /home/$1/notebook
chown $1: /home/$1/notebook
再度、Jupyterhubを起動します。
testuser10でログインすると...
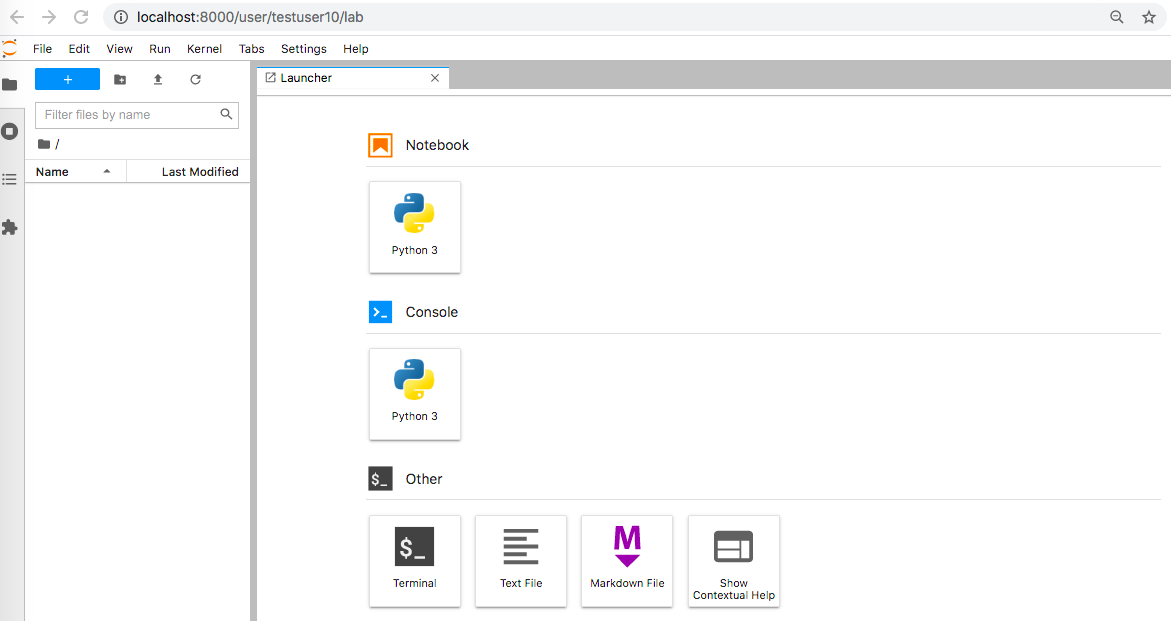
無事にJupyterlabが表示されました!
一番最後にjupyterhub_config.pyのコード全量を載せておきます。
まとめ
- Jupyterhubはdockerですぐに起動できるものの、使うためには設定が必要
- デフォルトだとOSのユーザで認証
- JupyterhubのAdminで追加できるユーザは(OSの)パスワード設定不可
- NativeAuthenticatorでサインアップ、ログインするには以下の2つが必要
- 管理者によるAuthorize & Add Usersの操作
- pre_spawn_hookによるOSユーザ & ディレクトリ作成
こうやればもっと楽にできるよ!などコメントあればお願いします!
参考にした記事など
- https://www.hatarilabs.com/ih-en/how-to-set-a-multiuser-jupyterlab-server-with-jupyterhub-in-windows-with-docker
- https://qiita.com/noguhiro2002/items/99758ad66587f24c0ef2
- https://qiita.com/kitoo/items/9b9ac98c0d059bd1ab1f
jupyterhub_config.py
c.JupyterHub.authenticator_class = 'nativeauthenticator.NativeAuthenticator'
c.Spawner.default_url = '/lab'
c.Spawner.notebook_dir = '~/notebook'
import pwd, subprocess
def pre_spawn_hook(spawner):
    username = spawner.user.name
    try:
        pwd.getpwnam(username)
    except KeyError:
        subprocess.check_call(['sh', '/srv/jupyterhub/bootstrap-script/bootstrap.sh', username])

c.Spawner.pre_spawn_hook = pre_spawn_hook
c.Authenticator.admin_users = {'testadmin'}
c.Authenticator.allowed_users = {'testuser01'}