皆さん、はじめまして。
IBMのIntelligent Content Services というチームでOCRソリューションを展開している酒井と言います。
初回投稿は、OCRとLLM連携からよりよい結果を引き出すためのオープンソースのツール「docling」の紹介をさせて頂きます。
1. はじめに:IBM docling
IBM doclingは、2024年11月にIBMからリリース発表されたオープンソースの文書変換ツールキットです。doclingは「Computer Vision Model(Docling独自のCVベース文書解析モデル)」を使用しています。CVは文書を画像的に見て、レイアウトや構造を解析する技術です。doclingは画像分類や物体検出に使われる技術を文書解析に応用し、文書から構造化されたテキストを抽出することができます。doclingは大量の構造データを学習しているため人が見たような構造を文書から抽出することができます。LLMに渡すテキストデータの補助加工ツールして期待されています。※OCR製品ではないためOCR機能は持っていません。
2. docling構造解析のLLM処理への効果
LLMに帳票のOCR結果であるテキストとHTMLを渡したときの結果を例示します。
それに対し、doclingを適用するとどう結果が変わるかをお見せします。
OCR製品は、IBM Datacap、LLMはWatsonxのLlamaを使用しています。
例:WatsonxにOCR結果(テキスト)を渡す
サンプルのインボイス(請求書)帳票に対してOCRしてみました。
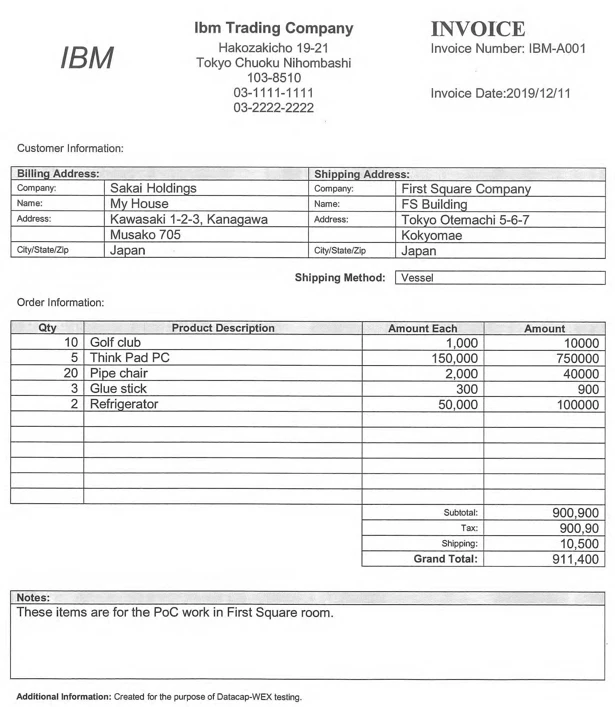
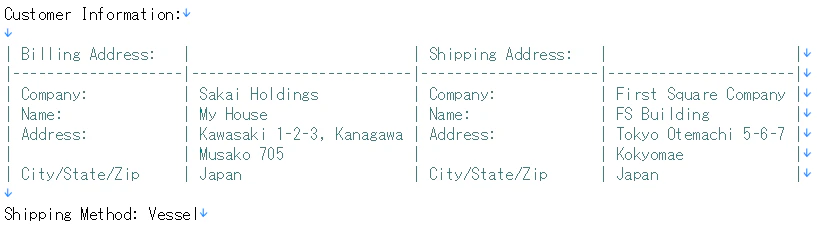
本稿ではdoclingの効果が出やすいこの表部分の識字結果を参照しながら説明します。
以下がDatacapが返した表部分の識字結果テキストとなります。
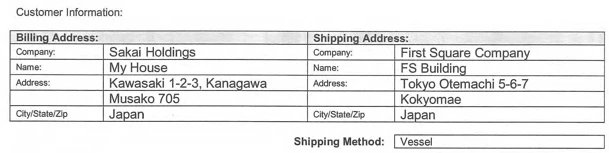
「Customer Information:
Billing Address: Shipping Address:
Company: Sakai Holdings Company: First Square Company
Name: My House Name: FS Building
Address: Kawasaki 1-2-3, Kanagawa Address: Tokyo Otemachi 5-6-7
Musako 705 Kokyomae
City/State/Zip Japan City/State/Zip Japan
Shipping Method: Vessel 」
この識字結果は単純なテキストであり罫線情報が失われています。
このテキストだけを見ても抽出元が表であったと知ることは難しいでしょう。
このテキストをWatsonxに渡してみました。
これが返ってきたキー値ペアです(JSON返答ファイルから抜粋)。
"Billing Address": "Kawasaki 1-2-3, Kanagawa, Japan",
"Shipping Address": "Tokyo Otemachi 5-6-7, Japan",
"Country of origin": "Japan",
"Shipping Method": "Vessel"
構造情報が消失しているのでWatsonxはAddressの範囲をうまく捉えることができませんでした。本来、Addressは2行ありますが1行目だけを使用してキー値ペアを作成しました。
① Billing Addressから「Musako 705」が抜けて落ちています。
② Shipping Addressから「Kokyomae」が抜け落ちています。
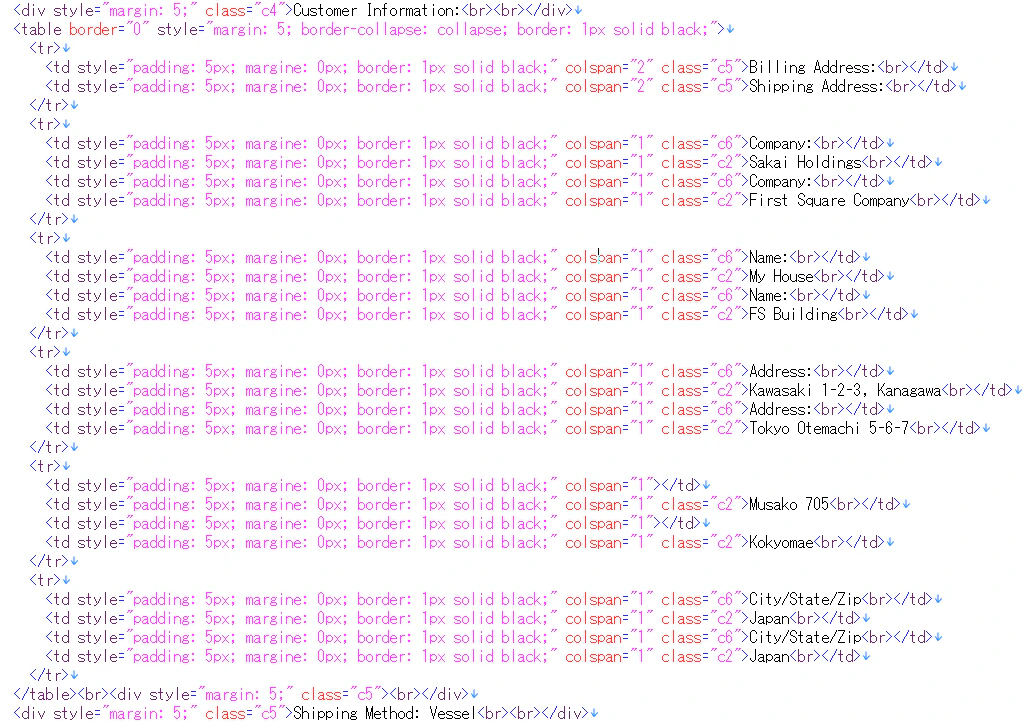
では、次にDatacapが識字結果と併せて作成したHTMLをWatsonxに渡した結果も見てみましょう。
例:WatsonxにOCR結果(HTML)を渡す
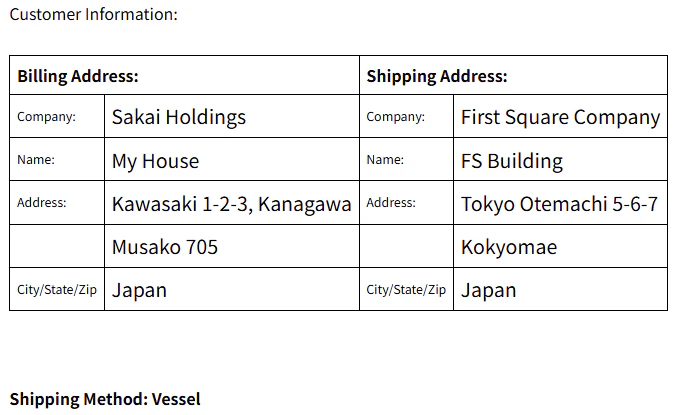
Datacapは識字処理をした結果、このHTMLも返しました。ブラウザで表示するとこう見えます。
WatsonxにはHTMLのソースをプロンプトに組み込み、プロンプトを投げキー値ペアを要求します。
--- HTMLソース ---
これがWatsonxから返されたキー値ペアの結果です。
"Billing Address": "Kawasaki 1-2-3, Kanagawa, Japan",
"Shipping Address": "Tokyo Otemachi 5-6-7, Japan",
"Country of origin": "Japan",
"Shipping Method": "Vessel"
HTMLを渡してもAddressの構造をうまく捉えてペアを抽出できていません。
テキストのときと同じ結果になりました。
Addressの最初の行と次の行の間にある罫線情報を正確に渡すことができました。
しかし、人が見た場合には、この2行は同じAddressだと見えるのですがWatsonxは行間にある罫線をAddressの区切りだと誤って理解したようです。
① Billing AddressからMusako 705が抜けて落ちています。
② Shipping AddressからKokyomaeが抜け落ちています。
では、このHTMLをdoclingに渡し構造化解析した結果を見てみましょう。
例:Watsonxにdocling解析結果を渡す
上記のHTMLをdoclingの構造解析に渡してみました。
表構造を人が見たように解析し、その結果をASCIIアート(べたな言い方ですが)にしてくれました。doclingは2行あるAddressをひとつのAddressセルに統合してくれました。
このASCIIアートをWatsonxに投げてみました。
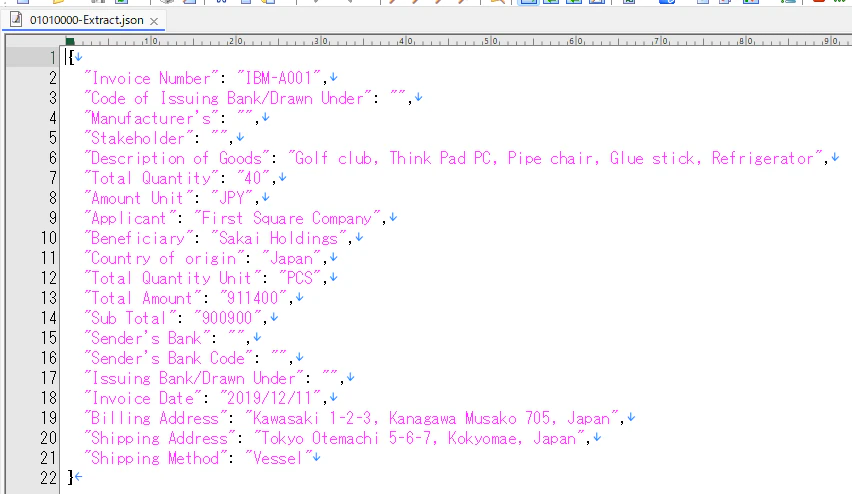
これがそのキー値ペアの結果です。
"Billing Address": "Kawasaki 1-2-3, Kanagawa Musako 705, Japan",
"Shipping Address": "Tokyo Otemachi 5-6-7, Kokyomae, Japan",
"Country of origin": "Japan",
"Shipping Method": "Vessel"
① Billing Addressに「Musako 705」が正しく含まれています。
② Shipping Addressに「Kokyomae」が正しく含まれています。
Addressがうまく取れました。
では次にどのような手順を実施すればdoclingをDatacapとWatsonxに適用できるのかを見ていきましょう。
3. doclingのセットアップとDatacapとWatsonxへの適用
以下はWindows 11 Proのマシンで動作を確認した手順となります。
前提ソフトウェア
これらのSWを事前に導入し、セットアップして下さい。
① OCR:IBM Datacap 9.1.9 Interim Fix 7
② Watsonx(IBM CloudのSaaSサービスを呼び出して利用)
モデル:meta-llama/llama-3-3-70b-instr
③ Python:3.11.9 (64bit)
④ Microsoft Visual C++ 2015-2022 Redistributable (x64) - 14.44.35211
doclingのインストール
① CMDプロンプトを管理者権限で起動する。
② pip install docling
を実行。
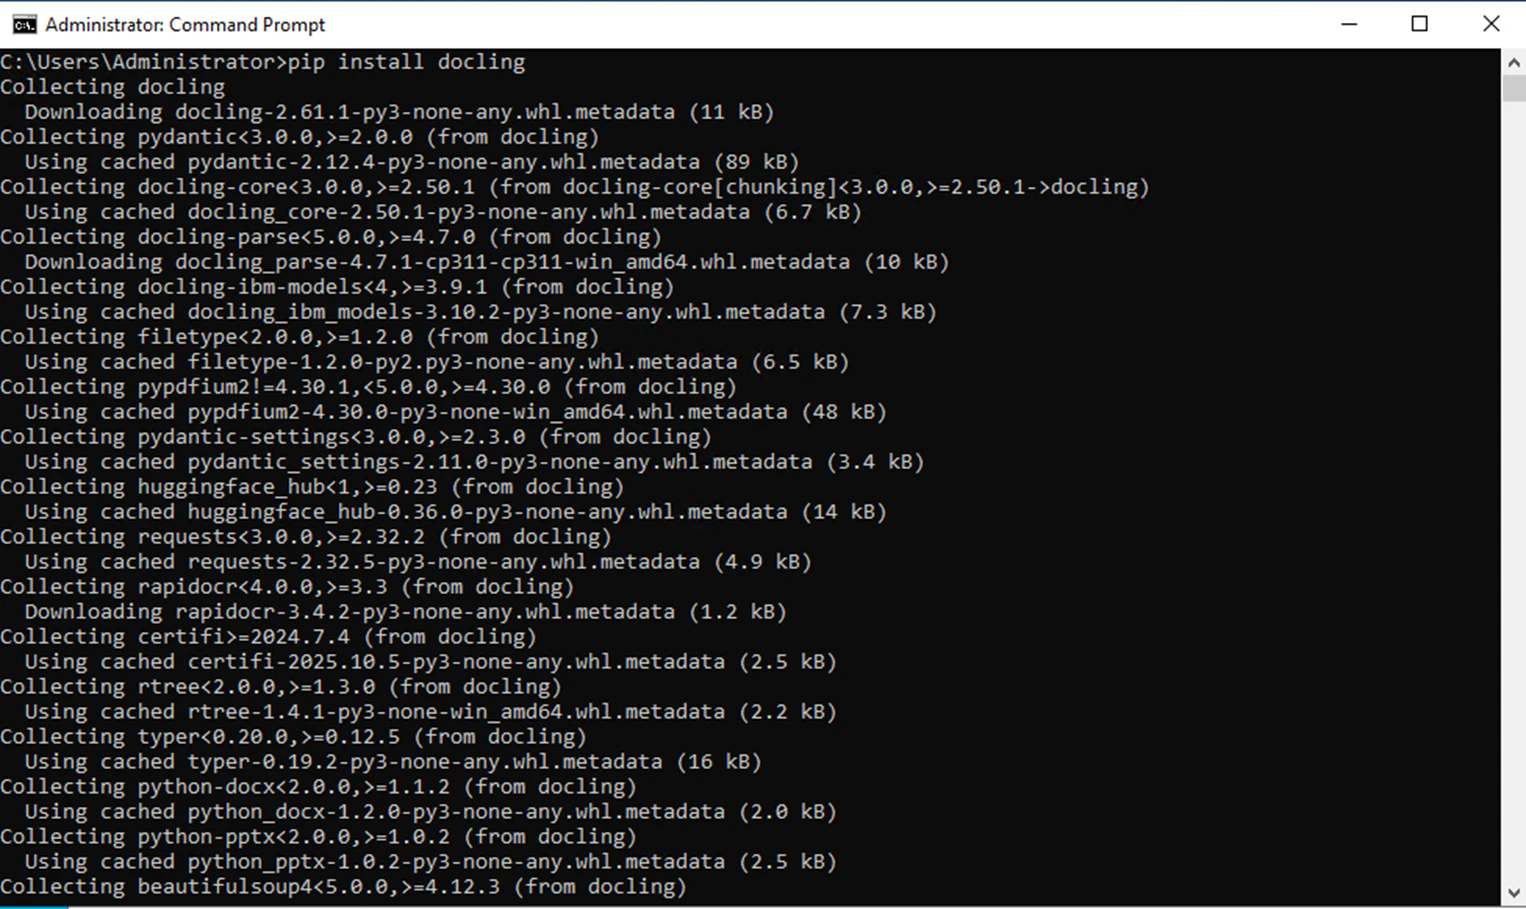
これでdoclingをローカルで実行できるようになります。
これをWebサービス化してDatacapからアクセスできるようにします。
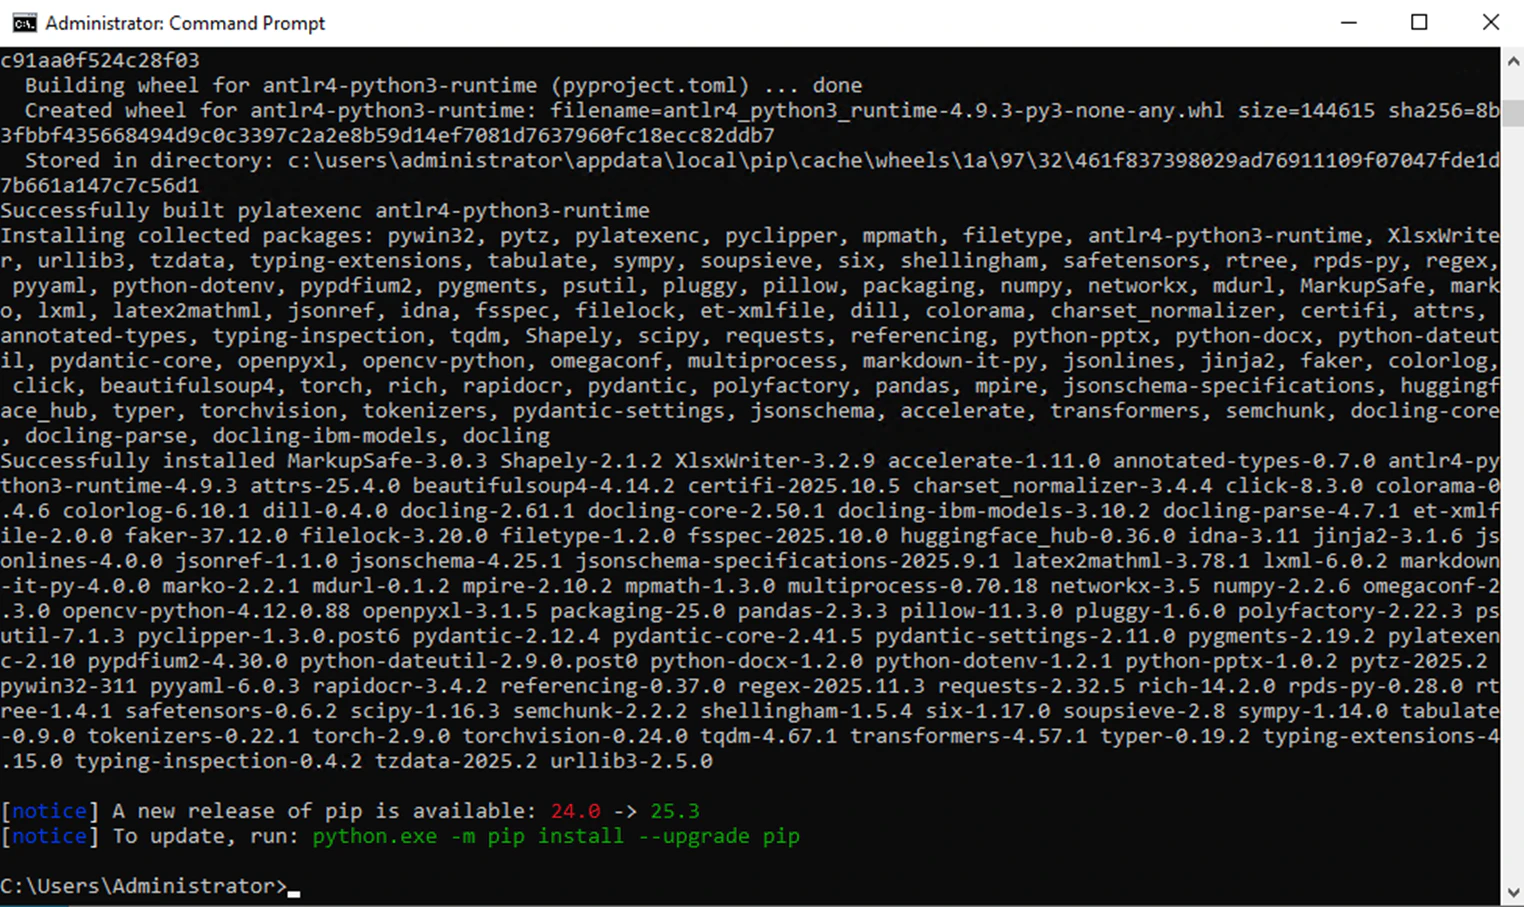
PythonプログラムのWebサービス化に必要なコンポーネントをインストール
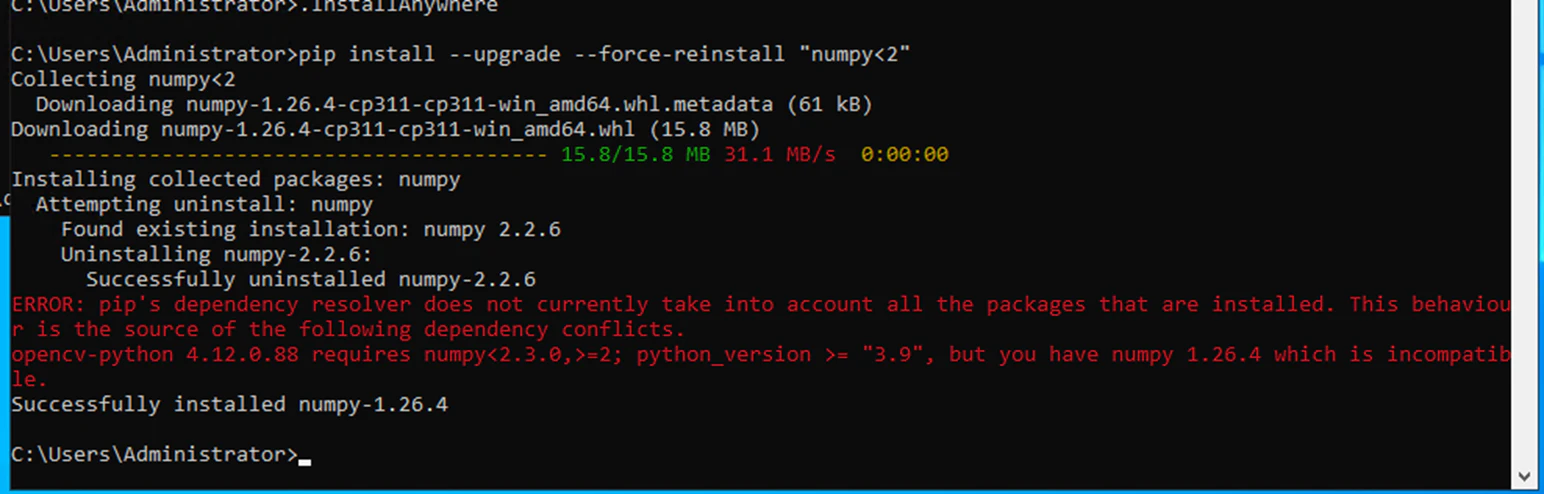
エラーは無視します。
① pip install --upgrade pip
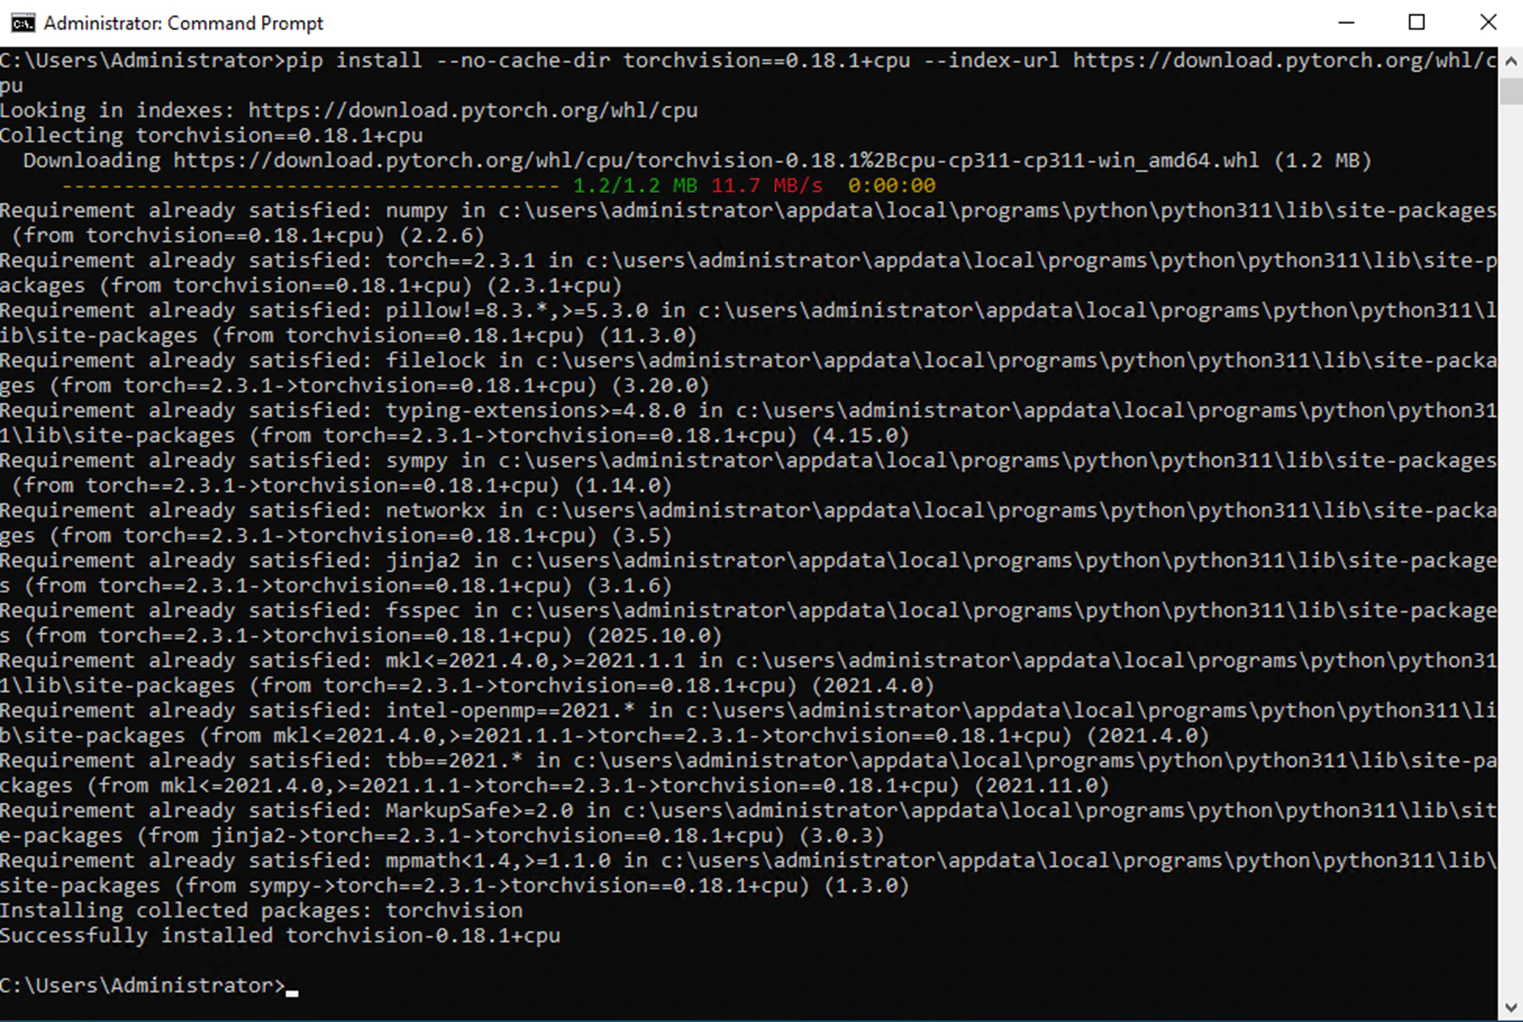
pip install --no-cache-dir torch==2.3.1+cpu --index-url https://download.pytorch.org/whl/cpu
pip install --no-cache-dir torchvision==0.18.1+cpu --index-url https://download.pytorch.org/whl/cpu
を実行。

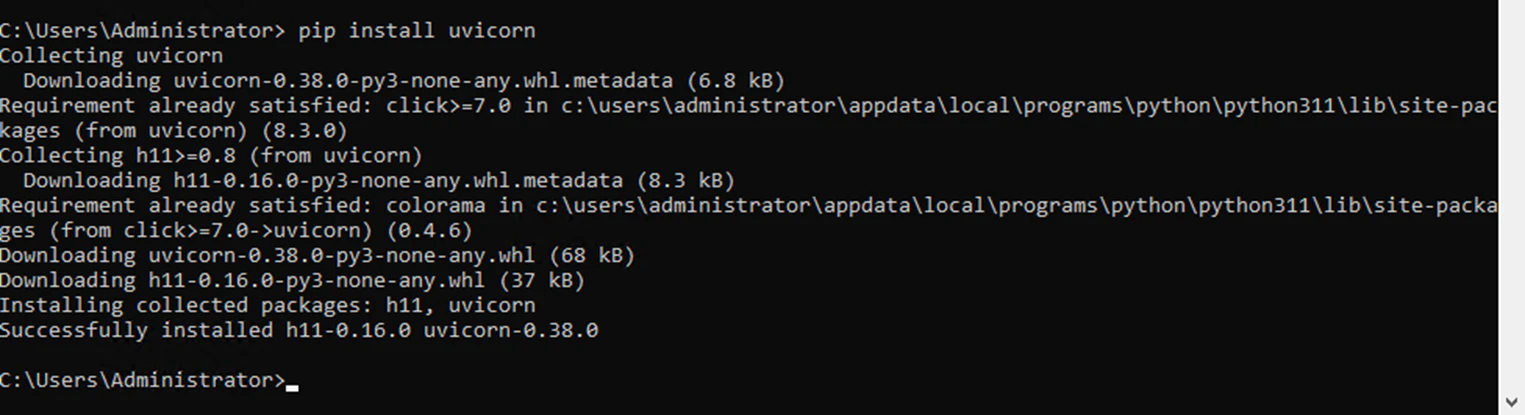
② pip install uvicorn
を実行。
③ pip install --upgrade --force-reinstall "numpy<2"
を実行。
doclingサービスをPythonプログラムで作成
「docling_service.py」を作ります。
以下がソースです。
from fastapi import FastAPI, Query
from docling.document_converter import DocumentConverter
import uvicorn
import os

app = FastAPI(title="Docling Text Converter API")

@app.get("/convert")
def convert_file(
    input_path: str = Query(..., description="Path to input file (local or URL)"),
    output_path: str = Query(..., description="Path to save converted text output")
):
    # 入力ファイル存在チェック
    if not os.path.exists(input_path):
        return {"error": f"Input file not found: {input_path}"}

    try:
        # Doclingで変換
        converter = DocumentConverter()
        result = converter.convert(input_path)
        text_output = result.document.export_to_text()

        # 出力フォルダを作成(存在しない場合)
        os.makedirs(os.path.dirname(output_path), exist_ok=True)

        # ファイルに書き込み
        with open(output_path, "w", encoding="utf-8") as f:
            f.write(text_output)

        return {
            "status": "success",
            "input": input_path,
            "output": output_path,
            "message": "Text file generated successfully."
        }

    except Exception as e:
        return {"error": str(e)}

if __name__ == "__main__":
    uvicorn.run(app, host="0.0.0.0", port=8000)
doclingサービスの実行
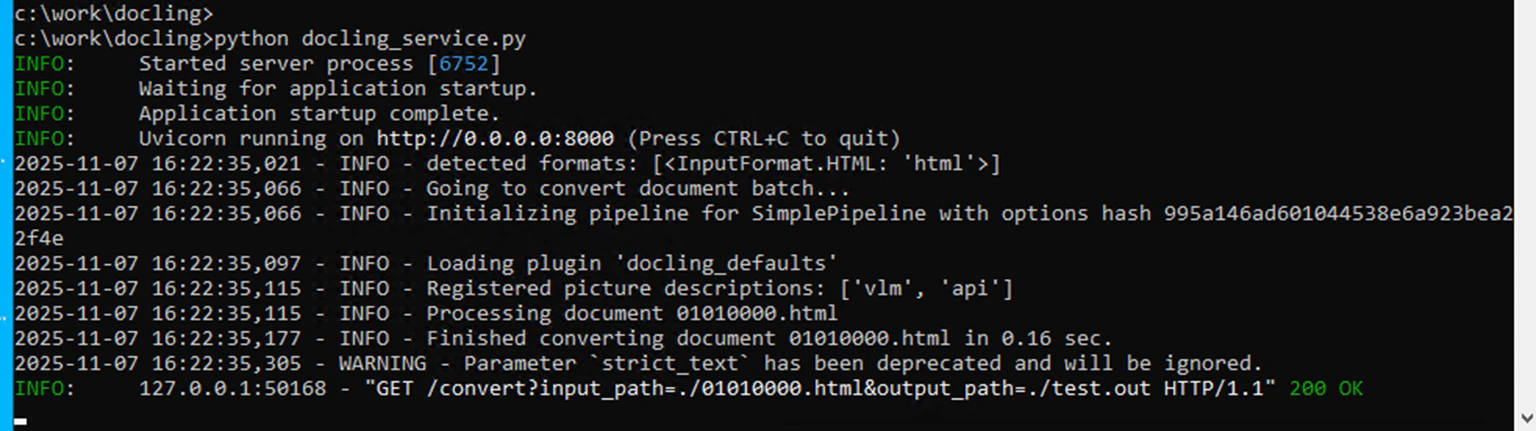
CMDプロンプトで以下を実行すると1,2分ほど待機した後にサービスが起動します。
「python docling_service.py」

curlコマンドでテストしてみましょう。
別のCMDプロンプトを開き、curlを実行します。
「curl "http://127.0.0.1:8000/convert?input_path=./01010000.html&output_path=./test.out"」
ここではDatacapがOCR結果として作成した01010000.htmlをdoclingサービスに渡しています。

doclingサービスを起動したCMDプロンプトを表示させリクエストが処理されたことを確認します。
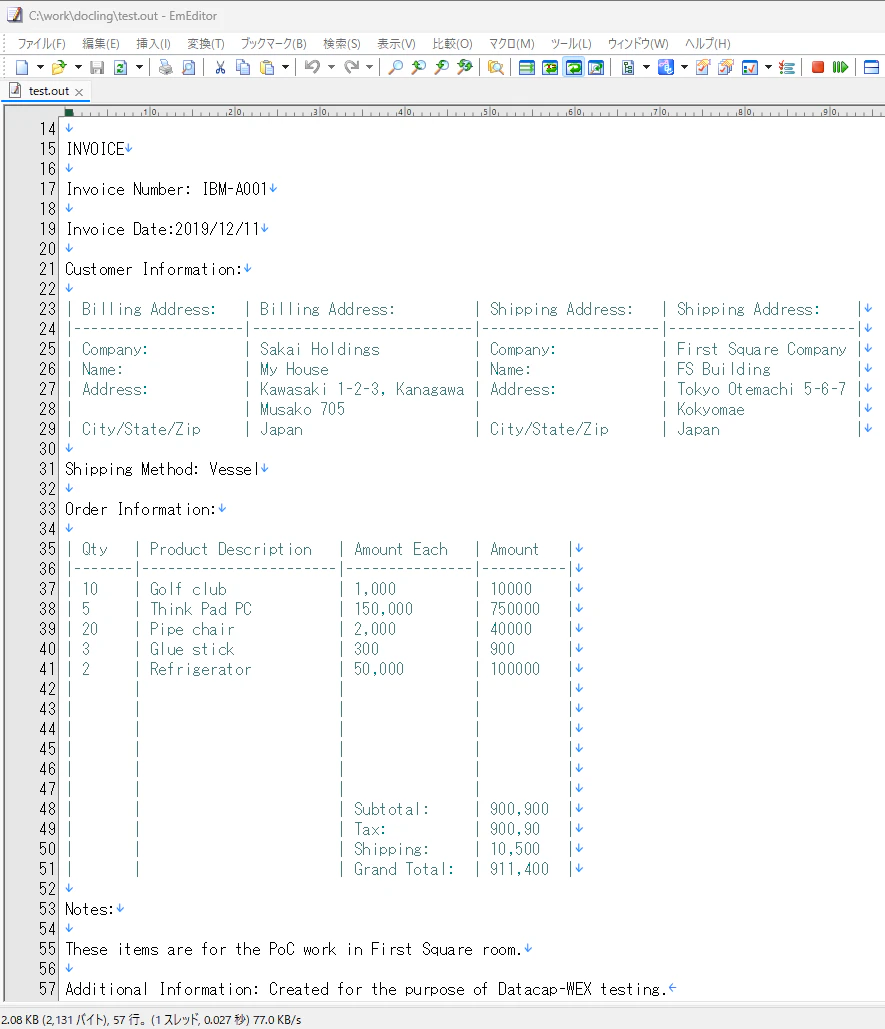
作業フォルダに出力されたtest.outを開いて結果を確認します。
この例ではHTMLをうまくASCIIアート化できていますね。
Datacapからdoclingサービスを呼び出す
以下のC#のプログラムをカスタムアクションに組み込みDatacapからdoclingサービスを呼び識字結果のHTMLを渡せるようにします。
        /// <summary>
        /// ローカルのdoclingサービスにクエリを投げる
        /// </summary>
        public async Task AccessDocling()
        {
            string baseUrl = "http://127.0.0.1:8000/convert";
            string batchPath = GetBatch().ToString();

            string html = getPageDCO().ID + ".html";
            string html_dclPath = getPageDCO().ID + "_dcl.html";
            string _inputPath = batchPath + @"\" + html;
            string inputPath = batchPath + @"\" + html_dclPath;

            deleteUTF16(_inputPath, inputPath);

            string dclTxt = getPageDCO().ID + "_dcl.txt";
            string outputPath = batchPath + @"\" + dclTxt;

            // クエリ文字列を作成
            string url = $"{baseUrl}?input_path={Uri.EscapeDataString(inputPath)}" +
                         $"&output_path={Uri.EscapeDataString(outputPath)}" +
                         $"&output_encoding=ascii&output_errors=backslash";

            bool result = await getToDocling(url);

            WriteLog2("    Docling Service: Result=[" + result + "]");
        }

        /// <summary>
        /// Doclingにポスト
        /// </summary>
        private async Task<bool> getToDocling(string url)
        {
            bool result = false;
            WriteLog2("      (getting) url=[" + url + "]");

            try
            {
                string responseString = await HttpAccessWithTimeoutAsync(url, 3);
                WriteLog2("        [Response] " + responseString);
                result = true;
            }
            //status codeのエクセプションはエラーにしないため、上位階層のcatchのなかで拾われないようにここでキャッチする。
            catch (HttpRequestException ex)
            {
                WriteLog2("       [Error] Failed the Docling request.");
            }
            //タイムアウトのエクセプションはエラーにしないため、上位階層のcatchのなかで拾われないようにここでキャッチする。
            catch (TimeoutException ex)
            {
                WriteLog2("       [Error] The Docling request timed out.");
            }

            return result;
        }


        /// <summary>
        /// タイムアウトの管理
        /// </summary>
        private static async Task<string> HttpAccessWithTimeoutAsync(string uri, int wait)
        {
            Task<string> webTask = HttpAccessAsync(uri, wait);

            // 指定した秒数以内にタスクが完了するかどうかを確認
            if (await Task.WhenAny(webTask, Task.Delay(wait * 1000)) == webTask)
            {
                // タスクが完了した場合、結果を返す
                return await webTask;
            }
            else
            {
                // タスクがタイムアウトした場合、例外をスロー
                throw new TimeoutException();
            }
        }

        /// <summary>
        /// GETする
        /// </summary>
        private static async Task<string> HttpAccessAsync(string url, int wait)
        {
            using (HttpClient client = new HttpClient())
            {
                // タイムアウト時間の設定(秒)
                client.Timeout = TimeSpan.FromMilliseconds(wait * 1000);

                HttpResponseMessage response = await client.GetAsync(url);

                // ステータスコードを取得
                int statusCode = (int)response.StatusCode;
                if (statusCode != 200)
                {
                    throw new HttpRequestException("StatusCode" + statusCode);
                }

                // レスポンスの内容を取得
                string responseBody = await response.Content.ReadAsStringAsync();
                return responseBody;
            }
        }

        /// <summary>
        /// htmlからUTF16の指定を除去
        /// </summary>
        private void deleteUTF16(string htmlPath, string html_dclPath)
        {

            // UTF-8 で読み込み
            string html = File.ReadAllText(htmlPath, Encoding.UTF8);

            // 置換
            string replaced = Regex.Replace(html, "; charset=utf-16", "");

            // UTF-8(BOMなし)で保存
            var utf8NoBom = new UTF8Encoding(false);
            File.WriteAllText(html_dclPath, replaced, utf8NoBom);
        }
doclingの解析結果をWatsonxに渡す
Datacapに組み込んだカスタム・アクションを呼び出し、以下のプロンプトを作成します。このプロンプトはdoclingの解析結果を組み込んだカスタム・プロンプトとなります。Datacapの標準機能では作成することができません。以下に添付するプロンプトを参考にしこの追加のカスタム・アクションを用意して下さい。
<|begin_of_text|><|start_header_id|>system<|end_header_id|> You are an expert data extraction assistant. You strictly follow instructions and provide accurate and precise results. Your task is to extract specific key-value information from the provided OCR text. Instructions: 1. The text between [document] and [end] is the OCR text. 2. From this text, identify and extract the following fields: - "Invoice Number" (possible variations: "Invoice No") - "Code of Issuing Bank/Drawn Under" (bank code for the issuing bank) - "Manufacturer's" (the company that manufactures the goods, listed separately if different from the exporting company) - "Stakeholder" - "Description of Goods" - "Total Quantity" (possible units: "kg", "pieces", etc.) - "Amount Unit" (the currency unit for the total amount, such as "USD" or "EUR") - "Applicant" (the importing company) - "Beneficiary" (the exporting company) - "Country of origin" - "Total Quantity Unit" (the unit of measure for the total quantity, prioritize the following if available: BL, CA, CTN, KG, KGS, LB, M3, MT, MTS, OTH, PAL, PC, PCS, PRS, SET, UNT) - "Total Amount" - "Sub Total" - "Sender's Bank" - "Sender's Bank Code" - "Issuing Bank/Drawn Under" (name of the issuing bank or the basis under which it is drawn)  - "Invoice Date" - "Billing Address" - "Shipping Address"  - "Shipping Method" 3. All extracted values must be alphanumeric only. 4. If a field cannot be found in the text, output an empty string (""). 5. The JSON keys must appear exactly as listed above and must be returned in the specific format shown below. 6. Output only the JSON object, without additional text, commentary, or formatting before or after. 7. If the extracted data does not match the expected format or contains errors, return an empty JSON object: {} <|eot_id|><|start_header_id|>user<|end_header_id|> [document] IBM

Ibm Trading Company

Hakozakicho 19-21

Tokyo Chuoku Nihombashi

103-8510

03-1111-1111

03-2222-2222

INVOICE

Invoice Number: IBM-A001

Invoice Date:2019/12/11

Customer Information:

| Billing Address:   |                          | Shipping Address:   |                      |
|--------------------|--------------------------|---------------------|----------------------|
| Company:           | Sakai Holdings           | Company:            | First Square Company |
| Name:              | My House                 | Name:               | FS Building          |
| Address:           | Kawasaki 1-2-3, Kanagawa | Address:            | Tokyo Otemachi 5-6-7 |
|                    | Musako 705               |                     | Kokyomae             |
| City/State/Zip     | Japan                    | City/State/Zip      | Japan                |

Shipping Method: Vessel

Order Information:

| Qty   | Product Description   | Amount Each   | Amount   |
|-------|-----------------------|---------------|----------|
| 10    | Golf club             | 1,000         | 10000    |
| 5     | Think Pad PC          | 150,000       | 750000   |
| 20    | Pipe chair            | 2,000         | 40000    |
| 3     | Glue stick            | 300           | 900      |
| 2     | Refrigerator          | 50,000        | 100000   |
|       |                       |               |          |
|       |                       |               |          |
|       |                       |               |          |
|       |                       |               |          |
|       |                       |               |          |
|       |                       |               |          |
|       |                       | Subtotal:     | 900,900  |
|       |                       | Tax:          | 900,90   |
|       |                       | Shipping:     | 10,500   |
|       |                       | Grand Total:  | 911,400  |

Notes:

These items are for the PoC work in First Square room.

Additional Information: Created for the purpose of Datacap-WEX testing. [end] <|eot_id|><|start_header_id|>assistant<|end_header_id|>
Datacapのwatsonx_aiライブラリにあるAskForPageValuesUsingKeysアクションを使ってこのカスタム・プロンプトをWatsonxに渡します。
なお、以下がWatsonxサービスに渡すパラメータです。
Model:meta-llama/llama-3-3-70b-instruct
Format:Text
temperature:1.0
maxTokens:4000
EndpointUrl:https://us-south.ml.cloud.ibm.com/ml/v1/text/generation?version=2023-05-29
結果を確認する
Datacapのバッチ・フォルダを開き、JSONファイルにWatsonxが生成したキー値ペアが出力されていることを確認します。
4. まとめ
doclingは従来のコンピュータよりもより人の直観に沿って文書を構造化するこができます。OCR結果にdoclingを適用し、ASCIIアート化した結果をLLMに渡すことにより、より正確なキー値ペアの抽出が可能となります。本稿では、IBM Datacap(OCR製品)とWatsonx(LLM製品)と連携し、doclingの効果を検証してみました。
5. 参考文献
■ Docling の正式紹介記事(IBM Research)
https://research.ibm.com/blog/docling
⇒ Doclingを IBM Research が公式に紹介した解説記事。
モデル構造、利用例、PDF→構造化データ変換などもここで説明。
■ 公式 GitHub リポジトリ
https://github.com/docling-project/docling
⇒ オープンソースになった Docling のコード、README、モデル情報がすべてここにある。
■ TableFormer: 表構造解析の基盤モデル(Docling の前身技術)
https://research.ibm.com/publications/tableformer
⇒ Docling の表抽出・テーブル理解の根幹になっている TableFormer の公式リサーチページ。