概要
普段は耳鼻科の開業医をしています。
前回の記事はこちら
GCP Cloud AutoML Vision を使った鼓膜画像分類
今回は作成したAutoML Visionの鼓膜画像分類モデルをNode.jsから使ってみました。
作成
1.プロジェクトの作成
こちらを参考にしました
Cloud AutoML: Node.js Client
require('dotenv').config();//.envを読み込む

const automl = require('@google-cloud/automl');
const fs = require('fs');

// Create client for prediction service.
const client = new automl.PredictionServiceClient();

/**
 * TODO(developer): Uncomment the following line before running the sample.
 */

const projectId = `The GCLOUD_PROJECT string, e.g. "my-gcloud-project"`;
const computeRegion = `region-name, e.g. "us-central1"`;
const modelId = `id of the model, e.g. “ICN723541179344731436”`;
const filePath = `local text file path of content to be classified, e.g. "./resources/flower.png"`;
const scoreThreshold = `value between 0.0 and 1.0, e.g. "0.5"`;

// Get the full path of the model.
const modelFullId = client.modelPath(projectId, computeRegion, modelId);

// Read the file content for prediction.
const content = fs.readFileSync(filePath, 'base64');

const params = {};

if (scoreThreshold) {
  params.score_threshold = scoreThreshold;
}

// Set the payload by giving the content and type of the file.
const payload = {};
payload.image = {imageBytes: content};

async function test(){
  // params is additional domain-specific parameters.
  // currently there is no additional parameters supported.
  const [response] = await client.predict({
    name: modelFullId,
    payload: payload,
    params: params,
  });
  console.log(`Prediction results:`);
  response.payload.forEach(result => {
    console.log(`Predicted class name: ${result.displayName}`);
    console.log(`Predicted class score: ${result.classification.score}`);
  });
}

test();
2.AutoML用認証キーの作成
コンソール画面左上のナビゲーションメニューから『APIとサービス』➡『認証情報』
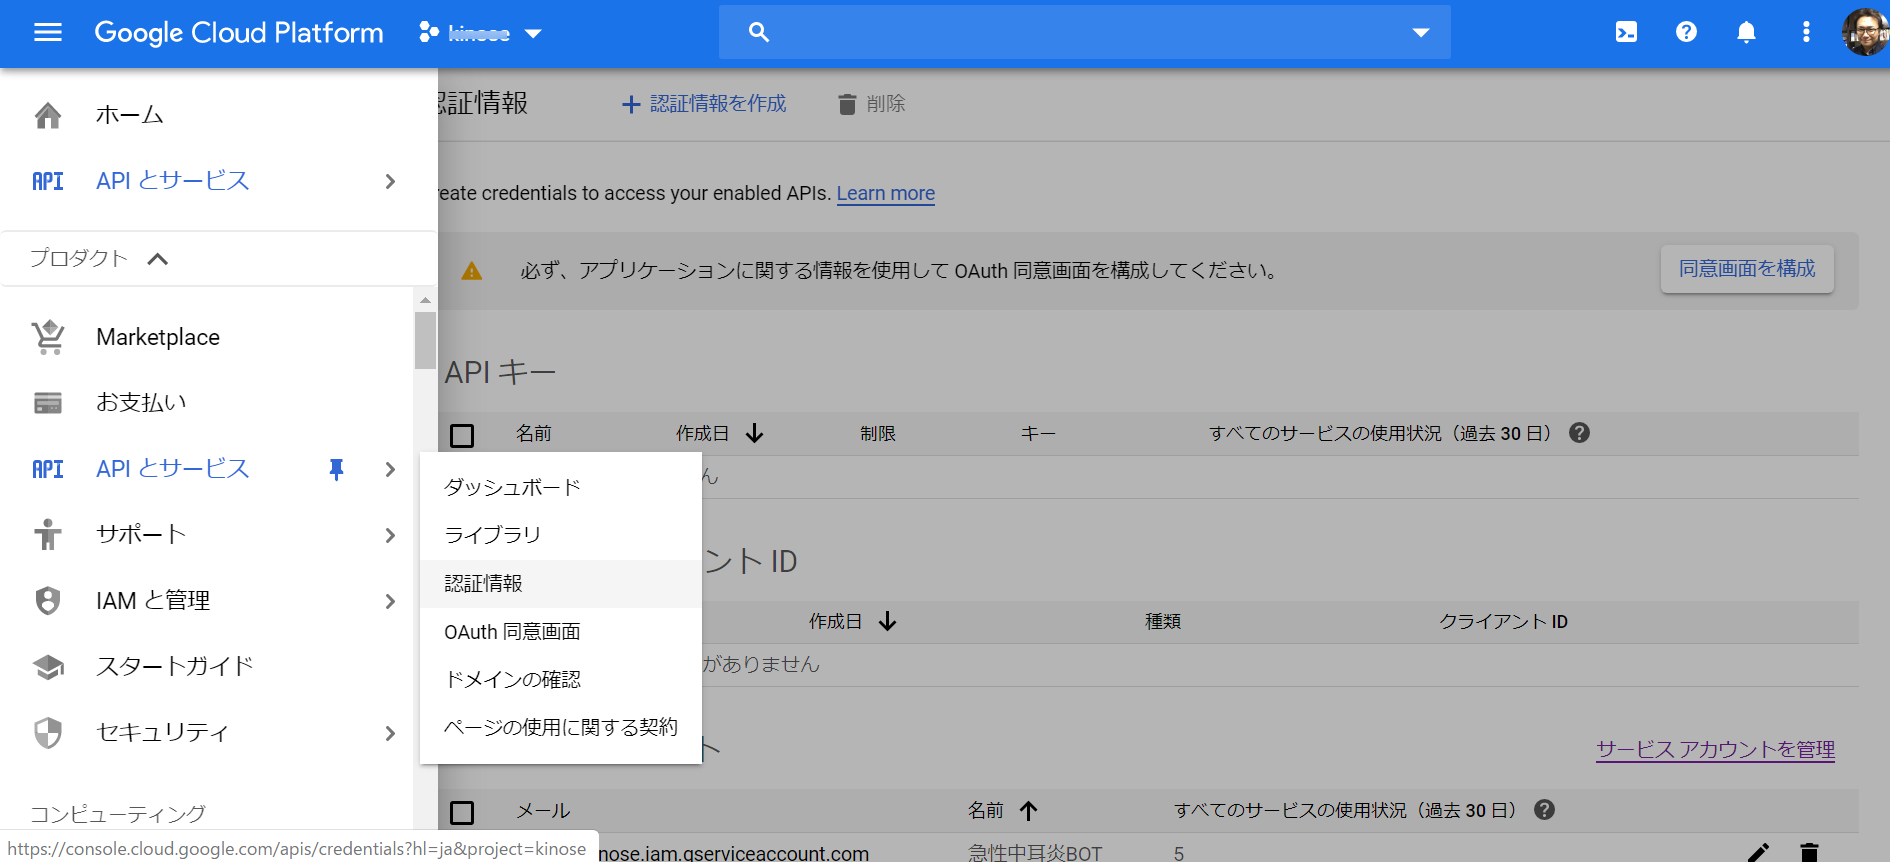
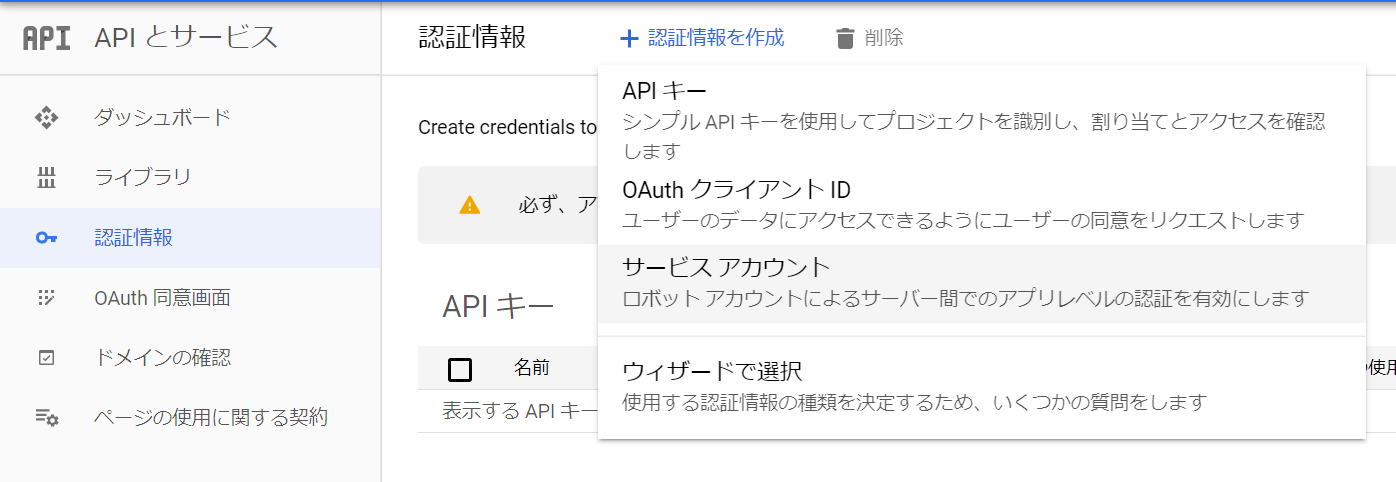
『認証情報を作成』➡『サービスアカウント』
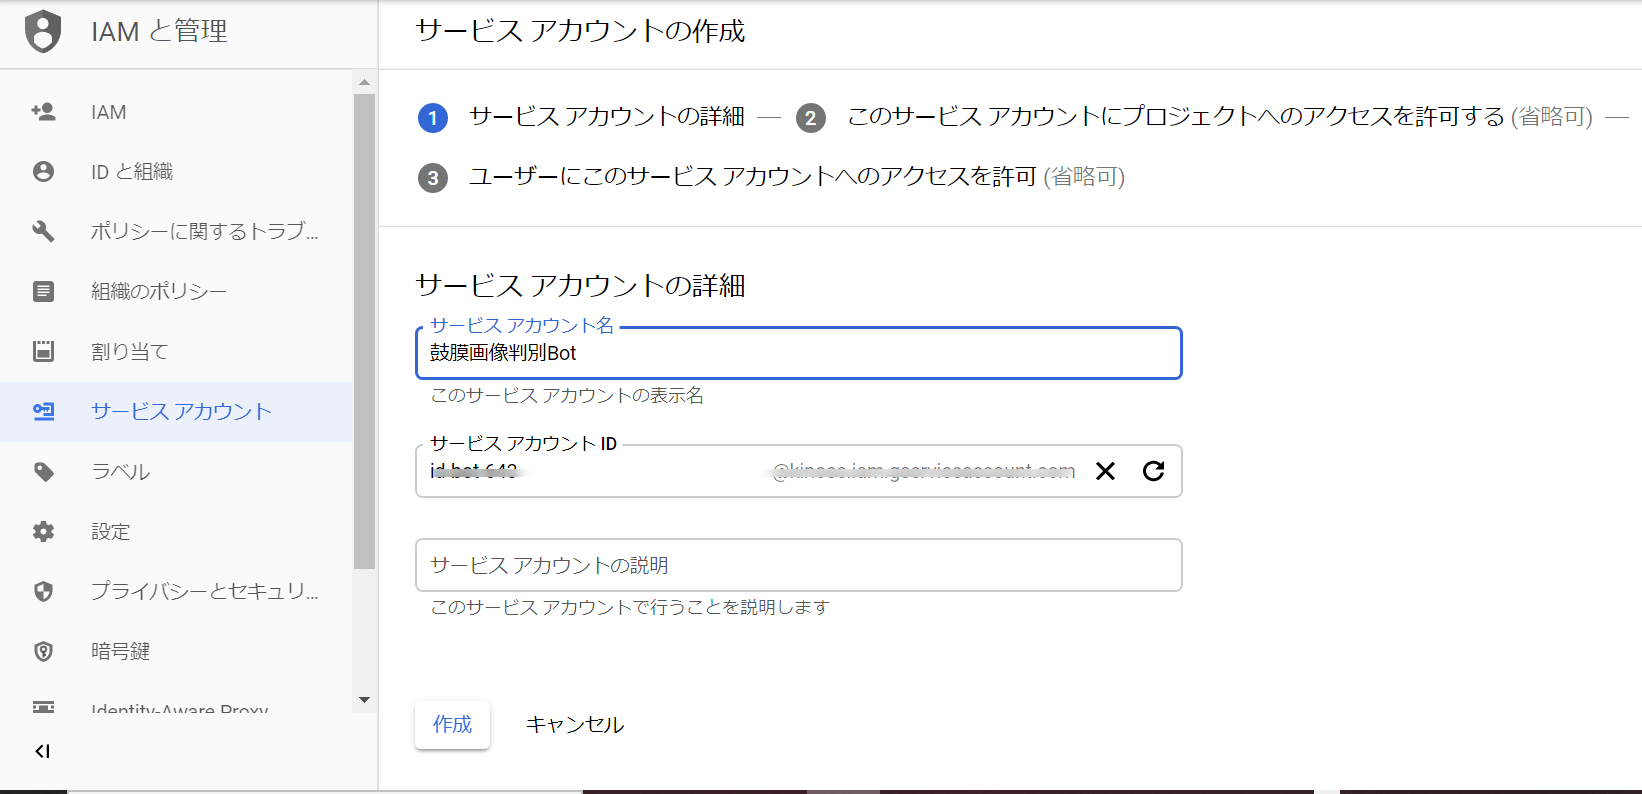
サービスアカウント名を適当に決めて『作成』を選択
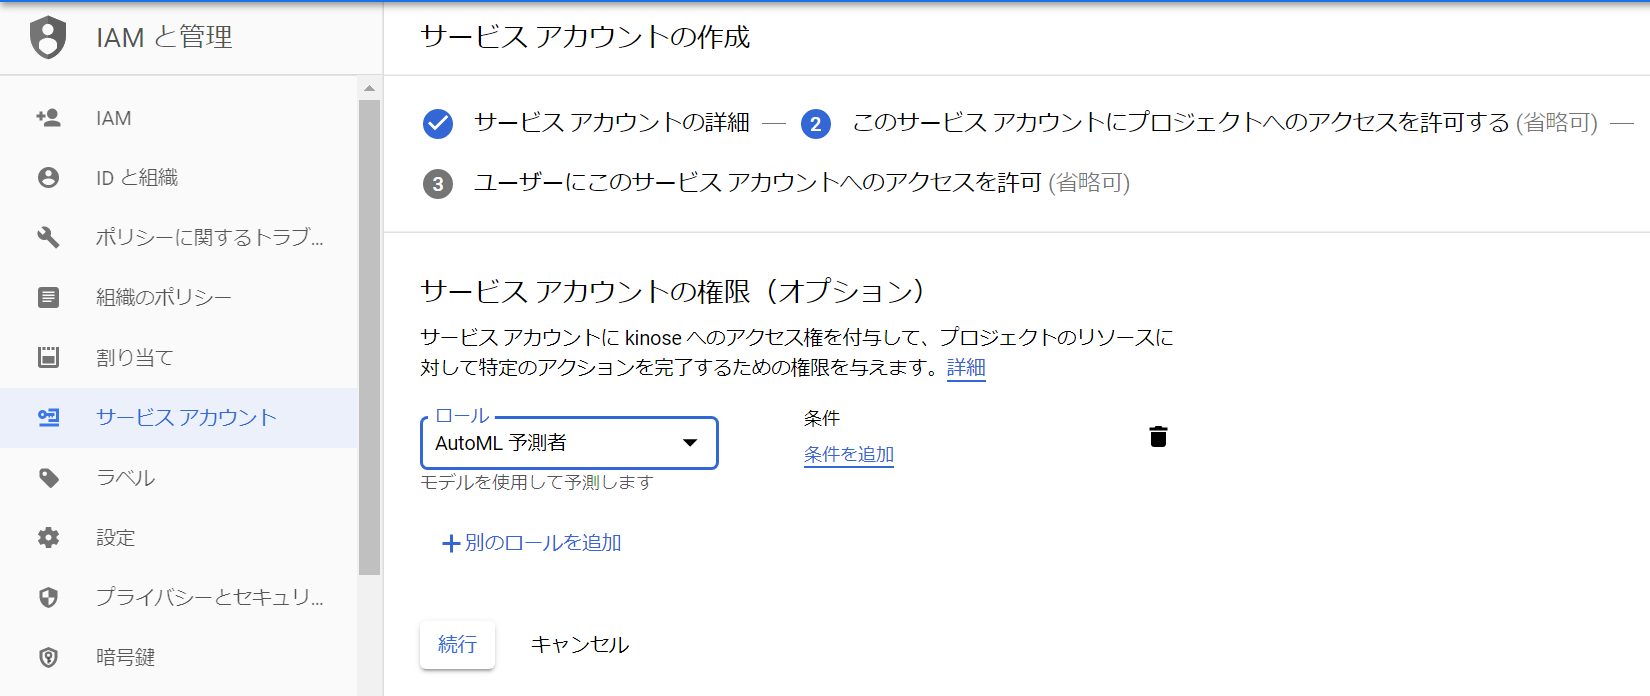
ロールは『AutoML 予測者』を選択し『続行』
『+キーを作成』を選択
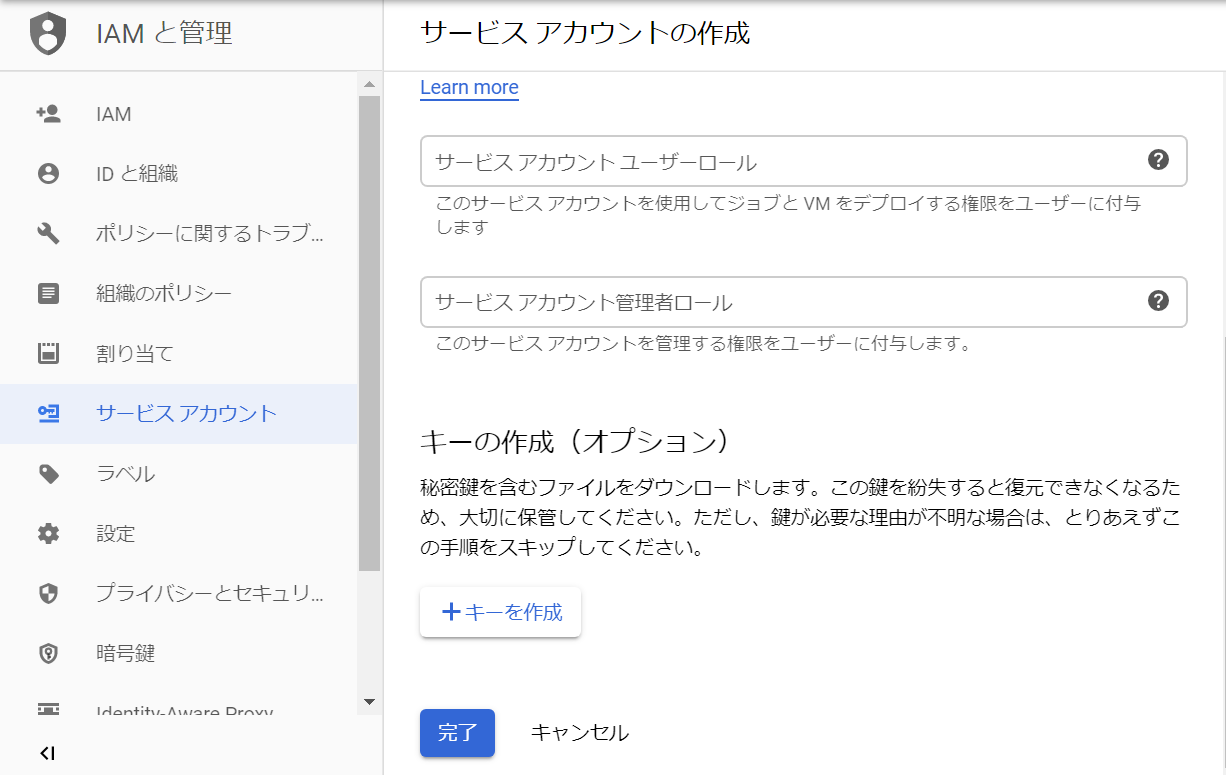
『JSON』➡『作成』を選択
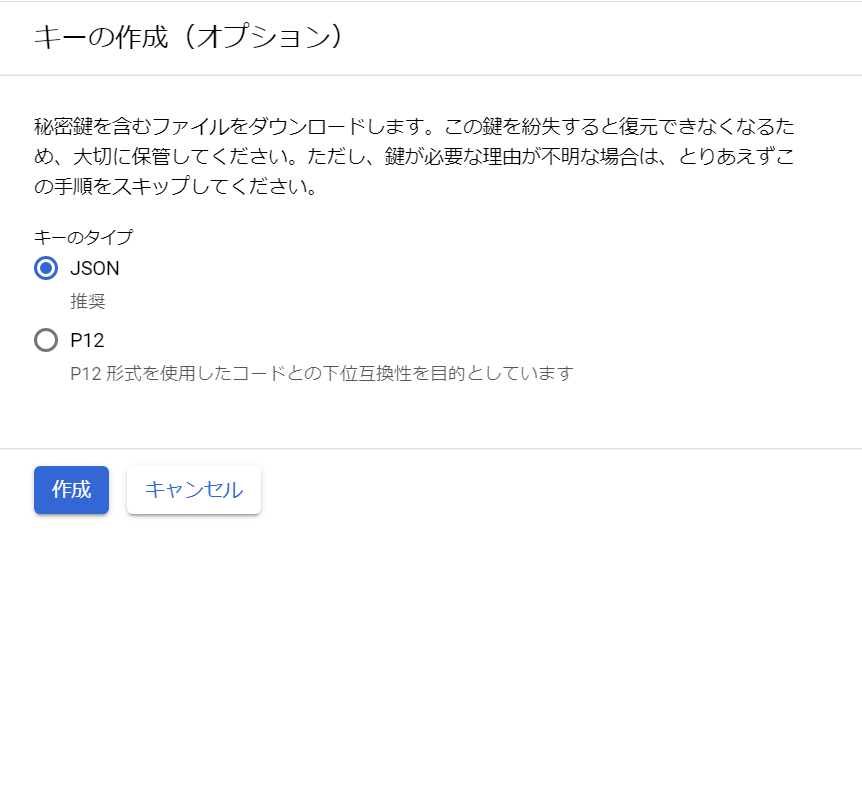
JSONファイルがダウンロードされます

3.AutoML用認証キーのつなぎ込み
ダウンロードされたJSONファイルをindex.jsと同じフォルダーに入れる
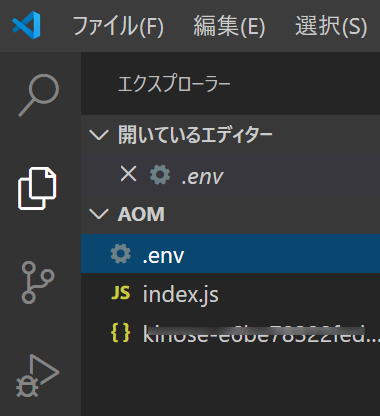
.envを作成
GOOGLE_APPLICATION_CREDENTIALS=./ここにダウンロードされたJSONファイル名を記入
必要なパッケージをインストール
$ npm install @google-cloud/automl
$ npm install dotenv
4.認証情報を設定
index.jsを以下のように書き換える
const projectId = "自分のプロジェクト名";
const computeRegion = "us-central1";
const modelId = "ICNで始まる番号";
const filePath = "テストしたいローカル画像のフルパス"
const scoreThreshold = "0.5";
modelIdはこちらの赤丸の部分

今回テストしたローカル画像はこちら
急性中耳炎の画像です
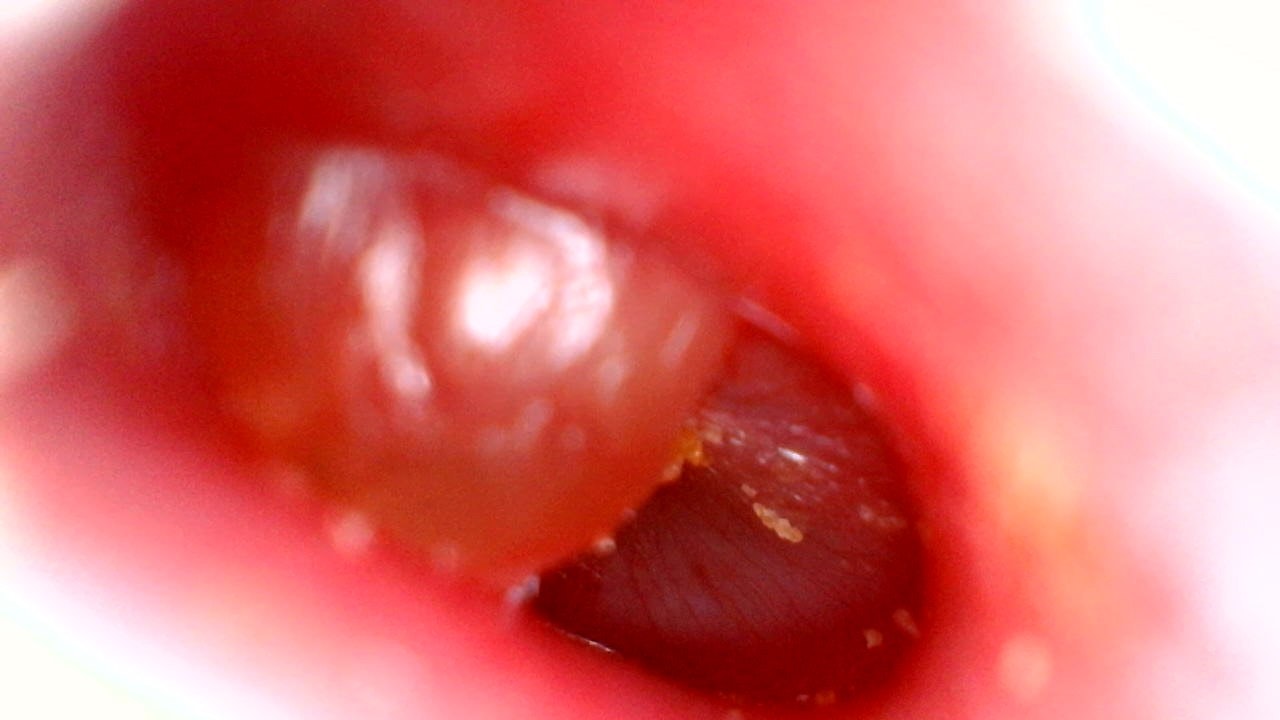
フルパスは以下のように区切らないとうまく動きませんでした(windows10)。
const filePath = "C:\\Users\\***\\data\\test\\aom\\WIN_20190529_08_40_52_Pro.jpg";
5.デプロイ
今回デプロイし終わるまで20~30分ほどかかりました。

ちなみにデプロイしたままにすると1日3000円ほど課金されますので。使わないときはデプロイを解除しましょう。
モデルのデプロイ解除の方法はこちら
テスト
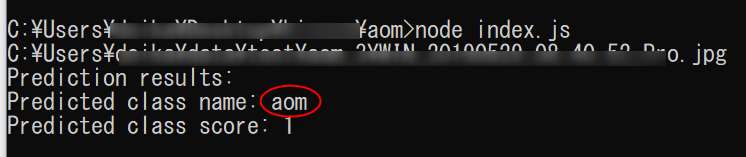
index.jsを実行します。
Prediction class name:aom(急性中耳炎)と正しく判定されています。
Prediction class score(信頼度 0.0〜1.0の値が入ります)は1なのでかなり自信があるようです。
考察
Node.jsからAutoML Vision の鼓膜画像分類モデルを使うことができました。
次はLINE Botに組み込んでみたいと思います。