この記事は, 対偶TUT Advent Calendar 2023 13日目の記事です.
昨日の記事は, Gyroさんの「ポエトリーリーディングってなに?本当になんなんだ」でした.
弊部が今年秋のM3にて頒布した「二元論」に収録されている, Gyroさん作曲の1曲目「豊橋技術科学大学の手引き」もポエトリーリーディングだったんだな~と気付きました. 表アドカレで出てきた「おそクラ」というイベントの1発目でGyroさんが流してたんですけど, この曲良いんですよね~~~
はじめに
DDliaと申します. 情報・知能工学課程の学部2年生です. 去年に引き続き, TUT Advent Calendar に参加させていただきます. (去年の記事)
今回は, アドカレサークル 音楽技術部にKubernetesを導入した話をします.
TUT Advent Calendar 2023 の1枚目であるTUT Advent Calendar及び, 2枚目の裏TUT Advent Calendar 2023にも参加しております. よければそちらもごらんください.
TUT Advent Calendar 2023 13日目: https://note.com/ddlia/n/n58dee466d2b7
裏TUT Advent Calendar 2023 16日目: https://note.com/ddlia/n/n2dd560a80296
対偶TUT Advent Calendar 2023 21日目: https://qiita.com/dodolia907/items/c350f9a69deca6e3b831
※Kubernetes初心者なので, 間違いとかがあったら優しく教えてください.
音楽技術部って何?
一言でいうと, 技科大のDJサークルです. DJが主体ではあるのですが, DJ以外にも舞台演出, 楽曲制作等の様々な活動を行っています.
興味のある方は, ホームページがありますので, そちらを見ていただければと思います. たまにコモンズでDJイベントをやっているので, ぜひご来場ください.
(話が逸れますが, このホームページはGitで管理していて, GitHubにPushするとGitHub Actionsが走ってCloudflare Pagesにデプロイされるようになっています)
↑ 技科大祭, こんな感じでした弊ブース、なんかもうすごい #語彙 pic.twitter.com/s6md1cyT4g
— ْ (@T_TEST__) October 7, 2023
部内向けサーバを建てたい
表TUT Advent Calendarに書いたように, 舞台演出基盤としてネットワークが構築されています. このネットワーク上で, 様々な機能を提供するサーバが欲しくなってきました.
技科大祭では, ネットワーク機器をsnmpで監視して異常がないか確認したり(コモンズ入口で監視データを展示していました!), コモンズ入口での時刻表示を提供するWebサーバを動かしたり, DJが見ている波形を読み取るBeat Link Triggerというソフトウェアをサーバ上で実行しリモートデスクトップ接続してもらうことで, 波形情報をVJ, 照明班に提供したりしていました. また, BINDで内部ネットワーク向けのDNSサービスも提供しています.
技科大祭のときは, サーバに直接Linuxをインストールして, そのまま動かしていたのですが, 最近Kubernetesを使ってみたいという気持ちがあり, Kubernetesに一部移行してみることにしました.
Kubernetesって何?
Kubernetesとは, もともとGoogleが開発したコンテナ管理ツールのことです.
コンテナというと, Dockerが有名ですが, Dockerが一つのサーバ内にコンテナを作成するのに対し, Kubernetesでは複数のサーバ内の複数のコンテナをまとめて管理することができます. さらに, 負荷分散やコンテナの冗長化を行うことも可能です.
使ってみる
このGitHubリポジトリの通りにインストールを行います.
今回はインストールが簡単で, シングルノードでの動作が可能なk3sを使ってみます.
興味のある方は, BGPを喋れる業務用ルータと適当なLinuxマシンを用意してやってみてください.
環境
検証環境
自宅のハイブリッドクラウド上, 及び部室で動作検証を行いました.
- サーバ
HITACHI HA8000/RS220-h
OS: Oracle Linux 9.3
CPU: Intel Xeon E5-2630 v2 2枚 12コア24スレッド
メモリ: 104GB - ルータ
AlaxalA AX620R-3110 (NEC UNIVERGE IX3110)
本番環境 (部室)
- サーバ
NEC Mate(PC-MJ34LLZZ1BSH)
OS: Oracle Linux 9.3
CPU: Intel Core i3-4130 2コア4スレッド
メモリ: 8GB - ルータ
Cisco 891FJ
NEC UNIVERGE IX3110
作業PC
Dell Inspiron 14 5425
OS: Windows11 Pro
CPU: AMD Ryzen 7 5825U 8コア16スレッド
メモリ: 32GB
サーバも作業PCも, こんなにモリモリしなくても多分動くと思います. また, 他のLinux環境でもたぶん動きます.
今回Calicoを使いたいので, ルータはBGPを喋れるものを用意します. 多分業務用じゃないと喋れないです.
インストール
rootユーザに切り替えて, k3sをインストールします.
Podネットワークは今回10.244.0.0/16に設定します. 既存のネットワークと重複する場合は, 別のものに変更します.
sudo su -
curl -sfL https://get.k3s.io | K3S_KUBECONFIG_MODE="644" INSTALL_K3S_EXEC="--flannel-backend=none --cluster-cidr=10.244.0.0/16 --disable-network-policy --disable=traefik" sh -
モノホンのKubernetesは本体のインストールが結構大変だったりするんですが, k3sはコマンド一発で終わります. すごい.
ネットワーク
CNIプラグインとしてCalicoを使います. Podネットワークを10.244.0.0/16から変更した場合は, 任意のテキストエディタで編集してからkubectl create -f <編集後のファイルパス> をします.
kubectl create -f https://raw.githubusercontent.com/projectcalico/calico/v3.26.4/manifests/tigera-operator.yaml
kubectl create -f https://raw.githubusercontent.com/technotut/k3s/main/setup/calico-manifest/custom-resources.yaml
一旦watch kubectl get pods --all-namespacesでコンテナが正常に作成されていることを確認します.
Calicoctlをインストールして, BGPピアの設定をします. ここでは, AS65000でiBGPピアを確立します.
AS番号を変更したり, ルータのアドレスを変更する必要がある場合は, 任意のテキストエディタで編集してからcalicoctl aplly -f <編集後のファイルパス> をします.
cd /usr/local/bin
curl -L https://github.com/projectcalico/calico/releases/download/v3.26.4/calicoctl-linux-amd64 -o calicoctl
sudo chmod +x ./calicoctl
ln -s /etc/rancher/k3s/k3s.yaml ~/.kube/config
wget https://raw.githubusercontent.com/technotut/k3s/main/setup/calico-manifest/bgppeer.yaml
wget https://raw.githubusercontent.com/technotut/k3s/main/setup/calico-manifest/bgpconfig.yaml
calicoctl apply -f bgppeer.yaml
calicoctl apply -f bgpconfig.yaml
ファイアウォールの設定をします.
<client-cidr> には, Podネットワークへアクセスを許可するアドレス範囲を入力します.
以下の一連のコマンドの代わりに, systemctl disable --now firewalld でファイアウォールを無効にしてしまっても良いです. (k3sのドキュメントではファイアウォールの無効化が推奨されています)
firewall-cmd --add-port=179/tcp --permanent
firewall-cmd --add-port=6443/tcp --permanent
firewall-cmd --add-port=10250/tcp --permanent
firewall-cmd --zone=trusted --add-source=10.43.0.0/16 --permanent
firewall-cmd --zone=trusted --add-source=10.244.0.0/16 --permanent
firewall-cmd --zone=trusted --add-source=<client-cidr> --permanent
firewall-cmd --reload
ルータの設定をします.
機種ごとに設定は異なりますが, ここでは例としてNEC IXルータ(IX3110), Cisco IOS(Cisco 891FJ)での設定を示します.
address-family ipv4 unicastを指定してからnetworkコマンドを実行することで, 経路情報を広報します. ここは, 環境によってアドレス範囲を変更します.
この記事の最後に, 需要があるかはわかりませんがNEC IX3110, Cisco 891FJでの設定サンプルを置いておきます.
router bgp 65000
neighbor <server-ip> remote-as 65000
address-family ipv4 unicast
network 192.168.10.0/24
network 192.168.11.0/24
network 192.168.20.0/24
network 192.168.99.0/24
exit
exit
write memory
show ip bgp summary を実行して, ESTABLISHしていることを確認します. また, show ip route を実行して, Podネットワーク10.244.0.0/16 がルーティングテーブルに登録されていることを確認します.
サーバ側でも正しく設定ができているか, 確認しましょう. 以下のコマンドで確認できます.
calicoctl get nodes -o wide
calicoctl get bgpPeer -o wide
calicoctl get ippool -o wide
calicoctl get bgpConfiguration -o wide
watch kubectl get pod -A -o wide
ip route
PersistentVolumeの設定
ネットワークの設定が終わったら, 次にストレージの設定を行います.
Kubernetesでは, PersistentVolumeといってPersistentVolumeClaimに応じて自動で永続ボリュームを割り当てる仕組みが存在します. ここでは, その設定を行います.
まずは, NFSサーバを建てます.
mkdir /nfs
dnf install nfs-utils
systemctl enable --now nfs-server
vim /etc/exports を実行して, 以下の内容で新たにファイルを作成します.
/nfs localhost(rw,no_root_squash)
exportfs -a
exportfs
firewall-cmd --add-service=nfs --permanent
firewall-cmd --reload
NFSサーバの構築は完了です. 次に, HelmというKubernetes用のパッケージマネージャーをインストールします.
cd /usr/local/bin
wget https://get.helm.sh/helm-v3.13.2-linux-amd64.tar.gz
tar -zxvf helm-v3.13.2-linux-amd64.tar.gz
mv linux-amd64/helm /usr/local/bin/helm
rm linux-amd64
rm helm-v3.13.2-linux-amd64.tar.gz
Helmを使ってnfs-subdir-external-provisionerをインストールします.
helm repo add nfs-subdir-external-provisioner https://kubernetes-sigs.github.io/nfs-subdir-external-provisioner/
helm install nfs-subdir-external-provisioner nfs-subdir-external-provisioner/nfs-subdir-external-provisioner --set nfs.server=localhost --set nfs.path=/nfs
これでk3sのインストールは終わりです.
ちょっと遊んでみる
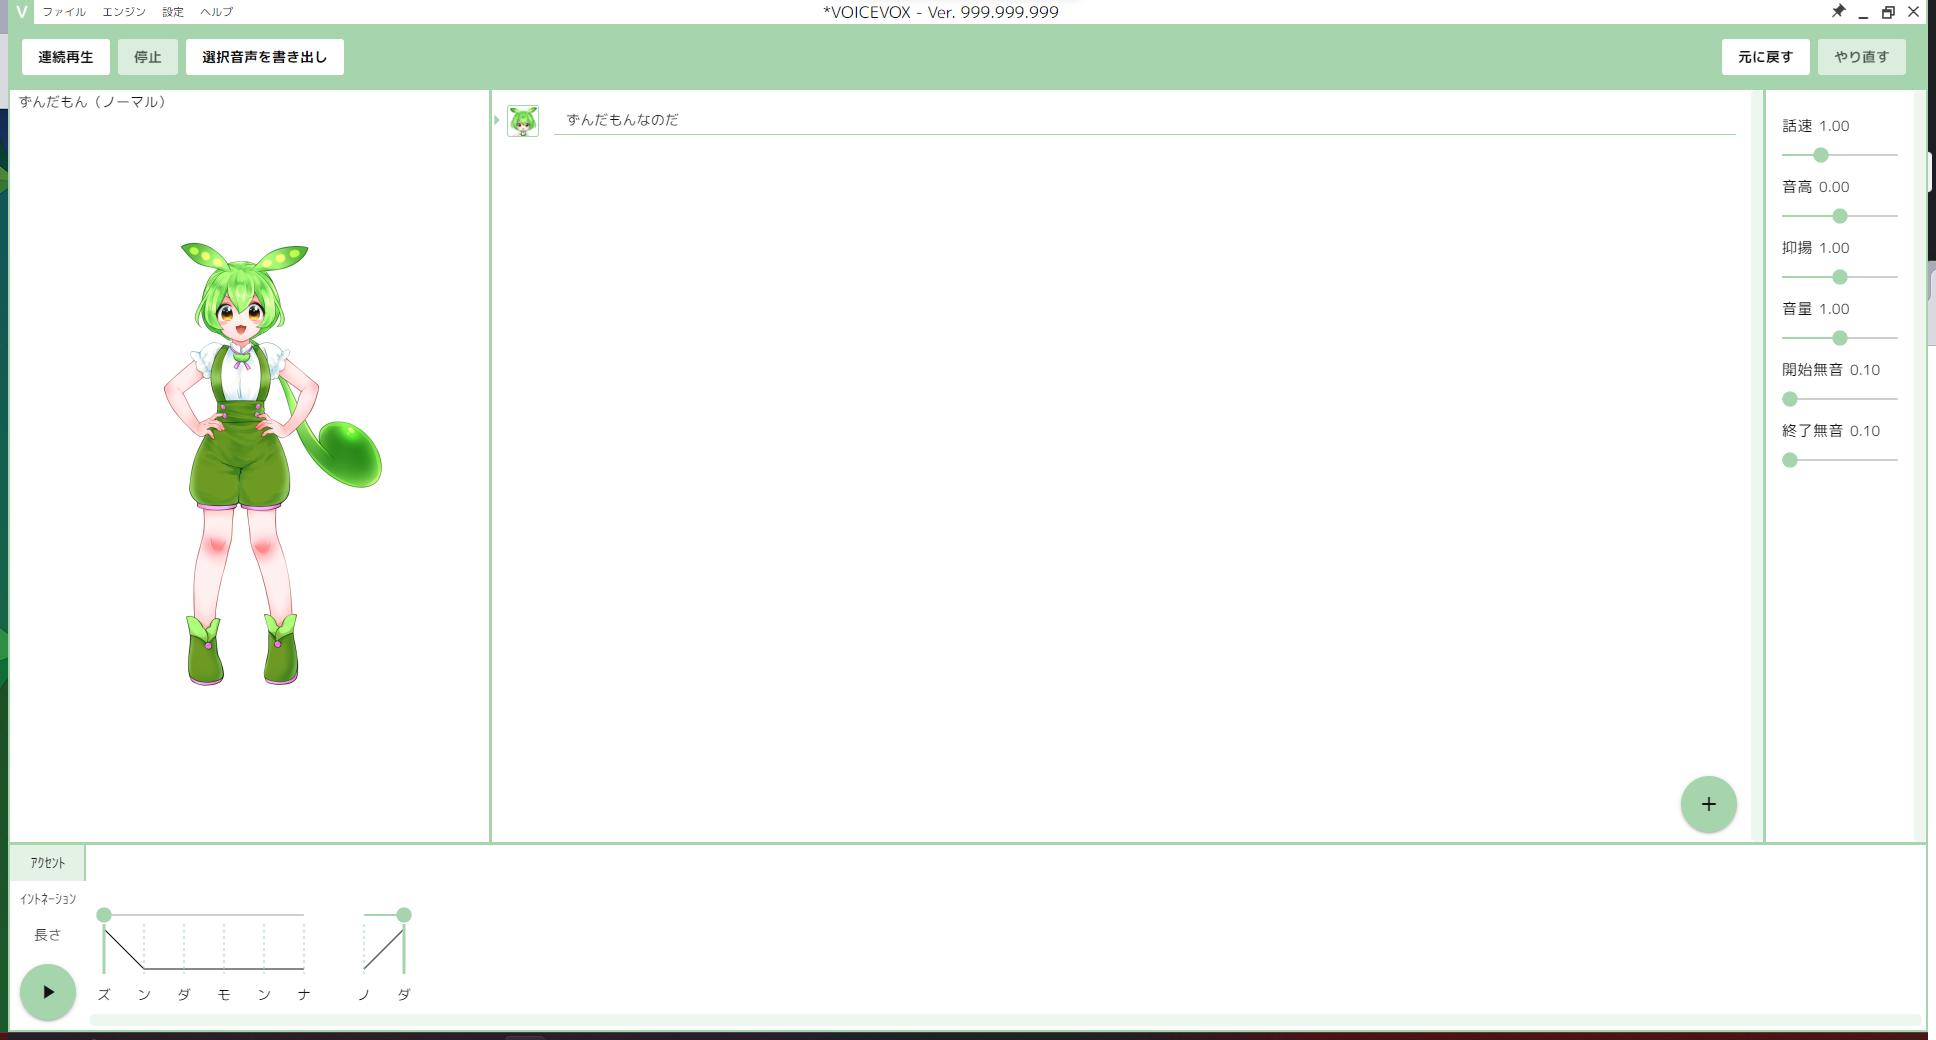
k3s上でVOICEVOXを実行してみます.
起動
以下のようにマニフェストを書きます.
apiVersion: v1
kind: Pod
metadata:
  name: voicevox
  namespace: default
spec:
  containers:
  - name: voicevox
    image: voicevox/voicevox_engine:cpu-ubuntu20.04-latest
    ports:
    - name: http
      containerPort: 50021
kubectl apply -f voicevox.yamlを実行して, マニフェストを適用します.
watch kubectl get pods -A -o wideで様子を温かい目で見守りましょう.
StatusがRunningになったら, ブラウザを開いてアクセスしてみましょう.
kubectl get pods -A -o wide | grep voicevoxで接続先のIPアドレスを確認します. 私の環境だと, 10.244.2.156に割り当てられていました.
手元のPCでhttp://10.244.2.156:50021/docs/ を開いてみて, 開ければ正常に起動ができています. (IPアドレスは接続先IPアドレスに置き換えてください)
喋らせる
正常に起動できていそうなのですが, なんだか味気ないので音声合成をしてみます.
VOICEVOXを自力でビルドすると接続先のサーバを変えれるらしいので, これを使ってみます.
gitとnodejsが必要なので, 事前にインストールしておきます.
Windowsだとwinget install Git.Gitとwinget install OpenJS.NodeJS.LTS -v 18.13.0で入ると思います. バージョンは18.13.0以上19以下じゃないと怒られたので, 従います.
インストールしたあとはターミナルを再起動しましょう.
手元のPCのターミナルを開いて, git cloneします.
git clone https://github.com/VOICEVOX/voicevox.git
cd voicevox
npm installで依存関係を入れて, .env.productionを編集します.
VITE_APP_NAME=voicevox
VITE_DEFAULT_ENGINE_INFOS=`[
    {
        "uuid": "074fc39e-678b-4c13-8916-ffca8d505d1d",
        "name": "VOICEVOX Engine",
        "executionEnabled": false,
        "executionFilePath": "vv-engine/run.exe",
        "executionArgs": [],
        "host": "http://10.244.2.156:50021"
    }
]`
VITE_OFFICIAL_WEBSITE_URL=https://voicevox.hiroshiba.jp/
VITE_LATEST_UPDATE_INFOS_URL=https://raw.githubusercontent.com/VOICEVOX/voicevox_blog/master/src/data/updateInfos.json
VITE_GTM_CONTAINER_ID=GTM-DUMMY
executionEnabledをfalseに, hostを先程の接続先IPアドレスに置き換えます.
ビルドして起動します.
npm run electron:build
# Windows
.\dist_electron\win-unpacked\VOICEVOX.exe
# Mac
open ./dist_electron/mac/VOICEVOX.app
これでずんだもんが喋るはず. 適当に喋らせてみましょう.
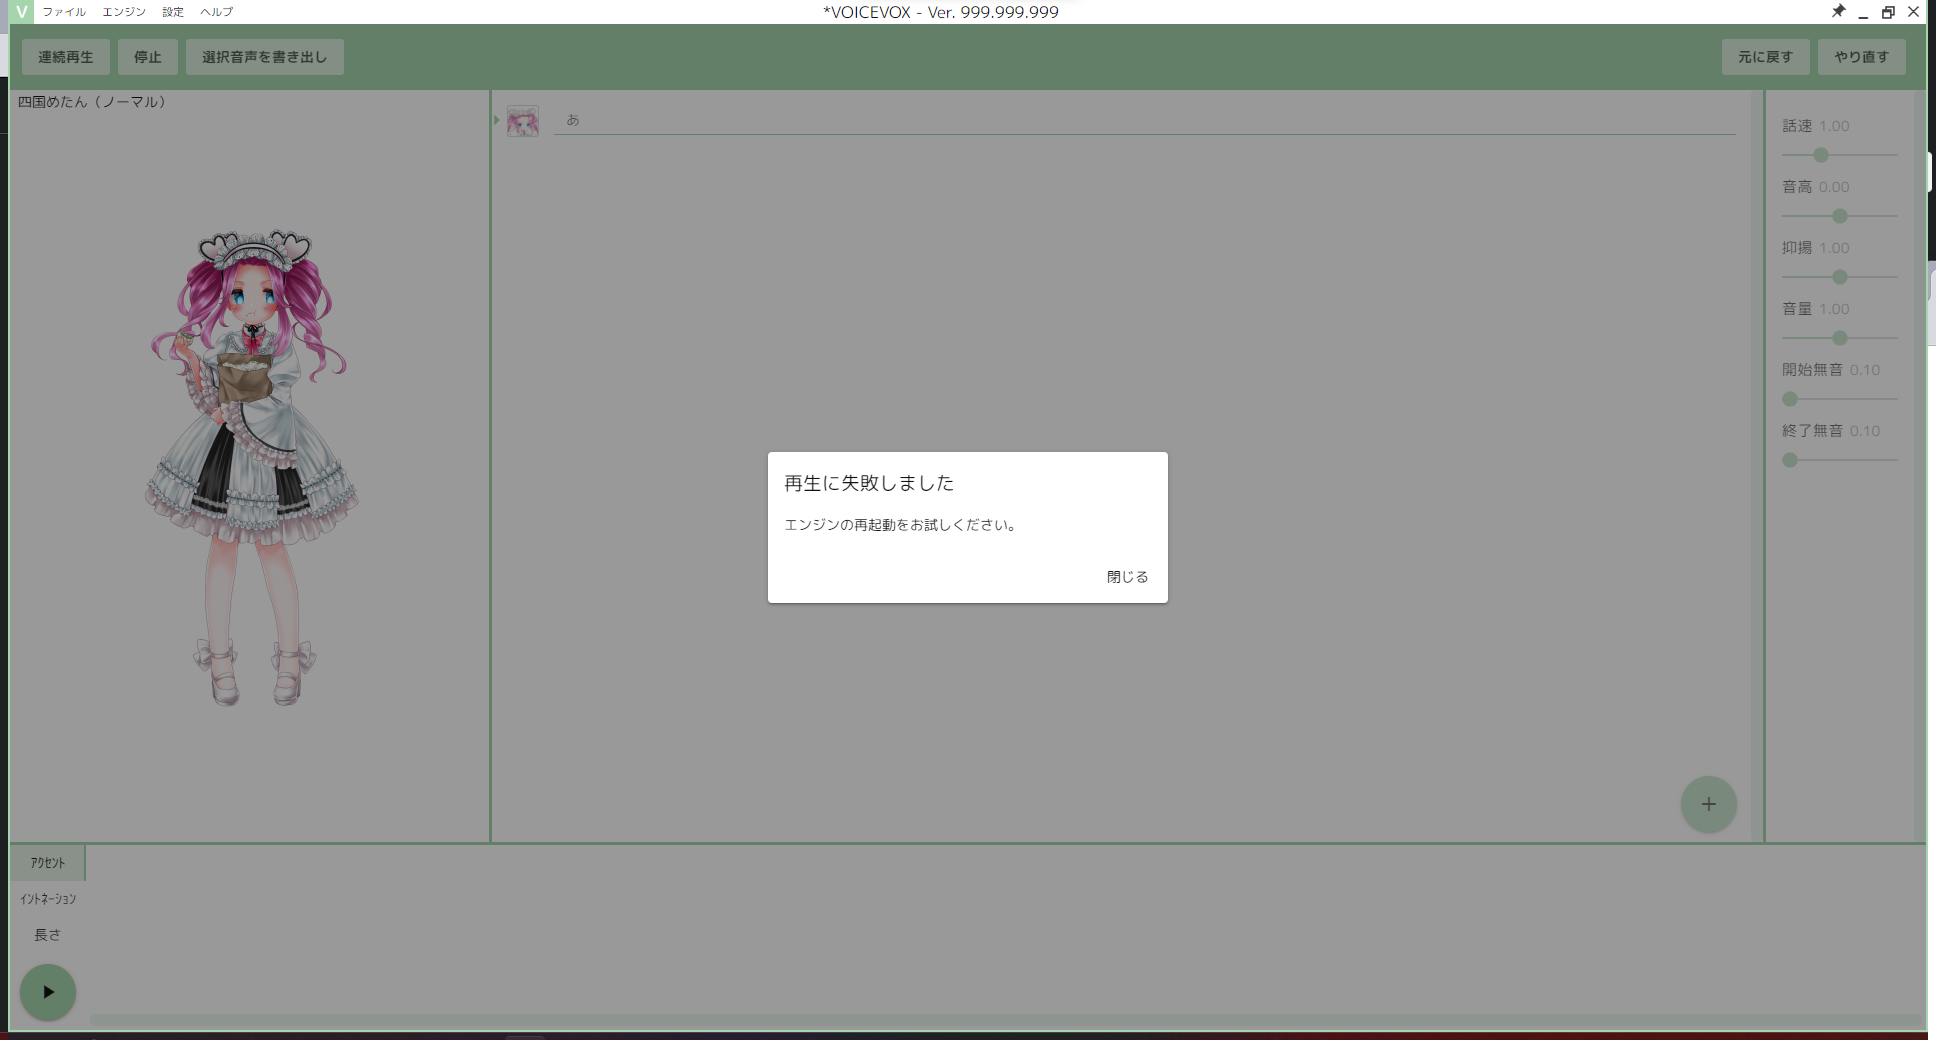
ここで, コンテナを削除してみましょう.
削除するには kubectl delete -f voicevox.yamlを実行します.
ということで, ちゃんとKubernetes上で音声合成してくれていましたね.
実際の運用
Kompose
docker-compose.yml をKubernetesのマニフェストに変換してくれるツールです. これまでDocker Composeで運用してきたものをそのまま使うことができます.
インストール
cd /usr/local/bin
curl -L https://github.com/kubernetes/kompose/releases/download/v1.31.2/kompose-linux-amd64 -o kompose
chmod +x kompose
使い方
docker-compose.ymlのあるディレクトリで, 新たにディレクトリを作りその中にKubernetesのマニフェストを書き出します.
mkdir kubernetes
cd kubernetes
kompose convert -f ../docker-compose.yml --volumes=hostPath
kubectl apply -f .
ちなみに, kubectl apply -f .と実行すれば, カレントディレクトリのマニフェストを全て一度に適用してくれます.
ArgoCD
ArgoCDは, KubernetesのCDツールです. GitHubにマニフェストを上げておいて, そのマニフェストを適用してPodを作成させることができます. ArgoCDはGitHubのリポジトリを監視していて, Pushすると自動で新たなマニフェストを再適用します.
インストール
kubectl create namespace argocd
kubectl apply -n argocd -f https://raw.githubusercontent.com/technotut/k3s/main/setup/argocd/install.yaml
cd /usr/local/bin
curl -L https://github.com/argoproj/argo-cd/releases/download/v2.9.2/argocd-linux-amd64 -o argocd
chmod +x argocd
firewall-cmd --add-port=30001/tcp --permanent
firewall-cmd --reload
argocd admin initial-password -n argocdを実行して, 初期パスワードを出力します.
argocd login localhost:30001でログインします.
argocd account update-passwordで初期パスワードを更新します.
https://<server-ip>:30001 を開くと, ArgoCDのWebUIを開けます.
アプリケーションの作成
ここに, Grafana, Prometheus, snmp_exporterのマニフェストを準備してあるので, このPodを作ってみます.
argocd app create stat --repo https://github.com/TechnoTUT/k3s.git --path manifest/stat/kubernetes --dest-server https://kubernetes.default.svc --dest-namespace default
作成すると, Web UIにも表示されるはずです.
アプリケーションをデプロイします.
argocd app sync stat
watch kubectl get pods -A -o wideでPodが作成されているか確認します. Web UIでも確認できます.
自動同期(GitHubのマニフェストが更新されたら自動で適用する)を有効にする場合は, argocd app set stat --sync-policy automated を実行します.
kubectl get pods -A -o wide | grep grafanaを実行して, GrafanaのPodのIPを確認し, http://pod-ip:3000 を開きます. Grafanaのログイン画面が出ていれば成功です.
おわりに
Kubernetes自体は昨年の5月頃から入門していたのですが, 最近ようやくアプリケーションをデプロイできるところまで行けました. シングルノードなのでKubernetesの恩恵は少なめなのですが, やはり部室に居なくてもマニフェストを書いてPushすれば自動でそれが適用されるというのは便利です. ぜひ, みなさんも入門されてみてはいかがでしょうか.
明日の記事はSessさんの「今年の百合を振り返る 2023」です. お楽しみに!!
謝辞
Kubernetesに入門するにあたって, @launchpencilさんと@ddpn08さんのお二人の協力をかなり頂きました. この場を借りて深く御礼申し上げます.
おまけ (ルータ設定サンプル)
役に立つのかわかりませんが, 誰かの役に立ったら幸いです.
Cisco 891
わざわざIRBを使っているのはスイッチとの接続にSFPポートを使いたかっただけです.
また, access-listを定義して通信を明示的にpermitしてあげないとVLAN間で通信ができませんでした.
(VLAN間で通信ができず3日くらいあたふたしていた)
TTUT_RT#show star
Using 5407 out of 262136 bytes
!
! Last configuration change at 12:11:20 UTC Thu Dec 7 2023 by admin
!
version 15.8
service timestamps debug datetime msec
service timestamps log datetime msec
no service password-encryption
!
hostname TechnoTUT_RT
!
boot-start-marker
boot-end-marker
!
!
enable secret 5 hugahuga
!
no aaa new-model
!
!
!
!
!
!
!
!
!
!
!
!
!
!
!
!
!


!
no ip dhcp conflict logging
ip dhcp excluded-address 192.168.20.1 192.168.20.100
ip dhcp excluded-address 192.168.20.201 192.168.20.254
ip dhcp excluded-address 192.168.11.1 192.168.11.100
ip dhcp excluded-address 192.168.11.201 192.168.11.254
ip dhcp excluded-address 192.168.99.1 192.168.99.100
ip dhcp excluded-address 192.168.99.201 192.168.99.254
!
ip dhcp pool vj
 network 192.168.20.0 255.255.255.0
 default-router 192.168.20.1
 dns-server 192.168.20.1
 lease 0 12
!
ip dhcp pool mg
 network 192.168.99.0 255.255.255.0
 default-router 192.168.99.1
 dns-server 192.168.99.1
 lease 0 3
!
!
!
ip domain name intra.technotut.net
ip cef
no ipv6 cef
!
!
!
!
!
multilink bundle-name authenticated
!
!
!
!
!
!
!
license udi pid C891FJ-K9 sn ***********
!
!
!
username admin secret 5 hugahuga
!
redundancy
!
!
!
!
!
!
!
!
!
!
!
bridge irb
!
!
!
!
!
interface Loopback0
 ip address 10.255.0.1 255.255.255.255
!
interface BRI0
 no ip address
 encapsulation hdlc
 shutdown
 isdn termination multidrop
!
interface FastEthernet0
 no ip address
 duplex auto
 speed auto
 shutdown
!
interface GigabitEthernet0
 switchport mode trunk
 no ip address
!
interface GigabitEthernet1
 switchport access vlan 20
 switchport mode access
 no ip address
 spanning-tree portfast
!
interface GigabitEthernet2
 switchport access vlan 20
 switchport mode access
 no ip address
 spanning-tree portfast
!
interface GigabitEthernet3
 switchport access vlan 10
 switchport mode access
 no ip address
 spanning-tree portfast
!
interface GigabitEthernet4
 switchport access vlan 99
 switchport mode access
 no ip address
 spanning-tree portfast
!
interface GigabitEthernet5
 switchport access vlan 30
 switchport mode access
 no ip address
 spanning-tree portfast
!
interface GigabitEthernet6
 switchport access vlan 30
 switchport mode access
 no ip address
 spanning-tree portfast
!
interface GigabitEthernet7
 switchport mode trunk
 no ip address
!
interface GigabitEthernet8
 no ip address
 duplex auto
 speed auto
!
interface GigabitEthernet8.1
 encapsulation dot1Q 10
 bridge-group 1
!
interface GigabitEthernet8.2
 encapsulation dot1Q 20
 bridge-group 2
!
interface GigabitEthernet8.3
 encapsulation dot1Q 30
 bridge-group 3
!
interface GigabitEthernet8.9
 encapsulation dot1Q 99
 bridge-group 9
!
interface Vlan1
 no ip address
 shutdown
!
interface Vlan10
 no ip address
 bridge-group 1
!
interface Vlan20
 no ip address
 bridge-group 2
!
interface Vlan30
 no ip address
 bridge-group 3
!
interface Vlan99
 no ip address
 bridge-group 9
!
interface Async3
 no ip address
 encapsulation slip
!
interface BVI1
 mac-address 0000.0c18.1f81
 ip address 192.168.10.1 255.255.255.0
 ip access-group 110 out
 ip virtual-reassembly in
!
interface BVI2
 mac-address 0000.0c18.1f82
 ip address 192.168.20.1 255.255.255.0
 ip access-group 120 out
 ip virtual-reassembly in
!
interface BVI3
 mac-address 0000.0c18.1f83
 ip address 192.168.11.1 255.255.255.0
 ip access-group 130 out
 ip virtual-reassembly in
!
interface BVI9
 mac-address 0000.0c18.1f89
 ip address 192.168.99.1 255.255.255.0
 ip access-group 199 out
 ip virtual-reassembly in
!
router bgp 65000
 bgp log-neighbor-changes
 neighbor 192.168.99.99 remote-as 65000
 !
 address-family ipv4
  redistribute connected
  neighbor 192.168.99.99 activate
 exit-address-family
!
ip forward-protocol nd
no ip http server
no ip http secure-server
!
!
ip dns view default
 dns forwarder 192.168.99.99
ip dns server
ip ssh version 2
!
ipv6 ioam timestamp
!
access-list 110 permit ip any any
access-list 120 permit ip any any
access-list 130 permit ip any any
access-list 199 permit ip any any
!
control-plane
!
bridge 1 protocol ieee
bridge 1 route ip
bridge 2 protocol ieee
bridge 2 route ip
bridge 3 protocol ieee
bridge 3 route ip
bridge 9 protocol ieee
bridge 9 route ip
!
!
mgcp behavior rsip-range tgcp-only
mgcp behavior comedia-role none
mgcp behavior comedia-check-media-src disable
mgcp behavior comedia-sdp-force disable
!
mgcp profile default
!
!
!
!
!
!
line con 0
 no modem enable
line aux 0
line 3
 speed 115200
line vty 0 4
 login local
 transport input ssh
!
scheduler allocate 20000 1000
!
!
!
!
!
!
!
end
NEC IX 3110
他のIXシリーズで使う場合は, 適宜インターフェースを読み変えてください.
RT(config)# show star
Using 3562 out of 2097152 bytes

! NEC Portable Internetwork Core Operating System Software
! IX Series IX3100 (magellan-sec) Software, Version 10.5.33, RELEASE SOFTWARE
! Compiled Jun 15-Thu-2023 20:00:23 JST #2
! Last updated Dec 07-Thu-2023 21:52:57 JST
!
hostname RT
timezone +09 00
!
username admin password hash hugahuga administrator
!
ip ufs-cache enable
ip dhcp enable
!
!
!
!
snmp-agent ip enable
snmp-agent ip community univerge
!
!
!
!
!
!
!
ssh-server ip enable
!
http-redirect mode web-auth
!
http-server username admin
http-server ip enable
!
web-auth username hogehoge secret-password hugahuga
!
!
!
!
!
!
!
ip dhcp profile dhcp-sv-dj
  assignable-range 192.168.10.101 192.168.10.200
  default-gateway 192.168.10.1
  dns-server 192.168.10.1
  domain-name dj.intra.technotut.net
  lease-time 86400
!
ip dhcp profile dhcp-sv-vj
  assignable-range 192.168.20.101 192.168.20.200
  default-gateway 192.168.20.1
  dns-server 192.168.20.1
  domain-name vj.intra.technotut.net
  lease-time 86400
!
ip dhcp profile dhcp-sv-led
  assignable-range 192.168.11.101 192.168.11.200
  default-gateway 192.168.11.1
  dns-server 192.168.11.1
  domain-name led.intra.technotut.net
  lease-time 86400
!
ip dhcp profile dhcp-sv-mg
  assignable-range 192.168.99.101 192.168.99.200
  default-gateway 192.168.99.1
  dns-server 192.168.99.1
  domain-name mg.intra.technotut.net
  lease-time 86400
!
router bgp 65000
  neighbor 192.168.99.99 remote-as 65000
  address-family ipv4 unicast
    network 192.168.10.0/24
    network 192.168.11.0/24
    network 192.168.20.0/24
    network 192.168.99.0/24
!
device GigaEthernet0
  shutdown
!
device GigaEthernet1
  shutdown
!
device GigaEthernet2
  shutdown
!
device GigaEthernet3
  connector-type sfp
!
interface GigaEthernet0.0
  no ip address
  shutdown
!
interface GigaEthernet1.0
  no ip address
  shutdown
!
interface GigaEthernet2.0
  no ip address
  shutdown
!
interface GigaEthernet3.0
  no ip address
  shutdown
!
interface GigaEthernet3.1
  encapsulation dot1q 10 tpid 8100
  auto-connect
  ip address 192.168.10.1/24
  ip dhcp binding dhcp-sv-dj
  web-auth enable
  http-redirect enable
  no shutdown
!
interface GigaEthernet3.2
  encapsulation dot1q 20 tpid 8100
  auto-connect
  ip address 192.168.20.1/24
  ip dhcp binding dhcp-sv-vj
  web-auth enable
  http-redirect enable
  no shutdown
!
interface GigaEthernet3.3
  encapsulation dot1q 30 tpid 8100
  auto-connect
  ip address 192.168.11.1/24
  no shutdown
!
interface GigaEthernet3.9
  encapsulation dot1q 99 tpid 8100
  auto-connect
  ip address 192.168.99.1/24
  ip dhcp binding dhcp-sv-mg
  no shutdown
!
interface Loopback0.0
  no ip address
!
interface Null0.0
  no ip address
参考文献
概要 | Kubernetes
Requirements | K3s
Quickstart for Calico on K3s
Configure BGP peering
kubernetes-sigs/nfs-subdir-external-provisioner
VOICEVOXエンジンをGoogle Colabで起動してMacのエディタから使う
Getting Started - Argo CD
Automated Sync Policy - Argo CD
Solved: 891 VLAN Routing Assistance - Cisco Community


