前回までの内容
kubeadmでのk8sクラスタの構築 1/3
kubeadmでのk8sクラスタの構築 2/3
はじめに
今回はmasterノードをクローンして、workerノードを作成する。その後、masterノードでkubeadm initして、Kubernetesのクラスタを作成し、workerノードをJoinする。
workerノードの準備
masterの設定をする前に、masterをクローンしてworkerノードを2台作成する。
クローンの作成
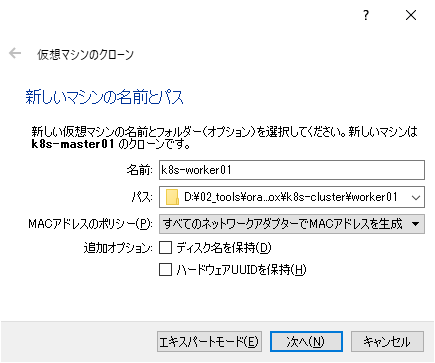
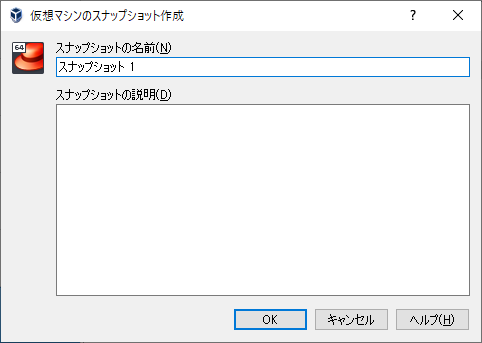
スナップショットからクローンを作成する。
デフォルトだと、MACアドレスがmasterと同じになるので、「すべてのネットワークアダプタでMACアドレスを生成」を選択する。

しばらく待つとVMが作成されるので、起動する。
ホスト名、IPアドレスの変更
クローンされたworkerノードは、masterとIPアドレス、ホスト名が同じなので変更する。
ホスト名の変更
$ sudo hostnamectl set-hostname k8s-worker01
$ hostname
k8s-worker01
IPアドレスの変更
$ sudo nmcli c m enp0s3 ipv4.addresses 10.20.30.20/24
$ sudo nmcli c down enp0s3
$ sudo nmcli c up enp0s3
$ sudo systemctl restart network
このあと一度ログアウトして、再度ログインする。
同じ操作でもう一つのworkerノードを作成する。
masterノードのセットアップ
kubeadmでinitする。
今回はクラスタ内ネットワークにCalicoを使用するので、Calicoのデフォルトである「192.169.0.0/16」を「pod-network-cidr」で指定する。
$ sudo kubeadm reset --force
$ sudo kubeadm init --pod-network-cidr=192.168.0.0/16
W0226 06:23:04.264200    9944 validation.go:28] Cannot validate kubelet config - no validator is available
W0226 06:23:04.264409    9944 validation.go:28] Cannot validate kube-proxy config - no validator is available
[init] Using Kubernetes version: v1.17.3
・・・
Your Kubernetes control-plane has initialized successfully!

To start using your cluster, you need to run the following as a regular user:

  mkdir -p $HOME/.kube
  sudo cp -i /etc/kubernetes/admin.conf $HOME/.kube/config
  sudo chown $(id -u):$(id -g) $HOME/.kube/config

You should now deploy a pod network to the cluster.
Run "kubectl apply -f [podnetwork].yaml" with one of the options listed at:
  https://kubernetes.io/docs/concepts/cluster-administration/addons/

Then you can join any number of worker nodes by running the following on each as root:

kubeadm join 10.20.30.10:6443 --token gqtt93.ajtoewdpxzjmzng2 \
    --discovery-token-ca-cert-hash sha256:db899341adbb0f3c26d1695a34292e98cc01b67e1881c5962f71cceaabed740f
メッセージに従って、コンフィグファイルをコピーする。
$ mkdir -p $HOME/.kube
$ sudo cp -i /etc/kubernetes/admin.conf $HOME/.kube/config
$ sudo chown $(id -u):$(id -g) $HOME/.kube/config
$ kubectl get node
NAME         STATUS     ROLES    AGE     VERSION
k8s-master   NotReady   master   6m58s   v1.17.3
workerノードのセットアップ
masterをセットアップした最後のメッセージを各workerノードで実行し、クラスタに参加させる。
$ sudo kubeadm join 10.20.30.10:6443 --token gqtt93.ajtoewdpxzjmzng2 \
>     --discovery-token-ca-cert-hash sha256:db899341adbb0f3c26d1695a34292e98cc01b67e1881c5962f71cceaabed740f
W0226 06:39:20.346866    2190 join.go:346] [preflight] WARNING: JoinControlPane.controlPlane settings will be ignored when control-plane flag is not set.
[preflight] Running pre-flight checks
[preflight] Reading configuration from the cluster...
[preflight] FYI: You can look at this config file with 'kubectl -n kube-system get cm kubeadm-config -oyaml'
[kubelet-start] Downloading configuration for the kubelet from the "kubelet-config-1.17" ConfigMap in the kube-system namespace
[kubelet-start] Writing kubelet configuration to file "/var/lib/kubelet/config.yaml"
[kubelet-start] Writing kubelet environment file with flags to file "/var/lib/kubelet/kubeadm-flags.env"
[kubelet-start] Starting the kubelet
[kubelet-start] Waiting for the kubelet to perform the TLS Bootstrap...

This node has joined the cluster:
* Certificate signing request was sent to apiserver and a response was received.
* The Kubelet was informed of the new secure connection details.

Run 'kubectl get nodes' on the control-plane to see this node join the cluster.
masterノードで認識されているか確認する。
$ kubectl get node
NAME           STATUS     ROLES    AGE     VERSION
k8s-master     NotReady   master   17m     v1.17.3
k8s-worker01   NotReady   <none>   3m34s   v1.17.3
k8s-worker02   NotReady   <none>   3m12s   v1.17.3
この状態だと各ノードはクラスタには参加しているけど、「NotReady」の状態になっている。
クラスタ内ネットワーク(Calico)のセットアップ
CalicoのInstallationに従ってセットアップする。
Installing with the Kubernetes API datastore—50 nodes or less
$ curl https://docs.projectcalico.org/manifests/calico.yaml -O
  % Total    % Received % Xferd  Average Speed   Time    Time     Time  Current
                                 Dload  Upload   Total   Spent    Left  Speed
100 20935  100 20935    0     0   8374      0  0:00:02  0:00:02 --:--:--  8377
$ ls
calico.yaml
$ kubectl apply -f calico.yaml
configmap/calico-config created
customresourcedefinition.apiextensions.k8s.io/felixconfigurations.crd.projectcalico.org created
customresourcedefinition.apiextensions.k8s.io/ipamblocks.crd.projectcalico.org created
customresourcedefinition.apiextensions.k8s.io/blockaffinities.crd.projectcalico.org created
customresourcedefinition.apiextensions.k8s.io/ipamhandles.crd.projectcalico.org created
customresourcedefinition.apiextensions.k8s.io/ipamconfigs.crd.projectcalico.org created
customresourcedefinition.apiextensions.k8s.io/bgppeers.crd.projectcalico.org created
customresourcedefinition.apiextensions.k8s.io/bgpconfigurations.crd.projectcalico.org created
customresourcedefinition.apiextensions.k8s.io/ippools.crd.projectcalico.org created
customresourcedefinition.apiextensions.k8s.io/hostendpoints.crd.projectcalico.org created
customresourcedefinition.apiextensions.k8s.io/clusterinformations.crd.projectcalico.org created
customresourcedefinition.apiextensions.k8s.io/globalnetworkpolicies.crd.projectcalico.org created
customresourcedefinition.apiextensions.k8s.io/globalnetworksets.crd.projectcalico.org created
customresourcedefinition.apiextensions.k8s.io/networkpolicies.crd.projectcalico.org created
customresourcedefinition.apiextensions.k8s.io/networksets.crd.projectcalico.org created
clusterrole.rbac.authorization.k8s.io/calico-kube-controllers created
clusterrolebinding.rbac.authorization.k8s.io/calico-kube-controllers created
clusterrole.rbac.authorization.k8s.io/calico-node created
clusterrolebinding.rbac.authorization.k8s.io/calico-node created
daemonset.apps/calico-node created
serviceaccount/calico-node created
deployment.apps/calico-kube-controllers created
serviceaccount/calico-kube-controllers created
しばらく待ってpodがデプロイされているか確認する。
$ kubectl get pod -n kube-system | grep calico
calico-kube-controllers-77c4b7448-6prr9   1/1     Running   0          2m48s
calico-node-2hc9b                         1/1     Running   0          2m48s
calico-node-cgdgk                         1/1     Running   0          2m48s
calico-node-tkcz5                         1/1     Running   0          2m48s
クラスタの状態を確認する。
$ kubectl get node
NAME           STATUS   ROLES    AGE   VERSION
k8s-master     Ready    master   30m   v1.17.3
k8s-worker01   Ready    <none>   16m   v1.17.3
k8s-worker02   Ready    <none>   16m   v1.17.3
Stausがすべて「Ready」になってればOK
まとめ
今回は大きなトラブルなく、一通りクラスタの構築ができました。
前に作ったときは、何度もトラブって途中諦めそうになったけど、そのトラブルシュートが活きたのかなと思います。
これでKubernetesの実機環境ができたので、「Kubernetes完全ガイド」を読んでいこう。
Kubernetes完全ガイド
個人的に、紙の本の方が読み返したりするのに便利なので紙の本を買ったけど、持ち運びが不便なのでKindle版も買おうか迷い中。。。
