はじめに
OCIのAlways FreeのObject Storageは標準層10GB、アーカイブ層10GBの計20GB無償で利用できます。
これをマウントしてMACのストレージを拡張してみたいと思います。
なお、利用するMACは
- M2 MacBook Air
- macOS Sonoma
- OCI CLI 3.36.2をインストール済み
です。
また、OCIのFreeTireアカウントにObject Storageのバケット(プライベート)は作成済みです。
rcloneのインストール
こちらを参考にrcloneをMACにインストールします。
 % sudo -v ; curl https://rclone.org/install.sh | sudo bash

Password:
  % Total    % Received % Xferd  Average Speed   Time    Time     Time  Current
                                 Dload  Upload   Total   Spent    Left  Speed
100  4707  100  4707    0     0   4743      0 --:--:-- --:--:-- --:--:--  4749

Archive:  rclone-current-osx-arm64.zip
   creating: tmp_unzip_dir_for_rclone/rclone-v1.64.2-osx-arm64/
  inflating: tmp_unzip_dir_for_rclone/rclone-v1.64.2-osx-arm64/git-log.txt  [text]
  inflating: tmp_unzip_dir_for_rclone/rclone-v1.64.2-osx-arm64/rclone  [binary]
  inflating: tmp_unzip_dir_for_rclone/rclone-v1.64.2-osx-arm64/rclone.1  [text]
  inflating: tmp_unzip_dir_for_rclone/rclone-v1.64.2-osx-arm64/README.html  [text]
  inflating: tmp_unzip_dir_for_rclone/rclone-v1.64.2-osx-arm64/README.txt  [text]

rclone v1.64.2 has successfully installed.
Now run "rclone config" for setup. Check https://rclone.org/docs/ for more details.
設定
コンフィグファイルを新規作成
% rclone config
2023/11/23 14:39:11 NOTICE: Config file "/Users/kosukemachida/.config/rclone/rclone.conf" not found - using defaults
No remotes found, make a new one?
n) New remote
s) Set configuration password
q) Quit config
n/s/q> n
任意の名称を設定
Enter name for new remote.
name> oci-os
OCI Object Storage(34)を選択
Option Storage.
Type of storage to configure.
Choose a number from below, or type in your own value.
 1 / 1Fichier
   \ (fichier)

・・・

34 / Oracle Cloud Infrastructure Object Storage
   \ (oracleobjectstorage)

・・・

53 / seafile
   \ (seafile)
Storage> 34
認証方式の選択
今回はAPIキーによる認証(2)を選択
Option provider.
Choose your Auth Provider
Choose a number from below, or type in your own string value.
Press Enter for the default (env_auth).
 1 / automatically pickup the credentials from runtime(env), first one to provide auth wins
   \ (env_auth)
   / use an OCI user and an API key for authentication.
 2 | you’ll need to put in a config file your tenancy OCID, user OCID, region, the path, fingerprint to an API key.
   | https://docs.oracle.com/en-us/iaas/Content/API/Concepts/sdkconfig.htm
   \ (user_principal_auth)
   / use instance principals to authorize an instance to make API calls.
 3 | each instance has its own identity, and authenticates using the certificates that are read from instance metadata.
   | https://docs.oracle.com/en-us/iaas/Content/Identity/Tasks/callingservicesfrominstances.htm
   \ (instance_principal_auth)
 4 / use resource principals to make API calls
   \ (resource_principal_auth)
 5 / no credentials needed, this is typically for reading public buckets
   \ (no_auth)
provider> 2
Object storage namespaceをOCIコンソールで確認して設定。
Option namespace.
Object storage namespace
Enter a value.
namespace> lrxxxxxxxxxxxx
コンパートメントOCIDを確認して設定。
Option compartment.
Object storage compartment OCID
Enter a value.
compartment> ocid1.xxxxxxxxxxxxxxxxxxxxxxxxxxxxxxxxxxxxxxxxxxxh3a
リージョンコードを設定
Option region.
Object storage Region
Enter a value.
region> uk-london-1
以降のオプションはデフォルトで設定
(~/.oci/configファイルは、OCI CLI設定時にAPIキーなどの認証情報を設定済みです)
Option endpoint.
Endpoint for Object storage API.
Leave blank to use the default endpoint for the region.
Enter a value. Press Enter to leave empty.
endpoint>

Option config_file.
Path to OCI config file
Choose a number from below, or type in your own string value.
Press Enter for the default (~/.oci/config).
 1 / oci configuration file location
   \ (~/.oci/config)
config_file>

Option config_profile.
Profile name inside the oci config file
Choose a number from below, or type in your own string value.
Press Enter for the default (Default).
 1 / Use the default profile
   \ (Default)
config_profile>

Edit advanced config?
y) Yes
n) No (default)
y/n> n
確認して保存
Configuration complete.
Options:
- type: oracleobjectstorage
- provider: user_principal_auth
- namespace: lrxxxxxxxxxx
- compartment: ocid1.xxxxxxxxxxxxxxxxxxxxxxxxxxxx3a
- region: uk-london-1
Keep this "oci-os" remote?
y) Yes this is OK (default)
e) Edit this remote
d) Delete this remote
y/e/d> y

Current remotes:

Name                 Type
====                 ====
oci-os               oracleobjectstorage

e) Edit existing remote
n) New remote
d) Delete remote
r) Rename remote
c) Copy remote
s) Set configuration password
q) Quit config
e/n/d/r/c/s/q> q
以下のように設定ファイルが作成されています。
[oci-os]
type = oracleobjectstorage
provider = user_principal_auth
namespace =
compartment =
region = uk-london-1
確認
以下のコマンドでバケットが表示されることを確認します。
% rclone lsd oci-os:
          -1 2023-11-20 14:54:47        -1 lhr-bucket01
マウント
MACの場合、macFUSEが必要ですので、こちらをインストールします。
なお、インストール後にシステム拡張機能を有効にする必要があります。
任意のディレクトリを作成してマウントします。
rclone mountコマンドに--daemonオプションをつけることで、バックグラウンドモードでマウントされます。
% mkdir oci-objectstorage
% rclone mount oci-os:lhr-bucket01 oci-objectstorage --daemon
% df -h oci-objectstorage
Filesystem             Size    Used   Avail Capacity iused ifree %iused  Mounted on
oci-os:lhr-bucket01    16Ti     0Bi    16Ti     0%       0  1.0G    0%   /Users/kosukemachida/oci-objectstorage
16TiBとなってますね。確か、Object Storage自体には容量の上限はなかったと思います。
とはいえ、20GBを超えたら課金対象となりますので、注意して使わないといけないです。
Finderではこのように認識されています。

Finderでフォルダーを作成して、適当にファイルを保存します。
% ls -l oci-objectstorage/folder01
total 11416
-rw-r--r--  1 kosukemachida  staff  3246730 11 23 15:57 DSC_0002.JPG
-rw-r--r--  1 kosukemachida  staff  2593472  6  2 07:46 DSC_0003.JPG
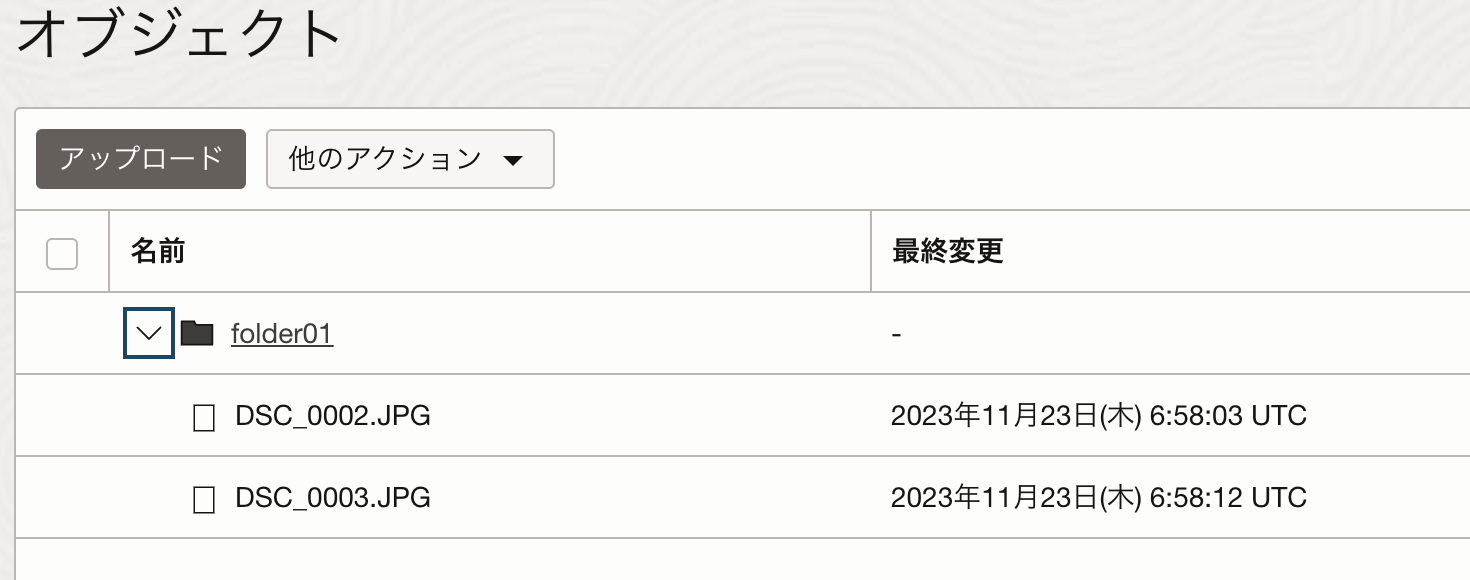
OCIコンソールでも確認できます。
再起動時にマウントするように.zshrcファイルにマウントコマンドを追記しておきました。
・・・

rclone mount oci-os:lhr-bucket01 oci-objectstorage --daemon