はじめに
OCI DevOps ProfessionalのLeaning PathにあるLabを実際にやってみて、OCI DevOpsの設定や動作を確認します。
ここでは上記Learning Pathのうち、以下のコンテナの復習とOKEへのデプロイ、OCI DevOpsを用いたCI/CDの設定と実行までをやっていきます。
01. Dockefileを使用したWeb Applicationの作成
02. OCIRを使用したコンテナイメージの管理
03. OCIR上のコンテナイメージをOKEから利用
04. OCI DevOps ProjectとCode Repositoryの作成
05. アーティファクト・レジストリの作成とセットアップ
06. CI/CD Pipelineの設定と実行
01. Dockefileを使用したWeb Applicationの作成
LabではCloud Shellを使用する手順になっていますが、ローカルに構築したOracle Linuxの仮想マシンで実施します。
$ docker -v
Docker version 24.0.2, build cb74dfc
コードのClone
使用するコードをGitHub Repositoryからクローンします。
$ git clone https://github.com/ou-developers/docker-helloworld-demo
Cloning into 'docker-helloworld-demo'...
remote: Enumerating objects: 20, done.
remote: Counting objects: 100% (20/20), done.
remote: Compressing objects: 100% (18/18), done.
remote: Total 20 (delta 4), reused 0 (delta 0), pack-reused 0
Receiving objects: 100% (20/20), 7.61 KiB | 7.61 MiB/s, done.
Resolving deltas: 100% (4/4), done.
$ cd docker-helloworld-demo/
$ ls -l
total 40
-rw-rw-r--. 1 opc opc  786 Jun 16 00:35 Dockerfile
-rw-rw-r--. 1 opc opc  824 Jun 16 00:35 HelloWorld-lb.yaml
-rw-rw-r--. 1 opc opc 1072 Jun 16 00:35 License.md
-rw-rw-r--. 1 opc opc  484 Jun 16 00:35 README.md
-rw-rw-r--. 1 opc opc  770 Jun 16 00:35 SECURITY.md
-rw-rw-r--. 1 opc opc 1691 Jun 16 00:35 build_spec.yaml
-rw-rw-r--. 1 opc opc 4425 Jun 16 00:35 index.html
-rw-rw-r--. 1 opc opc  272 Jun 16 00:35 nginx.conf
-rw-rw-r--. 1 opc opc  141 Jun 16 00:35 runner.sh
Dockefileの中身を確認しておきます。
############################################################
# Dockerfile to build Nginx Installed Containers
# Based on nginx image
############################################################


# Set the base image to nginx
FROM nginx

# File Author / Maintainer
MAINTAINER Mahendra Mehra

# Remove the default Nginx configuration file
RUN rm -v /etc/nginx/nginx.conf

# Copy a configuration file from the current directory
ADD nginx.conf /etc/nginx/

RUN mkdir /etc/nginx/logs

# Add a sample index file
ADD index.html /www/data/

# Create a runner script for the entrypoint
COPY runner.sh /runner.sh
RUN chmod +x /runner.sh

# Expose ports
EXPOSE 80

ENTRYPOINT ["/runner.sh"]

# Set the default command to execute
# when creating a new container
CMD ["nginx", "-g", "daemon off;"]
ImageのBuild
DockerfileからDocker ImageをBuildします。
$ sudo docker images
REPOSITORY   TAG       IMAGE ID   CREATED   SIZE
Tagとして1.0をつけてBuildします。
$ sudo docker build -t oci_sample_webapp_01:1.0 .
[+] Building 9.9s (12/12) FINISHED
=> [internal] load .dockerignore 0.0s
=> => transferring context: 2B 0.0s
=> [internal] load build definition from Dockerfile 0.0s
=> => transferring dockerfile: 884B 0.0s
=> [internal] load metadata for docker.io/library/nginx:latest 2.1s
=> [1/7] FROM docker.io/library/nginx@sha256:593dac25b7733ffb7afe1a72649a43e574778bf025ad60514ef40f6b5d606247 6.2s
=> => resolve docker.io/library/nginx@sha256:593dac25b7733ffb7afe1a72649a43e574778bf025ad60514ef40f6b5d606247 0.0s
=> => sha256:593dac25b7733ffb7afe1a72649a43e574778bf025ad60514ef40f6b5d606247 1.86kB / 1.86kB 0.0s
=> => sha256:5b5fe70539cd6989aa19f25826309f9715a9489cf1c057982d6a84c1ad8975c7 29.12MB / 29.12MB 1.0s
=> => sha256:441a1b46536703aec84bf2cabdd2524d4cc7dad9c6772491e01ff8ffe15b5507 41.46MB / 41.46MB 0.8s
=> => sha256:3b9543f2b5005b74aae0ffaa779803f2b162ec3bd461c9e10a21671512718c87 627B / 627B 0.2s
=> => sha256:d2b2f2980e9ccc570e5726b56b54580f23a018b7b7314c9eaff7e5e479c78657 1.78kB / 1.78kB 0.0s
=> => sha256:eb4a57159180767450cb8426e6367f11b999653d8f185b5e3b78a9ca30c2c31d 8.15kB / 8.15kB 0.0s
=> => sha256:ca89ed5461a9f2c681ebd39ed6583a7405d82f51b42177b7388c99eb6869e780 959B / 959B 0.8s
=> => extracting sha256:5b5fe70539cd6989aa19f25826309f9715a9489cf1c057982d6a84c1ad8975c7 1.3s
=> => sha256:b0e1283145af839c63923f671b4ab6c5d9e22826ab4372c6660db5a5556446c8 366B / 366B 1.2s
=> => sha256:4b98867cde79486d55399cb95957331018b849a2bf04ee9a6dcae9b8bc482d76 1.21kB / 1.21kB 1.2s
=> => sha256:4a85ce26214d83c77b5464631a67c71e1c2793b655261befe52ba0e20ffc3bd1 1.40kB / 1.40kB 1.2s
=> => extracting sha256:441a1b46536703aec84bf2cabdd2524d4cc7dad9c6772491e01ff8ffe15b5507 1.1s
=> => extracting sha256:3b9543f2b5005b74aae0ffaa779803f2b162ec3bd461c9e10a21671512718c87 0.0s
=> => extracting sha256:ca89ed5461a9f2c681ebd39ed6583a7405d82f51b42177b7388c99eb6869e780 0.0s
=> => extracting sha256:b0e1283145af839c63923f671b4ab6c5d9e22826ab4372c6660db5a5556446c8 0.0s
=> => extracting sha256:4b98867cde79486d55399cb95957331018b849a2bf04ee9a6dcae9b8bc482d76 0.0s
=> => extracting sha256:4a85ce26214d83c77b5464631a67c71e1c2793b655261befe52ba0e20ffc3bd1 0.0s
=> [internal] load build context 0.0s
=> => transferring context: 5.13kB 0.0s
=> [2/7] RUN rm -v /etc/nginx/nginx.conf 0.2s
=> [3/7] ADD nginx.conf /etc/nginx/ 0.0s
=> [4/7] RUN mkdir /etc/nginx/logs 0.2s
=> [5/7] ADD index.html /www/data/ 0.0s
=> [6/7] COPY runner.sh /runner.sh 0.0s
=> [7/7] RUN chmod +x /runner.sh 0.2s
=> exporting to image 0.9s
=> => exporting layers 0.9s
=> => writing image sha256:fefaa0f3727d5e02c83994cf443ab3b5c2f093028b189347a165044ec13e6f25 0.0s
=> => naming to docker.io/library/oci_sample_webapp_01:1.0 0.0s
$ sudo docker images
REPOSITORY             TAG       IMAGE ID       CREATED          SIZE
oci_sample_webapp_01   1.0       fefaa0f3727d   39 seconds ago   187MB
確認
BuildしたImageを起動(Run)します。
$ sudo docker run -d --name webapp-01 -p 80:80/tcp oci_sample_webapp_01:1.0
4d9119f9d61313fdf3d4ee95c05403f1e6ef3c0618b52581af3e04ba0c058724
$ sudo docker ps
CONTAINER ID   IMAGE                      COMMAND                   CREATED          STATUS          PORTS                               NAMES
4d9119f9d613   oci_sample_webapp_01:1.0   "/runner.sh nginx -g…"   11 seconds ago   Up 10 seconds   0.0.0.0:80->80/tcp, :::80->80/tcp   webapp-01
アクセスできることを確認します。
$ curl -k http://localhost:80
<html>
<head>
    <meta charset="utf-8">
    <meta http-equiv="X-UA-Compatible" content="IE=edge">
    <meta name="description" content="A simple docker helloworld example.">
    <meta name="author" content="Mahendra Mehra">
    <meta name="viewport" content="width=device-width, initial-scale=1">

        <!-- Latest compiled and minified CSS -->
・・・
停止します。
$ sudo docker stop 4d9119f9d613
4d9119f9d613
$ sudo docker ps
CONTAINER ID   IMAGE     COMMAND   CREATED   STATUS    PORTS     NAMES
$ sudo docker ps -a
CONTAINER ID   IMAGE                      COMMAND                   CREATED         STATUS                      PORTS     NAMES
4d9119f9d613   oci_sample_webapp_01:1.0   "/runner.sh nginx -g…"   2 minutes ago   Exited (0) 14 seconds ago             webapp-01
コンテナを削除します。
$ sudo docker rm webapp-01
webapp-01
$ sudo docker ps -a
CONTAINER ID   IMAGE     COMMAND   CREATED   STATUS    PORTS     NAMES
02. OCIRを使用したコンテナイメージの管理
コンテナレジストリにOCIのマネージドサービスのOCIR(Oracle Cloud Infrastructure Registry)を使用して、コンテナイメージを管理します。
その際、dockerコマンドを使用して、DockeHubと同様に操作できることを確認します。
ポリシーの設定
ここでは権限の都合上、動的グループに対してポリシーを設定します。
Allow dynamic-group <動的グループ名> to manage repos in compartment <コンパートメント名>
認証トークンの作成
ここで作成したトークンを使用しますので、ここでは割愛します。
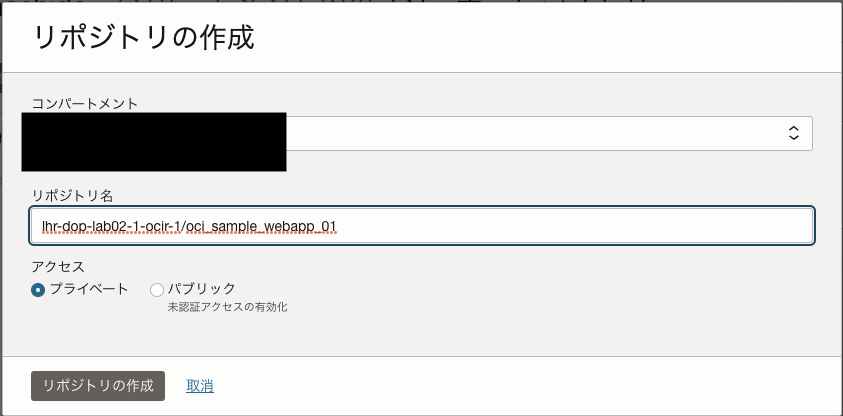
リポジトリの作成
OCIのコンソールから以下の設定でリポジトリを作成します。
OCIRへのログイン
docker loginコマンドでOCIRにログインします。
コマンド引数のlhrはリージョンキーで、OCIRを作成したリージョンに合わせて変更します。(lhrはロンドンリージョン)
そのほかのリージョンキーはこちらで確認できます。
$ sudo docker login lhr.ocir.io
Username: <tenancy-namespace>/<username>
Password: <認証トークン>
WARNING! Your password will be stored unencrypted in /root/.docker/config.json.
Configure a credential helper to remove this warning. See
https://docs.docker.com/engine/reference/commandline/login/#credentials-store

Login Succeeded
なお、テナンシーがOracle Identity Cloud Serviceでフェデレーションしている場合は、Usernameが<tenancy-namespace>/oracleidentitycloudservice/<username>になります。
コンテナイメージへのタグ付けとPush
Buildしたコンテナイメージにタグ付けしてOCIRにPushします。
$ sudo docker tag oci_sample_webapp_01:1.0 lhr.ocir.io/orasejapan/lhr-dop-lab02-1-ocir-1/oci_sample_webapp_01:latest
$ sudo docker images
REPOSITORY                                                           TAG       IMAGE ID       CREATED       SIZE
oci_sample_webapp_01                                                 1.0       fefaa0f3727d   4 hours ago   187MB
lhr.ocir.io/orasejapan/lhr-dop-lab02-1-ocir-1/oci_sample_webapp_01   latest    fefaa0f3727d   4 hours ago   187MB
$ sudo docker push lhr.ocir.io/orasejapan/lhr-dop-lab02-1-ocir-1/oci_sample_webapp_01:latest
The push refers to repository [lhr.ocir.io/orasejapan/lhr-dop-lab02-1-ocir-1/oci_sample_webapp_01]
446dc8125d41: Pushed
9790e90fe034: Pushed
179ef86f9e79: Pushed
074b93c4f63f: Pushed
fc48ac889762: Pushed
3c2e924b7ffb: Pushed
9e96226c58e7: Pushed
12a568acc014: Pushed
7757099e19d2: Pushed
bf8b62fb2f13: Pushed
4ca29ffc4a01: Pushed
a83110139647: Pushed
ac4d164fef90: Pushed
latest: digest: sha256:054b658ff90d0a528699a5922afd4e116366eb236d2a71a90cf97d3e4ded097a size: 3021
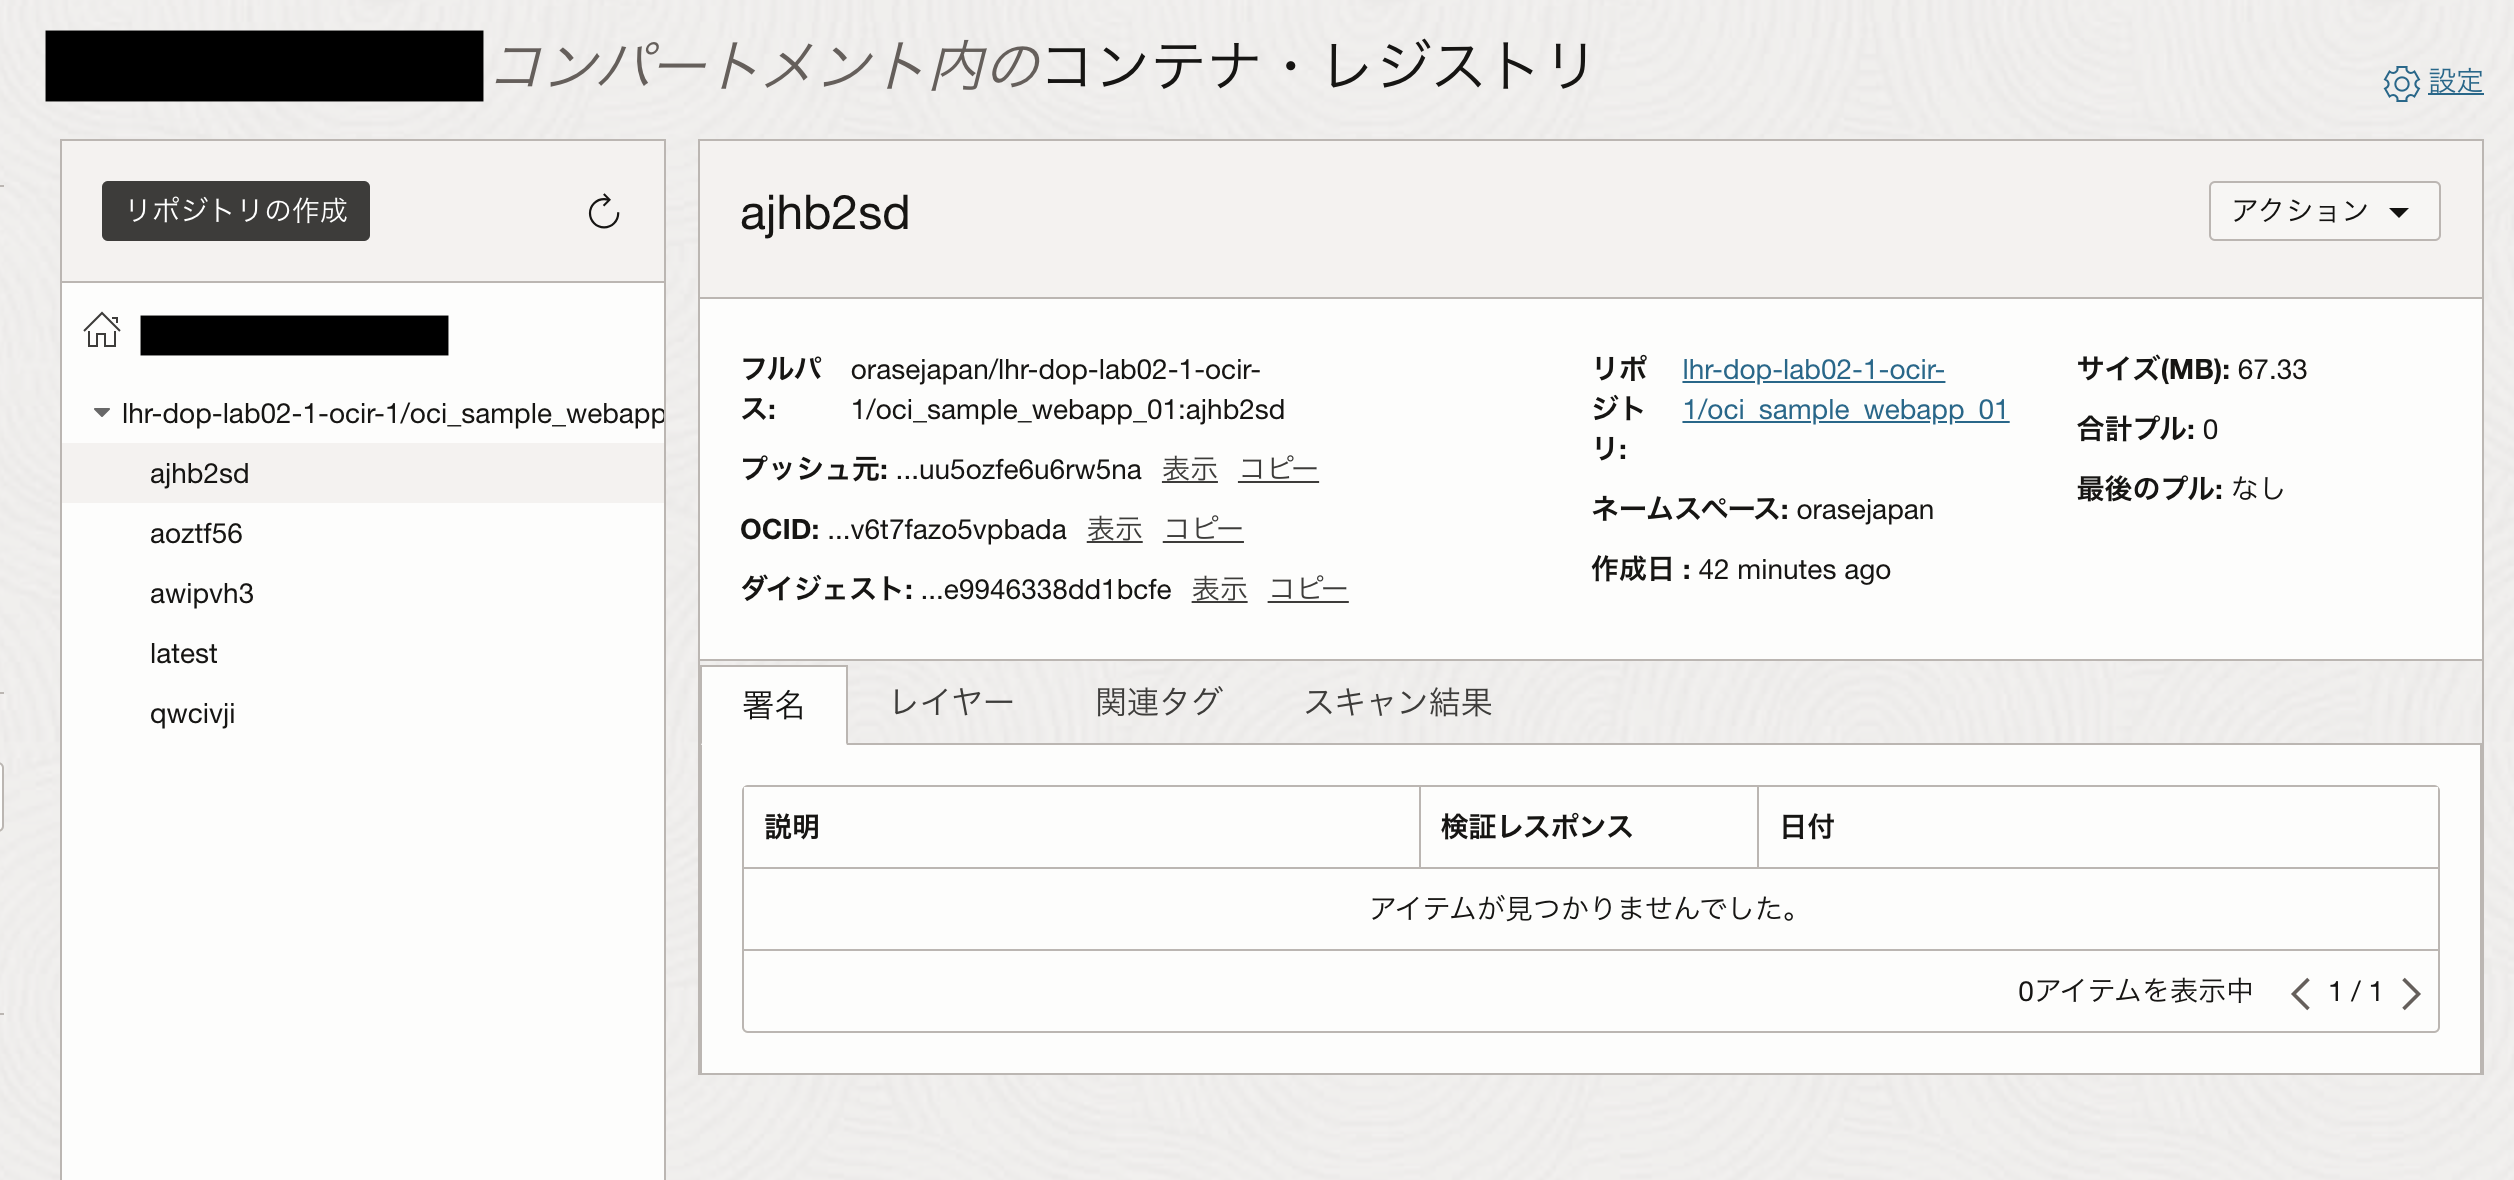
OCIコンソール上でイメージを確認できます。

イメージのPull
今度はOCIRからコンテナイメージをPullします。
一旦、ローカルにあるコンテナイメージを削除します。
$ sudo docker images
REPOSITORY                                                           TAG       IMAGE ID       CREATED       SIZE
oci_sample_webapp_01                                                 1.0       fefaa0f3727d   4 hours ago   187MB
lhr.ocir.io/orasejapan/lhr-dop-lab02-1-ocir-1/oci_sample_webapp_01   latest    fefaa0f3727d   4 hours ago   187MB
$ sudo docker rmi oci_sample_webapp_01:1.0
Untagged: oci_sample_webapp_01:1.0
$ sudo docker rmi lhr.ocir.io/orasejapan/lhr-dop-lab02-1-ocir-1/oci_sample_webapp_01:latest
Untagged: lhr.ocir.io/orasejapan/lhr-dop-lab02-1-ocir-1/oci_sample_webapp_01:latest
Untagged: lhr.ocir.io/orasejapan/lhr-dop-lab02-1-ocir-1/oci_sample_webapp_01@sha256:054b658ff90d0a528699a5922afd4e116366eb236d2a71a90cf97d3e4ded097a
Deleted: sha256:fefaa0f3727d5e02c83994cf443ab3b5c2f093028b189347a165044ec13e6f25
$ sudo docker images
REPOSITORY   TAG       IMAGE ID   CREATED   SIZE
OCIコンソールの右上のアクションからプル・コマンドのコピーを選択して、コマンドをコピーします。

(sudoを追記して)コマンドをペーストして実行します。
$ sudo docker pull lhr.ocir.io/orasejapan/lhr-dop-lab02-1-ocir-1/oci_sample_webapp_01:latest
latest: Pulling from orasejapan/lhr-dop-lab02-1-ocir-1/oci_sample_webapp_01
5b5fe70539cd: Already exists
441a1b465367: Already exists
3b9543f2b500: Already exists
ca89ed5461a9: Already exists
b0e1283145af: Already exists
4b98867cde79: Already exists
4a85ce26214d: Already exists
e4efc6e2208a: Already exists
74950baf2cdb: Already exists
badb3a061df2: Already exists
4ea2cca57f70: Already exists
e11f5e15cb1e: Already exists
922cb46c73c1: Already exists
Digest: sha256:054b658ff90d0a528699a5922afd4e116366eb236d2a71a90cf97d3e4ded097a
Status: Downloaded newer image for lhr.ocir.io/orasejapan/lhr-dop-lab02-1-ocir-1/oci_sample_webapp_01:latest
lhr.ocir.io/orasejapan/lhr-dop-lab02-1-ocir-1/oci_sample_webapp_01:latest
確認します。
$ sudo docker images
REPOSITORY                                                           TAG       IMAGE ID       CREATED       SIZE
lhr.ocir.io/orasejapan/lhr-dop-lab02-1-ocir-1/oci_sample_webapp_01   latest    fefaa0f3727d   4 hours ago   187MB
03. OCIR上のコンテナイメージをOKEから利用
LabではOKEのクラスタ構築からPod、LBのデプロイなどをやっていますが、ここでは構築済みのOKEクラスタにOCIRのコンテナイメージを使用してPodをデプロイする手順を確認します。
Secretの作成
OCIRはプライベートリポジトリにしていますので、イメージをPullする際に認証が必要になります。認証に使用するSecretを作成します。
$ k create secret docker-registry ocir-secret-01 \
--docker-server="lhr.ocir.io" \ #OCIRのリージョンに合わせて変更
--docker-username="<tenancy-namespace>/<username>" \
--docker-password="<認証トークン>" \
--docker-email="<メールアドレス>"
secret/ocir-secret-01 created
$ k get secret
NAME             TYPE                             DATA   AGE
ocir-secret-01   kubernetes.io/dockerconfigjson   1      14s
Podのデプロイ
作成したSecretをimagePullSecretsに指定してPodをデプロイします。
apiVersion: v1
kind: Pod
metadata:
  creationTimestamp: null
  labels:
    run: webapp
  name: webapp
spec:
  containers:
  - image: lhr.ocir.io/orasejapan/lhr-dop-lab02-1-ocir-1/oci_sample_webapp_01:latest
    name: webapp
    resources: {}
  imagePullSecrets:
  - name: ocir-secret-01
  dnsPolicy: ClusterFirst
  restartPolicy: Always
status: {}
$ k apply -f webapp.yaml
pod/webapp created
$ k get pod
NAME     READY   STATUS    RESTARTS   AGE
webapp   1/1     Running   0          70s
04. OCI DevOps ProjectとCode Repositoryの作成
OCI DevOpsはAWSだとCodeシリーズに相当するサービスです。
OCI DevOpsではProjectを作成して、そのProject配下にRepositoryなどを作成していきます。
ポリシーの設定
Labではgroupや複数の動的グループを作成してそれぞれにポリシーを設定していますが、今回は権限の都合上、一つの動的グループに対して以下のポリシーを設定します。
Allow dynamic-group <動的グループ名> to manage devops-project in compartment <コンパートメント名>
Allow dynamic-group <動的グループ名> to manage devops-repository in compartment <コンパートメント名>
Allow dynamic-group <動的グループ名> to manage devops-connection in compartment <コンパートメント名>
Allow dynamic-group <動的グループ名> to manage log-groups in compartment <コンパートメント名>
Allow dynamic-group <動的グループ名> to manage ons-topics in compartment <コンパートメント名>
Allow dynamic-group <動的グループ名> to manage repos in compartment <コンパートメント名>
Allow dynamic-group <動的グループ名> to manage devops-family in compartment <コンパートメント名>
Allow dynamic-group <動的グループ名> to manage vaults in compartment <コンパートメント名>
Allow dynamic-group <動的グループ名> to manage keys in compartment <コンパートメント名>
Allow dynamic-group <動的グループ名> to manage secret-family in compartment <コンパートメント名>
ミラーリポジトリの作成
GitHubからCode Repositoryにミラーするミラーリポジトリを作成します。
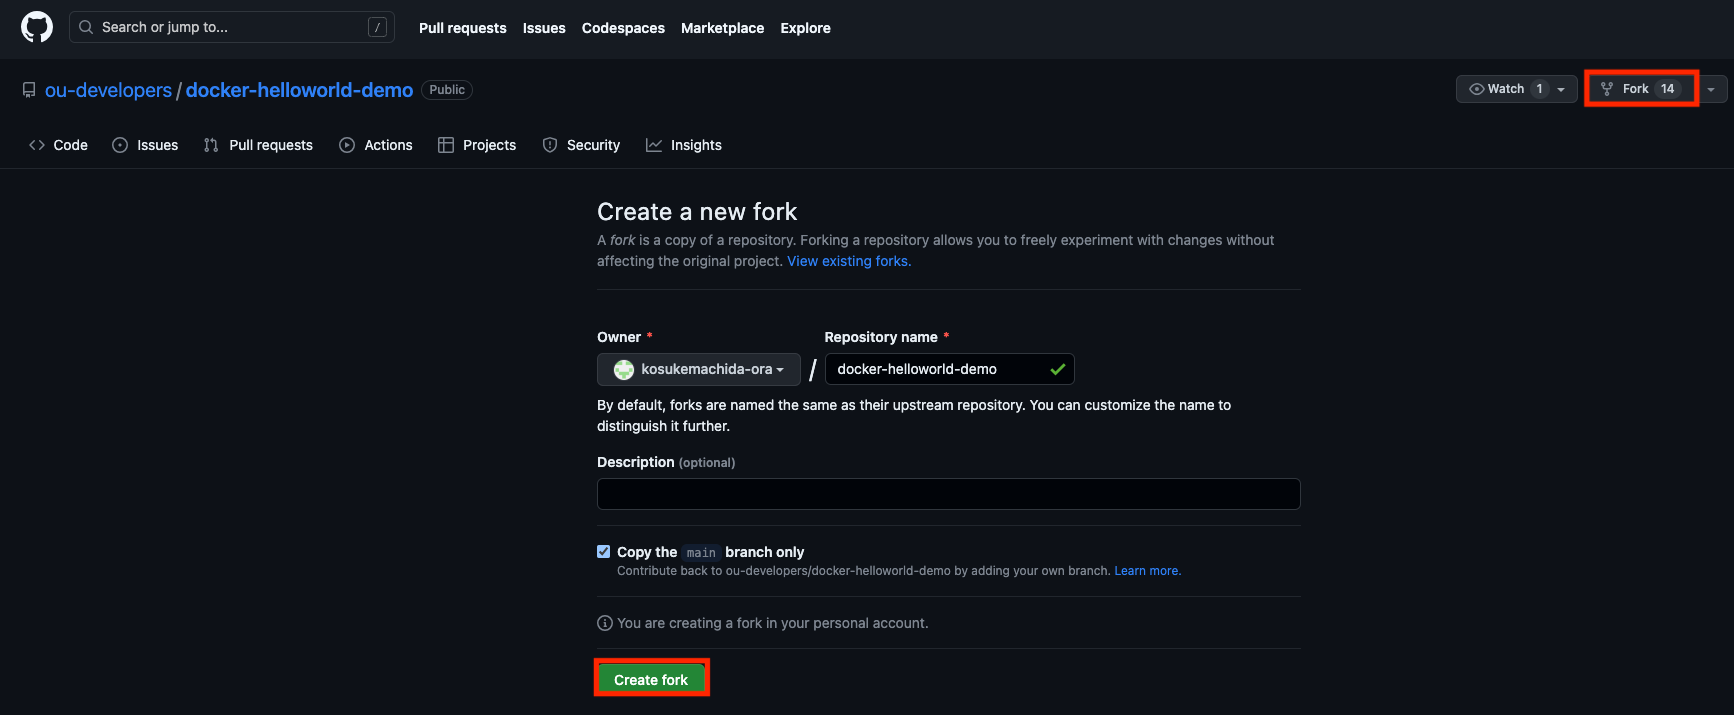
GitHubのアクセストークンの作成
GitHubにサインインして、以下のURLにアクセスします。
Forkします。
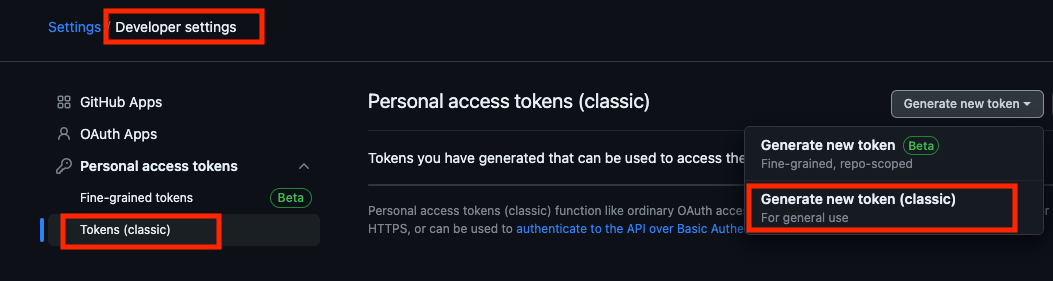
アカウントのSettingsから
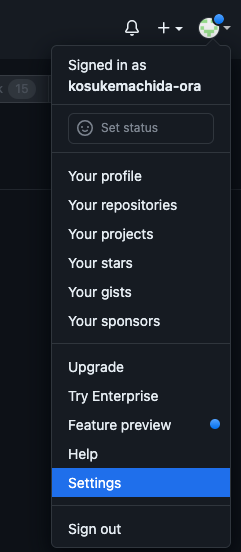
以下のようにGenerate new token(classic)を選択します。
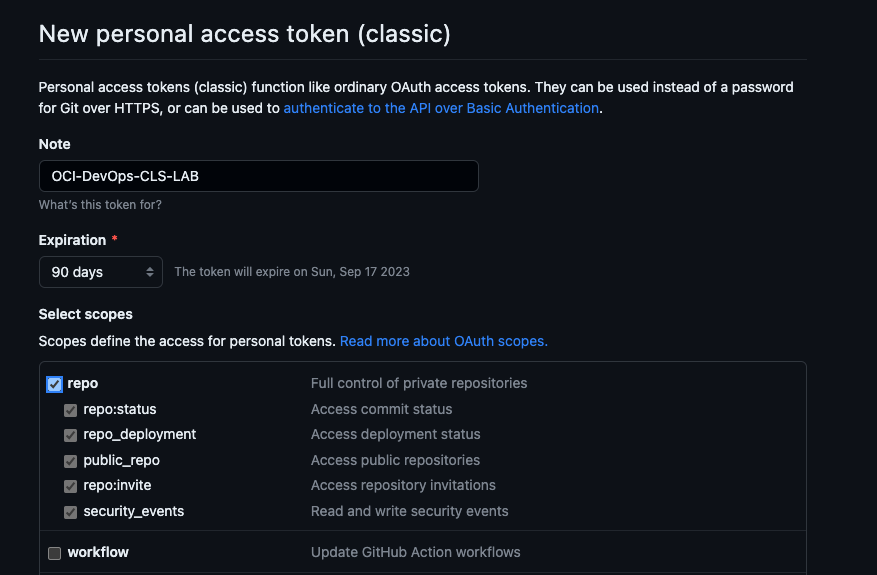
ここでは以下のように設定します。
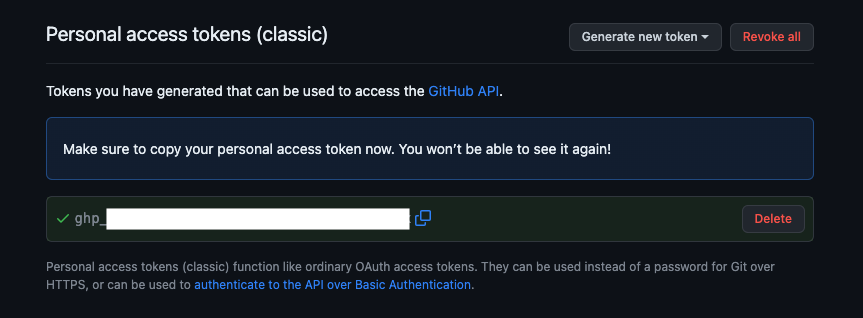
表示されたトークンをメモしておきます。
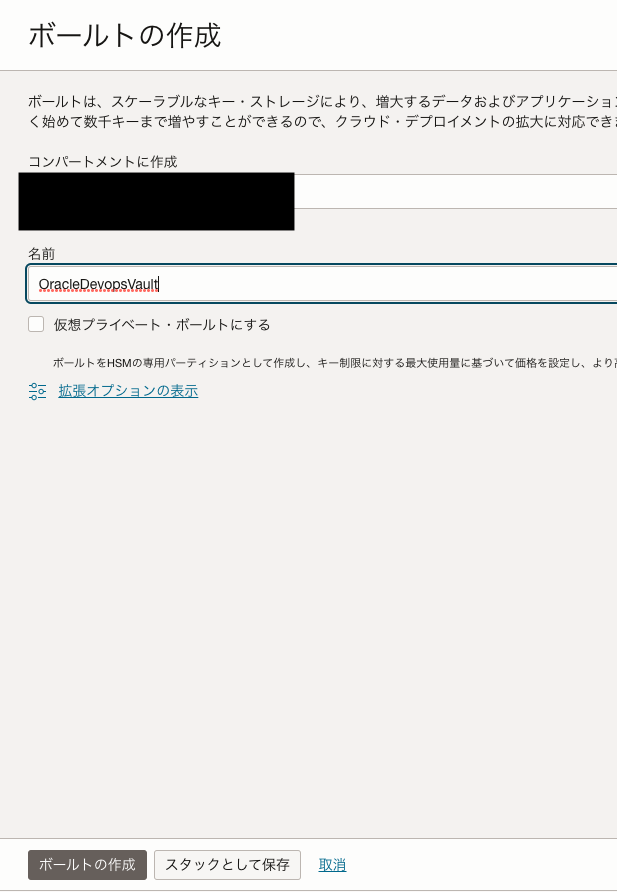
Vaultの作成
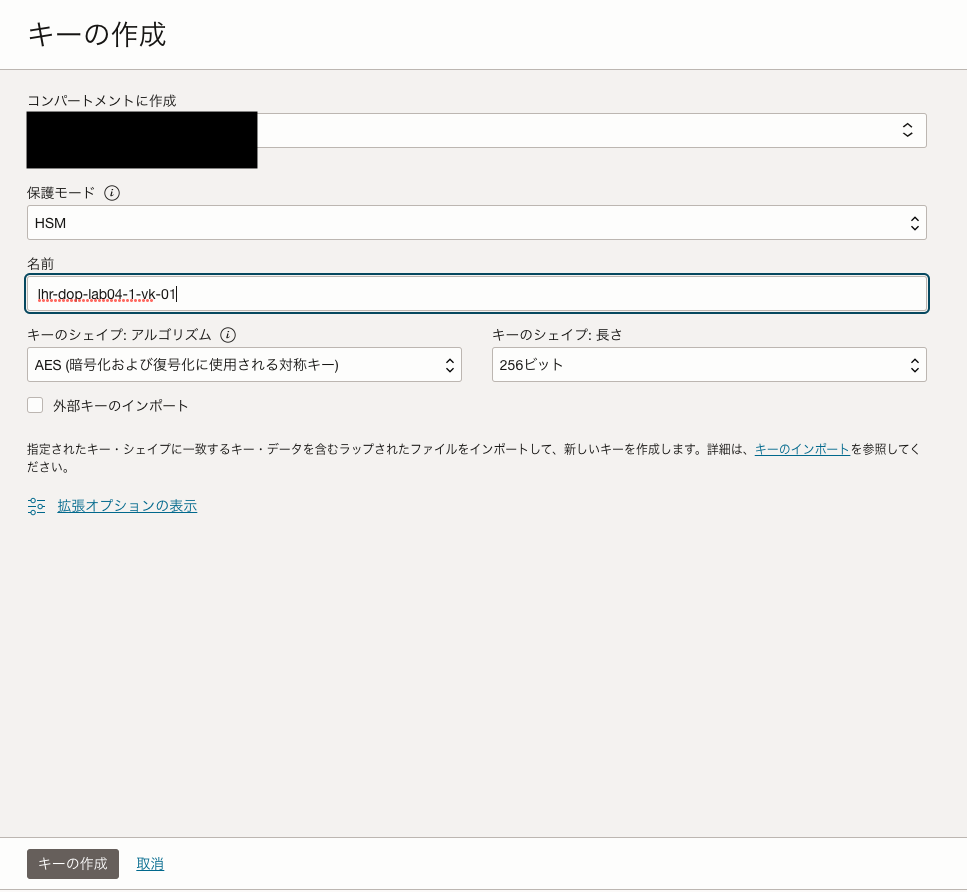
作成したVaultに以下の設定でキーを作成します。
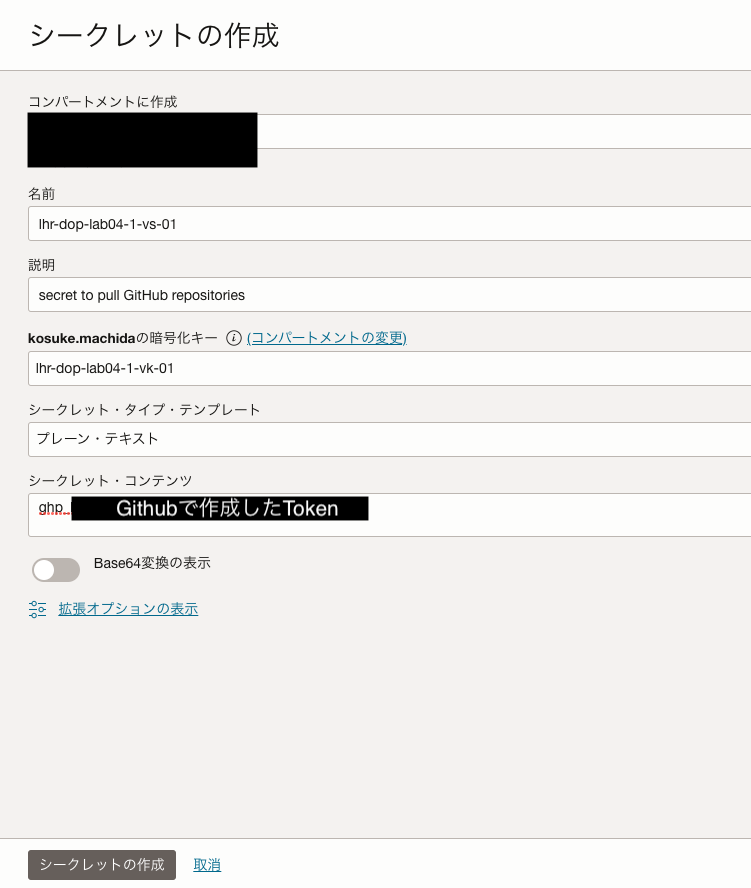
シークレットを以下の設定で作成します。
暗号化キーに上で作成したキーを選択し、シークレット・コンテンツにGitHubで作成したトークンを指定します。
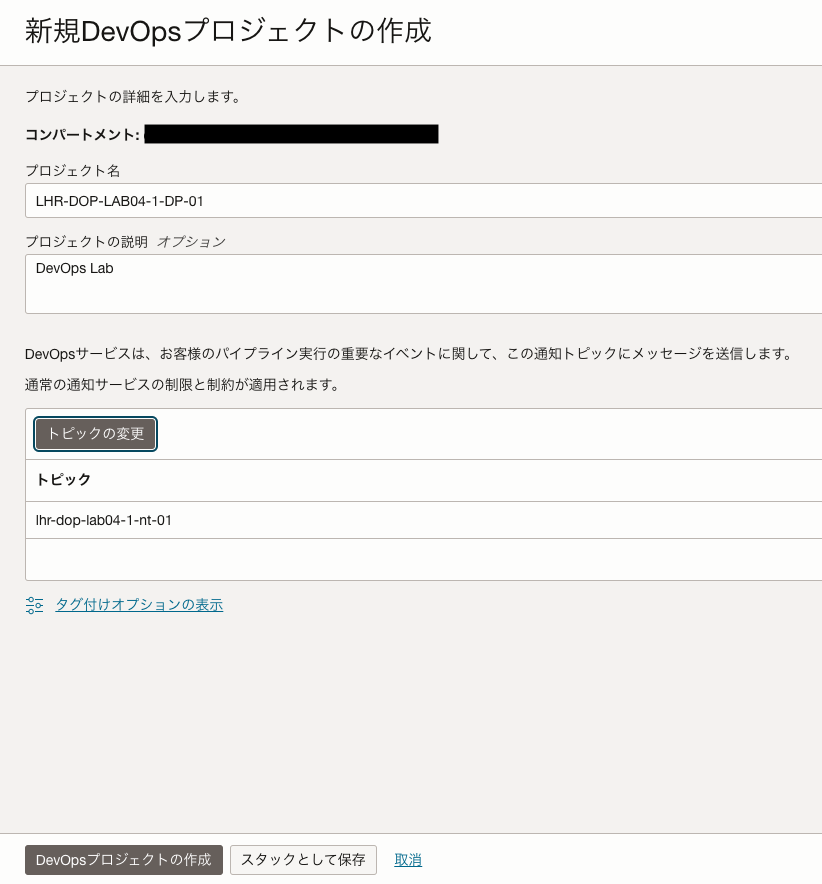
DevOps Projectの作成
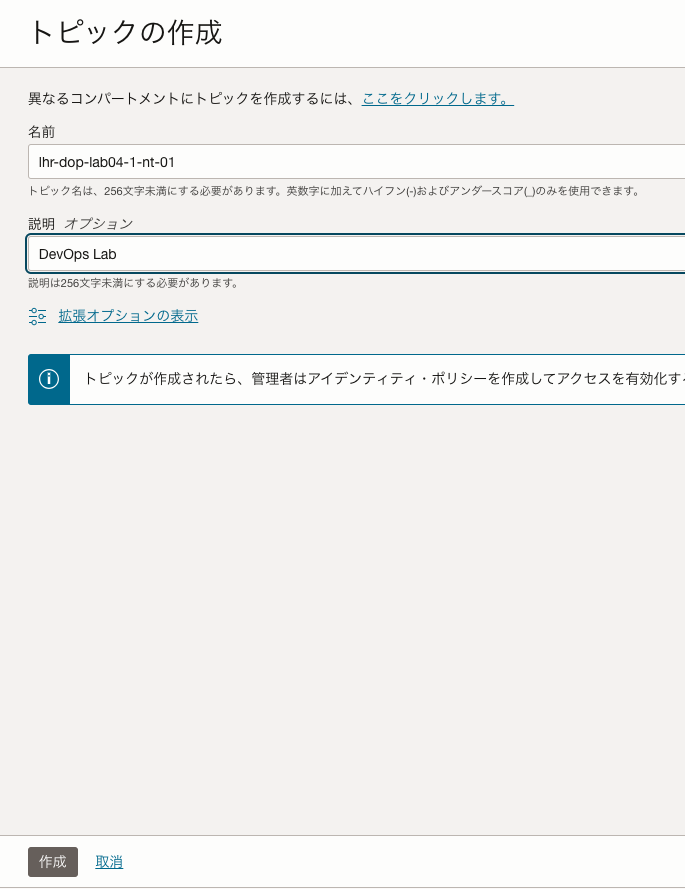
トピックの作成
DevOpsの通知に使用するトピックを作成します。
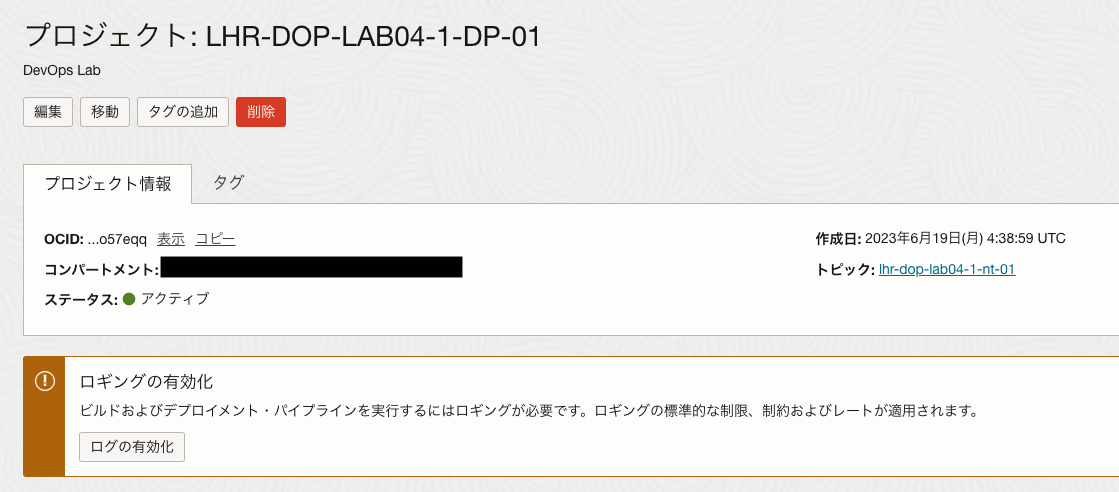
Projectの作成
以下のように作成したトピックを指定して、Projectを作成します。
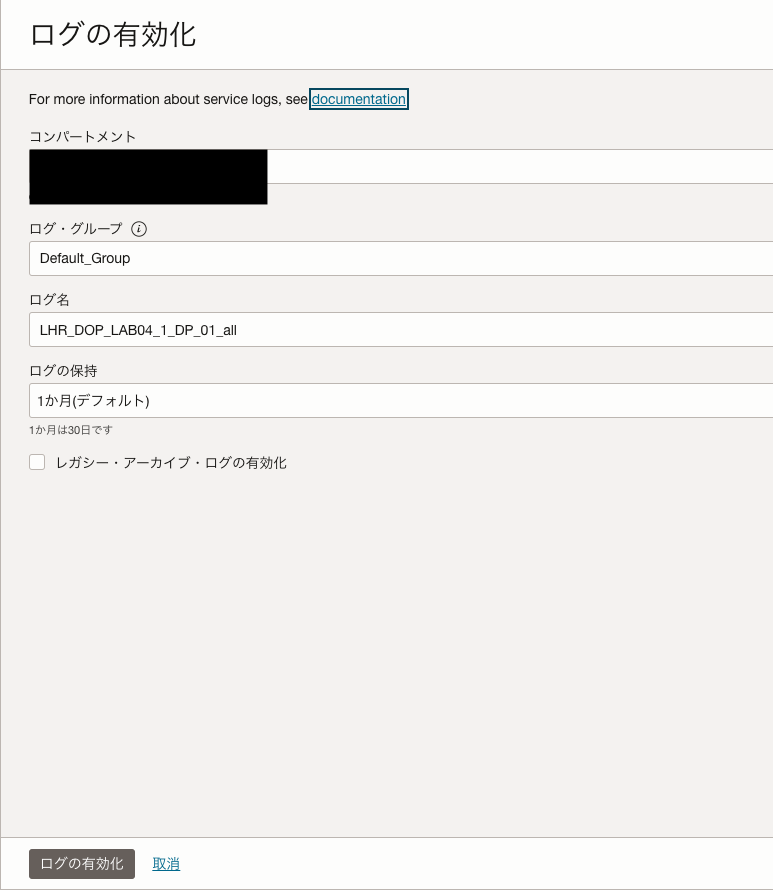
デフォルトではロギングが無効になっているので、有効にします。
以下の画面でログの有効化をクリックします。
以下の画面で有効にします。

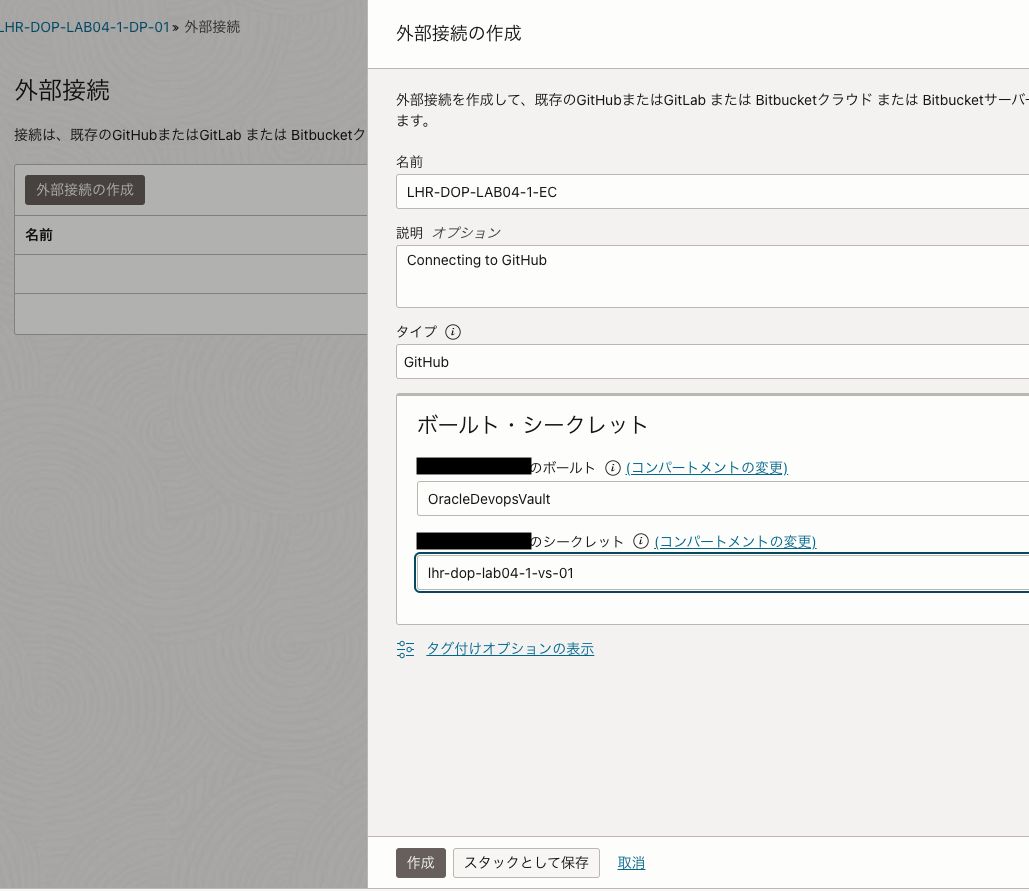
外部接続の作成
作成したProjectの左メニューから外部接続を選択し、以下のように設定して外部接続を作成します。
ミラーリポジトリの作成
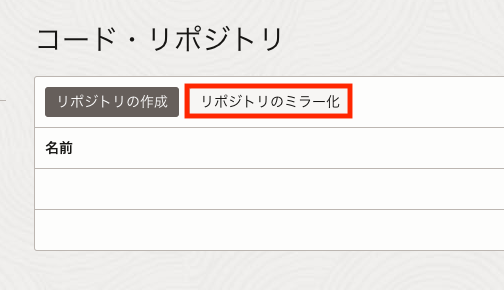
作成したProjectの左メニューからコード・リポジトリを選択し、リポジトリのミラー化を選択します。
以下のように作成した外部接続とリポジトリをプルダウンメニューから選択します。
また、同期するスケジュールは1分間隔にしました。

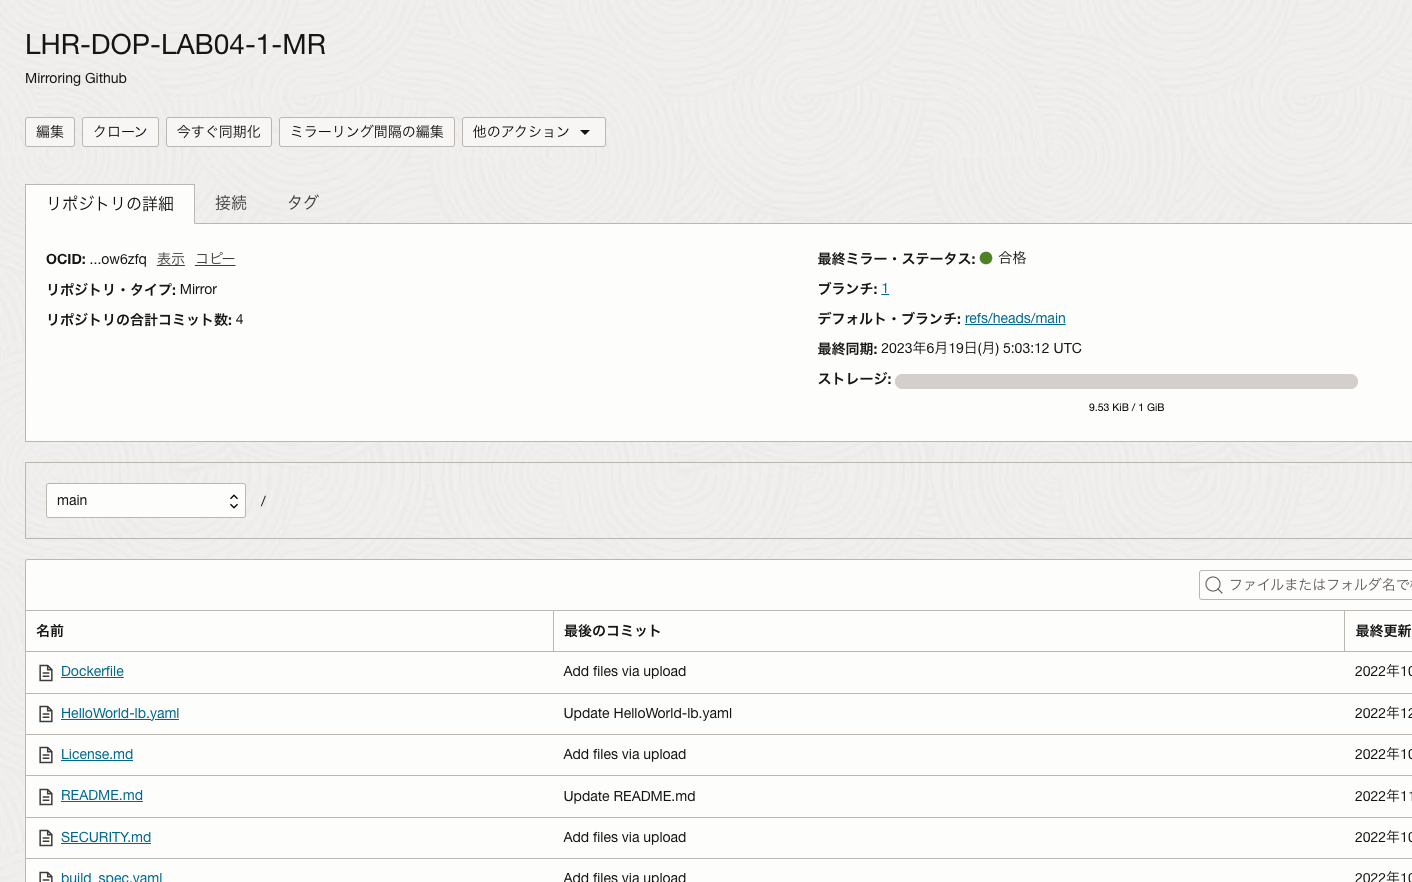
しばらくすると、以下のようにGitHubでForkしたリポジトリがミラーされていることがわかります。
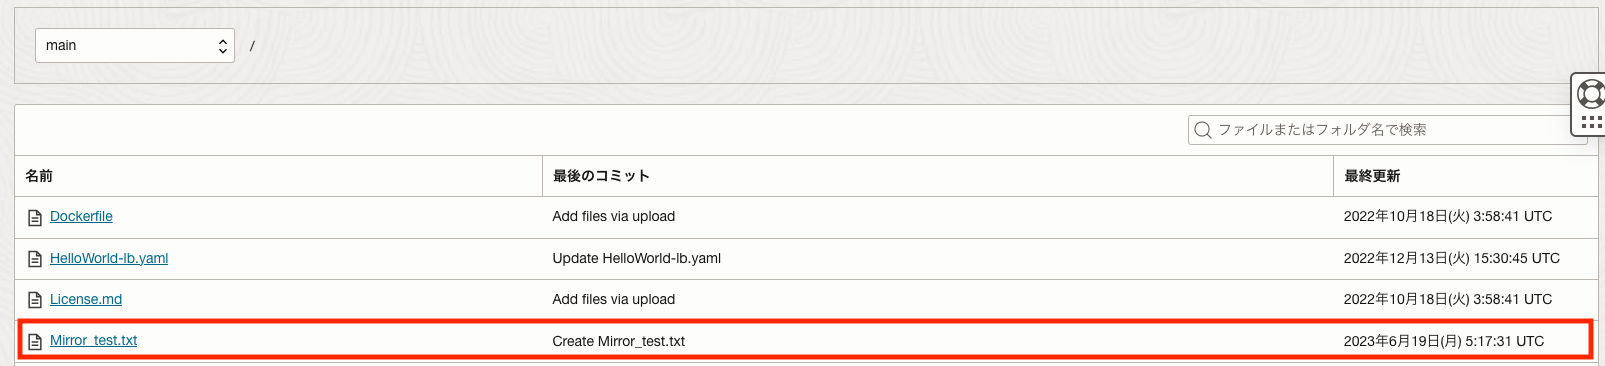
GitHubで新しいファイル(ここではMirror_test.txt)を作成し、1分待つか今すぐ同期化をクリックすると、リポジトリにも反映されることを確認します。
コード・リポジトリの作成
今度はミラーではなく、オリジナルなリポジトリを作成します。
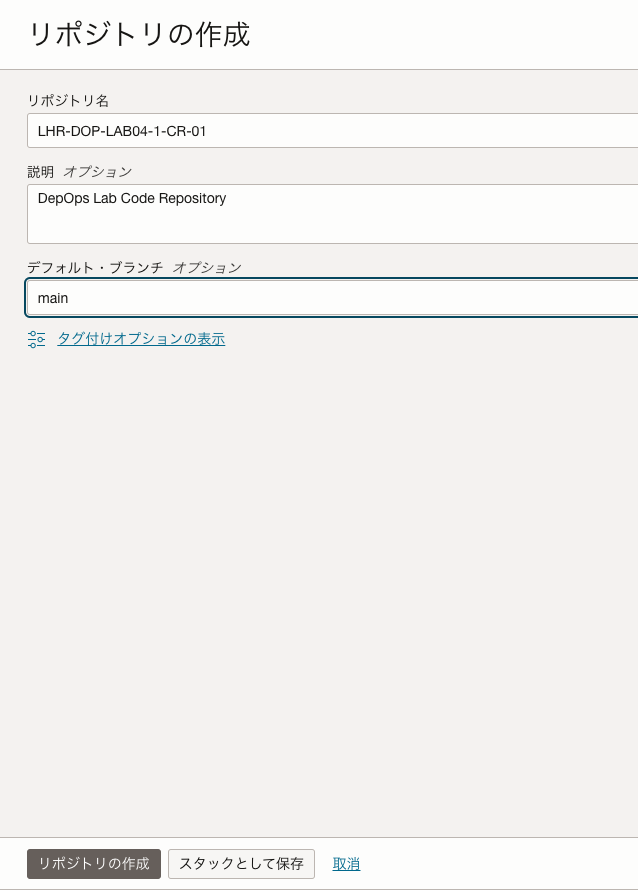
OCIコンソールのコード・リポジトリからリポジトリの作成をクリックします。
以下のように設定して、リポジトリを作成します。
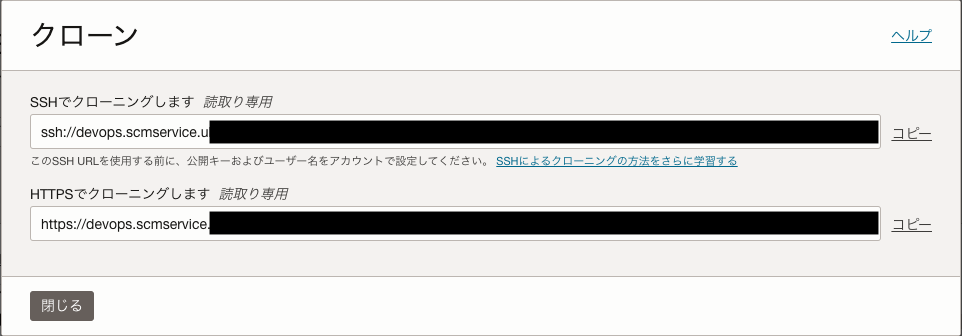
作成したリポジトリの画面でクローンをクリックし、
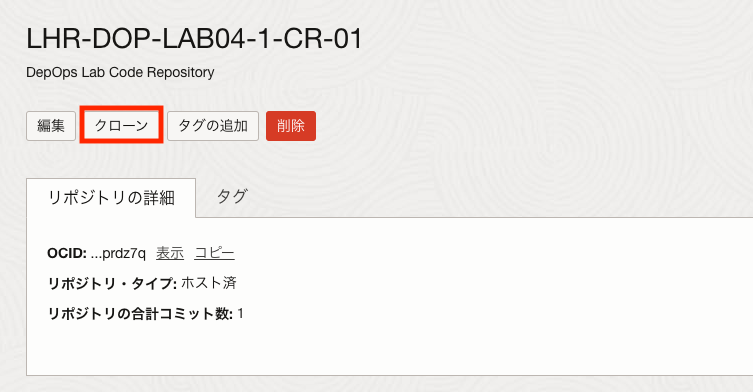
表示された画面のHTTPSでクローニングのURLをコピーします。
01. Dockefileを使用したWeb Applicationの作成で使用した仮想マシンにクローンします。
$ git clone https://devops.scmservice.uk-london-1.oci.oraclecloud.com/namespaces/<テナンシー>/projects/LHR-DOP-LAB04-1-DP-01/repositories/LHR-DOP-LAB04-1-CR-01
Cloning into 'LHR-DOP-LAB04-1-CR-01'...
Username for 'https://devops.scmservice.uk-london-1.oci.oraclecloud.com': <tenancy-namespace>/<username>
Password for 'https://<tenancy-namespace>/<username>@devops.scmservice.uk-london-1.oci.oraclecloud.com': <認証トークン>
remote: Counting objects: 2, done
remote: Finding sources: 100% (2/2)
remote: Getting sizes: 100% (1/1)
remote: Total 2 (delta 0), reused 2 (delta 0)
Unpacking objects: 100% (2/2), 141 bytes | 141.00 KiB/s, done.
$ cd LHR-DOP-LAB04-1-CR-01/
$ ls -l
total 0
01. Dockefileを使用したWeb Applicationの作成でクローンしたWebApplicationのディレクトリに移動して、各ファイルをコピーします。
$ cd ../../01/docker-helloworld-demo
$ cp * ../../04/LHR-DOP-LAB04-1-CR-01
$ cd ../../04/LHR-DOP-LAB04-1-CR-01
$ ls
Dockerfile  HelloWorld-lb.yaml  License.md  README.md  SECURITY.md  build_spec.yaml  index.html  nginx.conf  runner.sh
リポジトリにPushします。
$ git remote -v
origin  https://devops.scmservice.uk-london-1.oci.oraclecloud.com/namespaces/<テナンシー>/projects/LHR-DOP-LAB04-1-DP-01/repositories/LHR-DOP-LAB04-1-CR-01 (fetch)
origin  https://devops.scmservice.uk-london-1.oci.oraclecloud.com/namespaces/<テナンシー>/projects/LHR-DOP-LAB04-1-DP-01/repositories/LHR-DOP-LAB04-1-CR-01 (push)
$ git add .
$ git config --global user.email "<メールアドレス>"
$ git config --global user.name "<tenancy-namespace>/<username>"
$ git commit -m "first push"
[main 9863e6b] first push
 9 files changed, 311 insertions(+)
 create mode 100644 Dockerfile
 create mode 100644 HelloWorld-lb.yaml
 create mode 100644 License.md
 create mode 100644 README.md
 create mode 100644 SECURITY.md
 create mode 100644 build_spec.yaml
 create mode 100644 index.html
 create mode 100644 nginx.conf
 create mode 100644 runner.sh
$ git push -u -f origin main
Username for 'https://devops.scmservice.uk-london-1.oci.oraclecloud.com': <tenancy-namespace>/<username>
Password for 'https://<tenancy-namespace>/<username>@devops.scmservice.uk-london-1.oci.oraclecloud.com': <認証トークン>
Enumerating objects: 12, done.
Counting objects: 100% (12/12), done.
Delta compression using up to 2 threads
Compressing objects: 100% (11/11), done.
Writing objects: 100% (11/11), 5.41 KiB | 5.41 MiB/s, done.
Total 11 (delta 0), reused 0 (delta 0), pack-reused 0
To https://devops.scmservice.uk-london-1.oci.oraclecloud.com/namespaces/<テナンシー>/projects/LHR-DOP-LAB04-1-DP-01/repositories/LHR-DOP-LAB04-1-CR-01
   2c84bca..9863e6b  main -> main
branch 'main' set up to track 'origin/main'.
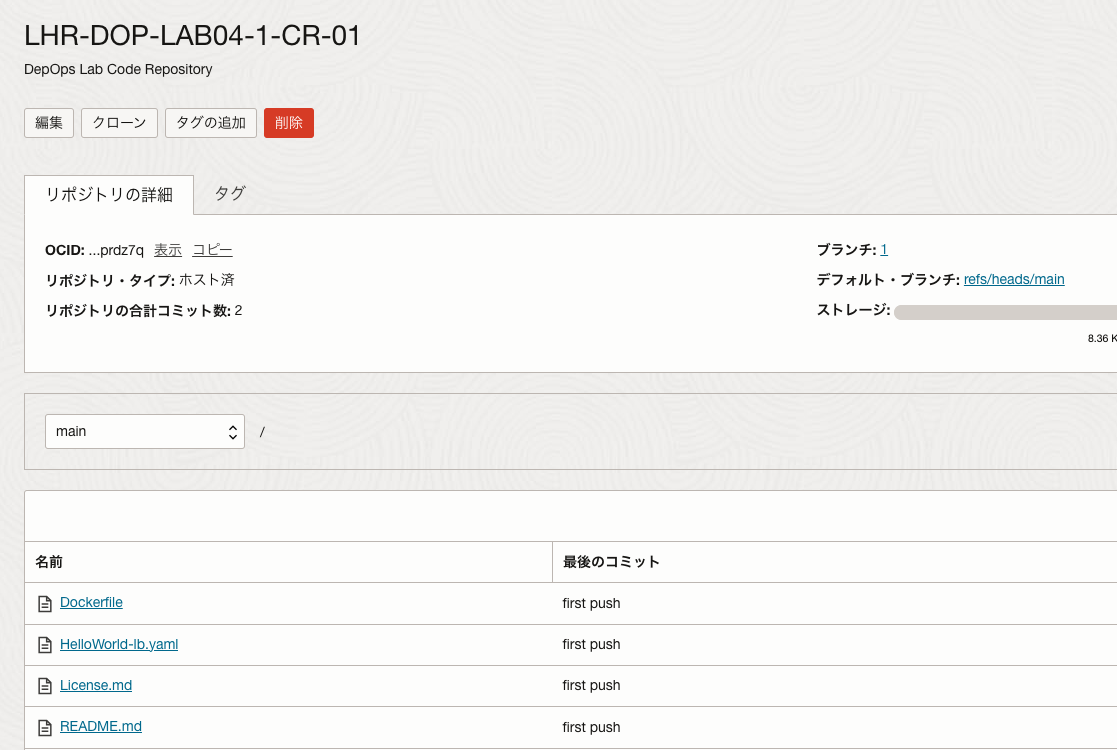
コンソールでも確認します。
05. アーティファクト・レジストリの作成とセットアップ
アーティファクト・レジストリは、ソフトウェアパッケージやバイナリ、Kubernetesのマニフェストファイルなどを管理するリポジトリです。
ポリシーの設定
以下のポリシーを設定しました。
Allow dynamic-group <動的グループ名> to manage artifact-repositories in compartment <コンパートメント名>
Allow dynamic-group <動的グループ名> to manage generic-artifacts in compartment <コンパートメント名>
Allow dynamic-group <動的グループ名> to manage devops-deploy-artifact in compartment <コンパートメント名>
Allow dynamic-group <動的グループ名> to manage devops-deploy-environment in compartment <コンパートメント名>
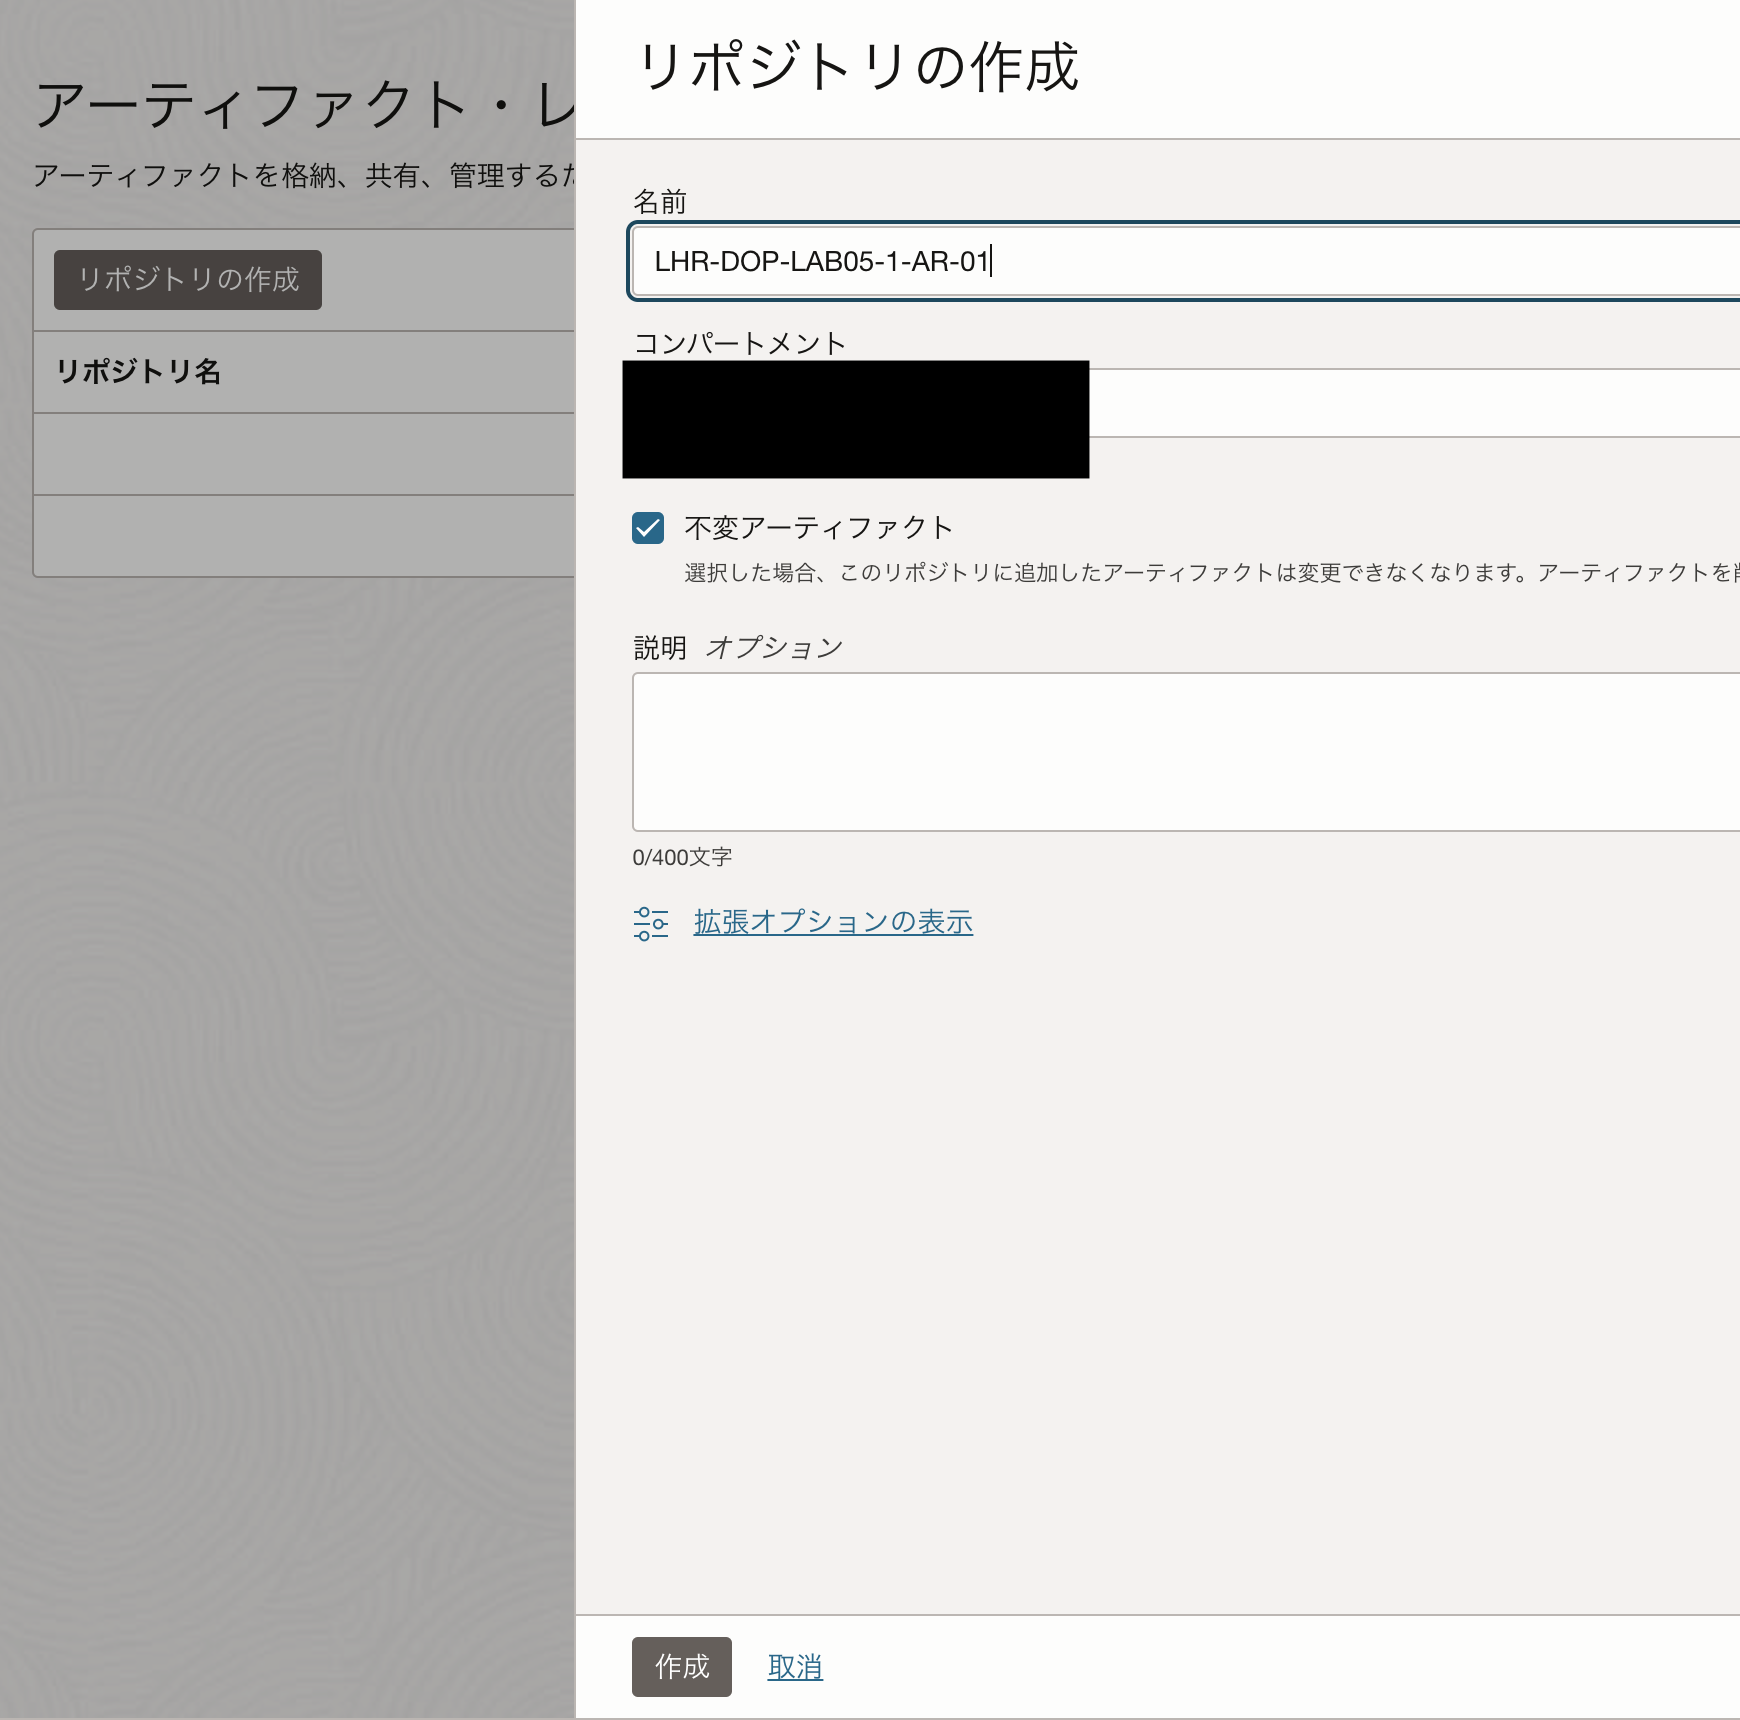
リポジトリの作成
以下の設定でリポジトリを作成します。
アーティファクトの追加
OCI DevOpsのProjectにアーティファクトを登録します。
ここでは、BuildPipeLine実行後のアーティファクトの保存先を設定します。
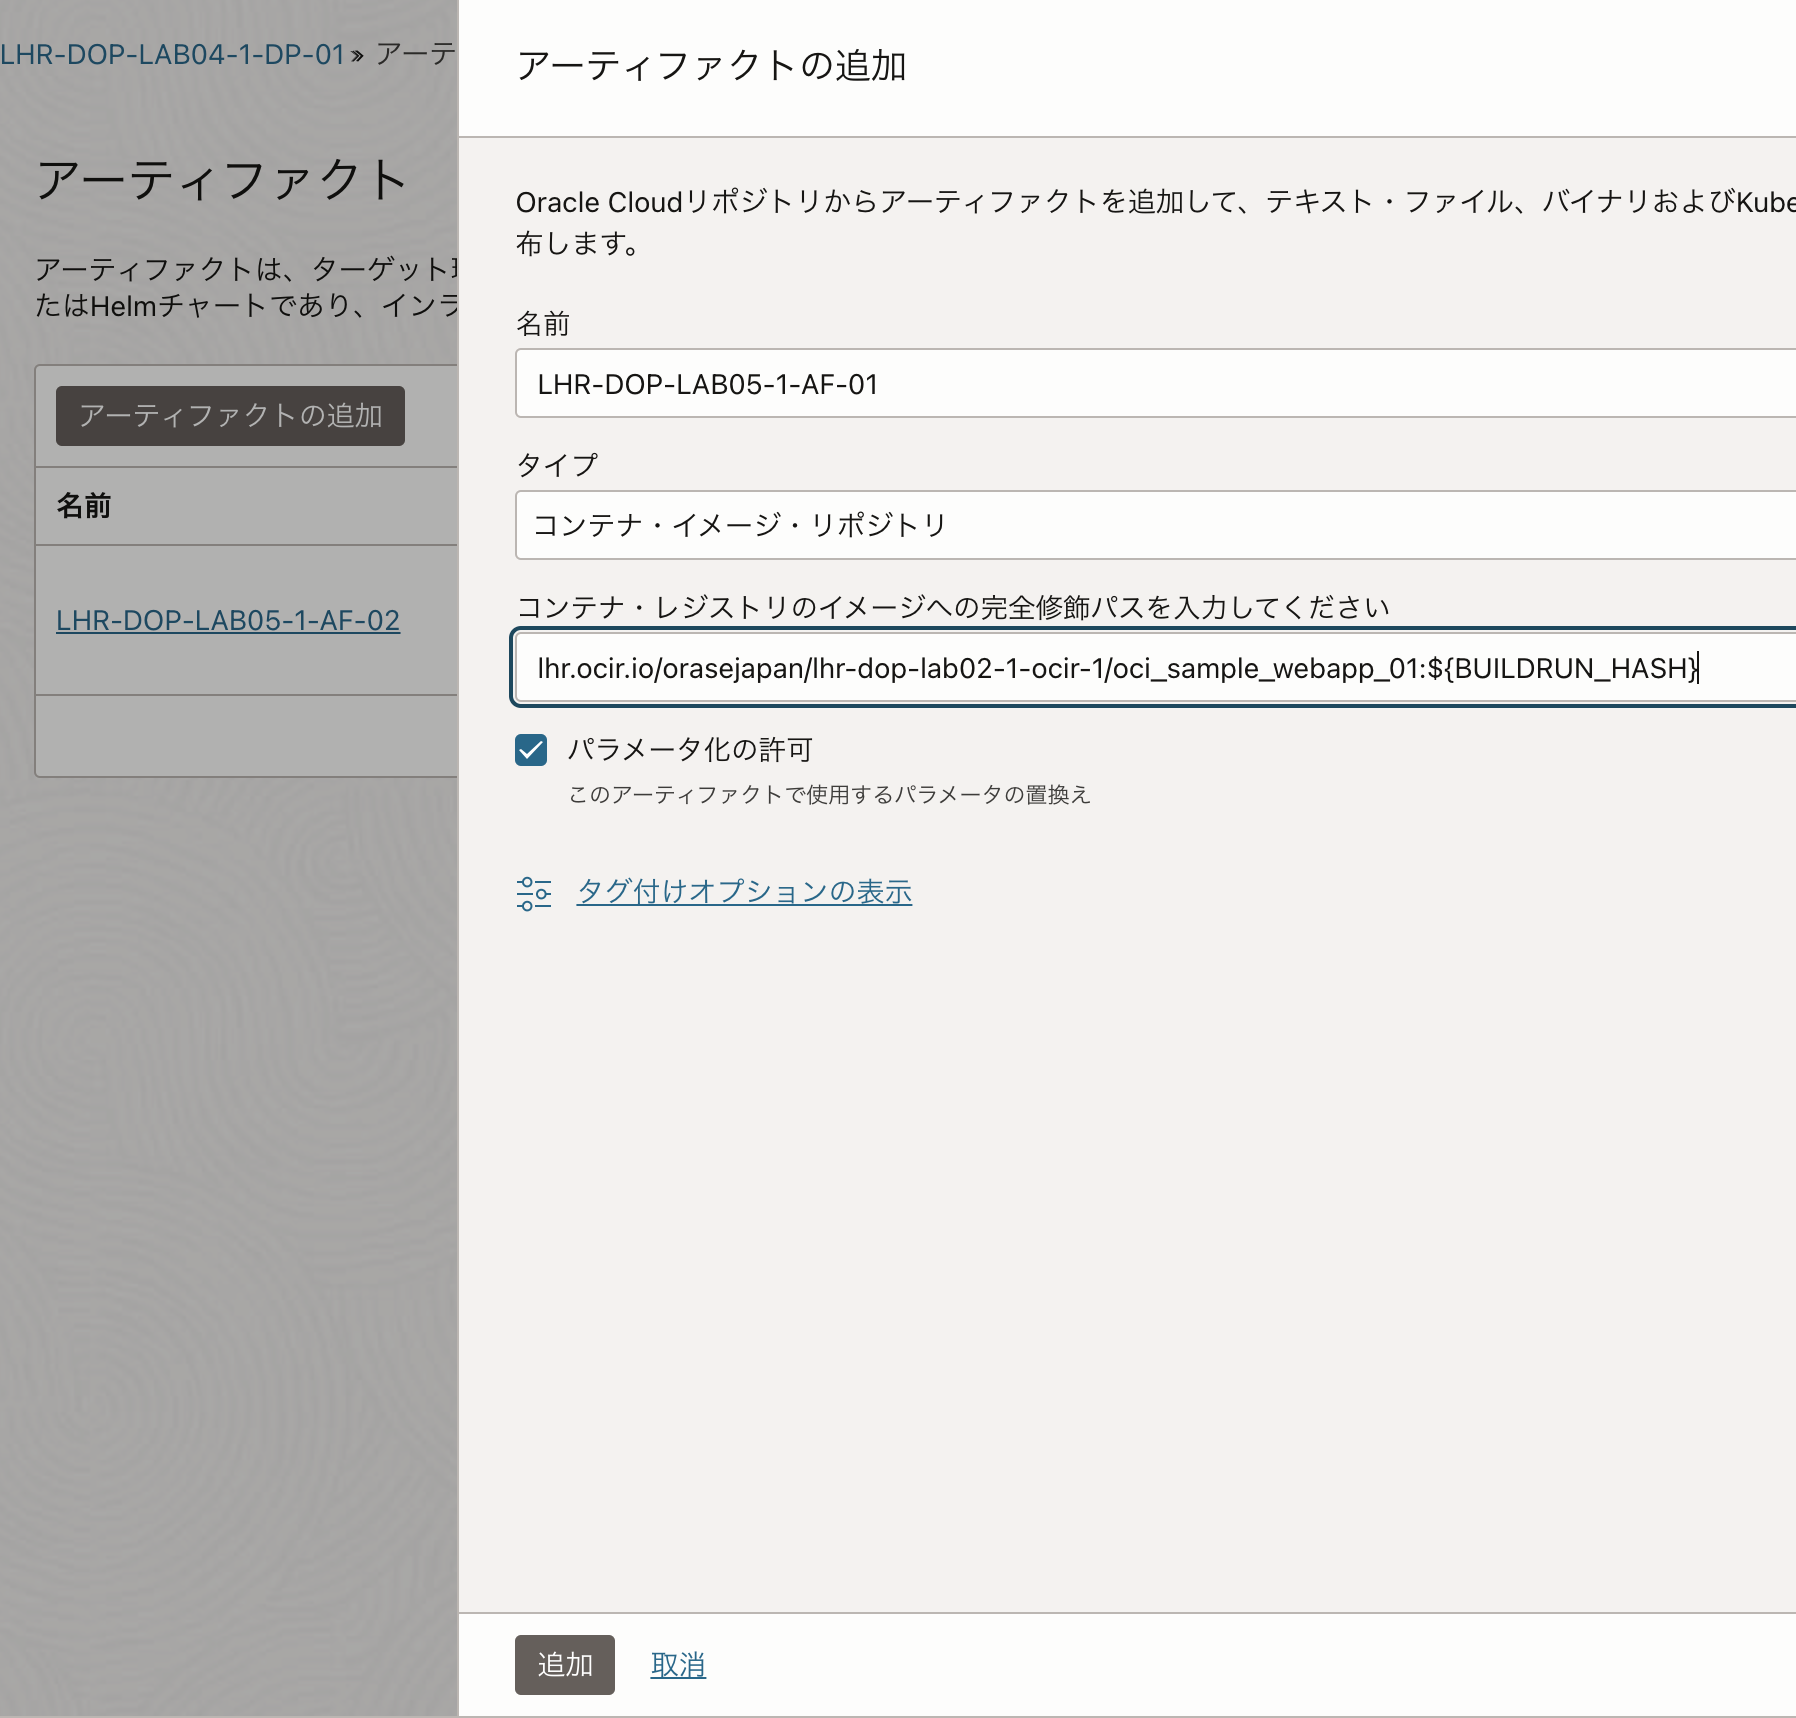
コンテナイメージ
Projectの左メニューからアーティファクトを選択し、アーティファクトの追加をクリックします。
以下のように設定します。Tagには${BUILDRUN_HASH}を指定し、Build実行後に動的にアップデートされるようにします。
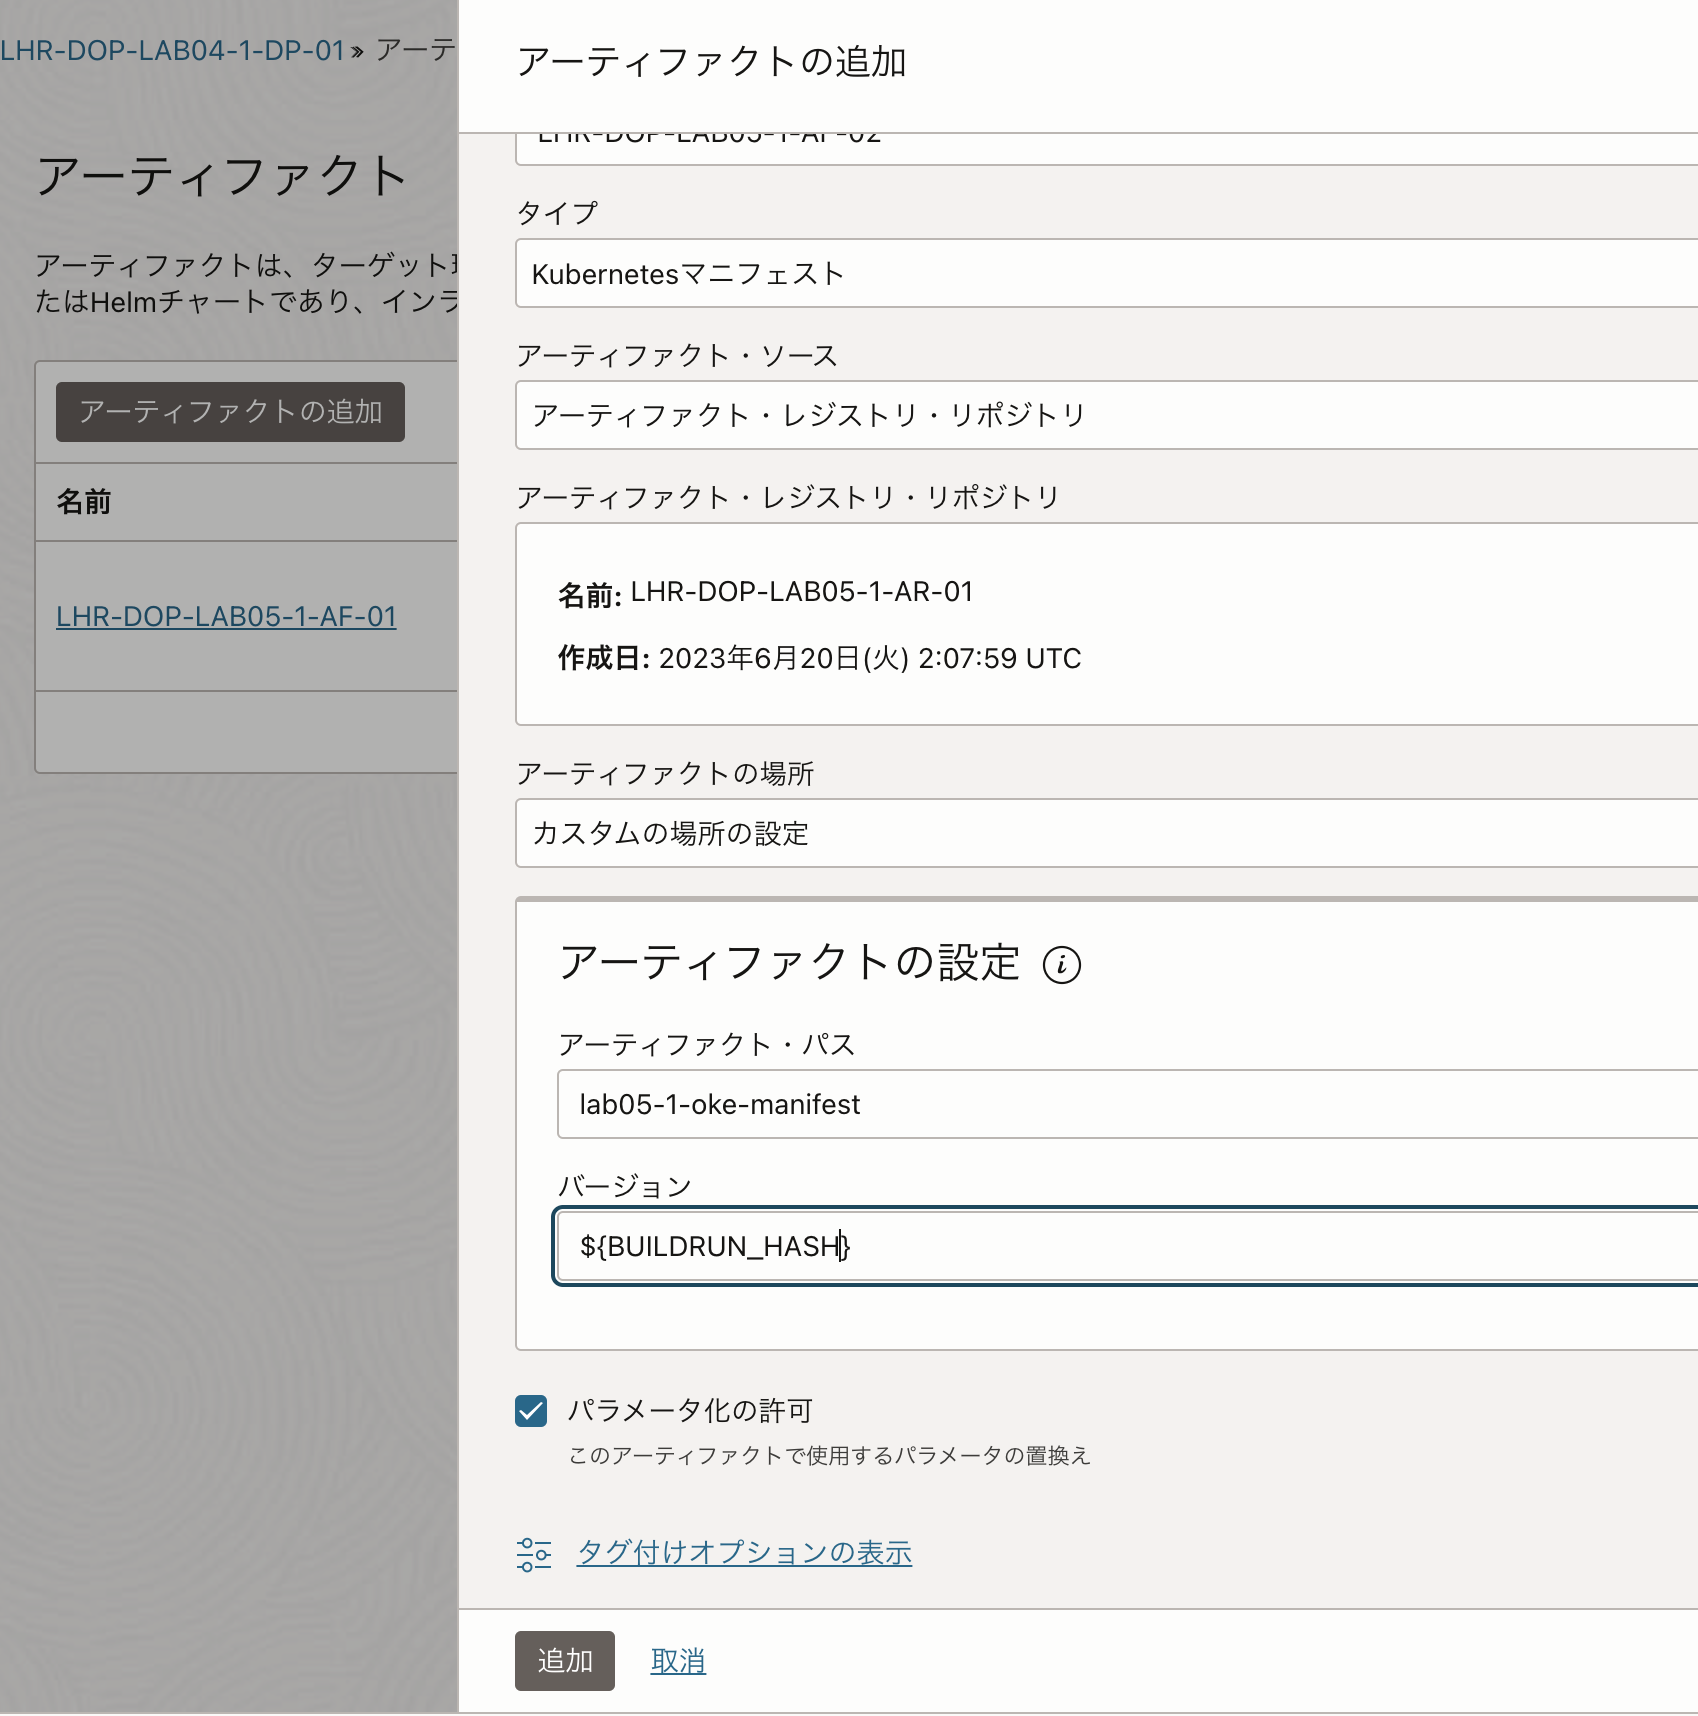
Kubernetesマニフェスト
同様にアーティファクトの追加から以下のように設定します。
アーティファクト・レジストリ・リポジトリには先ほど作成した、アーティファクト・レジストリを選択します。また、バージョンはコンテナイメージのTagと同様に${BUILDRUN_HASH}を設定します。
環境の作成
Projectの左メニューから環境を選択し、環境の作成をクリックします。
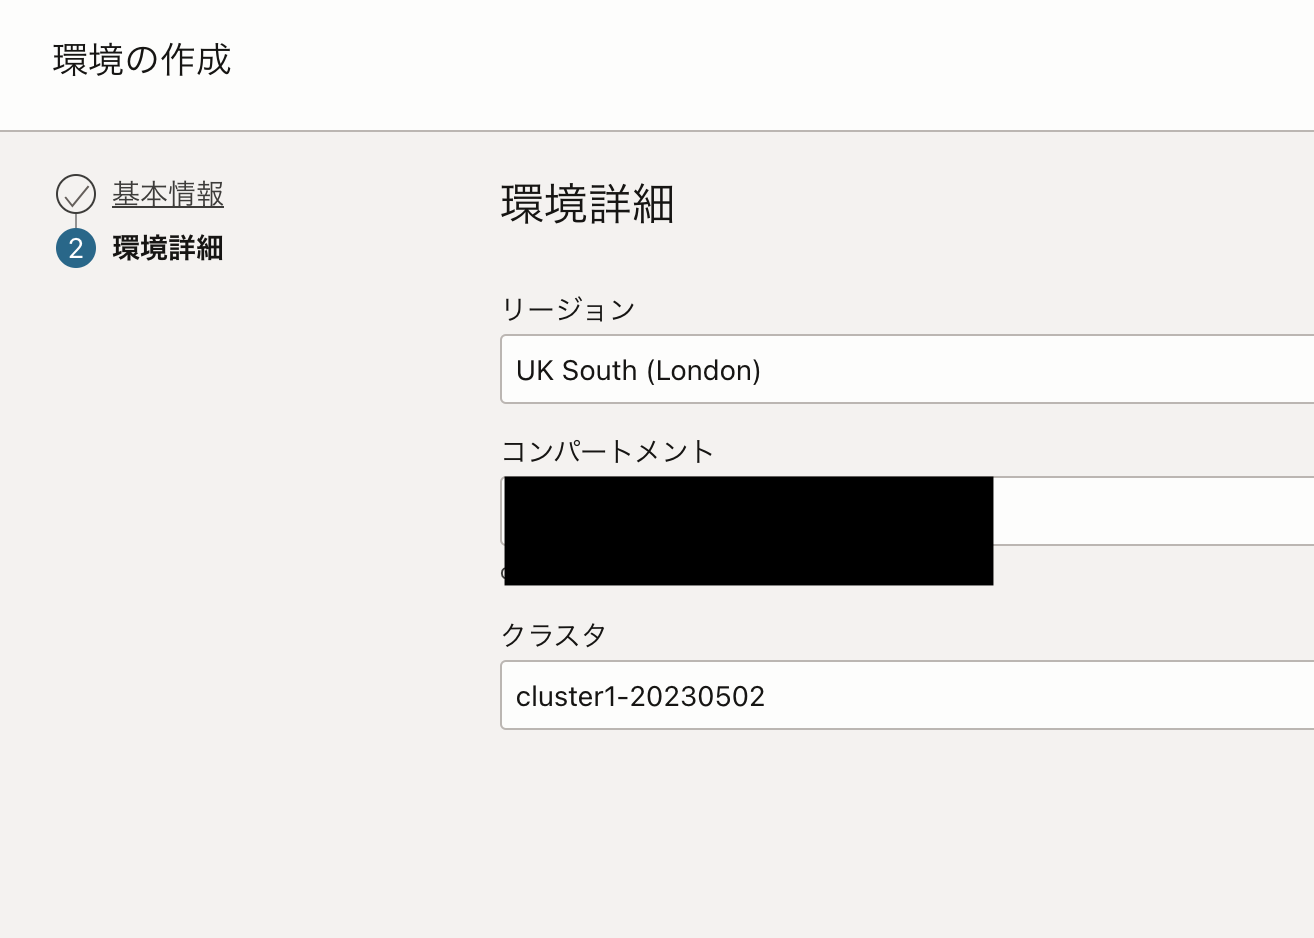
以下のように設定します。
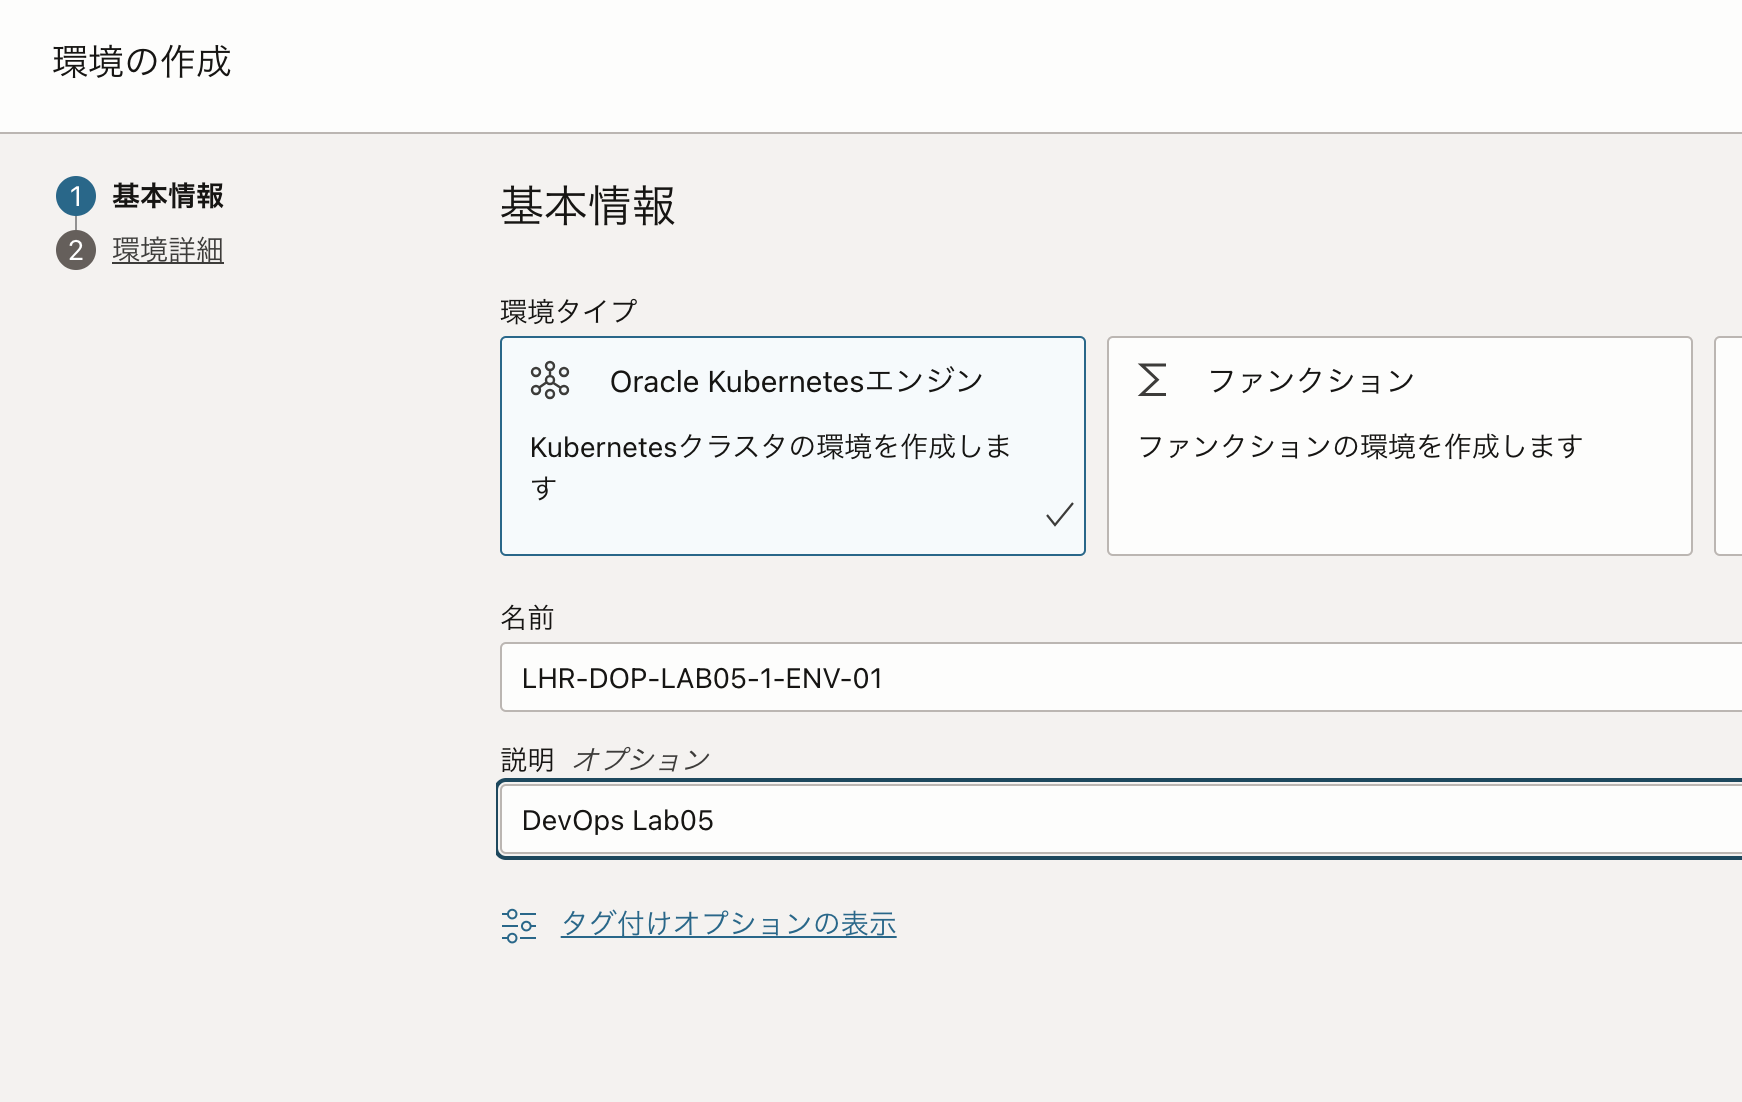
クラスタは事前に作成しておく必要があります。
06. CI/CD Pipelineの設定と実行
OCI DevOpsのBuild PipelineとDeployment Pipelineを設定して、コンテナイメージをビルドして、OKEにデプロイするまでのPipelineを実行します。
ポリシーの設定
これまで設定済みのポリシーに加えて、以下を設定します。
Allow dynamic-group <動的グループ名> to manage cluster in compartment <コンパートメント名>
Allow dynamic-group <動的グループ名> to manage all-resources in compartment <コンパートメント名>
Allow dynamic-group <動的グループ名> to read all-artifacts in compartment <コンパートメント名>
マニフェストファイルの編集
ここでは、「04. OCI DevOps ProjectとCode Repositoryの作成」で作成したコード・リポジトリのコードを編集して使用します。
$ cd LHR-DOP-LAB04-1-CR-01
$ ls -l
total 40
-rw-rw-r--. 1 opc opc  786 Jun 19 05:32 Dockerfile
-rw-rw-r--. 1 opc opc  824 Jun 19 05:32 HelloWorld-lb.yaml
-rw-rw-r--. 1 opc opc 1072 Jun 19 05:32 License.md
-rw-rw-r--. 1 opc opc  484 Jun 19 05:32 README.md
-rw-rw-r--. 1 opc opc  770 Jun 19 05:32 SECURITY.md
-rw-rw-r--. 1 opc opc 1691 Jun 19 05:32 build_spec.yaml
-rw-rw-r--. 1 opc opc 4425 Jun 19 05:32 index.html
-rw-rw-r--. 1 opc opc  272 Jun 19 05:32 nginx.conf
-rw-rw-r--. 1 opc opc  141 Jun 19 05:32 runner.sh
HelloWorld-lb.yamlを以下のように編集します。
動作確認はPodをデプロイするだけにしますので、LoadBalancerはコメントアウトします。また、Secretはdefault namespaceに作成済みなので、namespaceもコメントアウトしておきます。
また、コンテナイメージのTagはBuild時にユニークなものとするため、${BUILDRUN_HASH}にします。
apiVersion: apps/v1
kind: Deployment
metadata:
  name: helloworld-deployment-01
#  namespace: ns-01
spec:
  selector:
    matchLabels:
      app: helloworld
  replicas: 1
  template:
    metadata:
      labels:
        app: helloworld
    spec:
      containers:
      - name: helloworld
    # enter the path to your image, be sure to include the correct region prefix
        image: lhr.ocir.io/<テナンシーネームスペース>/lhr-dop-lab02-1-ocir-1/oci_sample_webapp_01:${BUILDRUN_HASH}
        ports:
        - containerPort: 80
      imagePullSecrets:
    # enter the name of the secret you created
      - name: ocir-secret-01
---
#apiVersion: v1
#kind: Service
#metadata:
#  name: helloworld-service-<userid>
#  namespace: ns-<userid>
#spec:
#  type: LoadBalancer
#  ports:
#  - port: 80
#    protocol: TCP
#    targetPort: 80
#  selector:
#    app: helloworld
Commitして、コード・リポジトリにPushします。
$ git add .
$ git status
On branch main
Your branch is up to date with 'origin/main'.
Changes to be committed:
(use "git restore --staged <file>..." to unstage)
modified: HelloWorld-lb.yaml
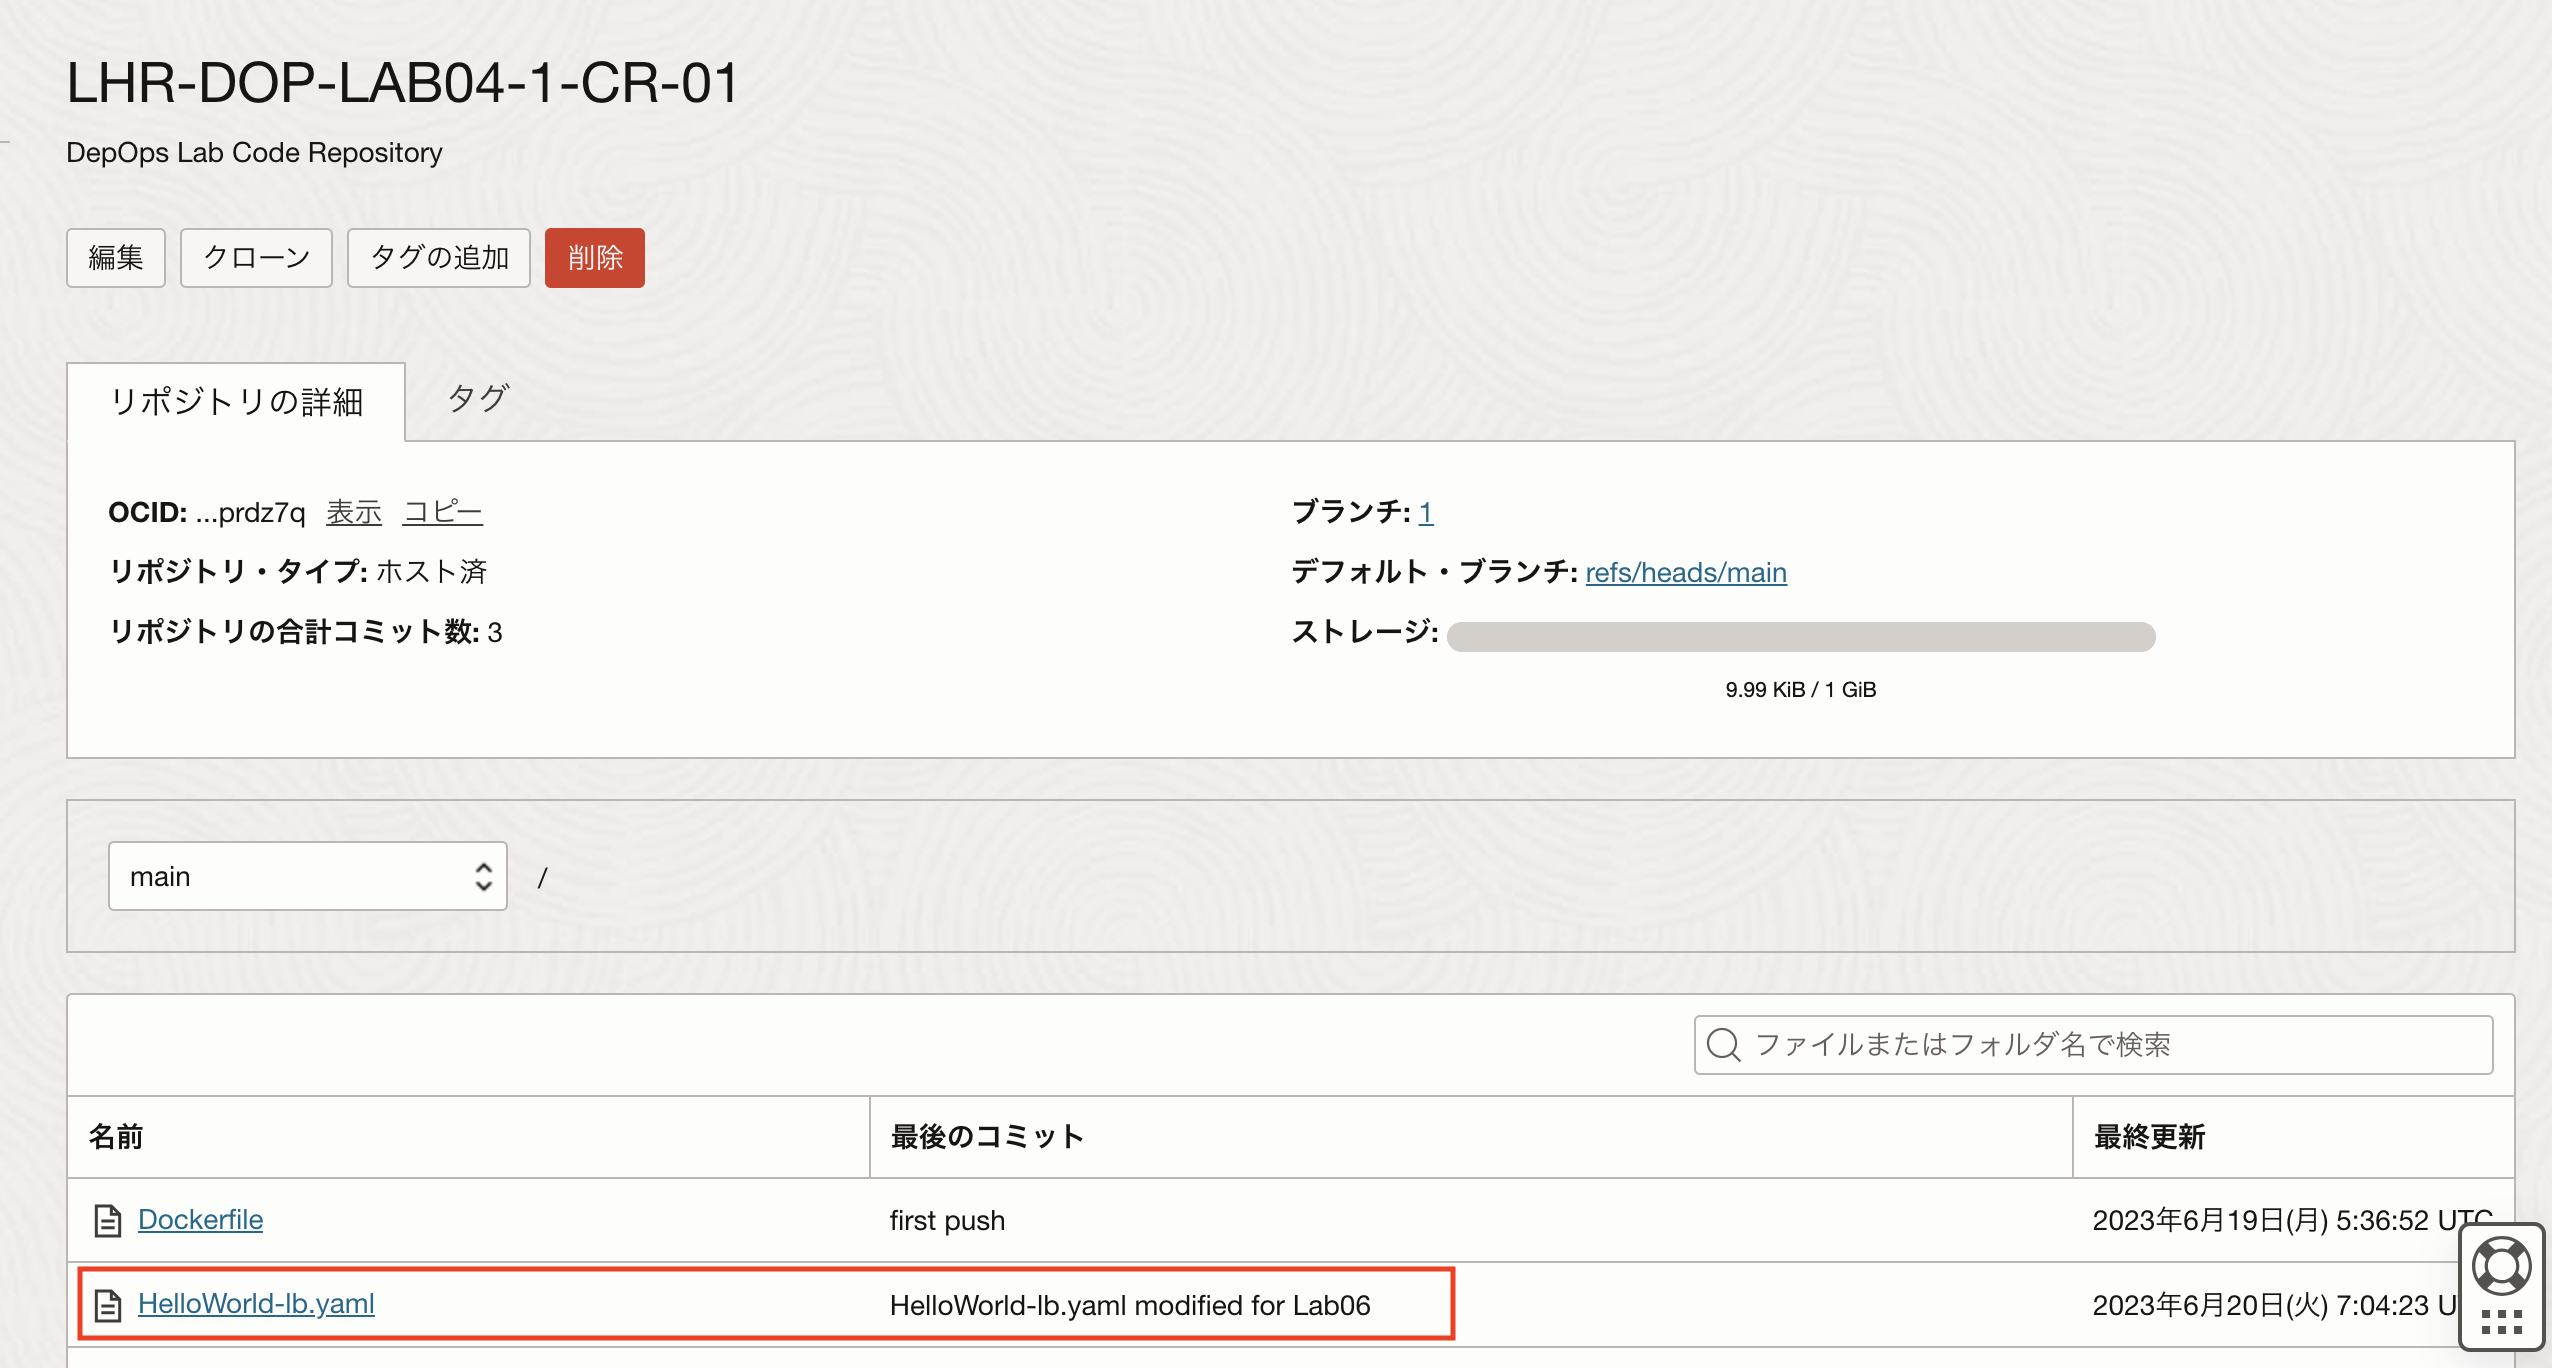
$ git commit -m "HelloWorld-lb.yaml modified for Lab06"
[main bafce83] HelloWorld-lb.yaml modified for Lab06
1 file changed, 17 insertions(+), 17 deletions(-)
$ git push -u -f origin main
Username for 'https://devops.scmservice.uk-london-1.oci.oraclecloud.com': <tenancy-namespace>/<username>
Password for 'https://<tenancy-namespace>/<username>@devops.scmservice.uk-london-1.oci.oraclecloud.com': <認証トークン>
Enumerating objects: 5, done.
Counting objects: 100% (5/5), done.
Delta compression using up to 2 threads
Compressing objects: 100% (3/3), done.
Writing objects: 100% (3/3), 591 bytes | 591.00 KiB/s, done.
Total 3 (delta 2), reused 0 (delta 0), pack-reused 0
remote: Resolving deltas: 100% (2/2)
To https://devops.scmservice.uk-london-1.oci.oraclecloud.com/namespaces/orasejapan/projects/LHR-DOP-LAB04-1-DP-01/repositories/LHR-DOP-LAB04-1-CR-01
9863e6b..bafce83 main -> main
branch 'main' set up to track 'origin/main'.
コード・リポジトリでも反映されていることが確認できます。
Build Pipelineの作成
CI/CDのCIの部分を設定します。
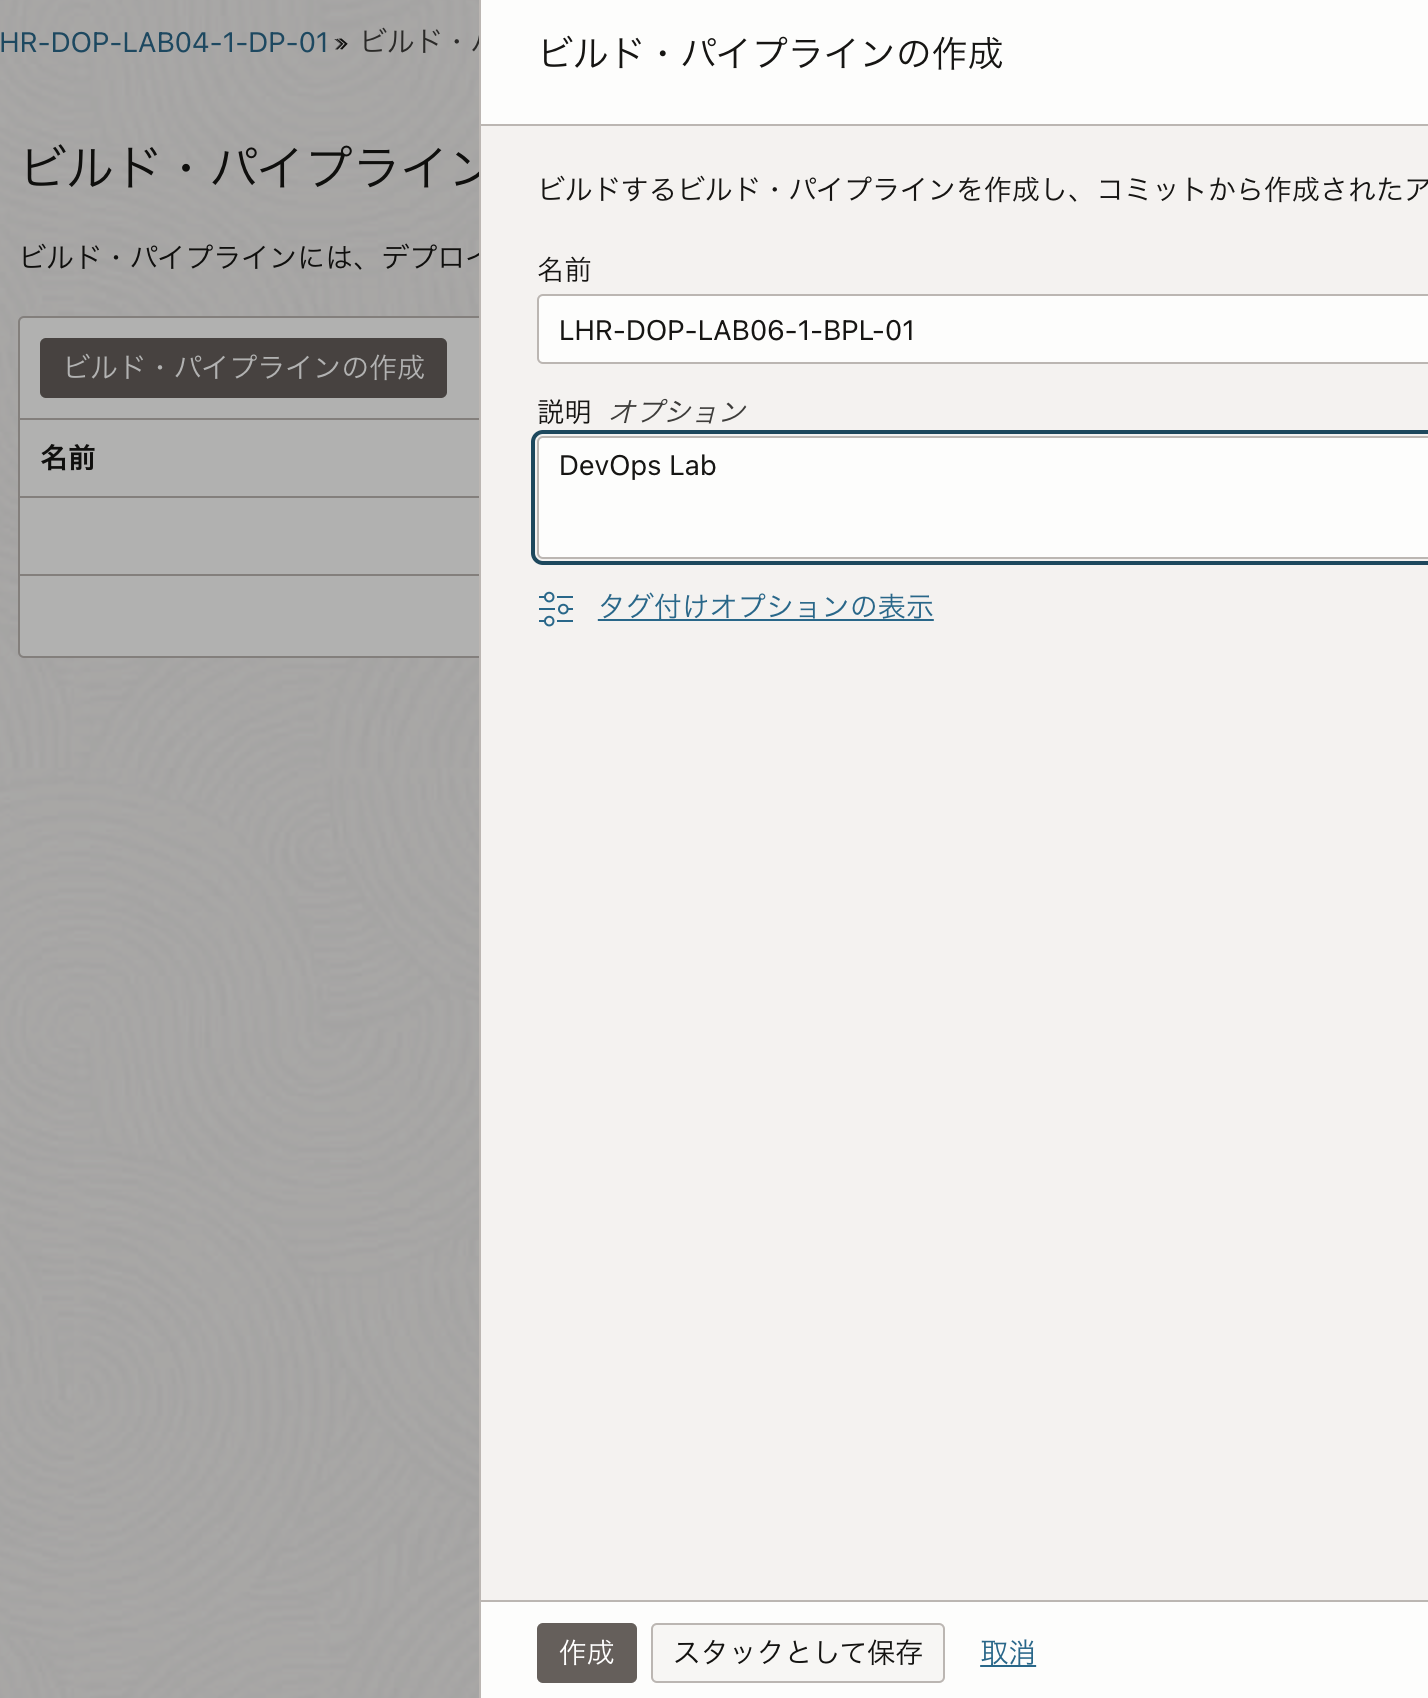
作成済みのProjectの左メニューからビルド・パイプラインを選択し、ビルド・パイプラインの作成をクリックします。
以下のように設定して作成をクリックします。
そうするとこの画面になります。
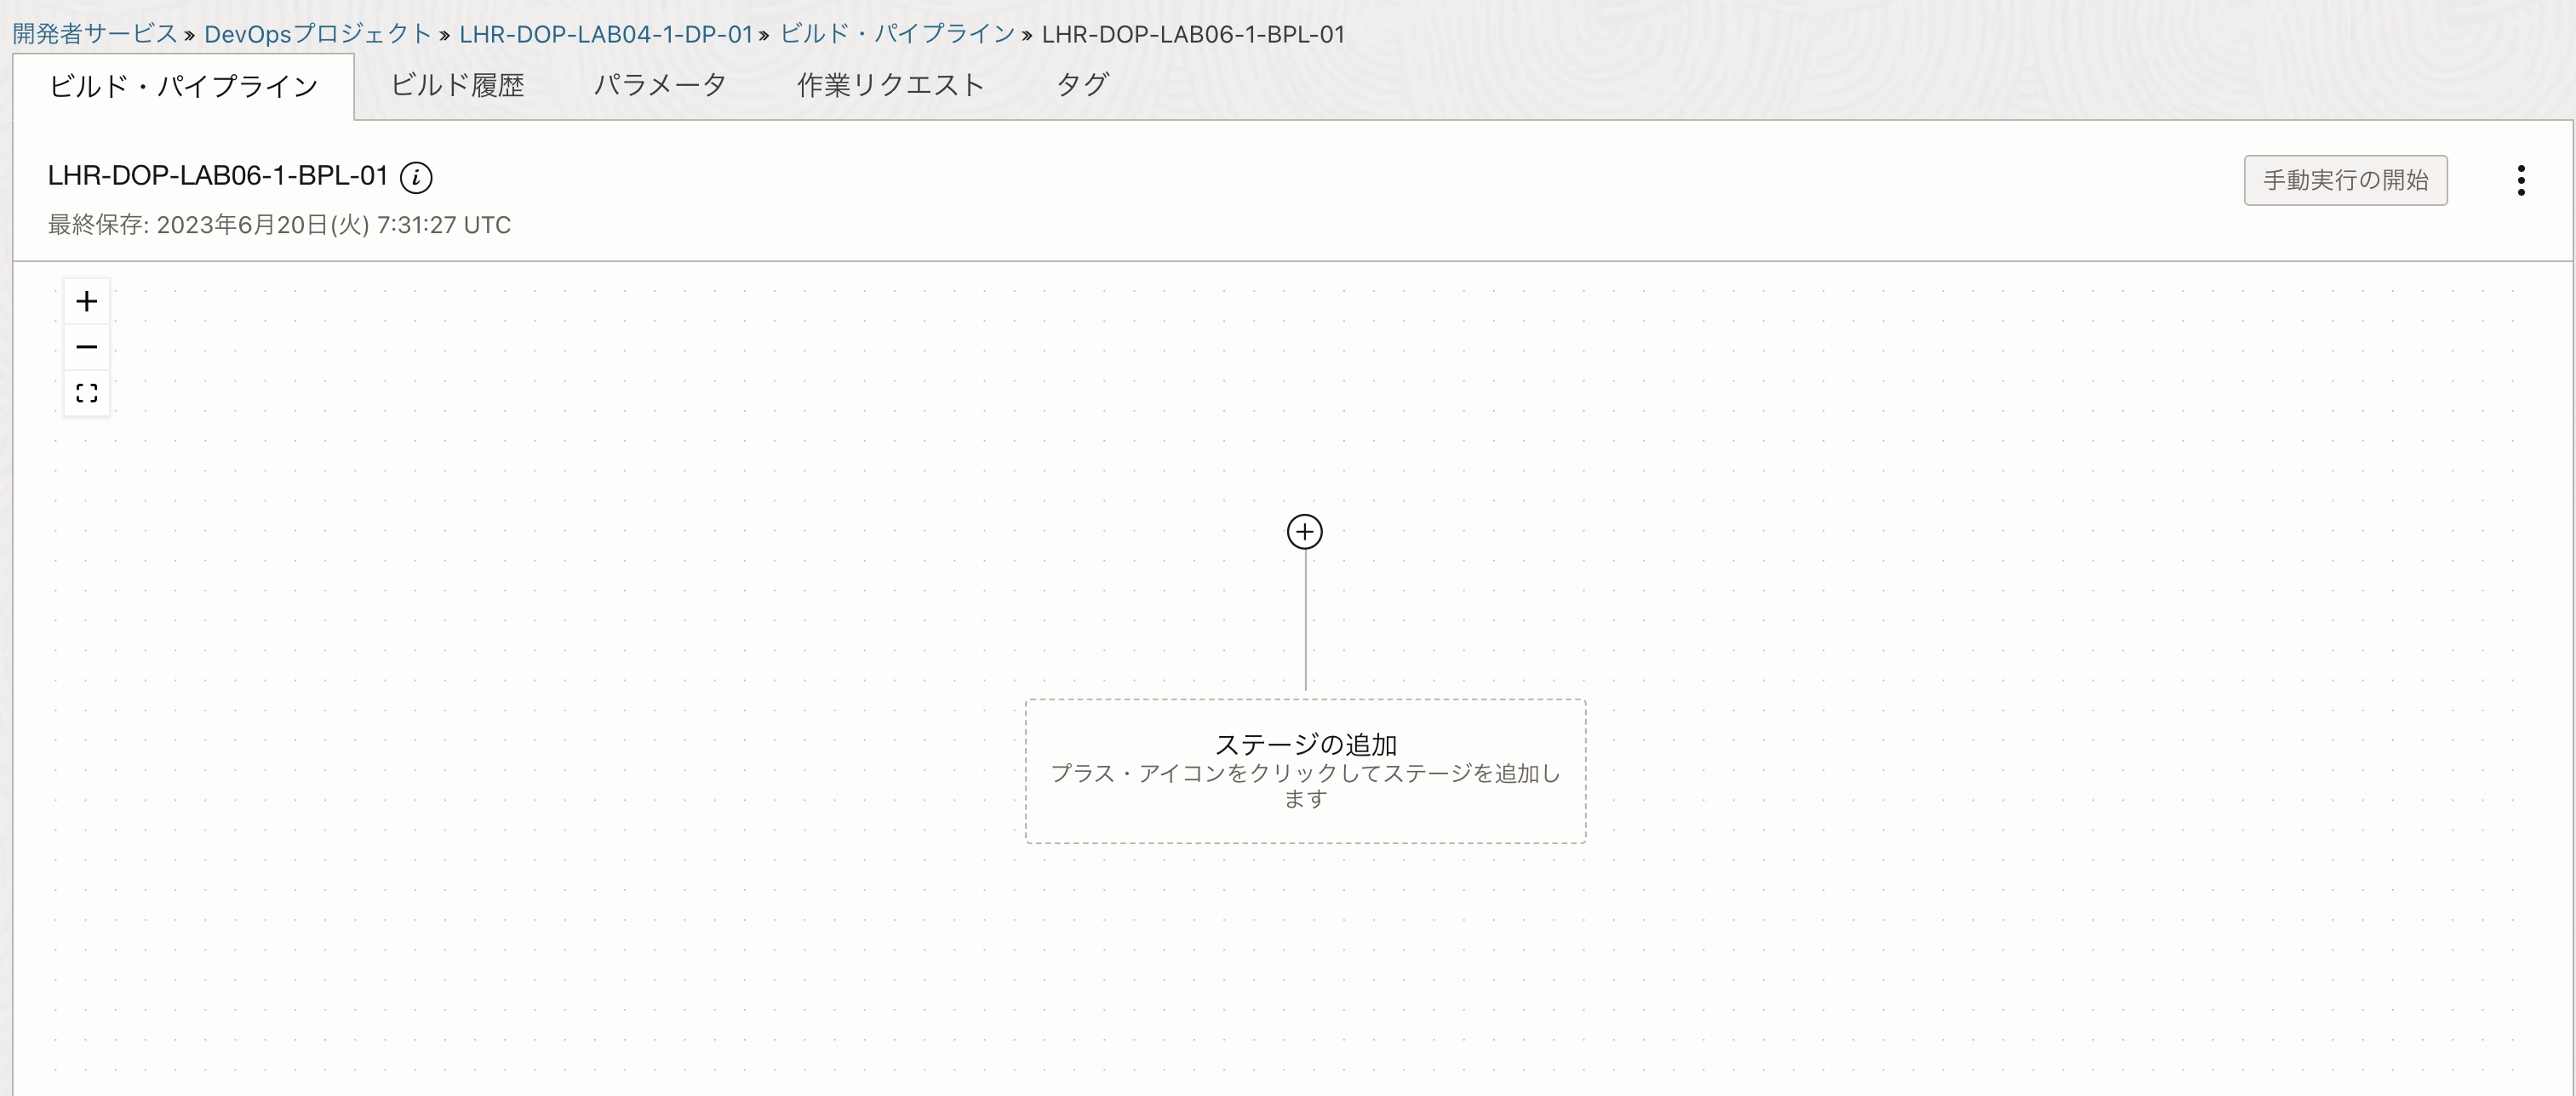
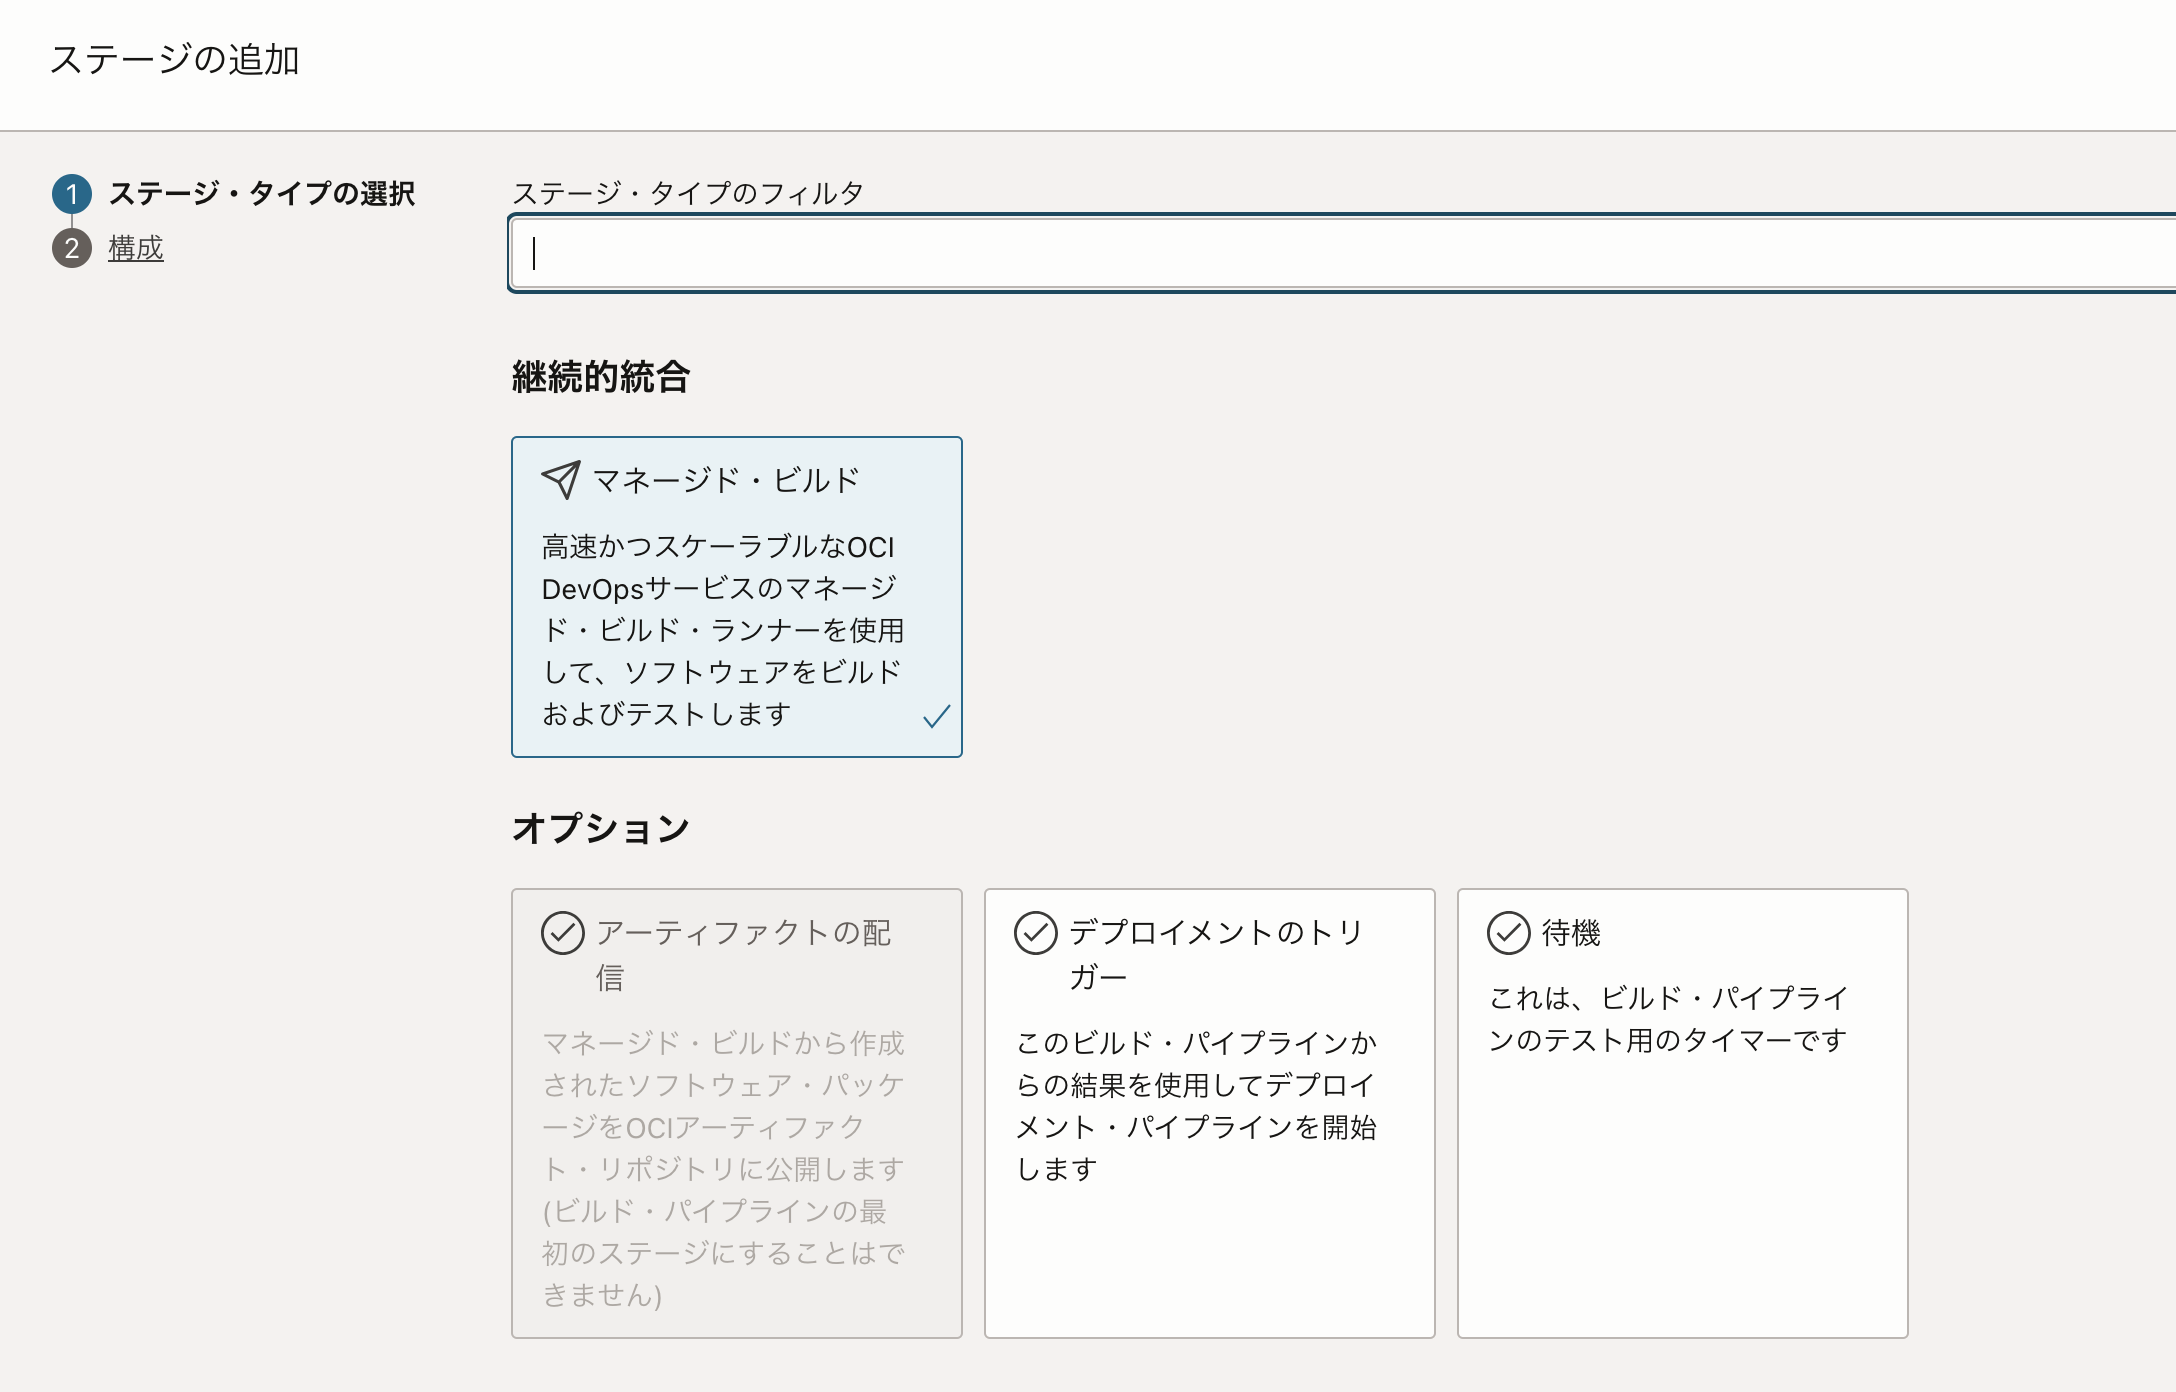
+アイコンからステージの追加をクリックします。
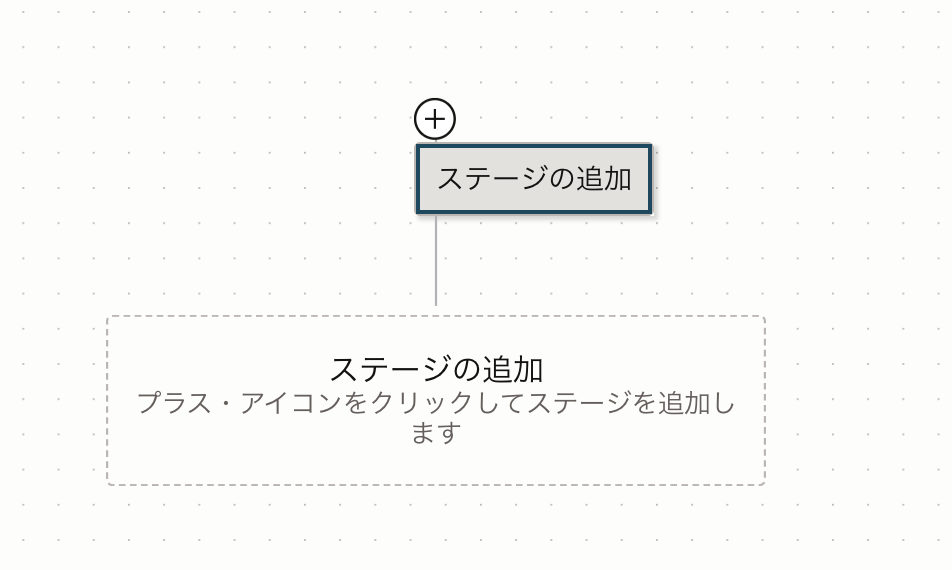
この画面になります。ここでマネージド・ビルドを選択して、ビルドとテストを実行するステージを追加します。
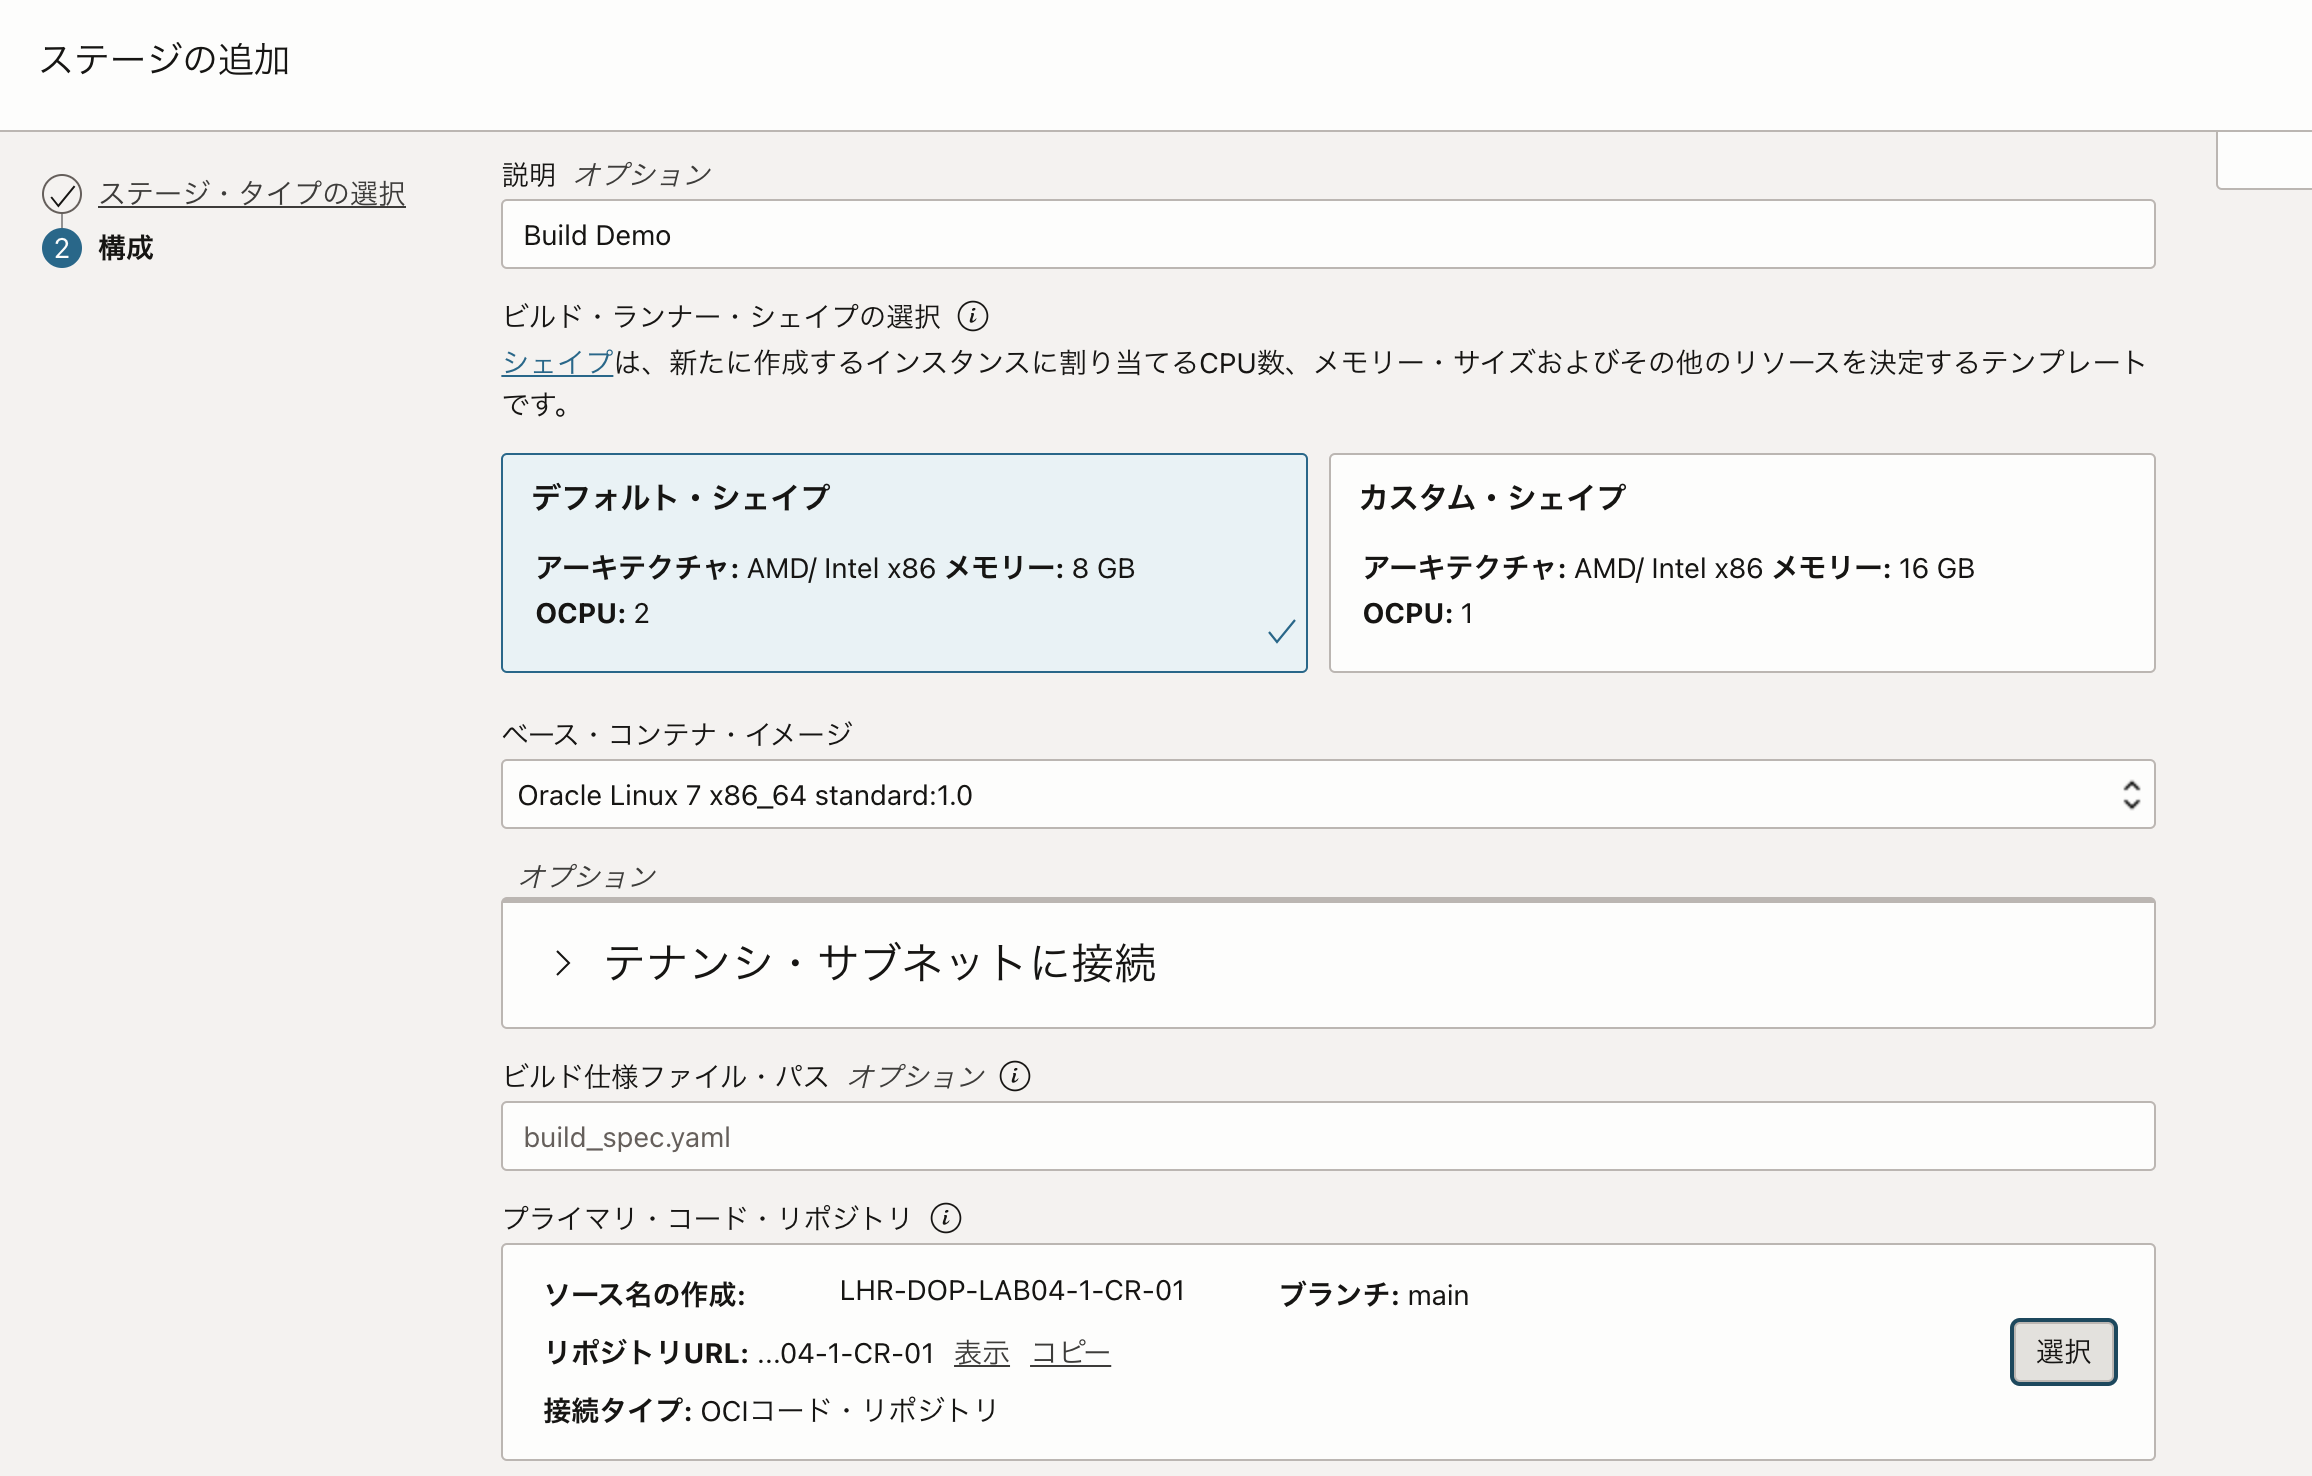
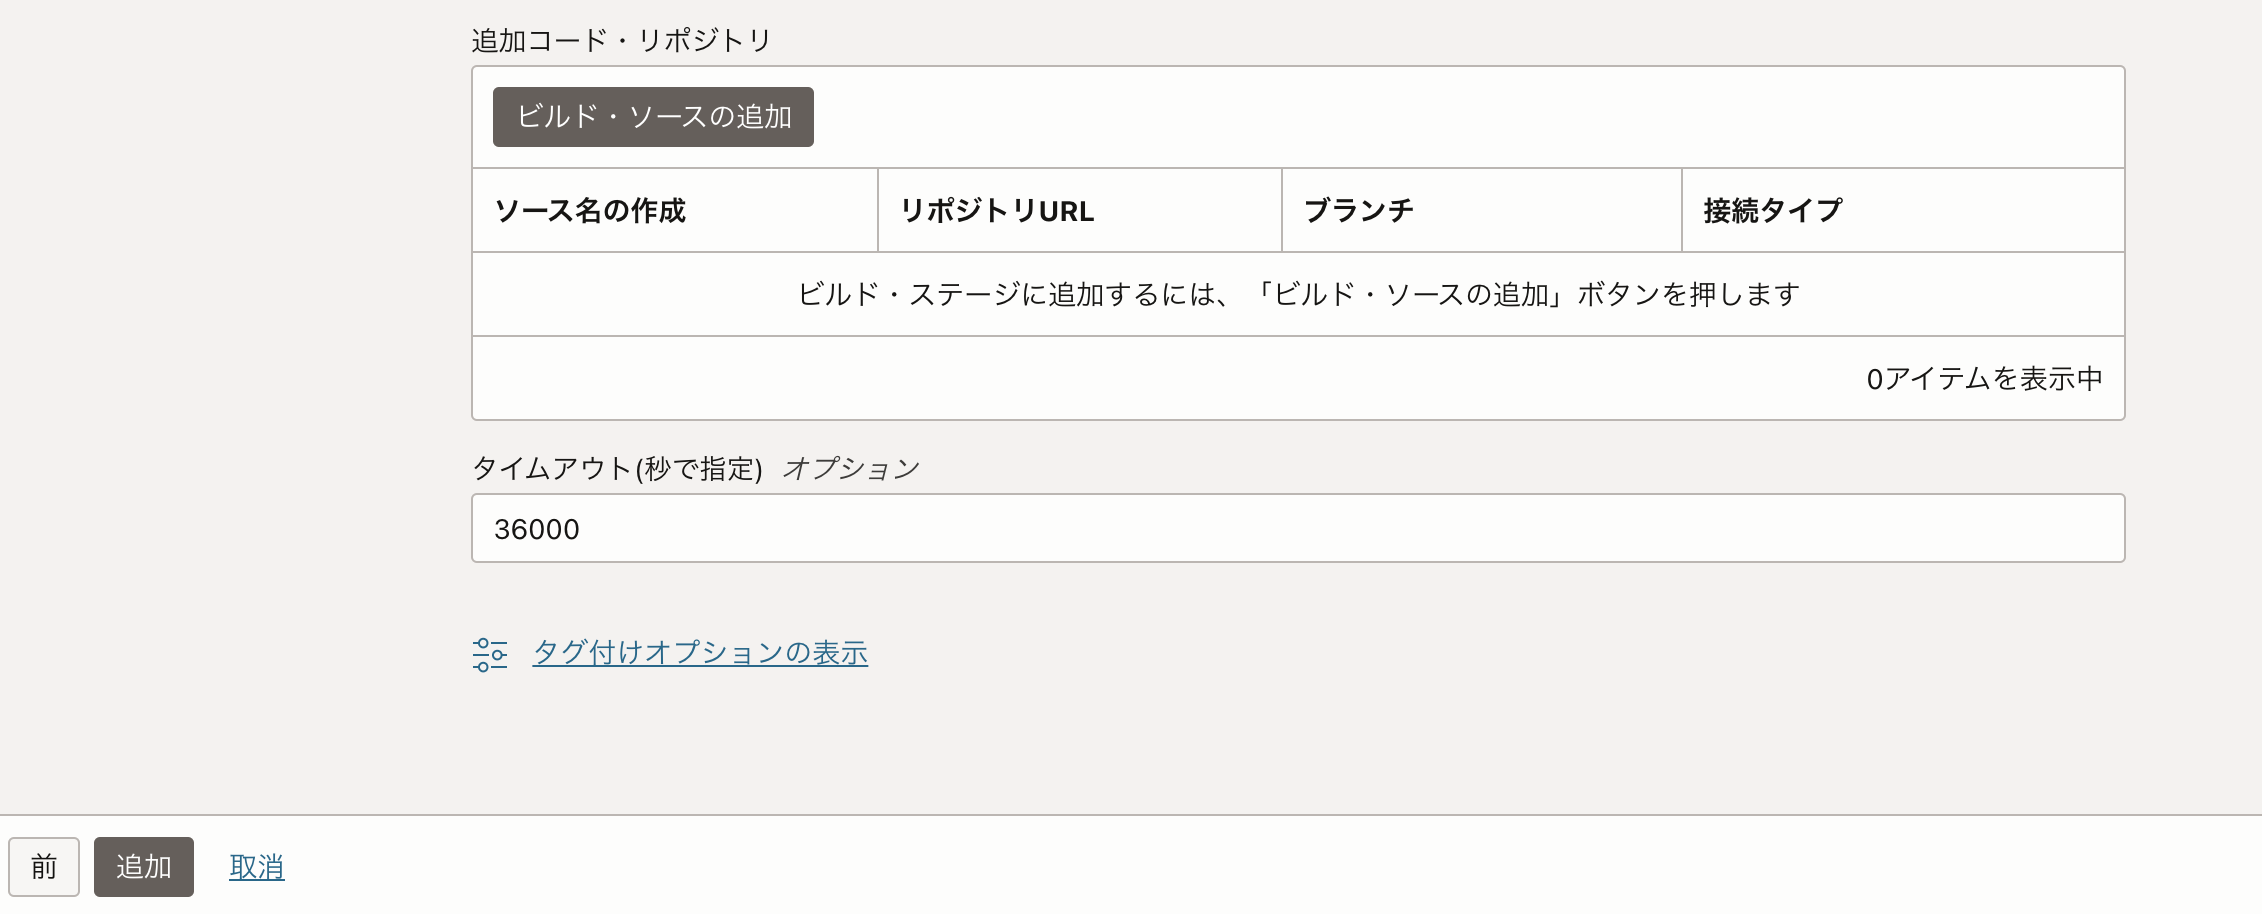
ここではこのように設定して、追加をクリックします。
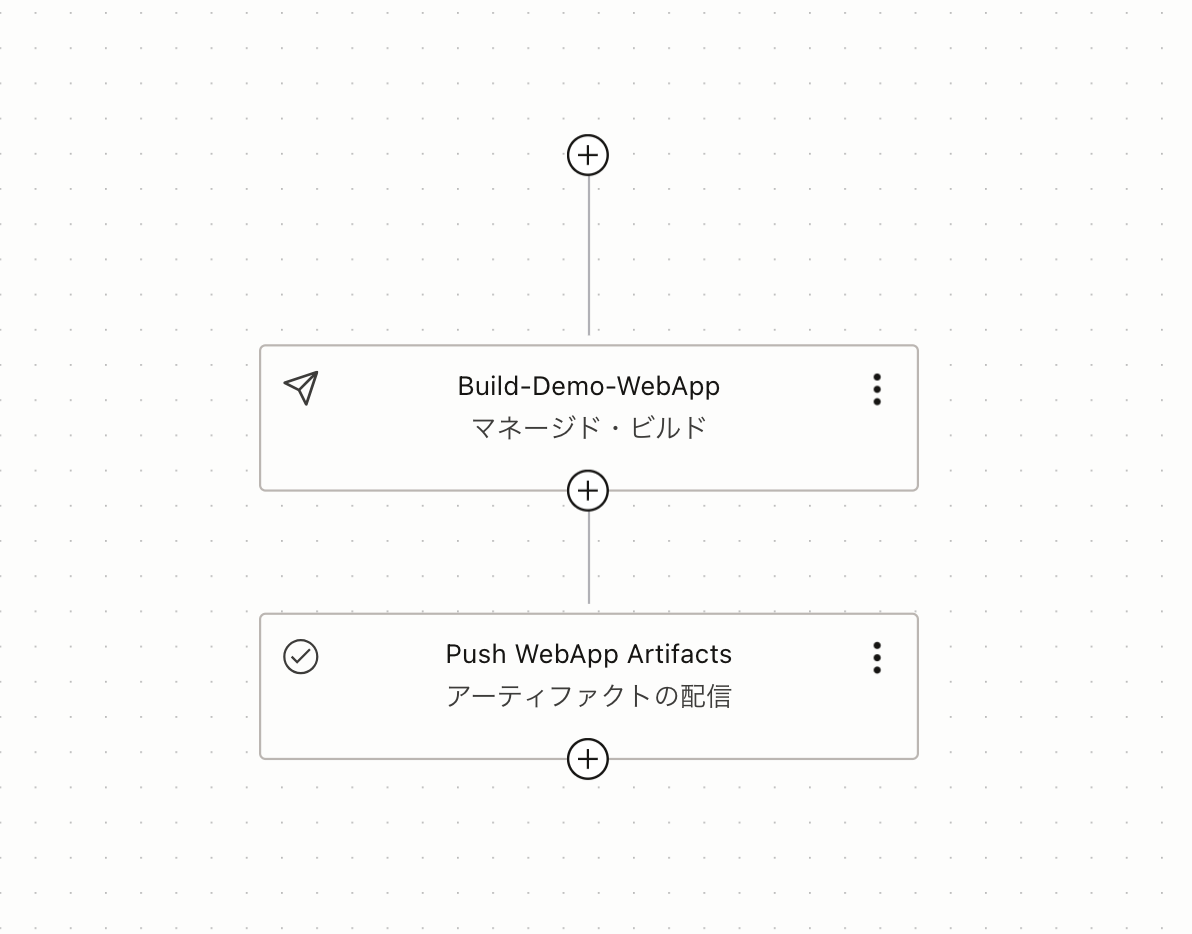
ステージが追加されました。
続いて、+アイコンをクリックして、
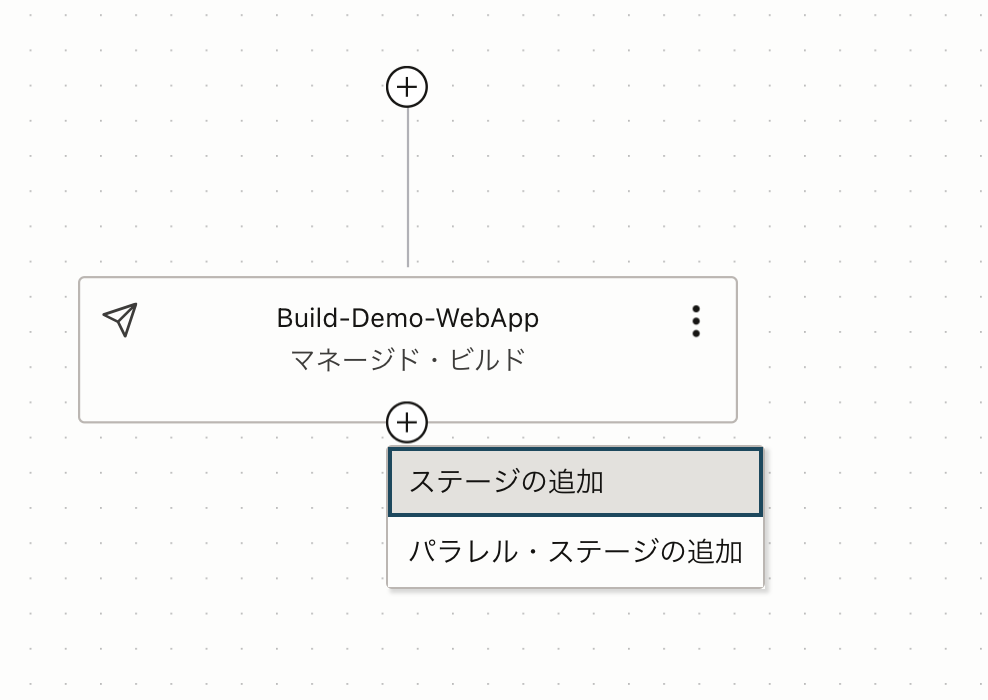
ビルドしたアーティファクトをリポジトリにPushするステージを追加します。
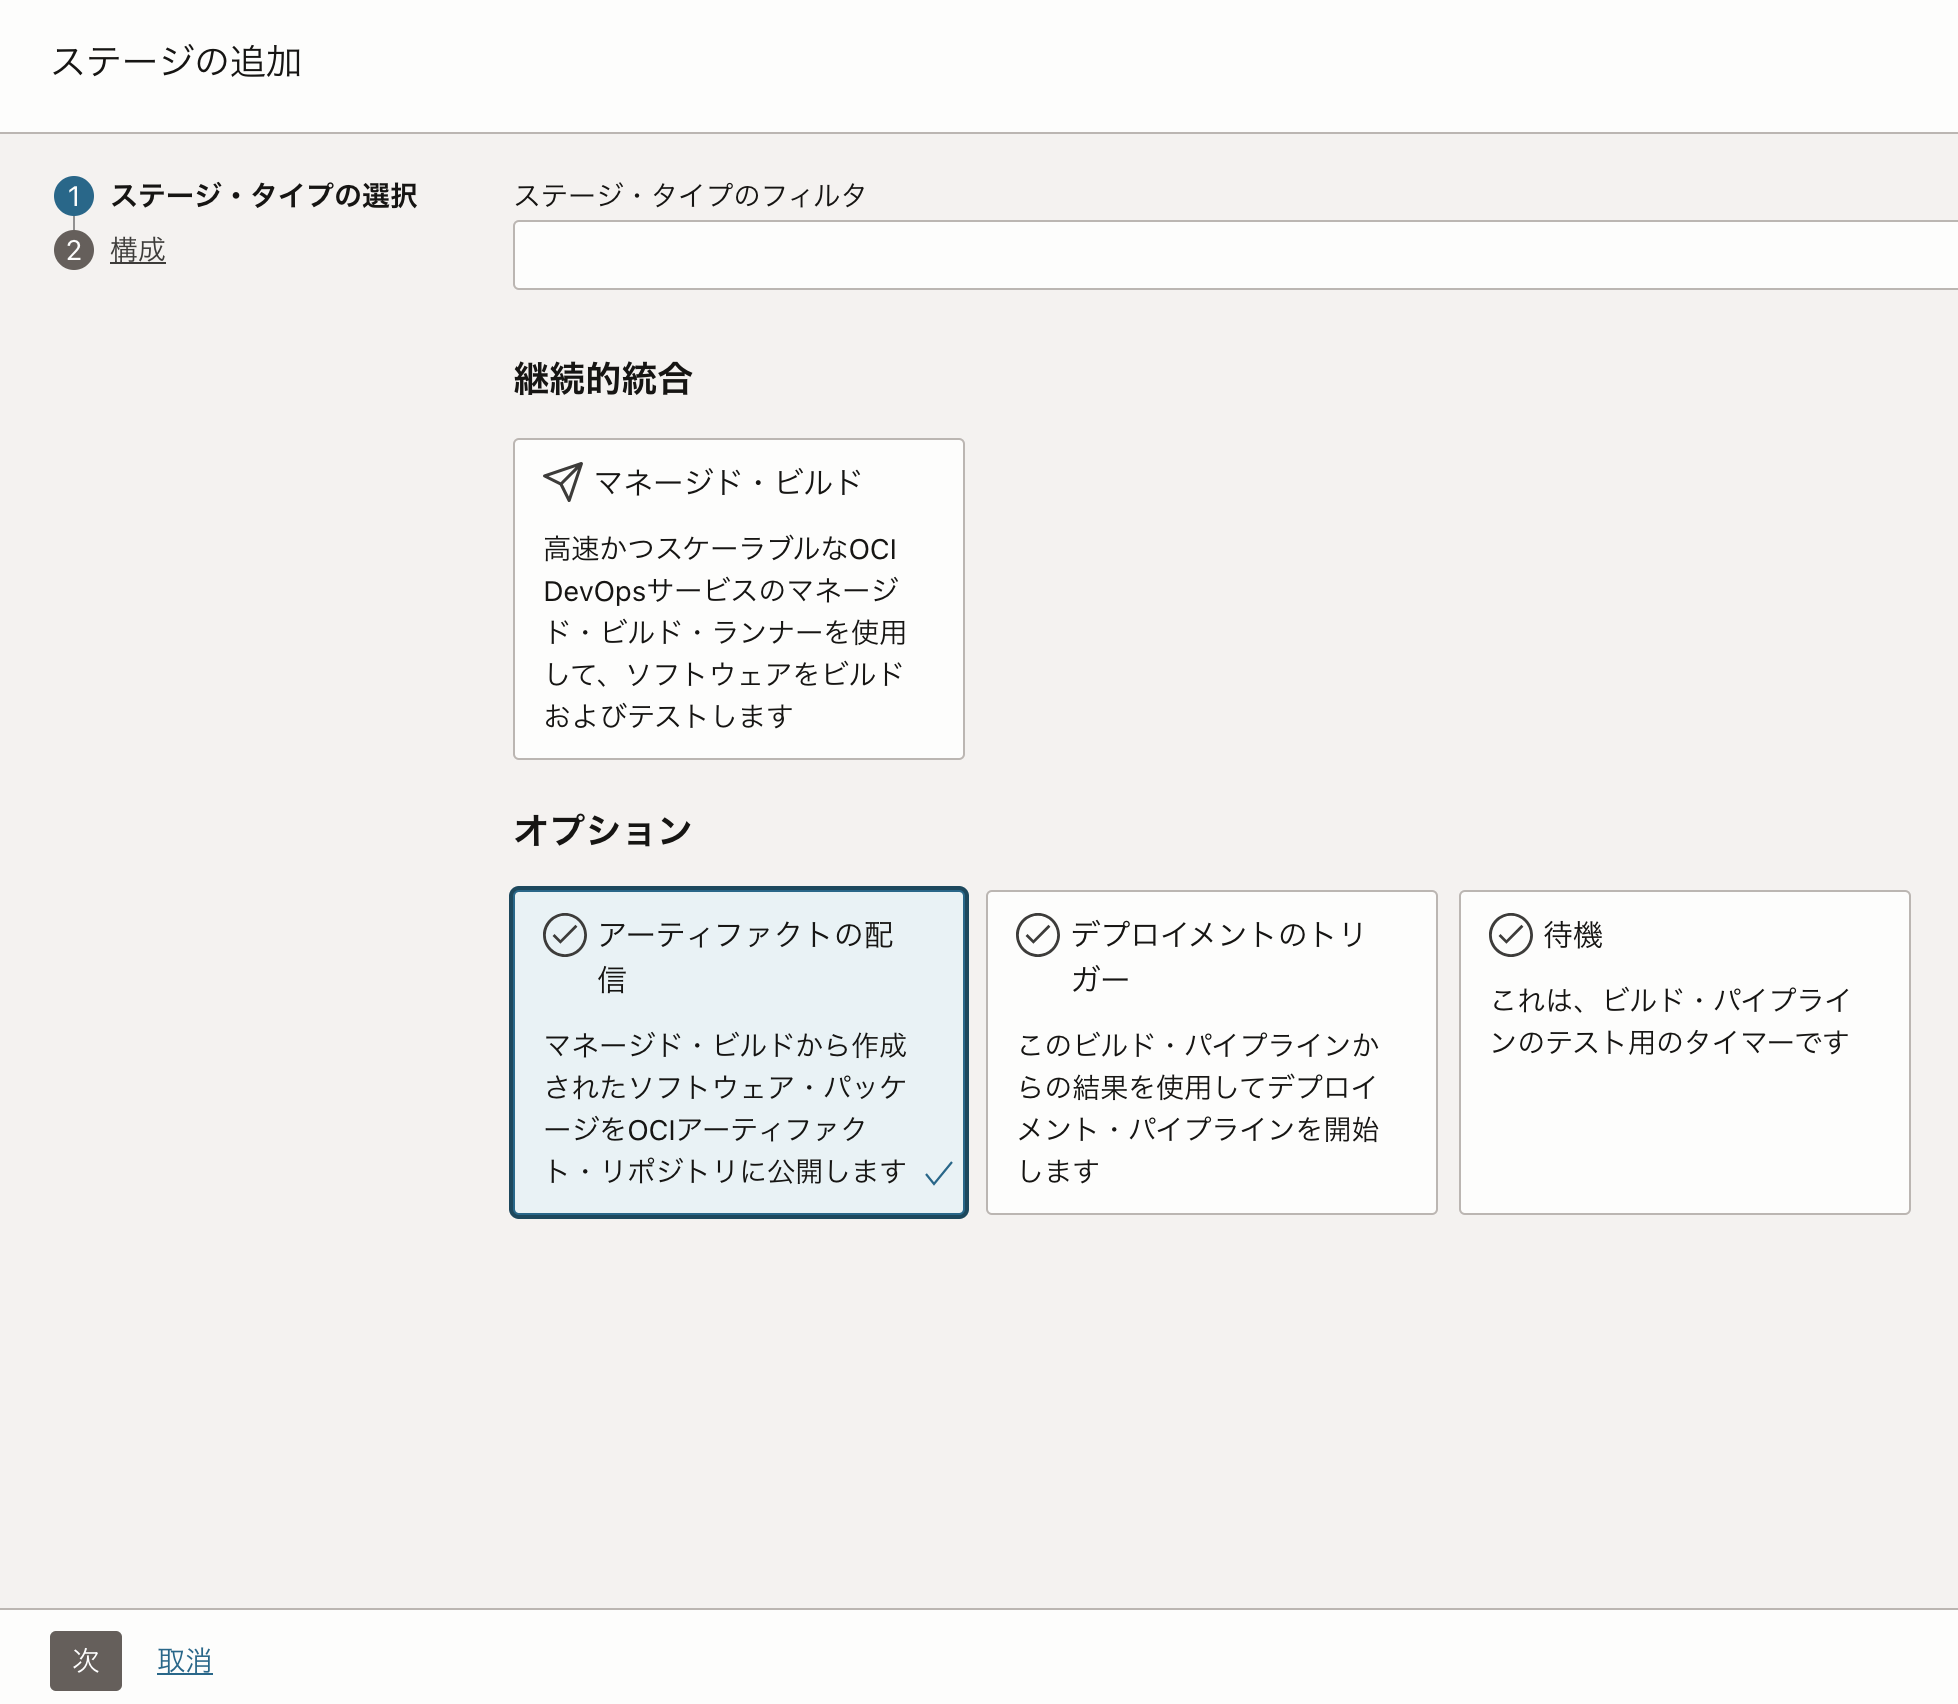
アーティファクトの保存先として、コンテナイメージをコンテナ・レジストリに、Kubernetesマニフェストをアーティファクト・レジストリに設定します。
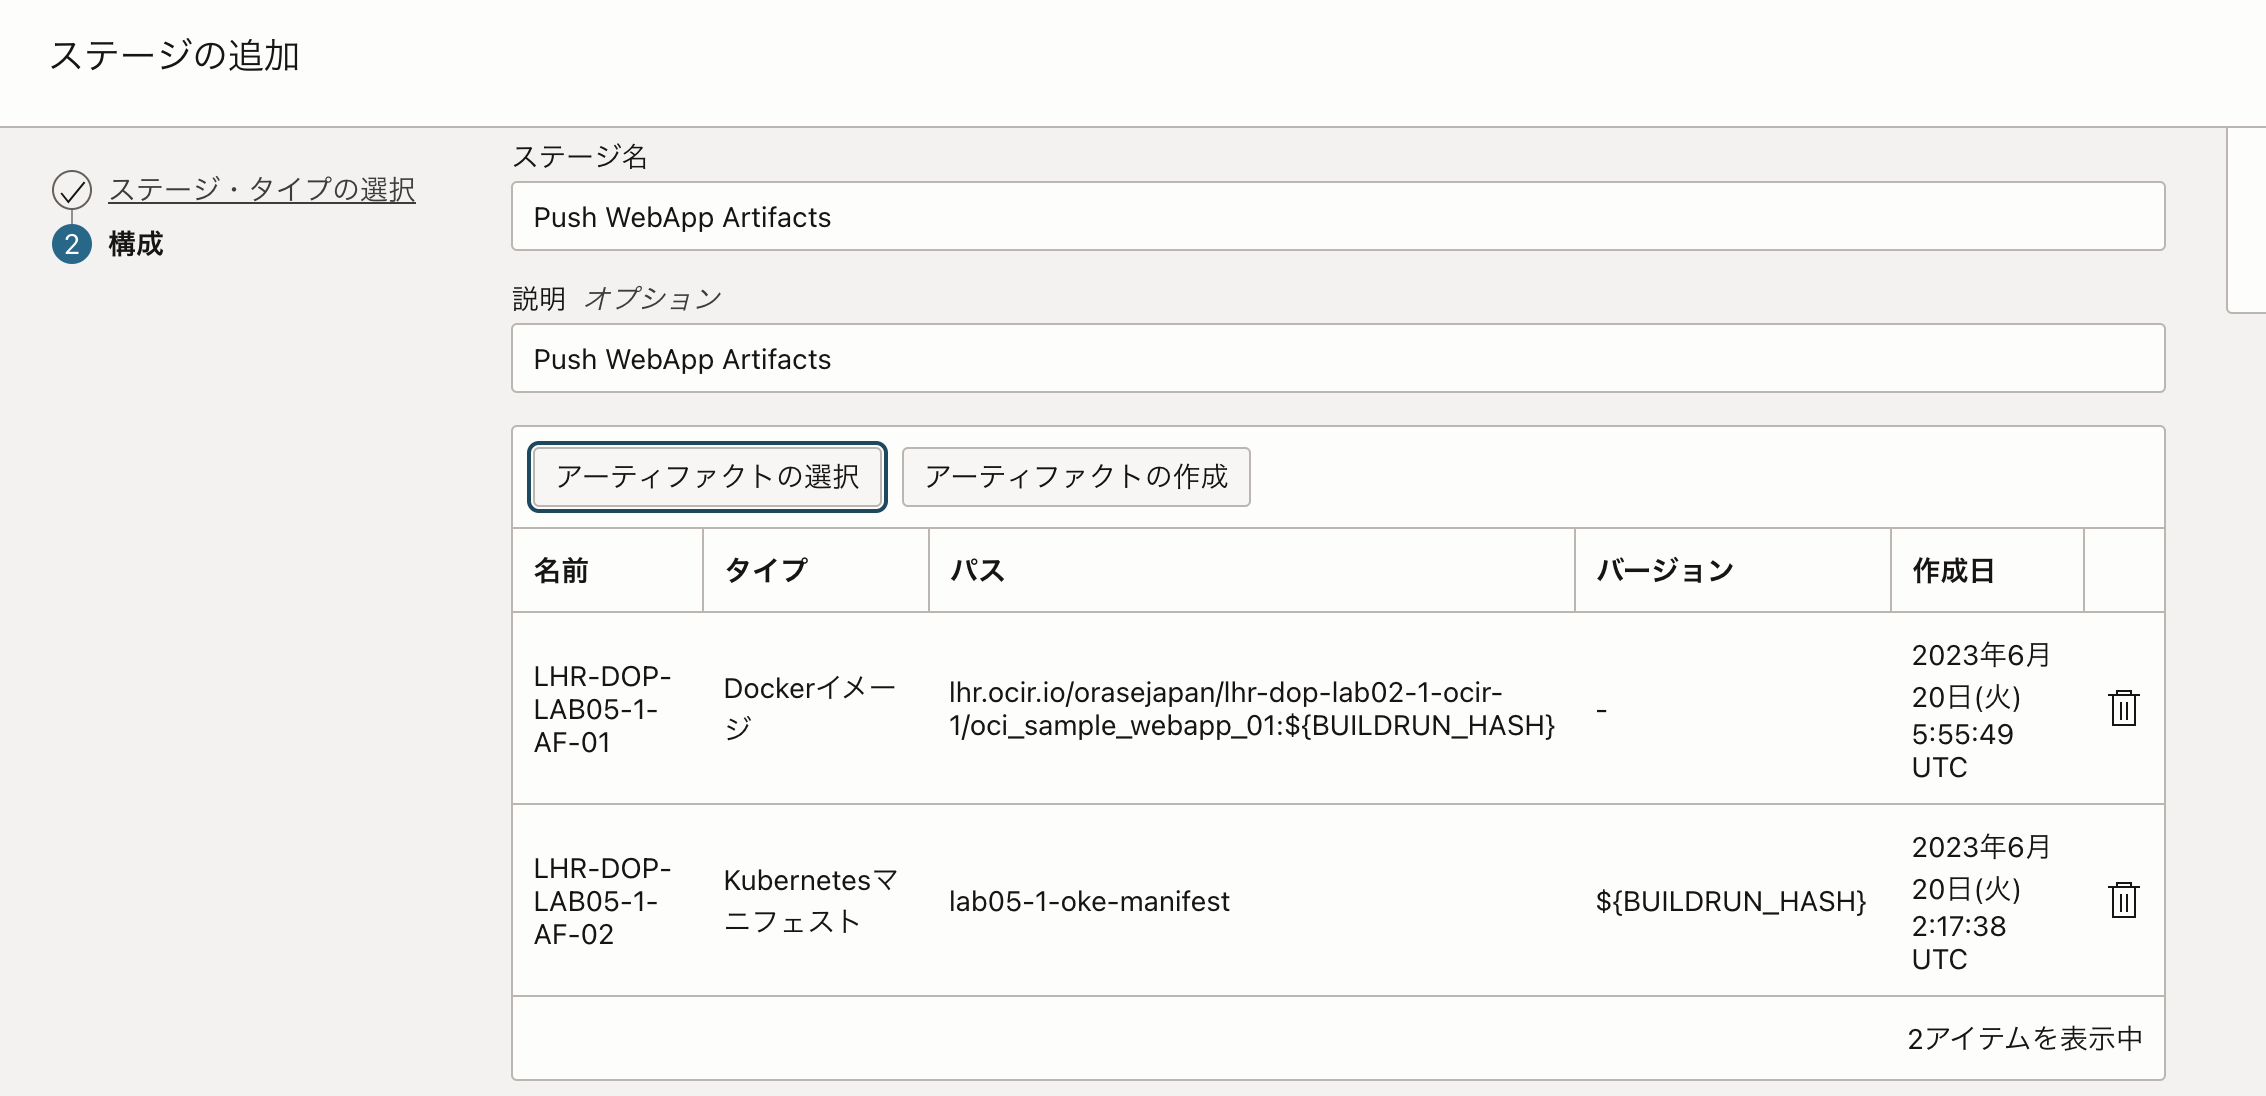
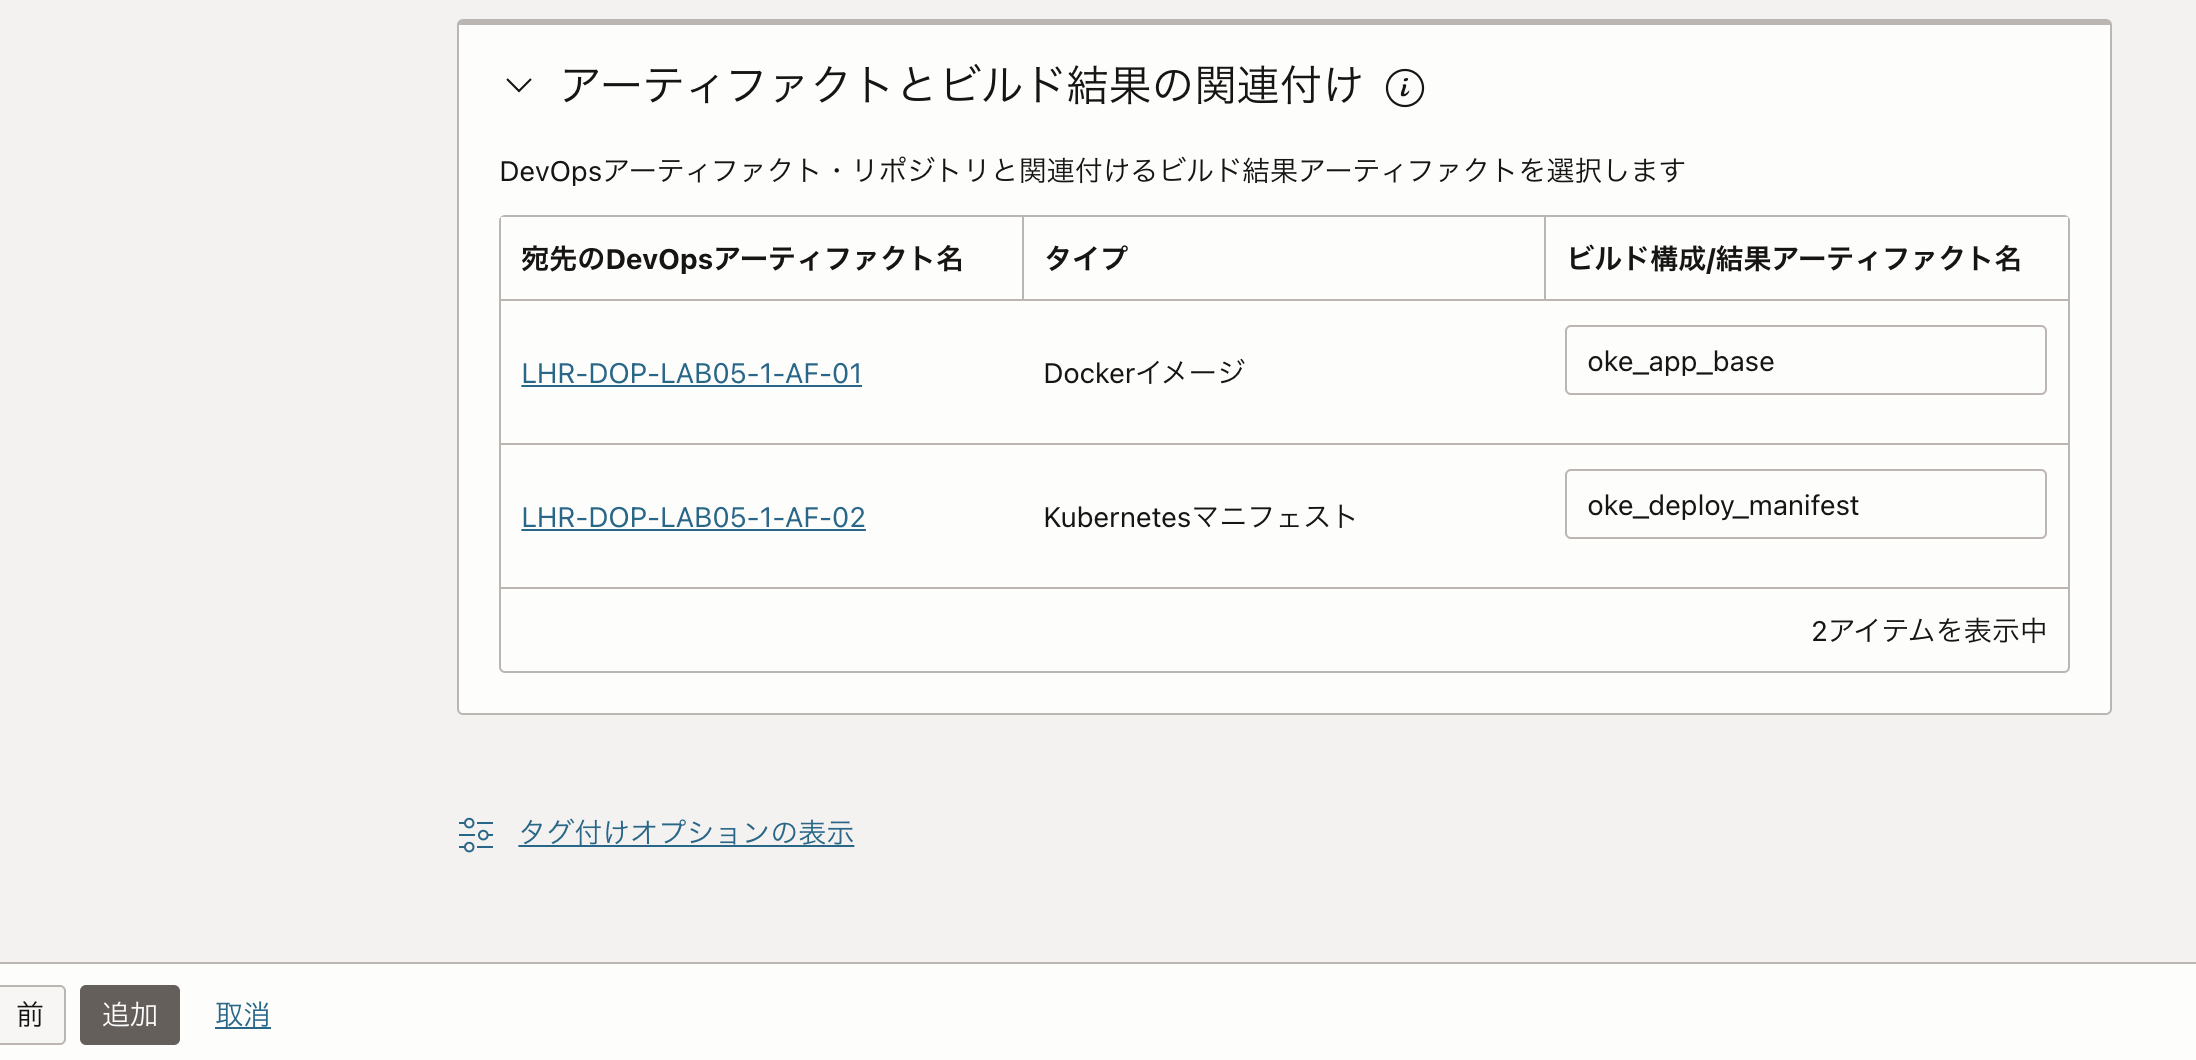
ビルド構成/結果アーティファクト名はbuild_spec.yamlで指定した名称と合わせます。
version: 0.1
component: build
timeoutInSeconds: 6000
runAs: root
shell: bash
env:
  # these are local variables to the build config
  variables:

  # the value of a vaultVariable is the secret-id (in OCI ID format) stored in the OCI Vault service
  # you can then access the value of that secret in your build_spec.yaml commands
  vaultVariables:

  # exportedVariables are made available to use as parameters in sucessor Build Pipeline stages
  # For this Build to run, the Build Pipeline needs to have a BUILDRUN_HASH parameter set
  exportedVariables:
    - BUILDRUN_HASH


#Its a native way to fetch artifacts from external or artifact repo or a file path to use before a stage.
# More about buildspec formats - https://docs.oracle.com/en-us/iaas/Content/devops/using/build_specs.htm

steps:
  - type: Command
    name: "Define unique image tag"
    timeoutInSeconds: 40
    command: |
      export BUILDRUN_HASH=`echo ${OCI_BUILD_RUN_ID} | rev | cut -c 1-7`
      echo "BUILDRUN_HASH: " $BUILDRUN_HASH

  - type: Command
    timeoutInSeconds: 1200
    name: "Build container image"
    command: |
      cd ${OCI_PRIMARY_SOURCE_DIR}
      docker build --pull --rm -t oke_app_base .

outputArtifacts:
  - name: oke_app_base #これ
    type: DOCKER_IMAGE
    # this location tag doesn't effect the tag used to deliver the container image
    # to the Container Registry
    location: oke_app_base:latest

  - name: oke_deploy_manifest #これ
    type: BINARY
    # this location tag doesn't effect the tag used to deliver the container image
    # to the Container Registry
    location: ${OCI_PRIMARY_SOURCE_DIR}/HelloWorld-lb.yaml
このようになります。
Deployment Pipelineの作成
CI/CDのCDの部分を設定します。
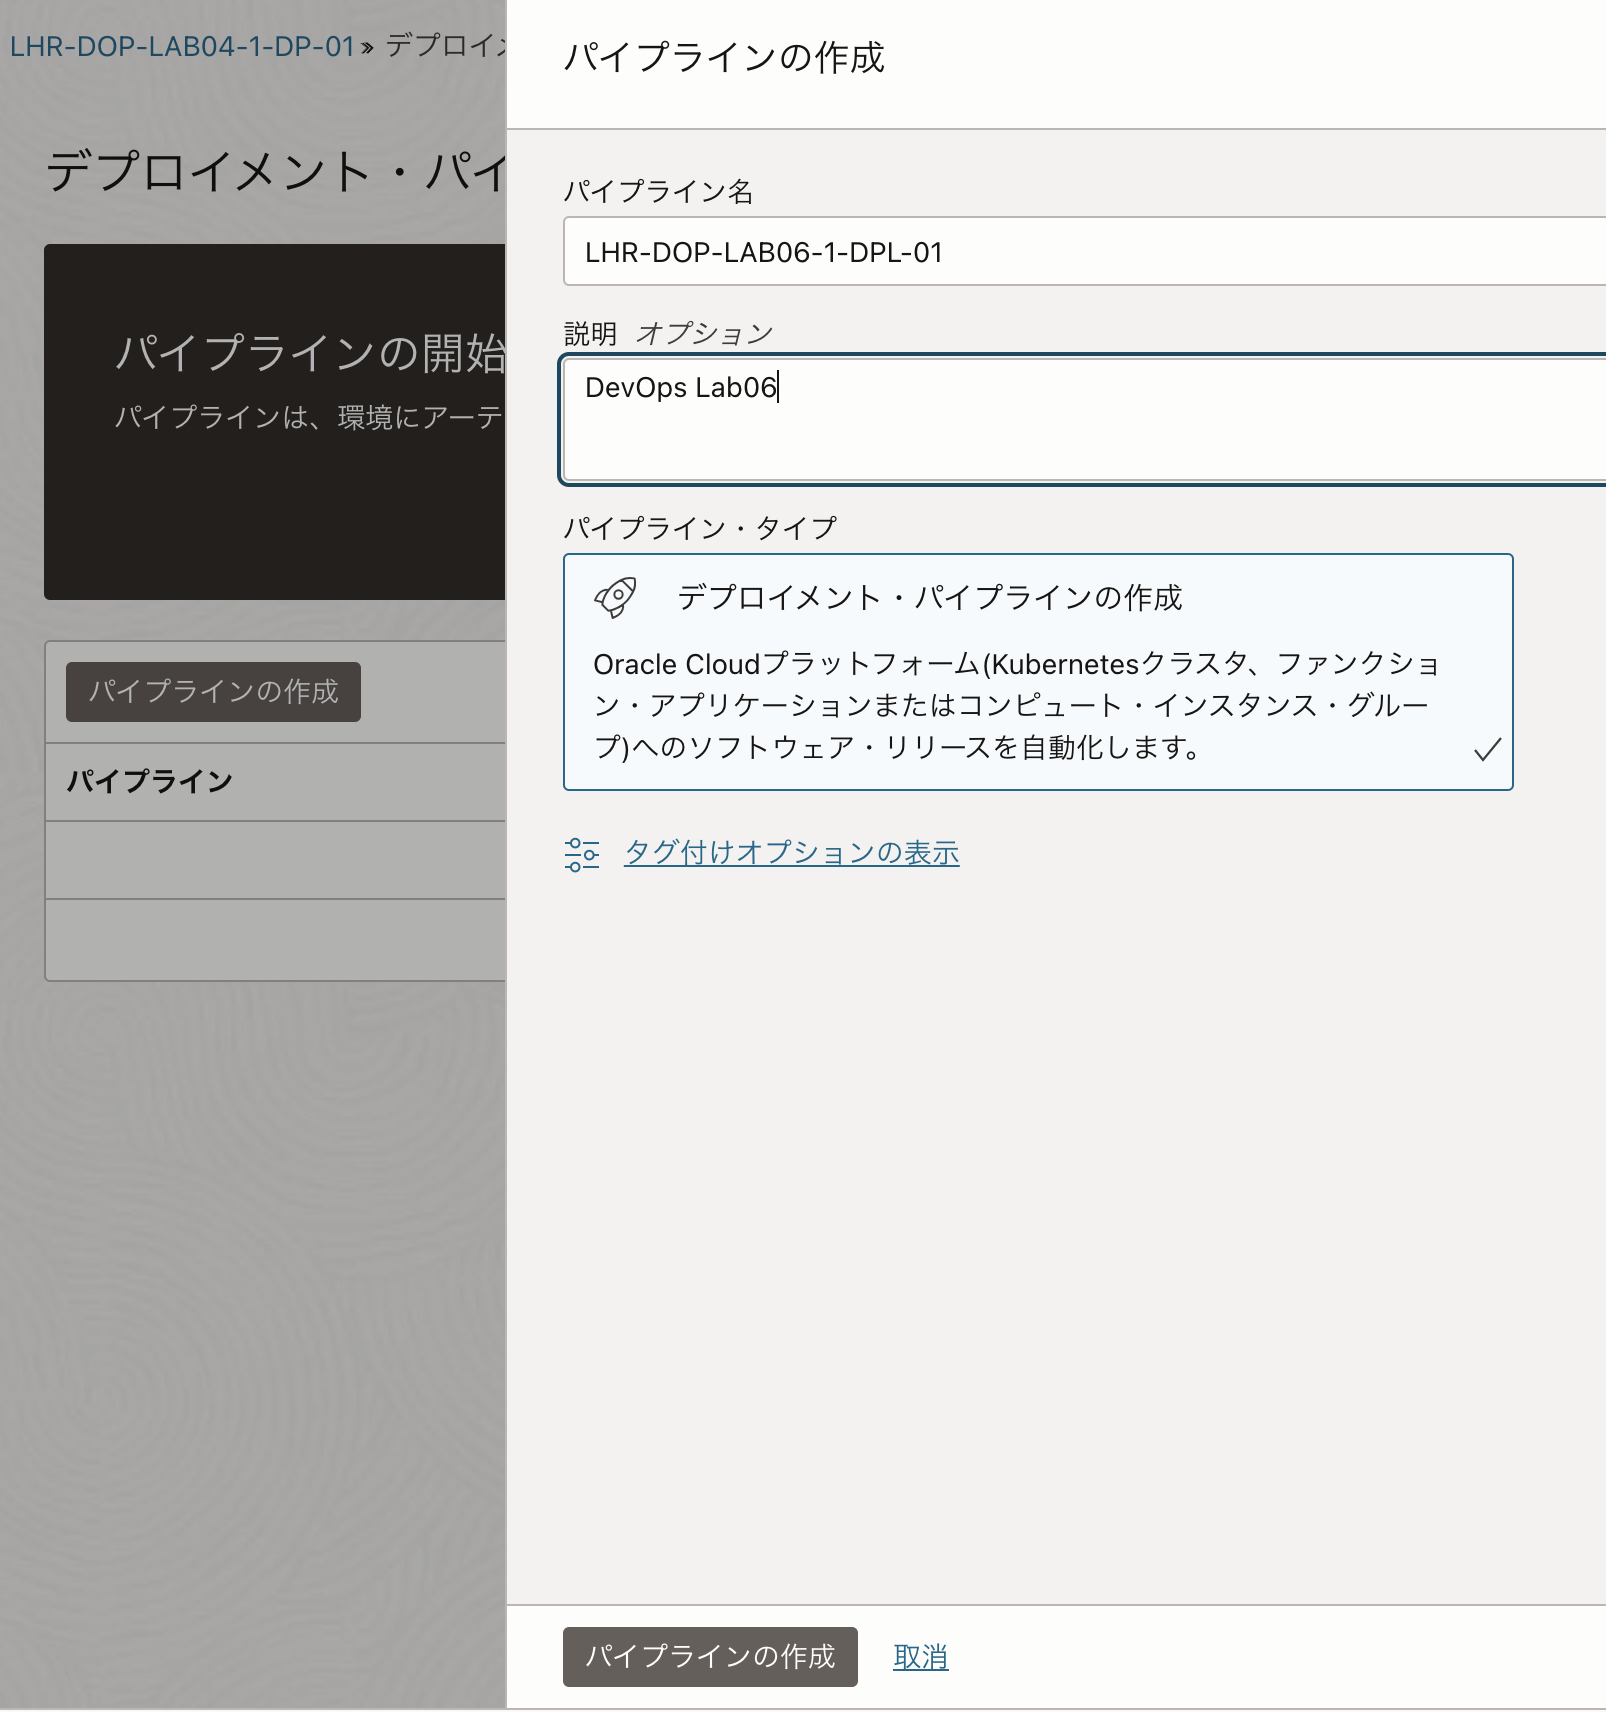
作成済みのProjectの左メニューからデプロイメント・パイプラインを選択し、デプロイメント・パイプラインの作成をクリックします。
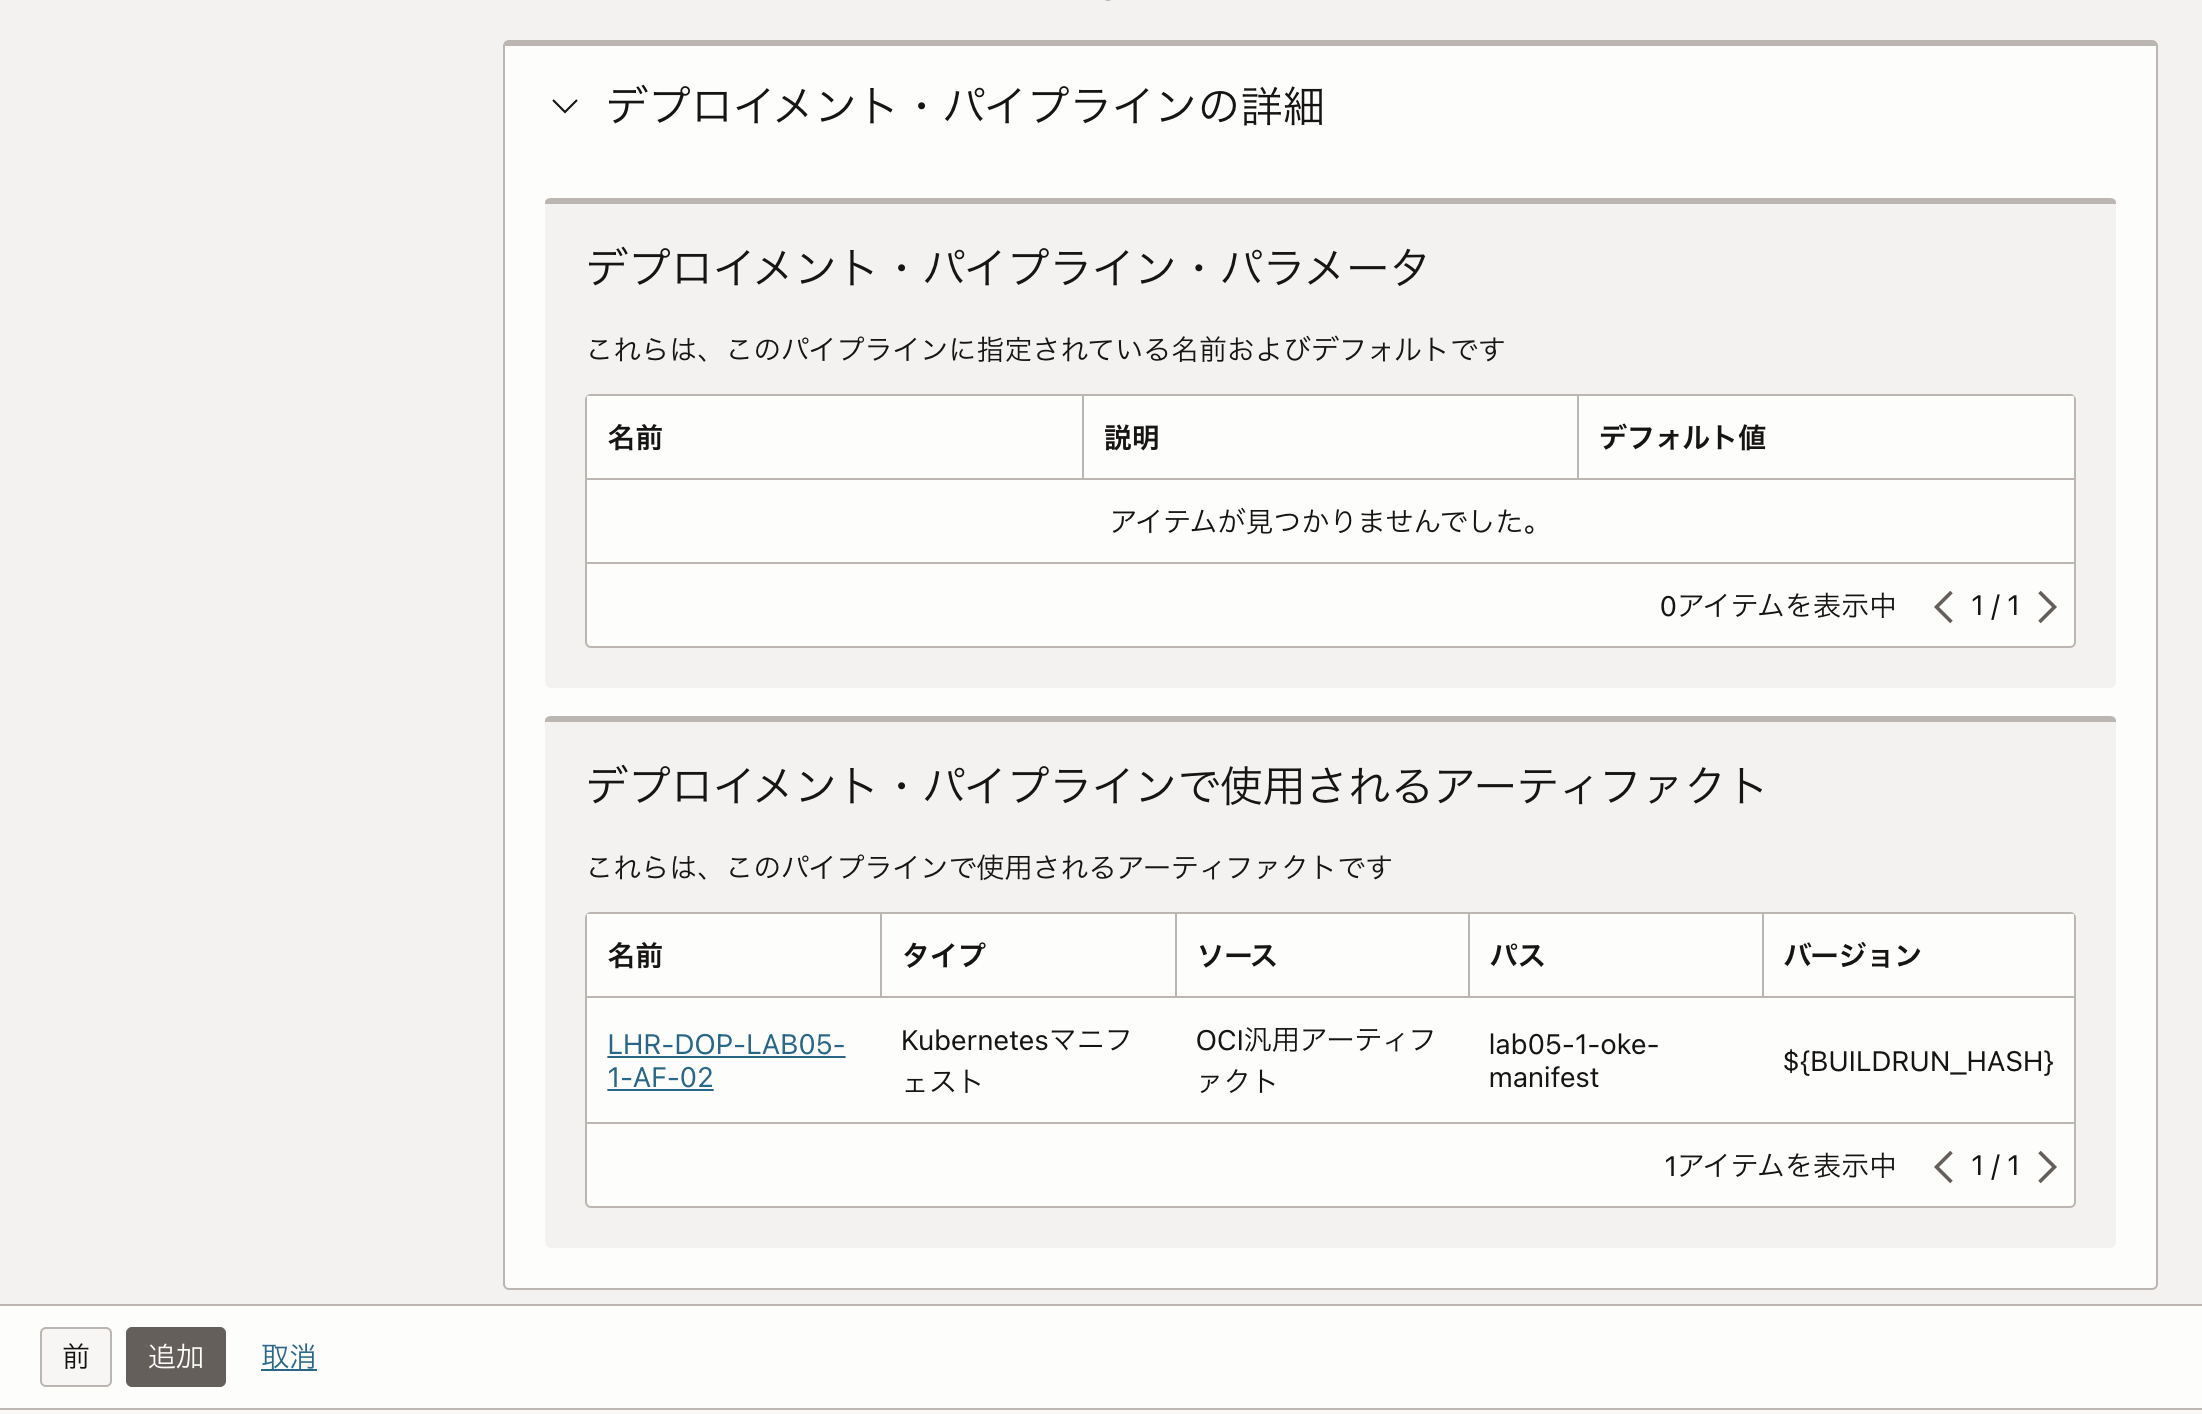
以下のように設定してパイプラインを作成します。
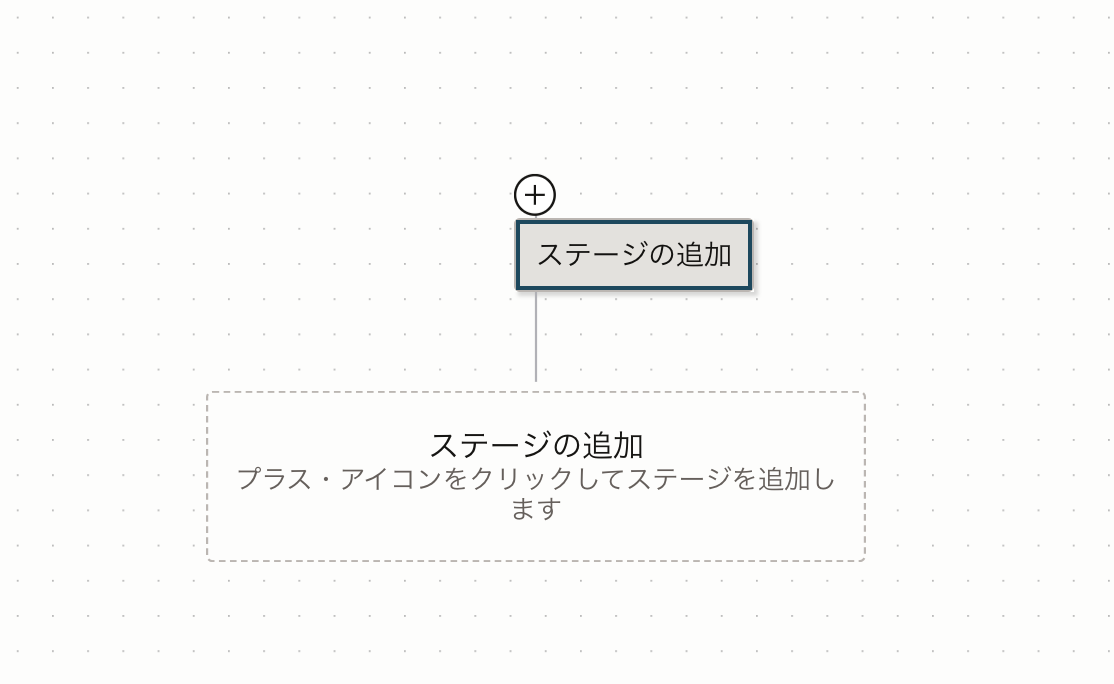
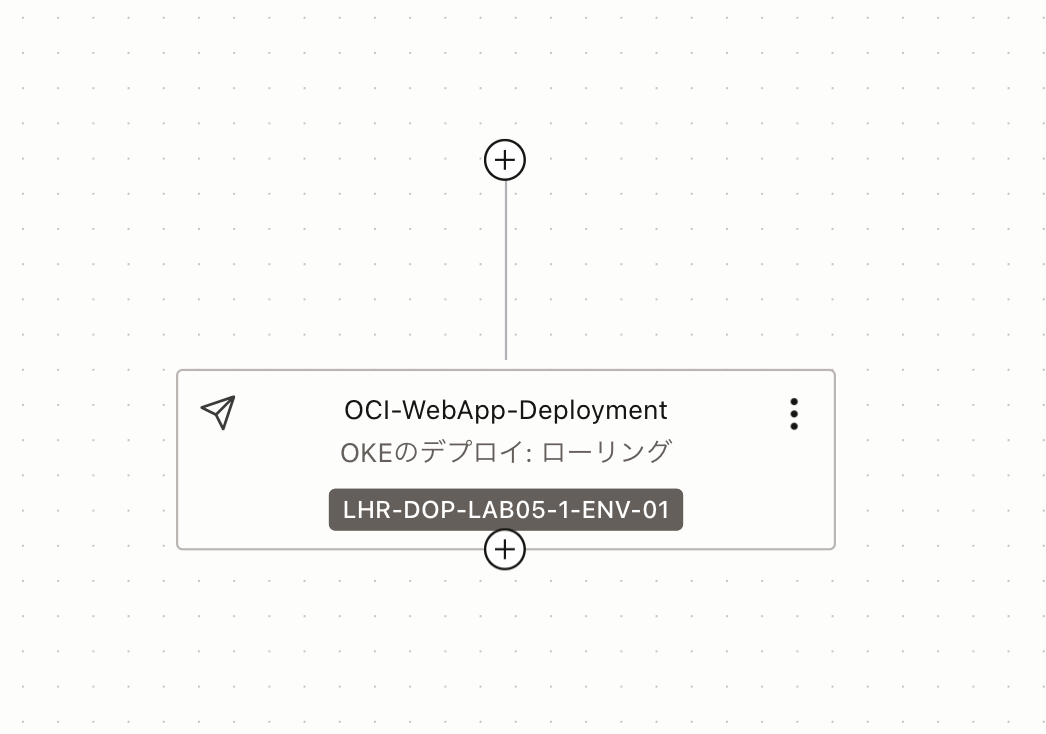
ビルド・パイプラインと同様に以下のような画面になりますので、+アイコンからステージの追加を選択します。
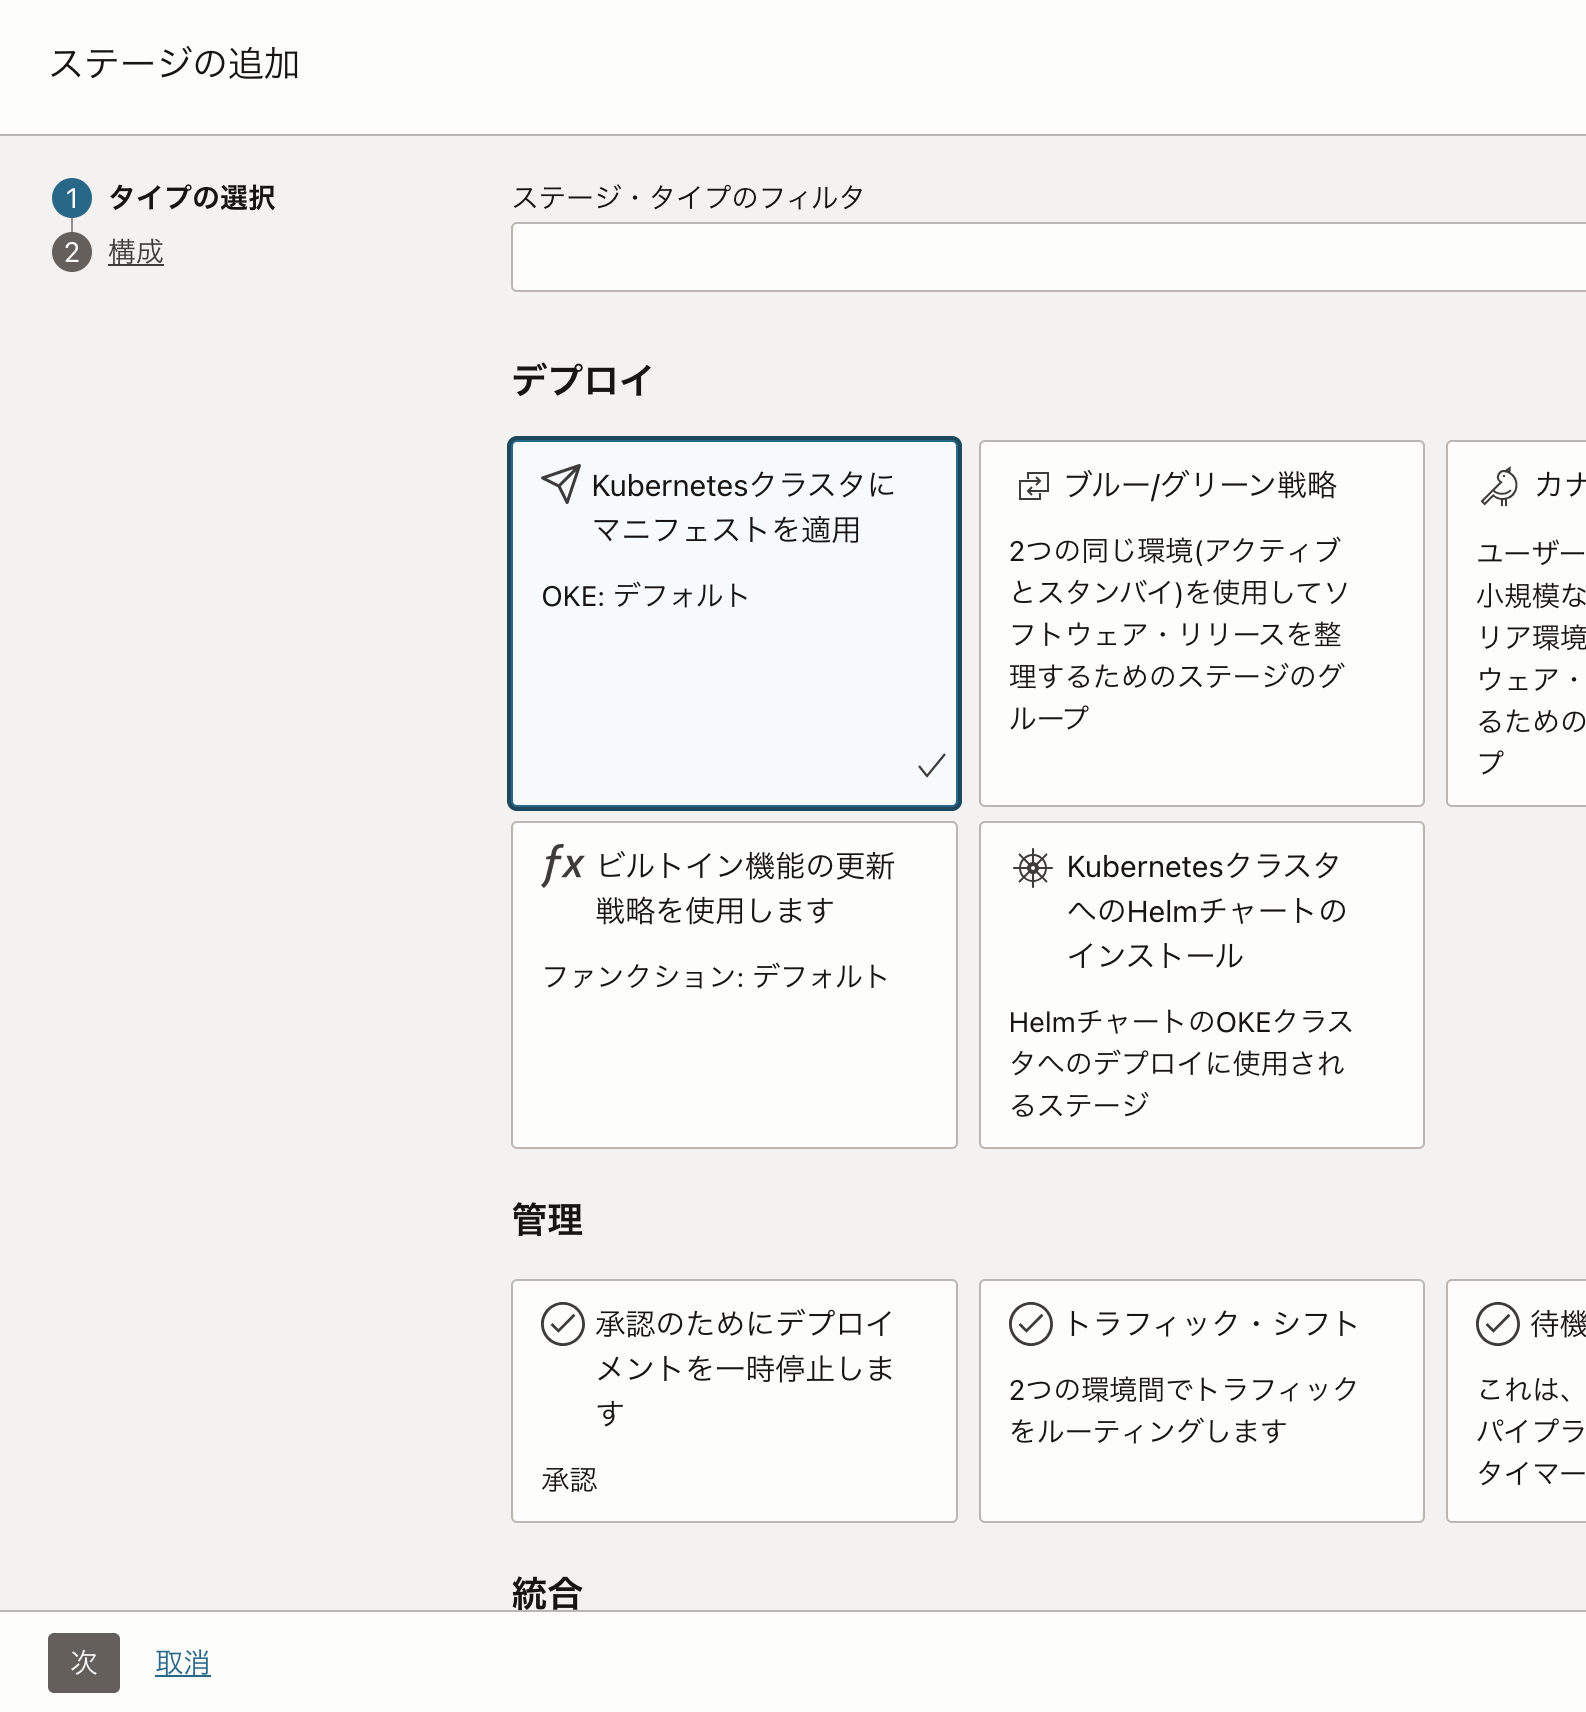
デプロイ先としてKubenetesクラスタにマニフェストを適用を選択します。
環境は作成済みの環境から選択し、アーティファクトも選択します。
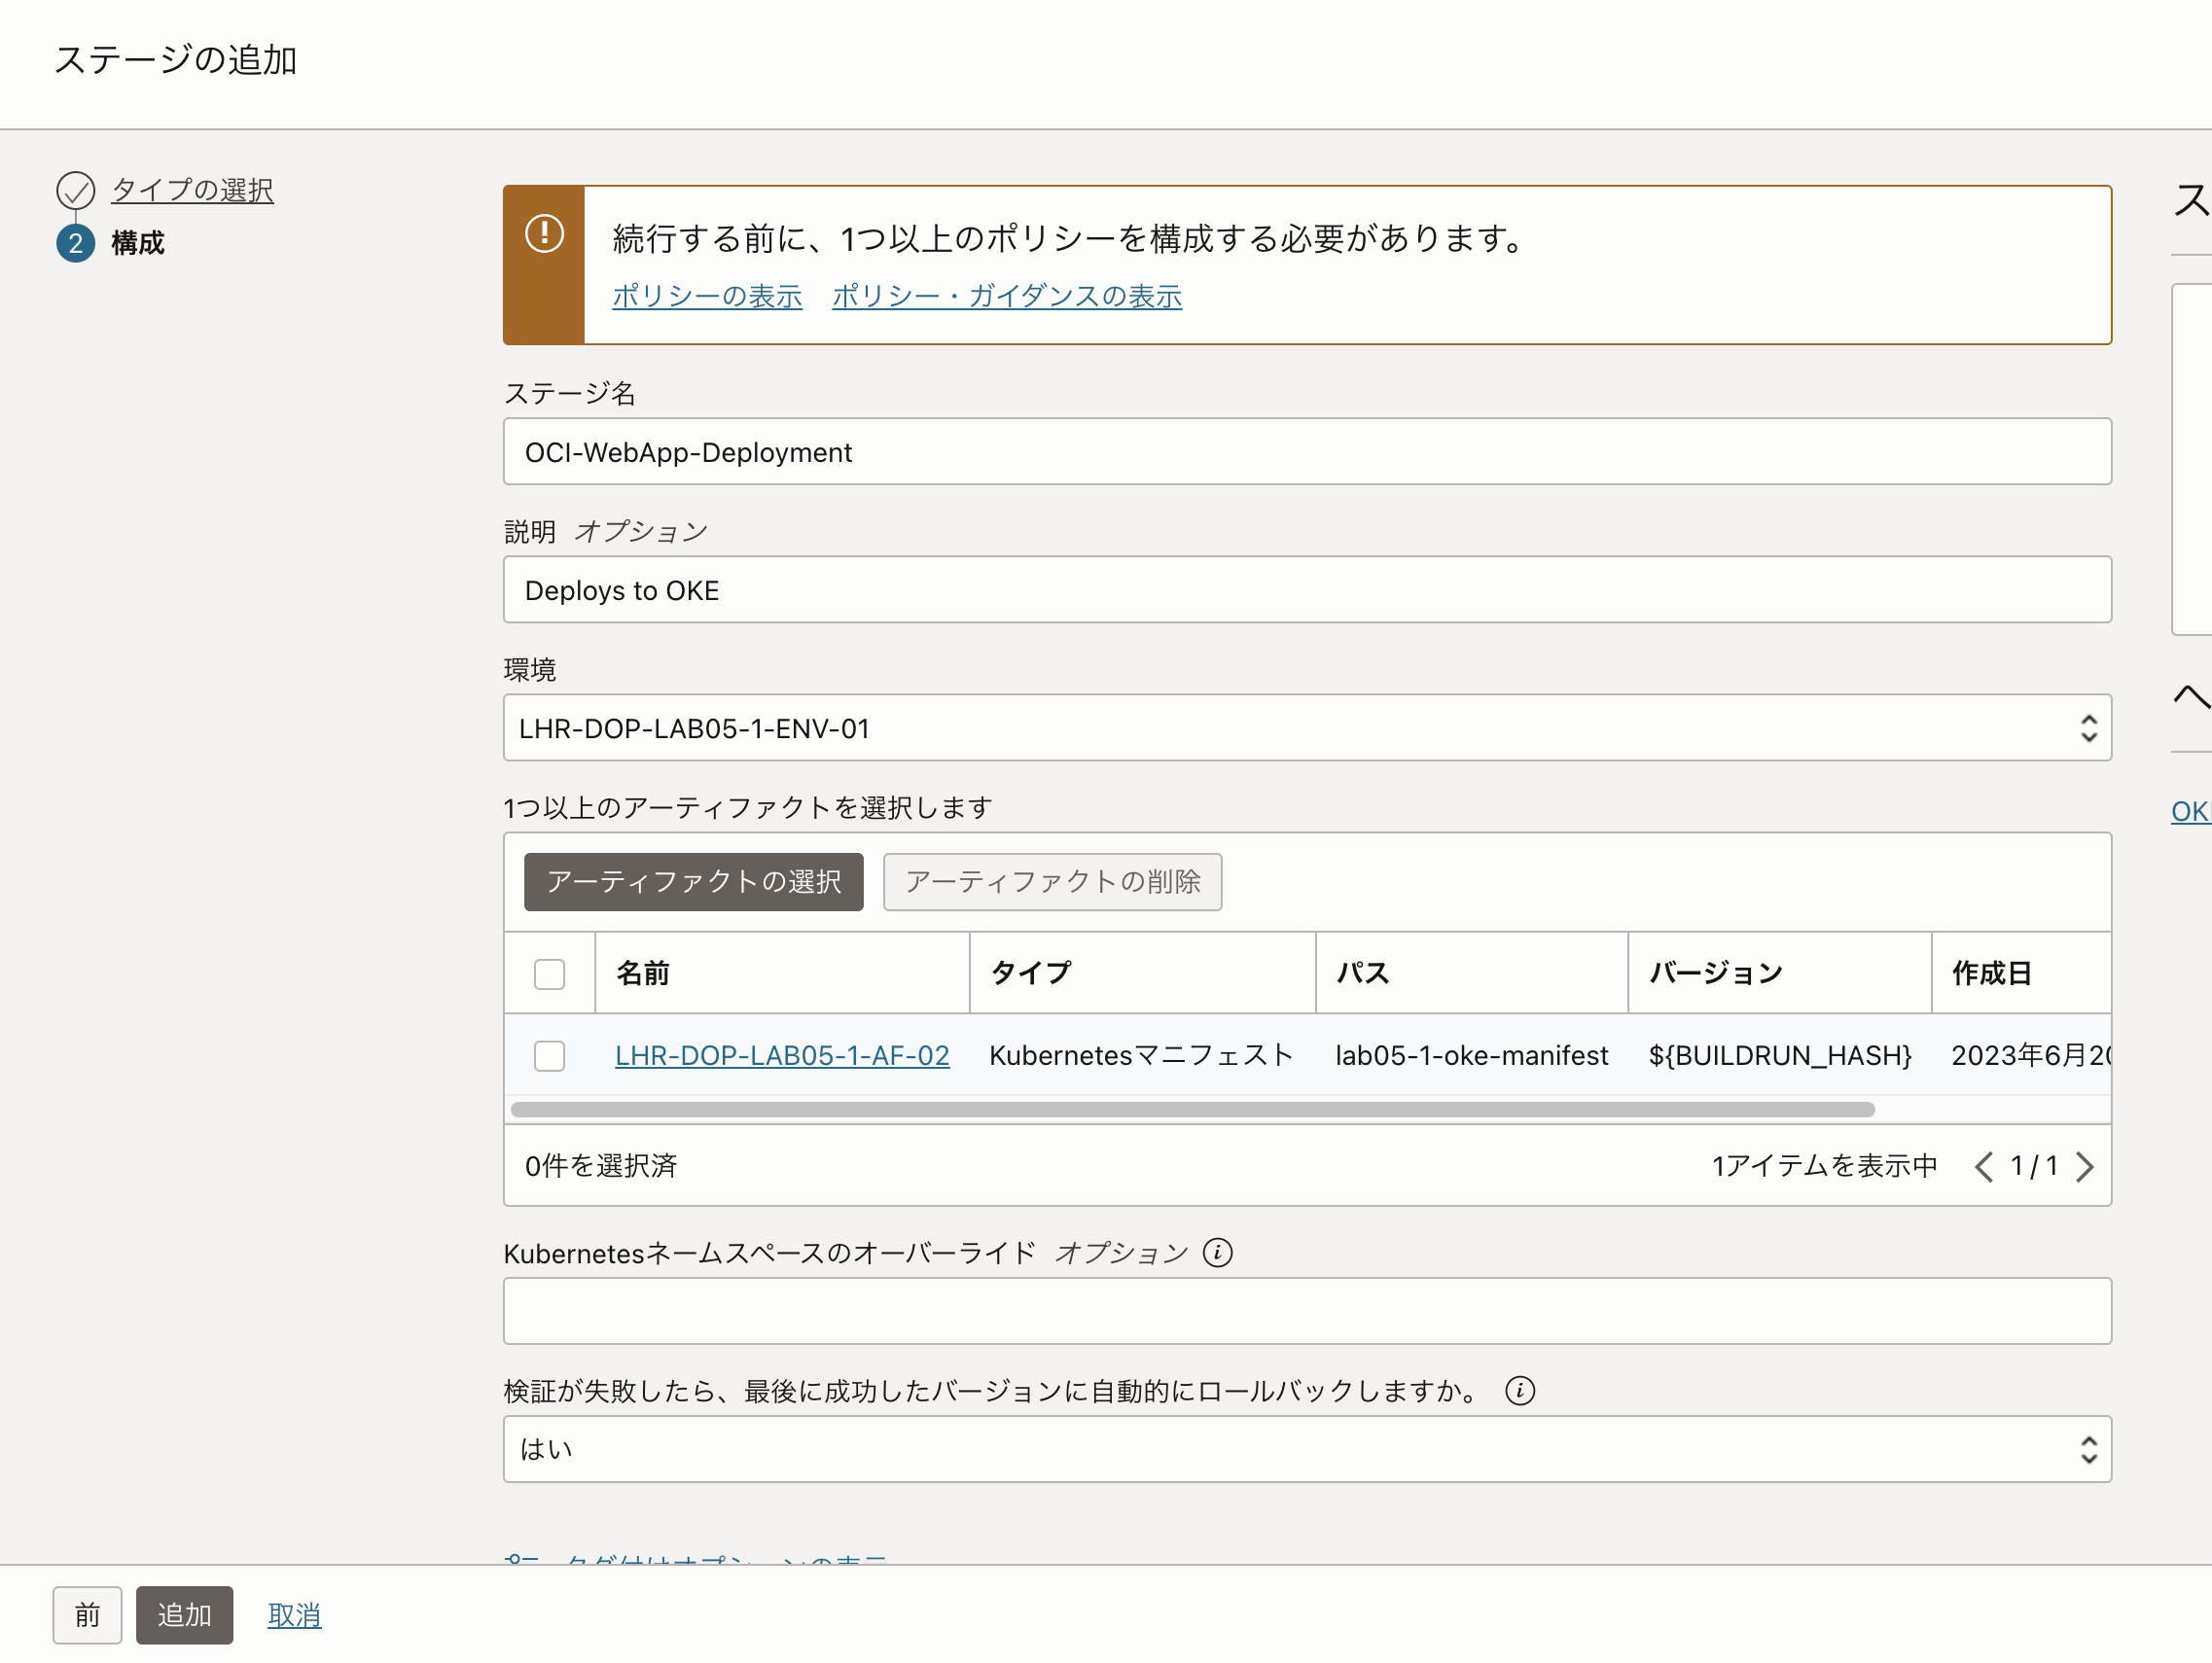
このような画面になります。
Trigger Deployment Stageの作成
ビルド・パイプラインに戻って、デプロイメント・パイプラインをキックするトリガーを追加します。
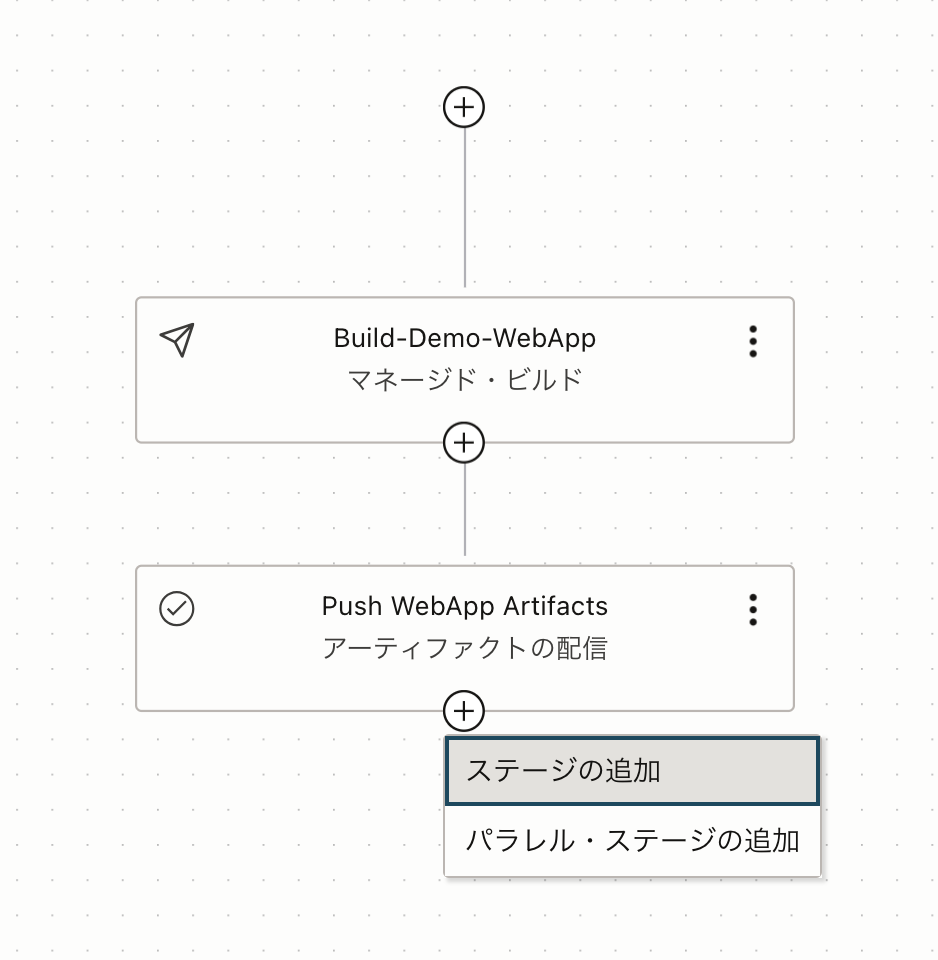
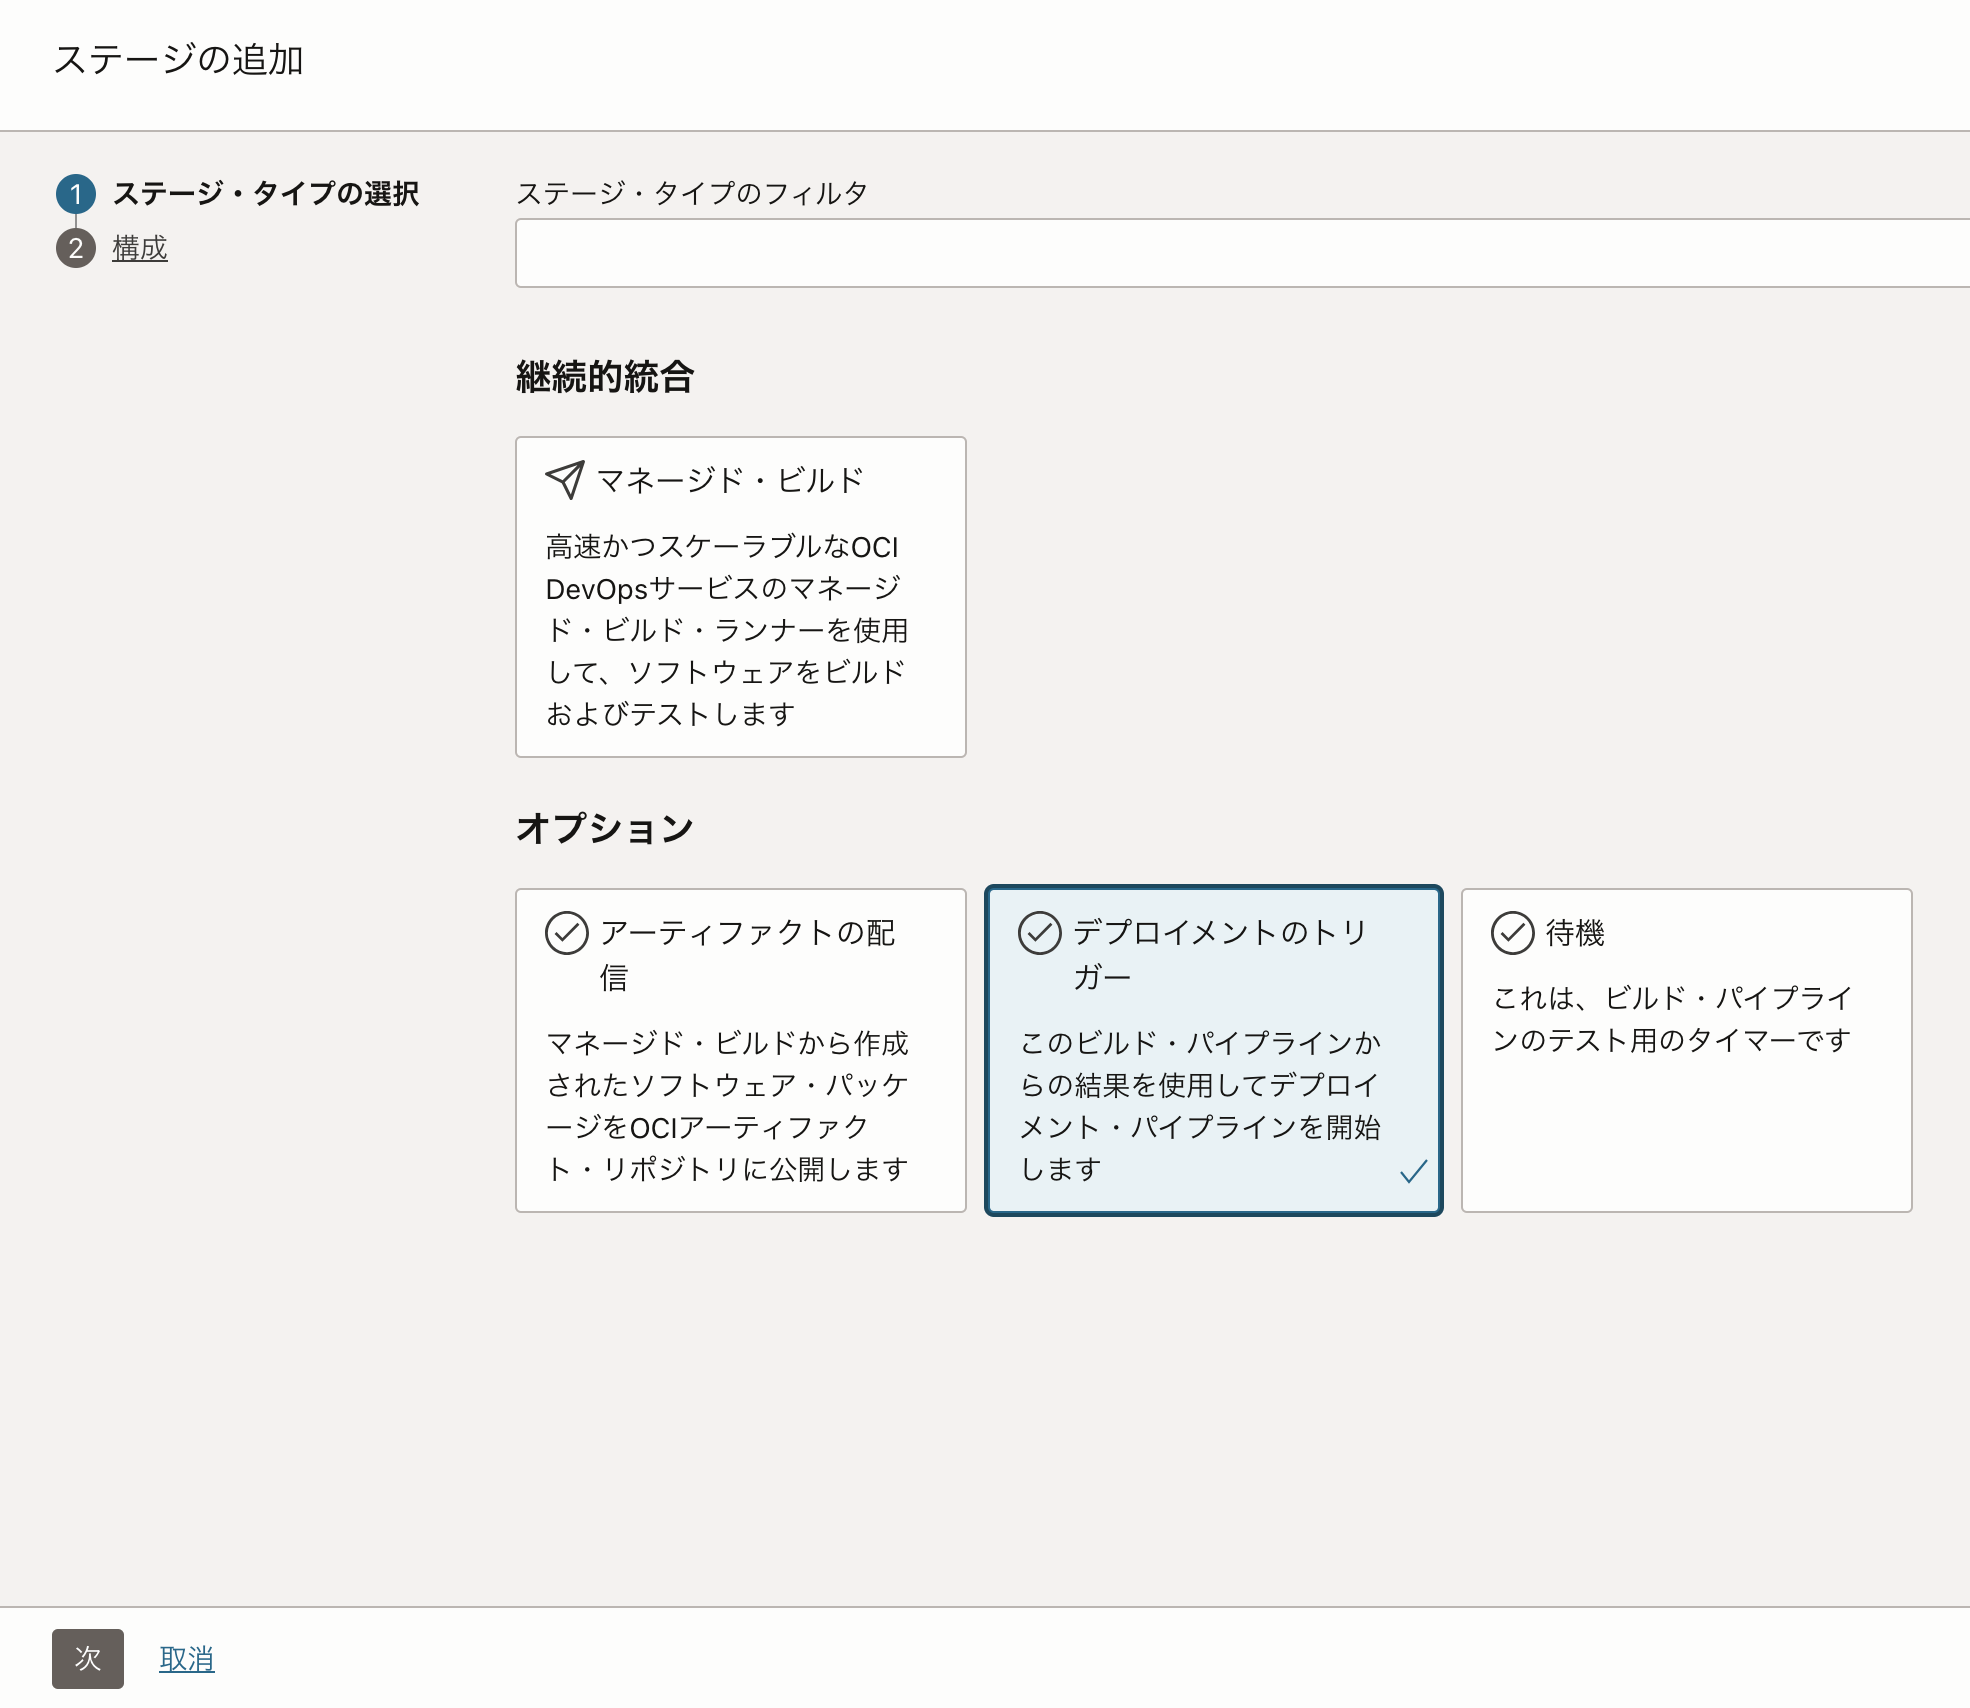
デプロイメントのトリガーを選択します。
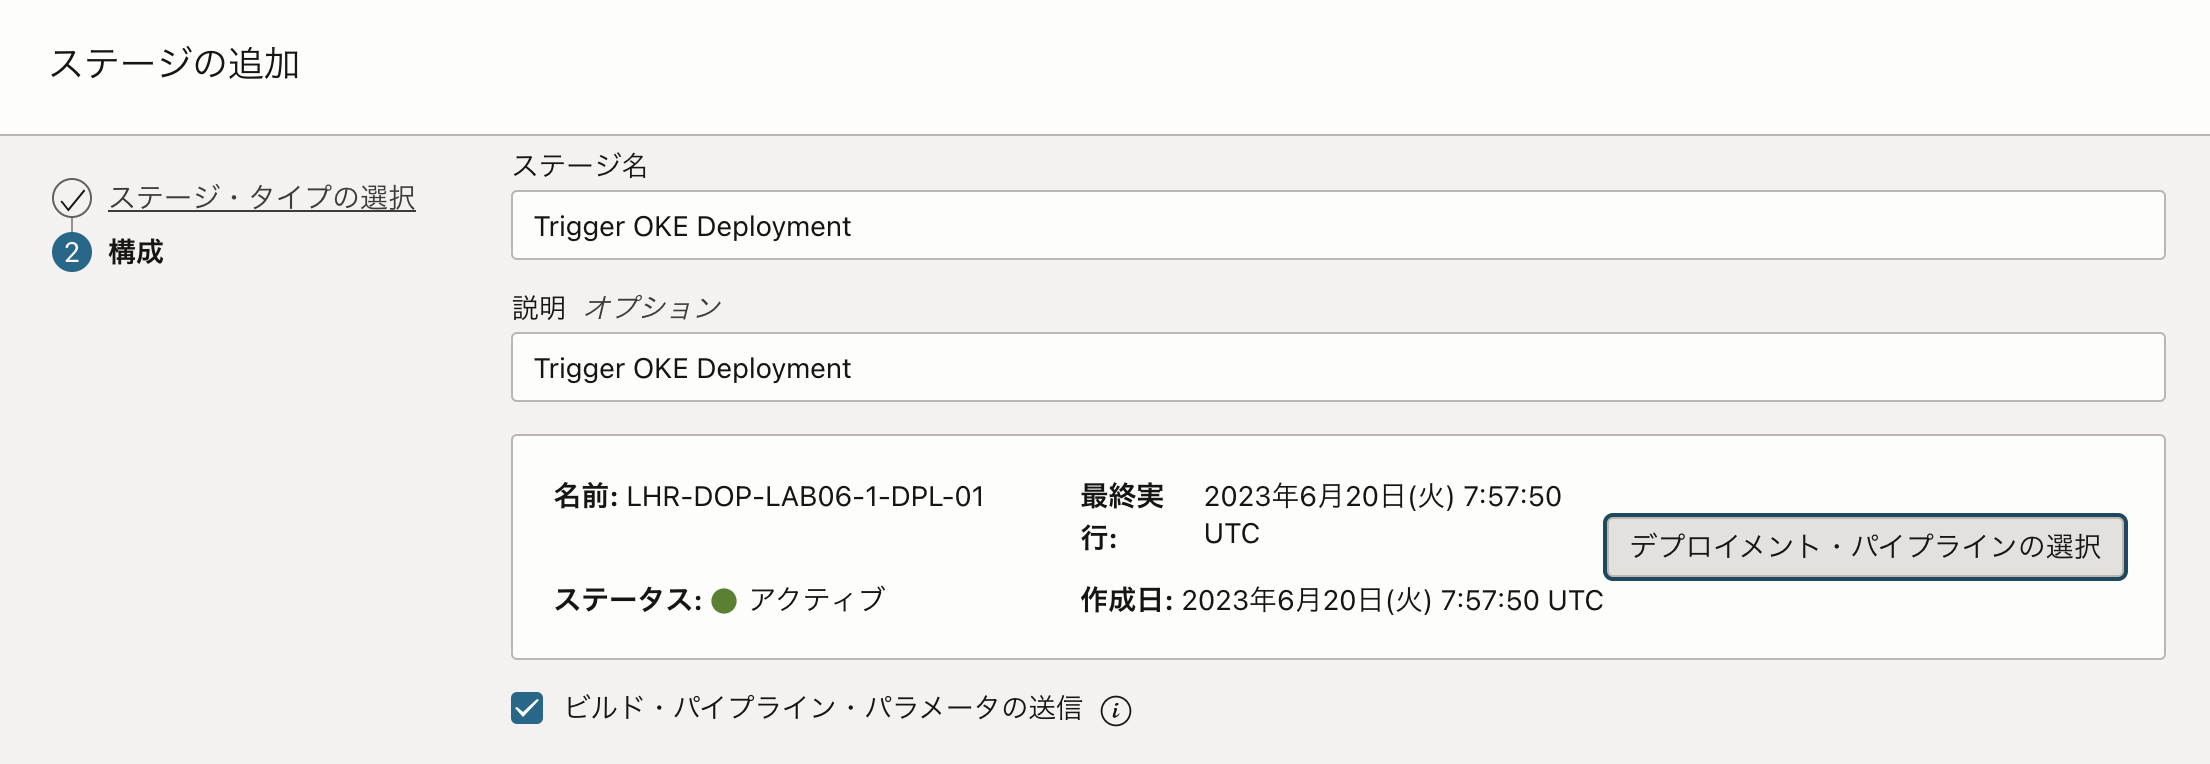
先ほど作成したデプロイメント・パイプラインを選択します。
このようにビルド・パイプラインは3つのステージで構成されています。

Pipelineの実行
設定したパイプラインを実行します。
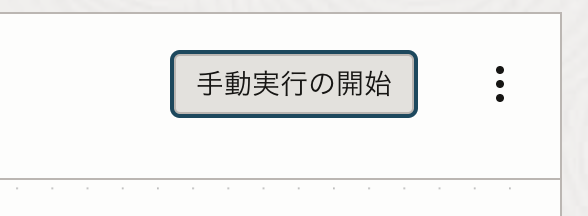
ビルド・パイプラインの画面から手動実行の開始をクリックします。
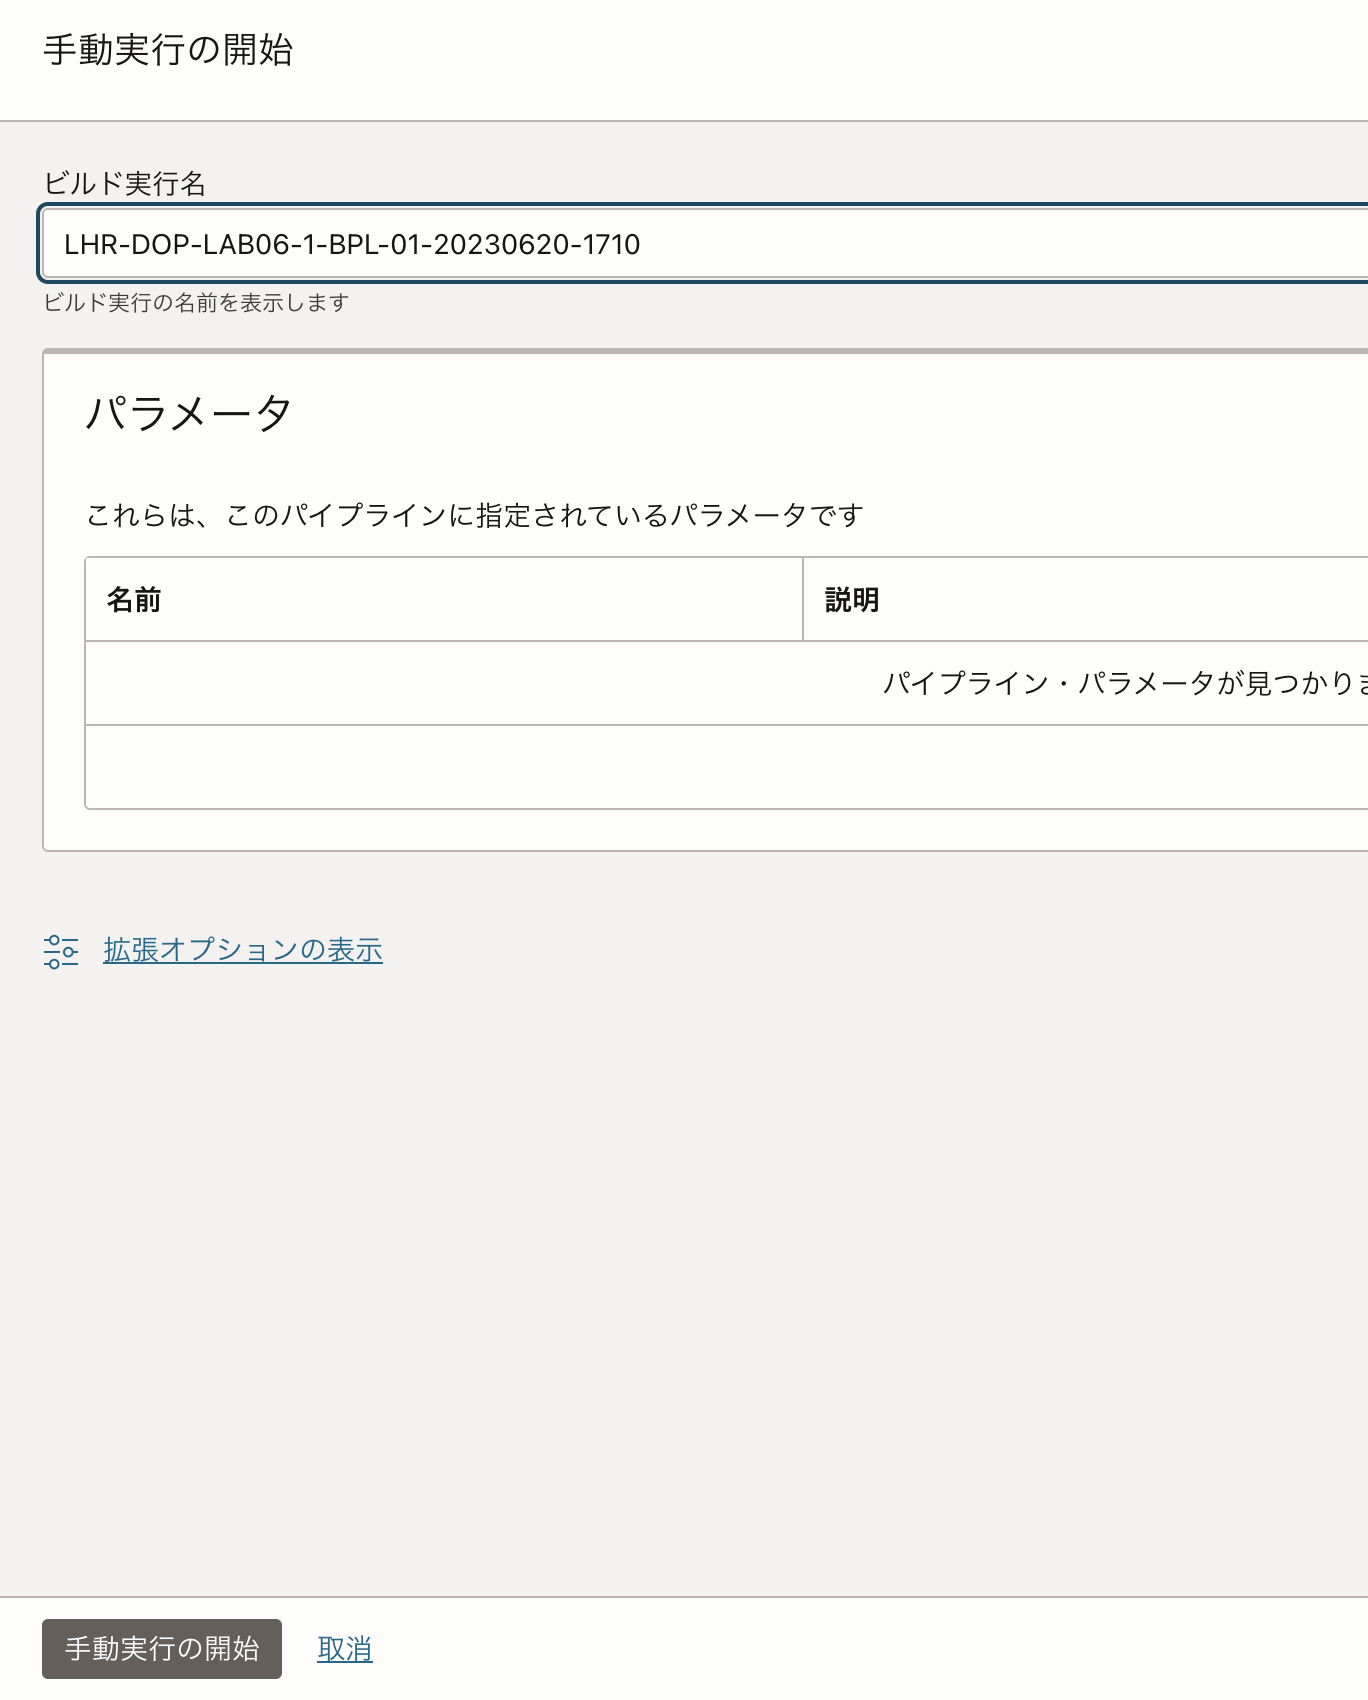
パイプラインを実行すると、以下のように実行中の様子がコンソールに表示されます。
パイプラインが完了すると、以下のようになってログが確認できます。
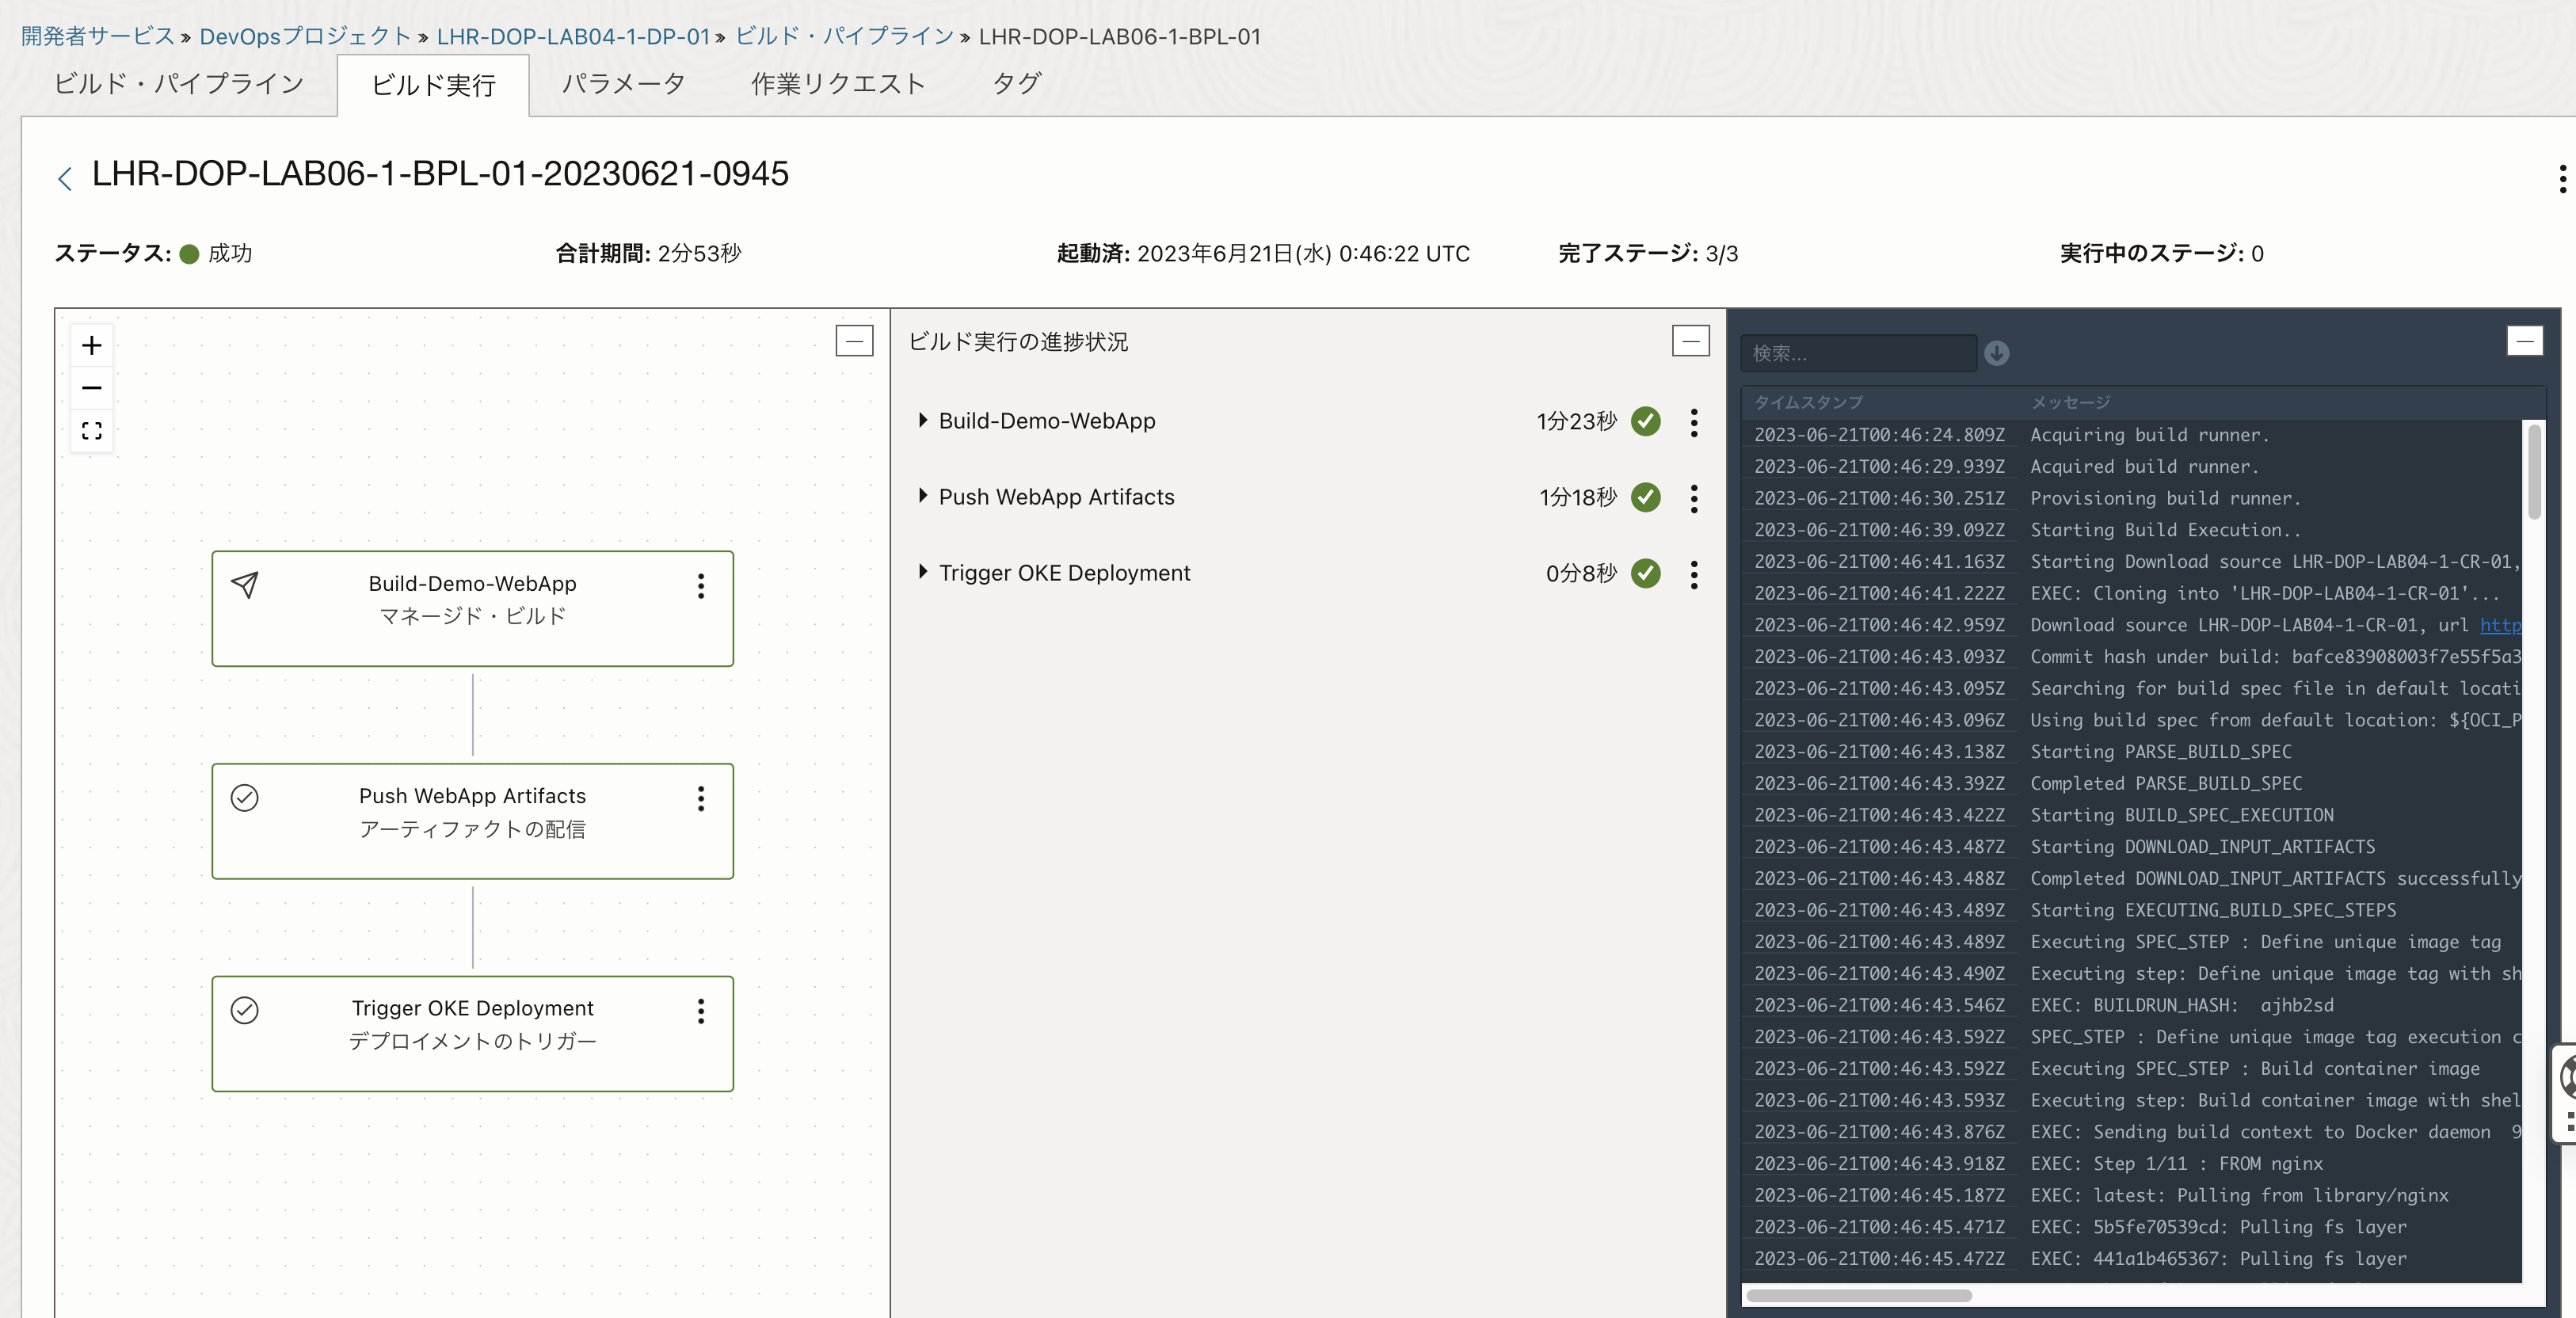
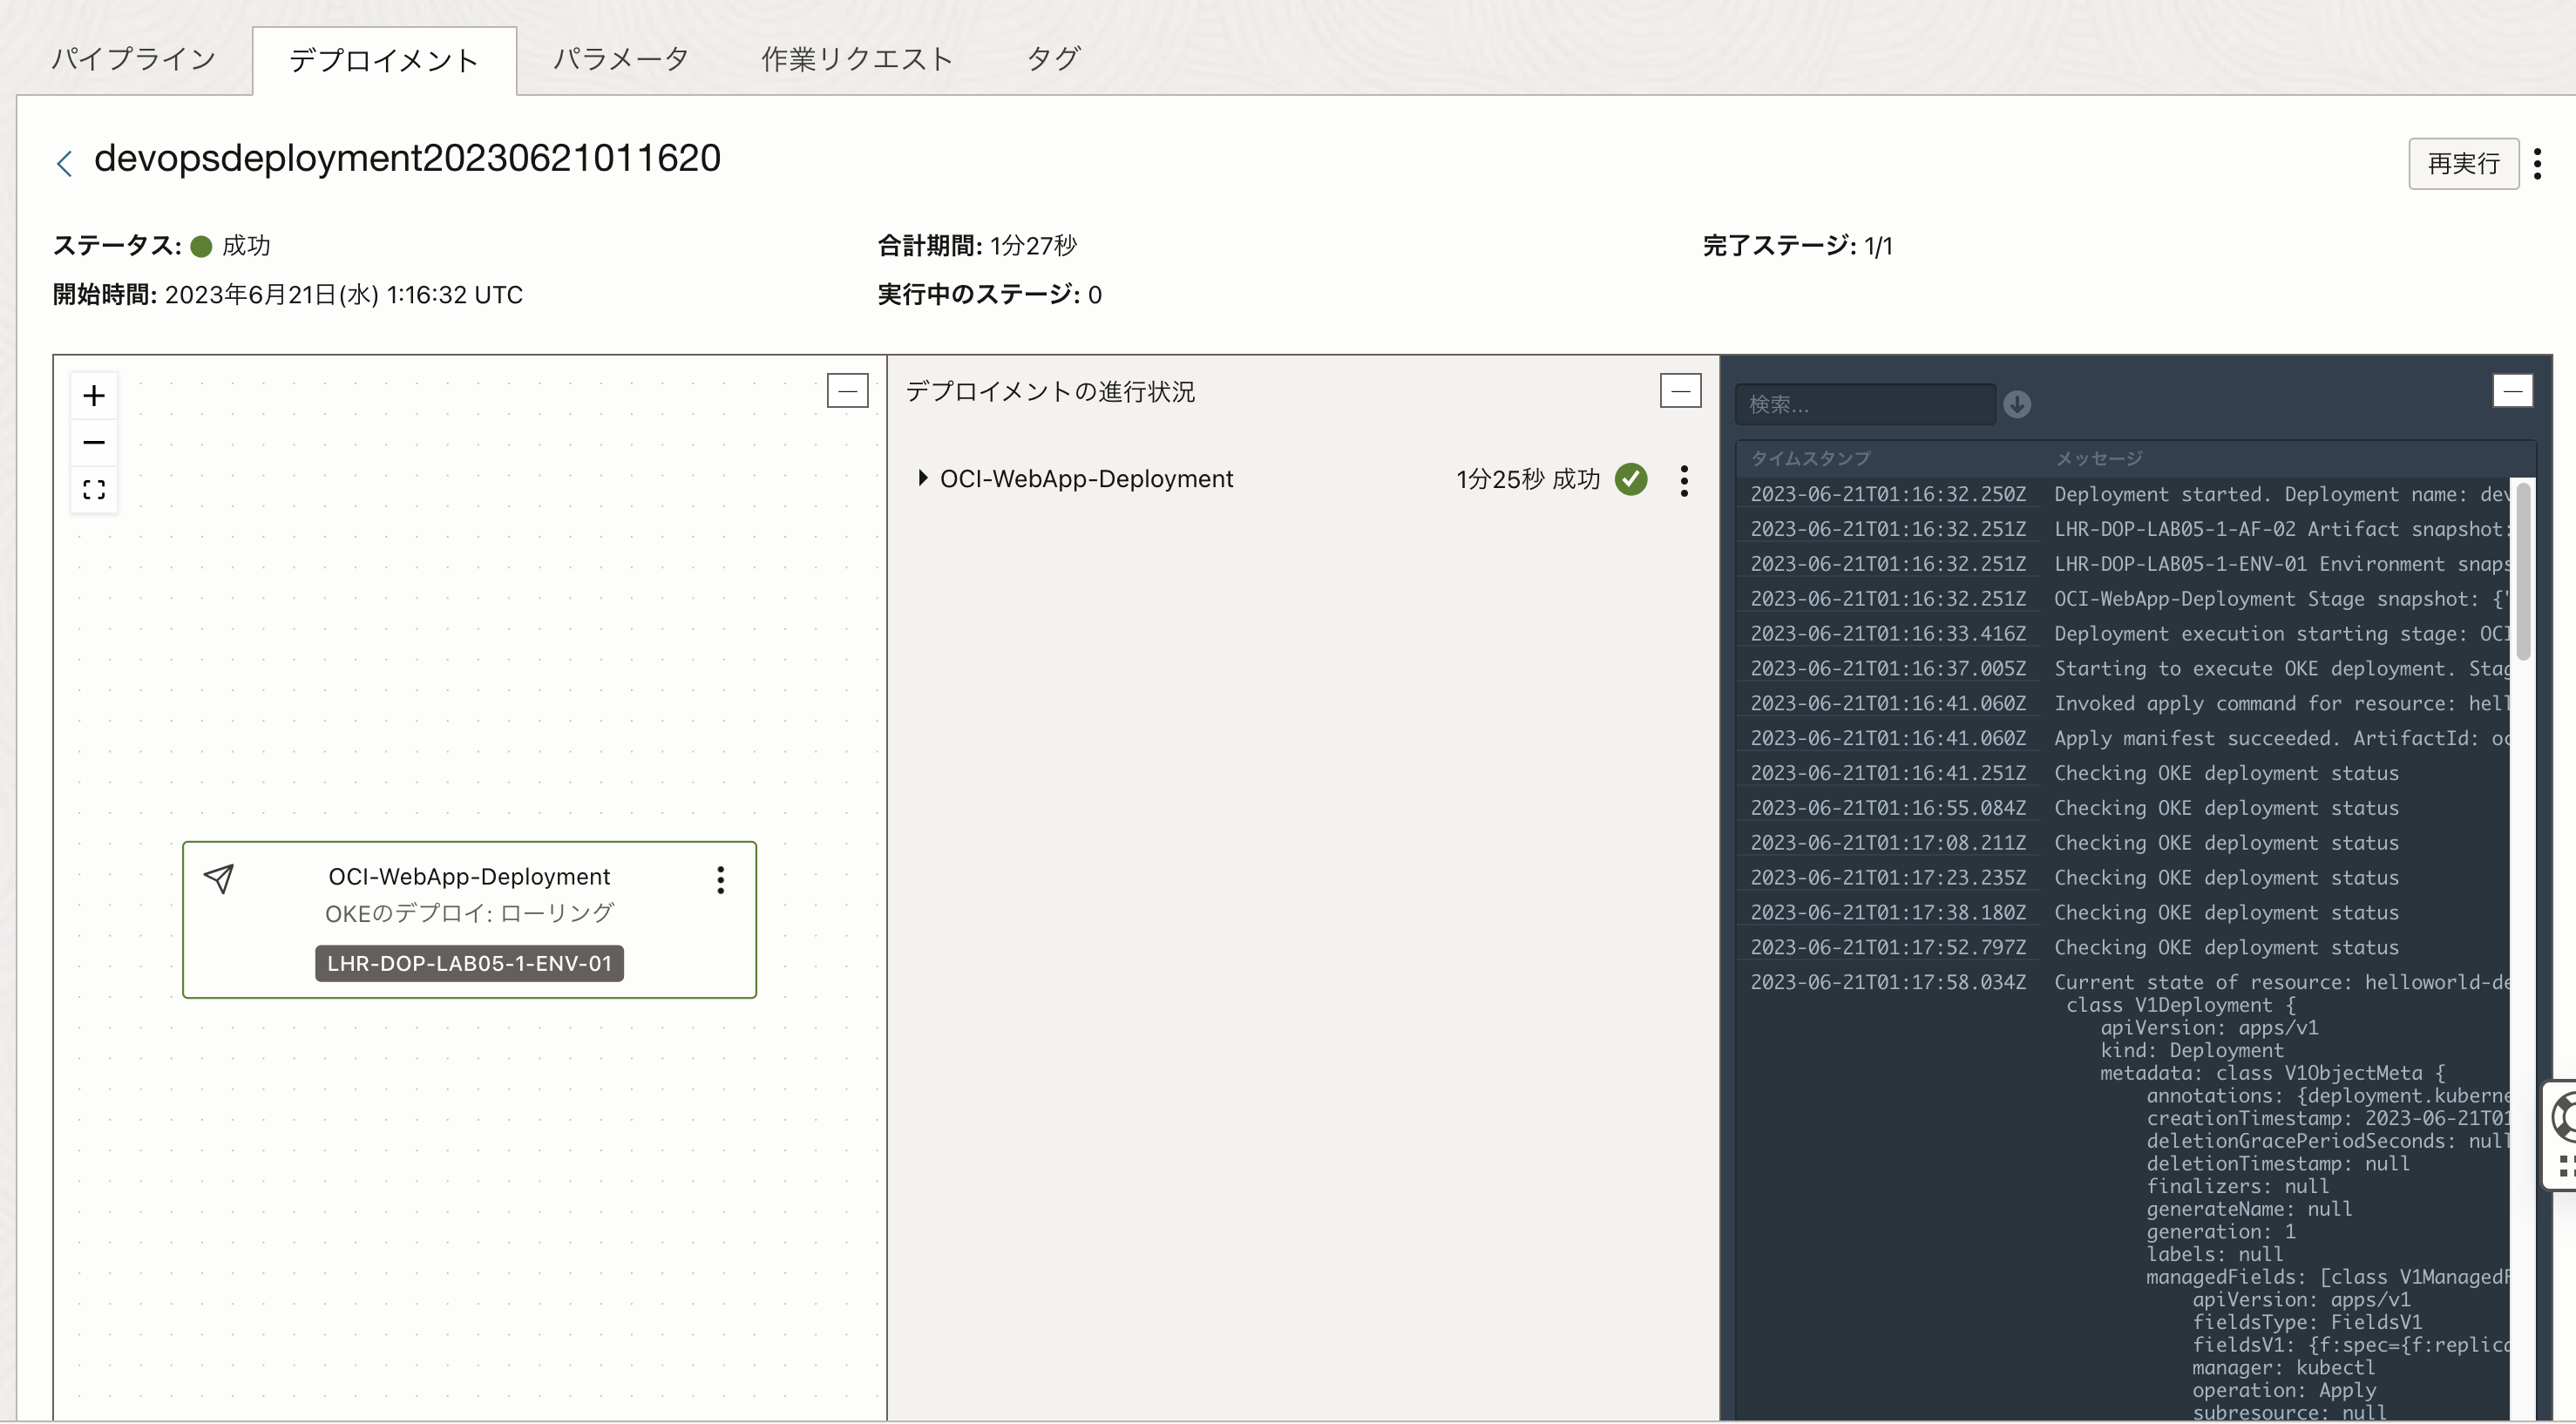
ビルド・パイプラインが完了すると、そのままデプロイメント・パイプラインが実行されます。
ちなみに、ビルド・パイプラインは1回で成功したのですが、デプロイメントは3回失敗して、4回目で成功しました。(ポリシーの設定が抜けていたり、namespaceの設定が間違っていたりしました)
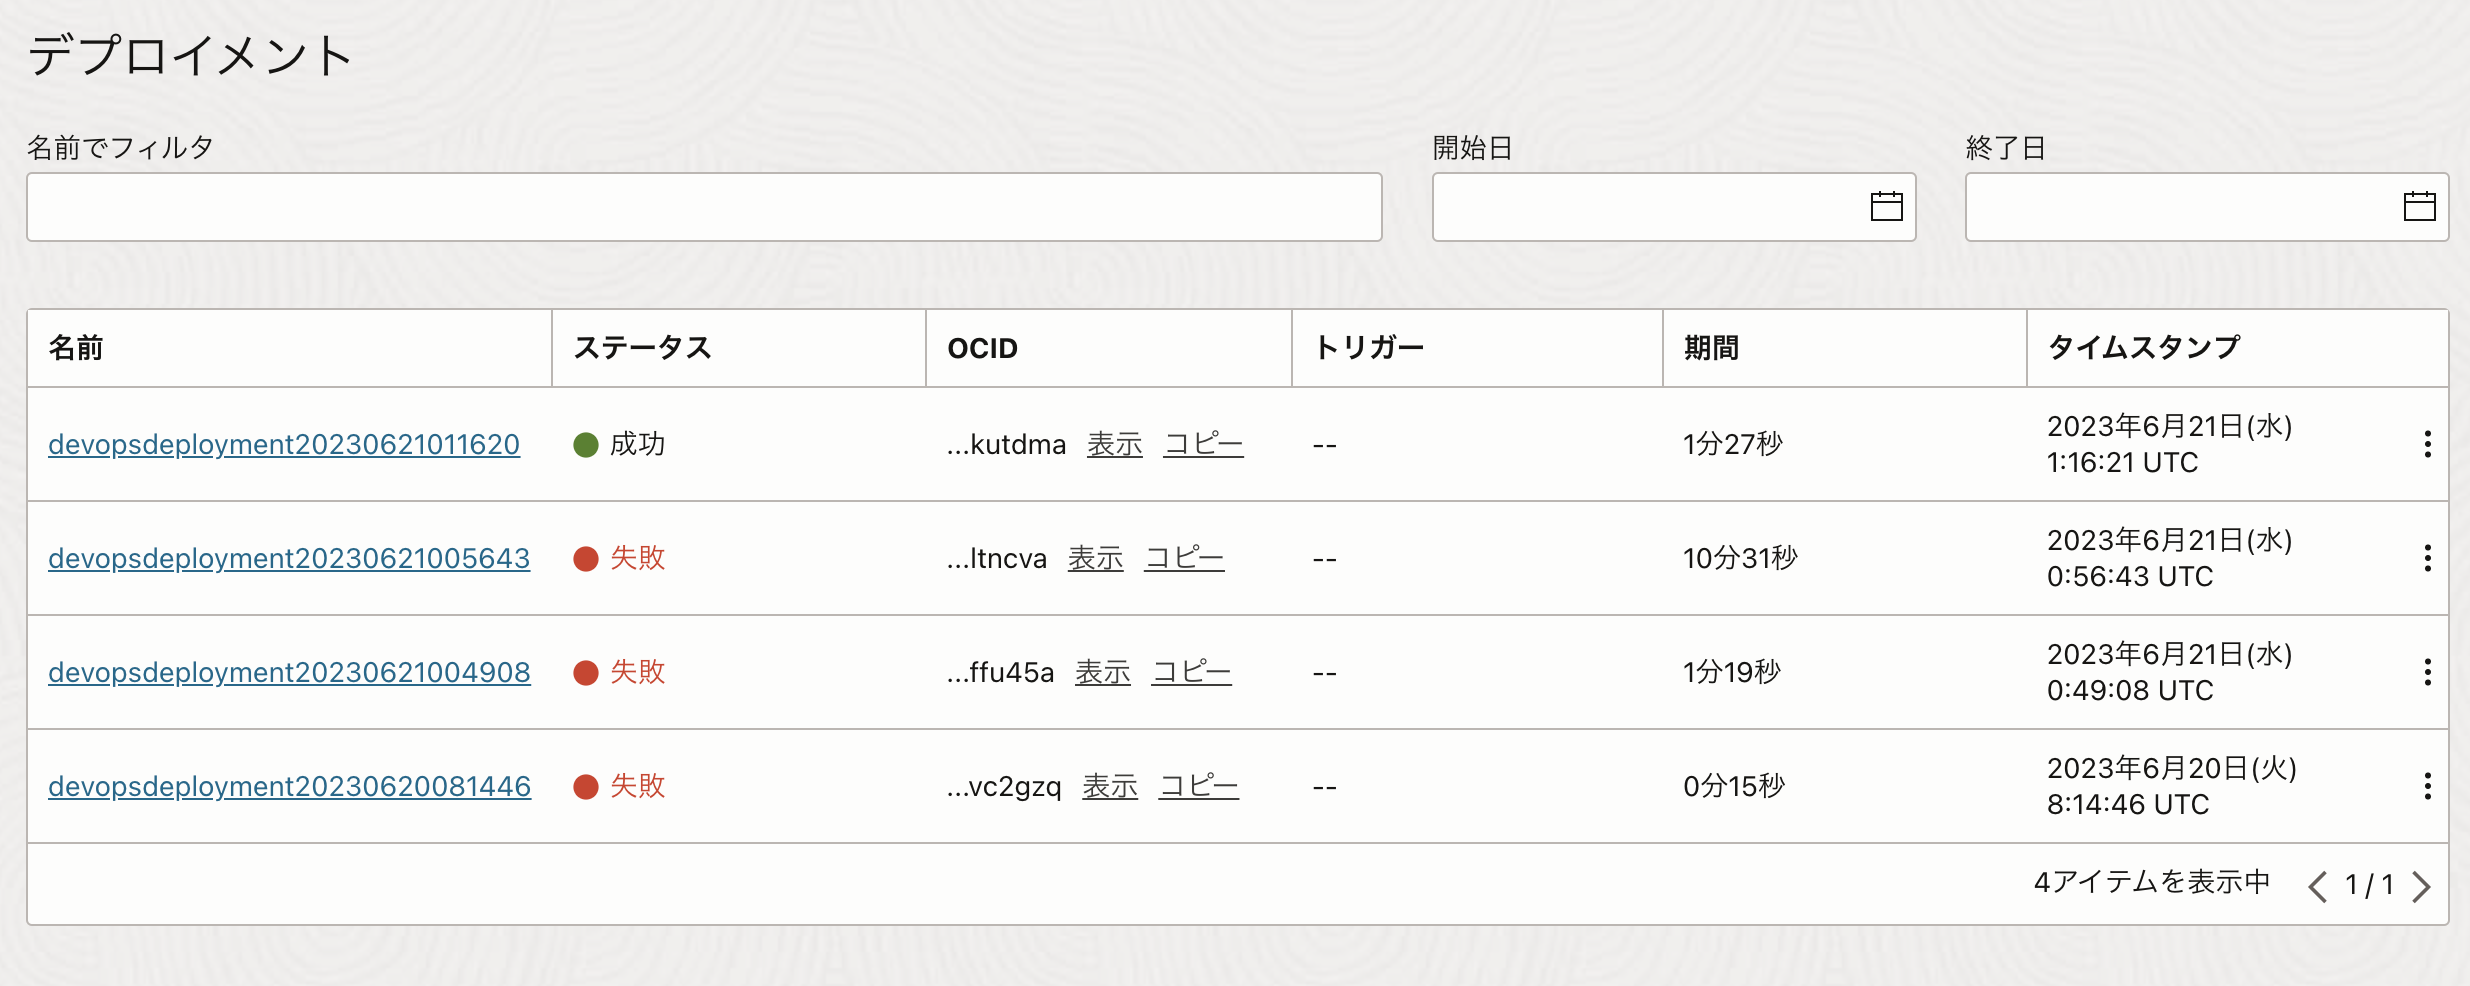
失敗した場合はこの画面でログを確認して修正します。成功した場合のログももちろん確認できます。
Podがデプロイされていることも確認できます。
$ k get pod
NAME                                        READY   STATUS    RESTARTS   AGE
helloworld-deployment-01-656885b4bb-b9lz8   1/1     Running   0          10m
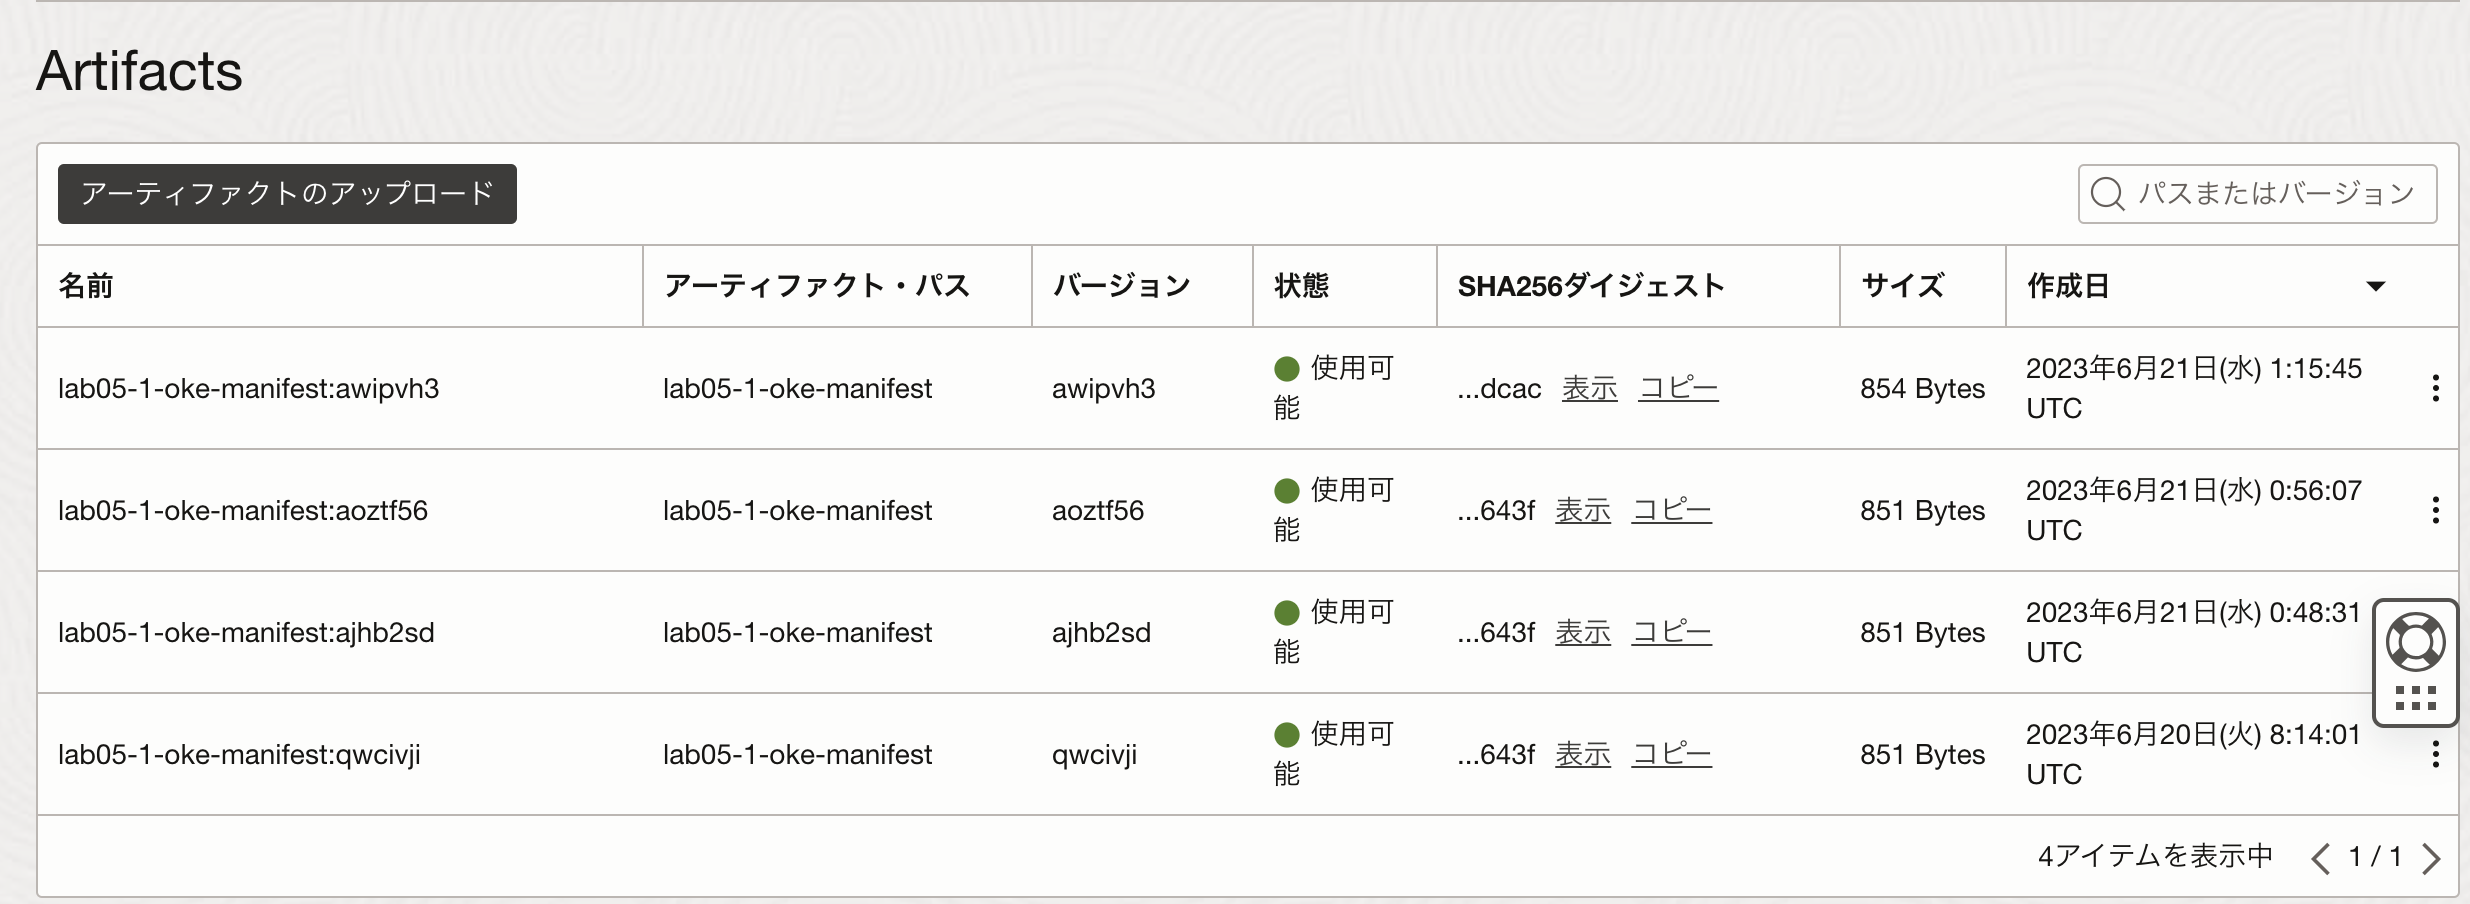
Buildイメージの確認
パイプライン実行でBuildしたアーティファクトを確認します。
ビルド・パイプラインは4回実行していますので、4つずつあります。タグやバージョンがBuild時のHASH値になっていることも確認できます。