はじめに
これは前回ーその1の続きです。
また今回も長々と書いていきますのでよろしくお願いします😃
開発環境
- iMac 2019
- Android studio Arctic Fox | 2020.3.1
- Kotlin Jetpack compose 1.0.0-rc02(正式リリースの可能性あり)
画面操作
clickable
clickableを使用すると、タップ操作を検知できます。
色々なオブジェクトにボタンのような機能を持たせることが可能です。
各オブジェクトのModifierに設定します。
@Composable
fun TapGesture(){
    var count by remember { mutableStateOf(0)}
    Box(
        modifier = Modifier.fillMaxSize(),
        contentAlignment = Alignment.Center
    ) {
        Text(
            text = count.toString(),
            modifier = Modifier
                .width(100.dp)
                .height(100.dp)
                .background(color = Color.Green)
                .clickable {
                    //クリックした時にしたい処理をここに書く
                    count += 1
                },
            fontSize = 70.sp,
            textAlign = TextAlign.Center,

        )
    }
}
pointerInput
clickableは1クリックのみでしたが、pointerInputを使用すると、ワンクリック、ダブルクリック、長押し、ジェスチャー開始の4つを指定することが可能です。
@Composable
fun TapGesture(){
    var TapState by remember { mutableStateOf("") }
    Column(
        modifier = Modifier.fillMaxSize(),
        verticalArrangement = Arrangement.Center,
        horizontalAlignment = Alignment.CenterHorizontally
    ) {
        Text(
            text = TapState,
            fontSize = 50.sp
        )
        Text(
            text = "Click",
            modifier = Modifier
                .pointerInput(Unit){
                    detectTapGestures(
                        onPress = { TapState = "onPress"},
                        onDoubleTap = { TapState = "onDoubleTap" },
                        onLongPress = { TapState = "onLongPress" },
                        onTap = { TapState = "onTap" }
                    )
                } ,
            fontSize = 50.sp
        )
    }
}
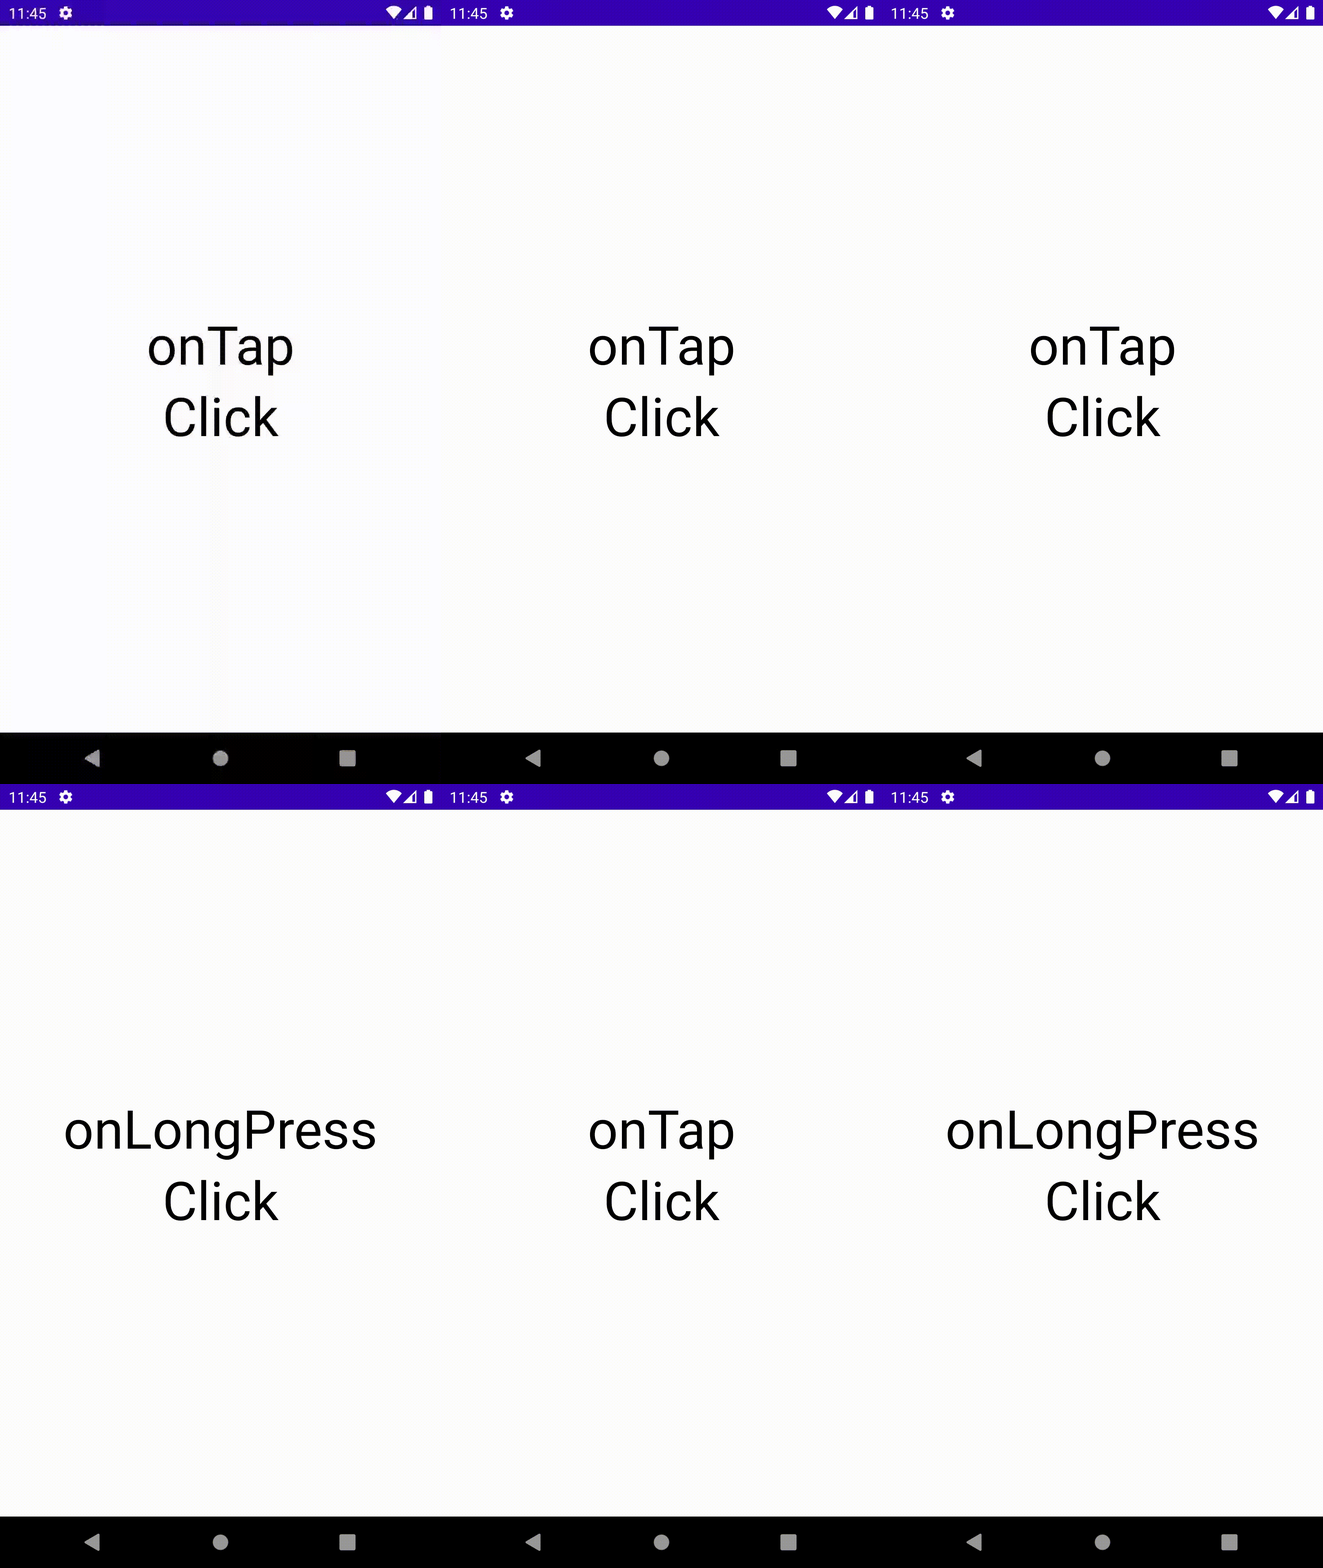
結果
 押したかどうかわかりにくいですが、ダブルタップ、長押し、タップ全ての動作の前にOnPressが呼び出されています。
スクロール
※アイテムのリストを表示する場合はLazyColumn,LazyRowを使用する方が効率が良いみたいです。後述します。
Scroll修飾子
ColumnやRowで画面がはみ出る時、それぞれのModifierに指定します。
@Composable
fun ScrollBoxes() {
    Column(
        modifier = Modifier
            .fillMaxSize()
    )
    {
        Text("縦スクロール",fontSize = 20.sp)
        Column(
            modifier = Modifier
                .background(Color.LightGray)
                .fillMaxWidth()
                .height(200.dp)
                .verticalScroll(rememberScrollState()),
            verticalArrangement = Arrangement.Center,
            horizontalAlignment = Alignment.CenterHorizontally
        )
        {
            repeat(100) {
                Text(
                    "Item $it",
                    modifier = Modifier.padding(2.dp),
                    fontSize = 30.sp
                )
            }
        }
        Text("横スクロール",fontSize = 20.sp)
        Row(
            modifier = Modifier
                .background(Color.LightGray)
                .fillMaxHeight()
                .width(200.dp)
                .horizontalScroll(rememberScrollState()),
            verticalAlignment = Alignment.CenterVertically,
            horizontalArrangement = Arrangement.Center
        )
        {
            repeat(100) {
                Text(
                    "Item $it",
                    modifier = Modifier.padding(2.dp),
                    fontSize = 30.sp
                )
            }
        }
    }
}
Scrollable修飾子
scroll修飾子との違いは、Scrollableはスクロール自体は検出しますが、そのコンテンツ自体のオフセット値は変更しないということです。ドキュメントを読んでもいまいち用途がわからなかったので割愛します。
スクロールのネスト
外側では縦スクロール、内側では横スクロールを使いたい場合がよくあると思います。
そんな時もJetpack Composeなら簡単にできます。
@Composable
fun NestedScroll(){
    val gradient = Brush.verticalGradient(0f to Color.Gray, 1000f to Color.White)
    Box(
        modifier = Modifier
            .background(Color.LightGray)
            .verticalScroll(rememberScrollState())
            .padding(32.dp)
            .width(100.dp)
    ) {
        Column {
            repeat(100) {
                Box(
                    modifier = Modifier
                        .height(75.dp)
                        //.verticalScroll(rememberScrollState())
                        .horizontalScroll(rememberScrollState())
                ) {
                    Text(
                        "Scroll here",
                        modifier = Modifier
                            .border(12.dp, Color.DarkGray)
                            .background(brush = gradient)
                            .padding(24.dp)
                            .width(200.dp)
                    )
                }
            }
        }
    }
}
外側の
Boxは縦スクロール
内側のBoxは横スクロール
ドラッグ
単一方向ドラッグ
@Composable
fun DragTest(){
    var offsetX by remember { mutableStateOf(0f) }  //コンテンツのOffsetを変更する用
    Box(
        modifier = Modifier.fillMaxSize(),
        contentAlignment = Alignment.Center
    ) {
        Text(
            text = "Drag x:${offsetX}",
            modifier = Modifier
                .offset { IntOffset(offsetX.roundToInt(), 0) }
                .draggable(
                    orientation = Orientation.Horizontal,      //ドラッグの方向指定
                    state = rememberDraggableState { delta ->  //値を取得
                        offsetX += delta
                    }
                )
        )
    }
}
.draggableのorientationをOrientation.Verticalに変えると縦方向になる。
結果

双方向ドラッグ
@Composable
fun DragTest(){
    var offsetX by remember { mutableStateOf(0f) }
    var offsetY by remember { mutableStateOf(0f) }
    Box(
        modifier = Modifier.fillMaxSize(),
        contentAlignment = Alignment.TopStart
    ) {
        Text(
            text = "x:${offsetX}\ny:${offsetY}",
            modifier = Modifier
                .offset { IntOffset(offsetX.roundToInt(), offsetY.roundToInt()) }
                .pointerInput(Unit){
                    detectDragGestures { change, dragAmount ->
                        change.consumeAllChanges()
                        offsetX += dragAmount.x
                        offsetY += dragAmount.y
                    }
                }
                .background(Color.Green),
            fontSize = 20.sp
        )
    }
}
pointerInputを使用して、二次元のドラッグ操作を再現することができる。
スワイプ
スワイプ操作は使用する場面が多いと思います。
スワイプして閉じる、スワイプして更新する...etc
@ExperimentalMaterialApi
@Composable
fun SwipeableSample() {
    val width = 288.dp
    val squareSize = 48.dp

    val swipeableState = rememberSwipeableState(0)
    val sizePx = with(LocalDensity.current) { squareSize.toPx() }
    val anchors = mapOf(0f to 0, sizePx * 5 to 1) //初期の位置から、スワイプ後の位置を指定する

    Column(
        Modifier.fillMaxSize(),
        verticalArrangement = Arrangement.Center,
        horizontalAlignment = Alignment.CenterHorizontally
    ) {
        Box(
            modifier = Modifier
                .width(width)
                .swipeable(
                    state = swipeableState,
                    anchors = anchors,
                    thresholds = { _, _ -> FractionalThreshold(0.3f) },
                    orientation = Orientation.Horizontal
                )
                .background(Color.LightGray)
        ) {
            Box(
                Modifier
                    .offset { IntOffset(swipeableState.offset.value.roundToInt(), 0) }
                    .size(squareSize)
                    .background(Color.DarkGray)
            )
        }
    }
}
今回は以上になります。ありがとうございました。


