#はじめに
久しぶりにAndroidアプリの手入れをしたらJetpackComposeの仕様がかなり変わっていたので備忘録として記事にします。
まだ正式にリリースされたわけではなく、変更があるかもしれませんのでご注意ください。
公式ドキュメントを軽くまとめたものになります。
その2←続き
#Jetpack Composeとは
去年か一昨年くらいにAppleからSwiftUIが発表されました。それのAndroid版です。
通常、Androidアプリを作成するときは、xmlファイルとkotlinファイルの2つのファイルを使って作成するかと思いますが、
Jetpack Composeを使用すると、UIの全てをコードで作成することができます。
##開発環境
- iMac 2019
- Android studio Arctic Fox | 2020.3.1
- Kotlin Jetpack compose 1.0.0-rc02(正式リリースの可能性あり)
##基本
class MainActivity : ComponentActivity() {
    override fun onCreate(savedInstanceState: Bundle?) {
        super.onCreate(savedInstanceState)
        setContent {
            Greeting("Android")
        }
    }
}

@Composable
fun Greeting(name: String) {
    Text(text = "Hello $name!")
}

@Preview(showBackground = true)
@Composable
fun DefaultPreview() {
    Greeting("Android")
}
@Composable・・・画面構成に使用する関数全てにつけなければならない (compose=構成する、構図する等の意味があります)
@Preview・・・Android Studio内でプレビューを表示したいときにつける
基本的にはMainActivity内には画面構成のコードを書きません
画面の部品毎にコンポーズ可能な関数(@Composableアノテーション)を作成していきます
今までのJetpackComposeを使ってアプリを作成するとより直感的にデザインすることが可能です
##画面構成
JetpackComposeでは画面は三次元的に捉えることが可能です

このようにColumnは縦方向、Rowは横方向、Boxは奥行きとなっています。
###レイアウトについて
- それぞれの指定可能な引数。 =以降は指定しなかった時の規定値
Column(
  modifier: Modifier = Modifier,
  verticalArrangement: Arrangement.Vertical = Arrangement.Top,
  horizontalAlignment: Alignment.Horizontal = Alignment.Start,
  content: ColumnScope.() -> Unit
){}
Row(
  modifier: Modifier = Modifier,
  horizontalArrangement: Arrangement.Horizontal = Arrangement.Horizontal,
  verticalAlignment: Alignment.Vertical = Alignment.Start,
  content: rowScope.() -> Unit
){}
Box(
  modifier: Modifier = Modifier,
  contentAlignment: Alignment = Alignment.TopStart,
  propagateMinConstraints: Boolean = false,
  content: BoxScope.() -> Unit
){}
ArrangementとAlignmentを指定して、任意の範囲内での配置場所を決定することができます。
BoxのpropagateMinConstraintsはあまりよくわからない。英語の意味的に最小の制約を伝播するという感じ。
動き自体は、左上に固定されるというものでした
Modifierは後述。
これら3つを使用して部品の置く場所などを決めていきます
##Text
###Text
@Composable
fun ExampleText(){
  Text("Hello, JetpackCompose")
}
アプリの文字表示はText()を使用します。

このように普通の文字です
少し深掘りしましょう
Text(
  text: String,
  modifier: Modifier = Modifier,
  color: Color = Color.Unspecified,
  fontSize: TextUnit = TextUnit.Unspecified,
  fontStyle: FontStyle? = null,
  fontFamily: FontFamily? = null,
  letterSpacing: TextUnit = TextUnit.Unspecified,
  textDecoration: TextDecoration? = null,
  textAlign: TextAlign? = null,
  lineHeight: TextUnit = TextUnit.Unspecified,
  overflow: TextOverflow = TextOverflow.Clip,
  softWrap: Boolean = true
  maxLines: Int = Int.MAX_VALUE,
  onTextLayout: (TextLayoutResult) -> Unit = {},
  style: TextStyle = LocalTextStyle.current
)
これだけの引数があり、これらの値をいじってテキストをデザインしていきます。
よく使いそうなものだけ紹介
@Composable
fun ExampleText(){
  Text("Color", color = Color.Red, modifier = Modifier.padding(5.dp))  //色指定 rgbも可→Color(255,0,0)
  Text("fontSize", fontSize = 20.sp, modifier = Modifier.padding(5.dp))  //文字サイズ
  Text("fontStyle", fontStyle = FontStyle.Italic, modifier = Modifier.padding(5.dp))  //文字スタイル
  Text("fontFamily", fontFamily = FontFamily.Cursive, modifier = Modifier.padding(5.dp))  //書式
  Text("1:maxLines\n2:maxLines", maxLines = 1, modifier = Modifier.padding(5.dp))  //行数制限 \n以降が表示されない
}
##TextField
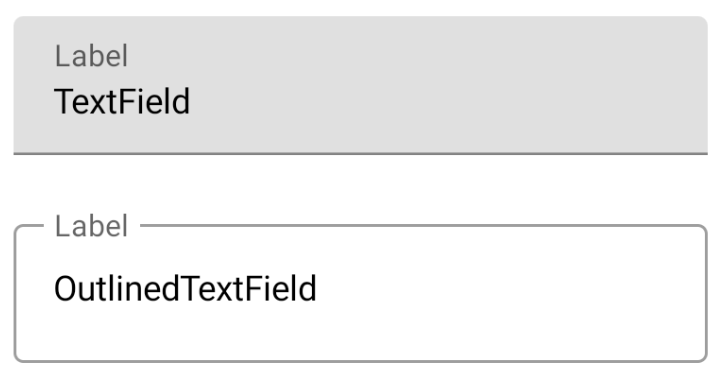
@Composable
fun ExampleTextField(){
    var text1 by remember { mutableStateOf("TextField") }
    var text2 by remember { mutableStateOf("OutlinedTextField") }
    //var text by remember { mutableStateOf("") } ○
    //var text by remember { mutableStateOf(TextFieldValue()) } ○
    //var text = remember { mutableStateOf("") } ○

    TextField(
        value = text1,
        onValueChange = { text1 = it },
        label = { Text("Label") }
    )
    OutlinedTextField(
        value = text2,
        onValueChange = { text2 = it },
        label = { Text("Label") }
    )
}
初期値を空白にしたい場合は**mutableStateOf("")**か、
mutableStateOf(TextFieldValue())にすると初期値が空白になる。両者とも違いはありません。
TextFieldとOutlinedTextFieldは見た目の違いしかありません。
rememberとmutableStateOfに関しては後述。
- 指定可能な引数
TextField(
    value: String,
    onValueChange: (String) -> Unit,
    label: (() -> Unit)? = null,
    modifier: Modifier = Modifier
    enabled: Boolean = true,
    readOnly: Boolean = false,
    textStyle: TextStyle = LocalTextStyle.current,
    placeholder: (() -> Unit)? = null,
    leadingIcon: (() -> Unit)? = null,
    trailingIcon: (() -> Unit)? = null,
    isError: Boolean = false,
    visualTransformation: VisualTransformation = VisualTransformation.None,
    keyboardOptions:KeyboardOptions = KeyboardOption.Default,
    keyboardActions: KeyboardActions = KeyboardActions(),
    singleLine: Boolean = false,
    maxLines: Int = Int.MAX_VALUE,
    interactionSource: MutableInteractionSource = ,
    shape: Shape = ,
    colors: TextFieldColors =
よく使いそうなものだけ紹介
@Composable
fun LoginContent(){
    var mailaddress by remember { mutableStateOf("") }
    var password by remember { mutableStateOf("") }
    val focusManger = LocalFocusManager.current          //returnキーでキーボードを閉じるときに使用

    Column{
        TextField(
            value = mailaddress,
            onValueChange = { mailaddress = it},
            label = { Text("メールアドレス") },
            placeholder = { Text("example@emai.com") },
            modifier = Modifier.padding(10.dp),
            singleLine = true,
            maxLines = 1,
            keyboardOptions = KeyboardOptions(             //キーボードのタイプとチェックマークを押した時のイベント指定
                    keyboardType = KeyboardType.Email,
                    imeAction = ImeAction.Done
            ),
            keyboardActions = KeyboardActions(onDone = {   //キーボードを閉じる操作をする
                focusManager.clearFocus()
            })
        )
        OutlinedTextField(
            value = password,
            onValueChange = { password = it},
            label = { Text("パスワード") },
            placeholder = { Text("8文字以上で英字・数字を含む文字",) },
            modifier = Modifier.padding(10.dp),
            singleLine = true,
            maxLines = 1,
            keyboardOptions = KeyboardOptions(
                    keyboardType = KeyboardType.Password,
                    imeAction = ImeAction.Done
            ),
            keyboardActions = KeyboardActions(onDone = {
                focusManager.clearFocus()
            }),
            visualTransformation = PasswordVisualTransformation()
        )
    }
}
会員制のアプリとかはよくあるパスワードがアスタリスクになる
あとは、キーボードの右下にある完了ボタン?を押すとキーボードが自動で閉じるようにするのもよく使いそうですね
##その他のText
他にも面白い使い方を見つけたので紹介します
一つのTextで複数のスタイルを使用したい時
@Composable
fun MulitipleStylesText(){
    Text(
        buildAnnotatedString {
            withStyle(style = SpanStyle(Color.Blue)){
                append("He")
            }
            append("llo, ")
            withStyle(SpanStyle(Color.Green)){
                append("wor")
            }
            append("ld")
        },
        modifier = Modifier.padding(3.dp)
    )
}
- 選択可能なテキストを使用したい時
fun SelectableText(){
    SelectionContainer(modifier = Modifier.padding(3.dp)){
        Column{
            Text("ここからの文章は")
            Text("ユーザーが選択できる文章です")
            DisableSelection {
                Text("しかし、ここから")
                Text("ここまでの文章は選択できません")
            }
            Text("ここからまた、選択できる文章になりました")
        }
    }
}
##Graphic
Kotlinで図形とかを作成するのがかなり手間だったが、Jetpack Composeではかなり素早く簡単にできます。
- 基本コード
@Composable
fun Graphics(){
    Canvas(modifier = Modifier.fillMaxSize()) {
        val canvasWidth = size.width             //キャンバスの横のサイズ取得
        val canvasHeight = size.height           //キャンバスの縦のサイズ取得
        //最初に描画される
        drawLine(
            start = Offset(x = canvasWidth, y = 0f),   //線の始点
            end = Offset(x = 0f, y = canvasHeight),    //線の終点
            color = Color.Red,                         //線の色
            strokeWidth = 10F                          //線の太さ
        )
        //2番目に描画される
        drawCircle(
            center = Offset(x = canvasWidth/2,y = canvasHeight/2),   //円の中心
            radius = size.minDimension/6,                            //円の半径
            color = Color.Green                                      //円の色
        )
    }
}
グラフィックを扱う際は
Canvasを使用しなければならない
CanvasはX,Y,Zの3次元。上記の場合、線の上に円が被さる
結果

以下は、キャンバスと他のビューを一緒に使う場合。
@Composable
fun MainContent(){
    Box(modifier = Modifier.fillMaxSize()) {
        LoginContent()
        Graphics()
    }
}
@Composable
fun Graphics() {
    Canvas(modifier = Modifier.fillMaxSize()) {
        val canvasWidth = size.width
        val canvasHeight = size.height

        drawLine(
            start = Offset(x = canvasWidth, y = 0f),
            end = Offset(x = 0f, y = canvasHeight),
            color = Color.Red,
            strokeWidth = 10F
        )
        drawCircle(
            center = Offset(x = canvasWidth / 2, y = canvasHeight / 2),
            radius = size.minDimension / 6,
            color = Color.Green
        )
    }
}
@Composable
fun LoginContent(){
    var mailAddress by remember { mutableStateOf("") }
    var password by remember { mutableStateOf("") }
    Column {
        OutlinedTextField(
            value = mailAddress,
            onValueChange = { mailAddress = it },
            label = { Text("メールアドレス") },
            keyboardOptions = KeyboardOptions(keyboardType = KeyboardType.Email),
            modifier = Modifier.padding(3.dp)
        )
        OutlinedTextField(
            value = password,
            onValueChange = { password = it },
            label = { Text("パスワード") },
            visualTransformation = PasswordVisualTransformation(),
            keyboardOptions = KeyboardOptions(keyboardType = KeyboardType.Email),
            modifier = Modifier.padding(3.dp)
        )
    }
}
今回は
Boxを使用しましたが、当然Column、Rowも使用可能
Kotlinでこれを再現するのにどれだけ苦労するのか忘れちゃいましたが(xmlもいじらないといけなかったような)、かなり簡単に思えます。
- 四角の場合
@Composable
fun Graphics(){
    Canvas(modifier = Modifier.fillMaxSize()){
        val canvasWidth = size.width
        val canvasHeight = size.height
        //一番上
        drawRect(
            color = Color.Gray,                      //四角の色
            topLeft = Offset(x = 0F, y = 0F),        //四角の始点(左上)
            size = Size(width = 300F, height = 300F) //四角の大きさ
        )
        //真ん中
        rotate(degrees = 45F) { //45度傾ける
            drawRect(
                color = Color.Blue,
                topLeft = Offset(x = canvasWidth / 2 - 150F, y = canvasHeight / 2 - 250F),
                size = Size(300F, 500F)
            )
        }
        //一番下
        drawRect(
            color = Color.Magenta,
            topLeft = Offset(x = canvasWidth - 300F, y = canvasHeight - 300F),
            size = Size(300F,300F),
            style = Stroke(width = 10F)  //四角形のスタイルを決める
        )
    }
}
rotateを使用して、四角形の中心から傾けさせる。
styleを指定することで枠のみの四角形もできる。指定しないと、規定値のstyl = Fillになる
やはり、より直感的にUIの作成ができます。
##Animation
アプリではかなり重要なアニメーションです。アニメーションの無いアプリはほとんどないでしょう...
今までJetpack Composeはかなり簡素化されてわかりやすいものだったかと思いますが、Animationは結構難しいです。
アニメーションを加えたい場所によって使うものが変わってきます。
Animationの種類
AnimationVisibility(試験運用版)Modifier.animateContentSizeCrossfaderememberInfiniteTransitionupdateTransitionanimte*AsStateAnimationAnimatableAnimationStateanimate
の種類がありました。また、公式ドキュメントには以下のようなフローチャートが紹介されいます。
所々状況が想像できない箇所がありますが、これがあればなんとか使い分けれそうです。
AnimatedVisibility(コンテンツの表示・非表示)
これは試験運用となっておりますので、変更または削除される可能性がありますのでご注意ください
@ExperimentalAnimationApi
@Composable
fun Animation(){
    var isShow by remember { mutableStateOf(false) }
    Column(
        modifier = Modifier.fillMaxSize(),
        verticalArrangement = Arrangement.Center,
        horizontalAlignment = Alignment.CenterHorizontally
        ){
        AnimatedVisibility(
            visible = isShow,
            enter = slideInHorizontally(
                initialOffsetX = {-400}
            ),
            exit = slideOutHorizontally(
                targetOffsetX = {400}
            )
        ) {
            Text("AnimatedVisibility")
        }
        Spacer(modifier = Modifier.padding(10.dp))
        Button(
            onClick = { isShow = !isShow }
        ) {
            Text(if(isShow) "非表示" else "表示")
        }
    }
}
AnimatedVisibilityには
enterとexitを指定する。

enterとexitに指定できるもの
EnterTransition
| オブジェクト名 | 動作 | 引数等 |
|---|---|---|
| fadeIn | フェードイン | fadeIn(initialAlpha = 0.6F) |
| slideIn | 任意の場所からスライドさせて表示 | slideIn(initialOffset = {IntOffset(x: Int, y: Int)}) |
| expandIn | 任意の起点から広がるように表示 | expandIn(expandFrom = Alignment.BottomEnd) |
| expandHorizontally | expandInの横 | expandHorizontally(expandFrom = Alignment.Start, initialWidth = { 100 }) |
| expandVertically | expandInの縦バージョン | expandVertically(expandFrom = Alignment.Bottom, initialHeight = {100}) |
| slideInHorizontally | slideInの横バージョン | slideInHorizontally(initialOffsetX = { -100 }) |
| slideInVertically | slideInの縦バージョン | slideInVertically(initialOffsetY = { - 100 }) |
ExitTransition
| オブジェクト名 | 動作 | 例 |
|---|---|---|
| fadeOut | フェードアウト | fadeOut(initialAlpha = 0.3F) |
| slideOut | 現在の場所から任意の場所へスライドさせて非表示 | slideOut(targetOffset = { IntOffset(x: -100, y:100)}) |
| shrinkOut | 現在の場所から任意のサイズに縮ませながら非表示 | shrinkOut(targetSize = { IntSize(0,0) }) |
| shrinkHorizontally | shrinkOutの横バージョン | shrinkHorizontally(shrinkTowards = Alignment.End, targetWidth = {0}) |
| shrinkVertically | shrinkOutの縦バージョン | shrinkVertically(shrinkTowards = Alignment.Bottom, targetHeight = {0}) |
| slideOutHorizontally | slideOutの横バージョン | slideOutHorizontally(targetOffsetX = {-300}) |
| slideOutVertically | slideOutの縦バージョン | slideOutVertically(targetOffsetY = {-200}) |
※複数合わせて使いたい場合は+でつなげる
exit = fadeOut() + shrinkOut() + ...

animateContentSize(コンテンツのサイズ)
@Composable
fun Animation(){
    var isBig1 by remember { mutableStateOf(false) }
    var isBig2 by remember { mutableStateOf(false) }
    Column() {
        //アニメーションなし
        Text(
            text = "アニメーションなし",
            fontSize = if(isBig1) 35.sp else 20.sp,
            color = Color.White,
            modifier = Modifier
                .background(Color.Blue)
                .padding(5.dp)
        )
        Button(
            onClick = { isBig1 = !isBig1 },
            modifier = Modifier.padding(5.dp)
        ) {
            Text(if(isBig1) "縮小" else "拡大")
        }
        //アニメーションあり
        Text(
            text = "アニメーションあり",
            fontSize = if(isBig2) 35.sp else 20.sp,
            color = Color.White,
            modifier = Modifier
                .background(Color.Blue)
                .padding(5.dp)
                .animateContentSize()              //これを指定する。
        )
        Button(
            onClick = { isBig2 = !isBig2 },
            modifier = Modifier.padding(5.dp)
        ) {
            Text(if(isBig2) "縮小" else "拡大")
        }
    }
}
Crossfade(ページの切り替え等)
@Composable
fun Animation(){
    var currentPage by remember { mutableStateOf("A") }
    Column {
        Text("アニメーションあり")
        Crossfade(targetState = currentPage) { screen ->
            when (screen) {
                "A" -> A()
                "B" -> B()
            }
        }
        Text("アニメーションなし")
        when(currentPage){
            "A" -> A()
            "B" -> B()
        }
        Button(onClick = { currentPage = if(currentPage == "A") "B" else "A" }) {
            Text(text = "切り替え")
        }
    }
}

@Composable
fun A(){
    Box(
        modifier = Modifier
            .height(300.dp)
            .fillMaxWidth()
        ,
        contentAlignment = Alignment.Center
    ) {
        Canvas(modifier = Modifier.fillMaxSize()){
            drawRect(
                color = Color.Red
            )
        }
        Text(
            text = "This page is A",
            color = Color.White
        )
    }
}

@Composable
fun B(){
    Box(
        modifier = Modifier
            .height(300.dp)
            .fillMaxWidth()
        ,
        contentAlignment = Alignment.Center
    ) {
        Canvas(modifier = Modifier.fillMaxSize()){
            drawRect(
                color = Color.Green
            )
        }
        Text(
            text = "This page is B",
            color = Color.White
        )
    }
}

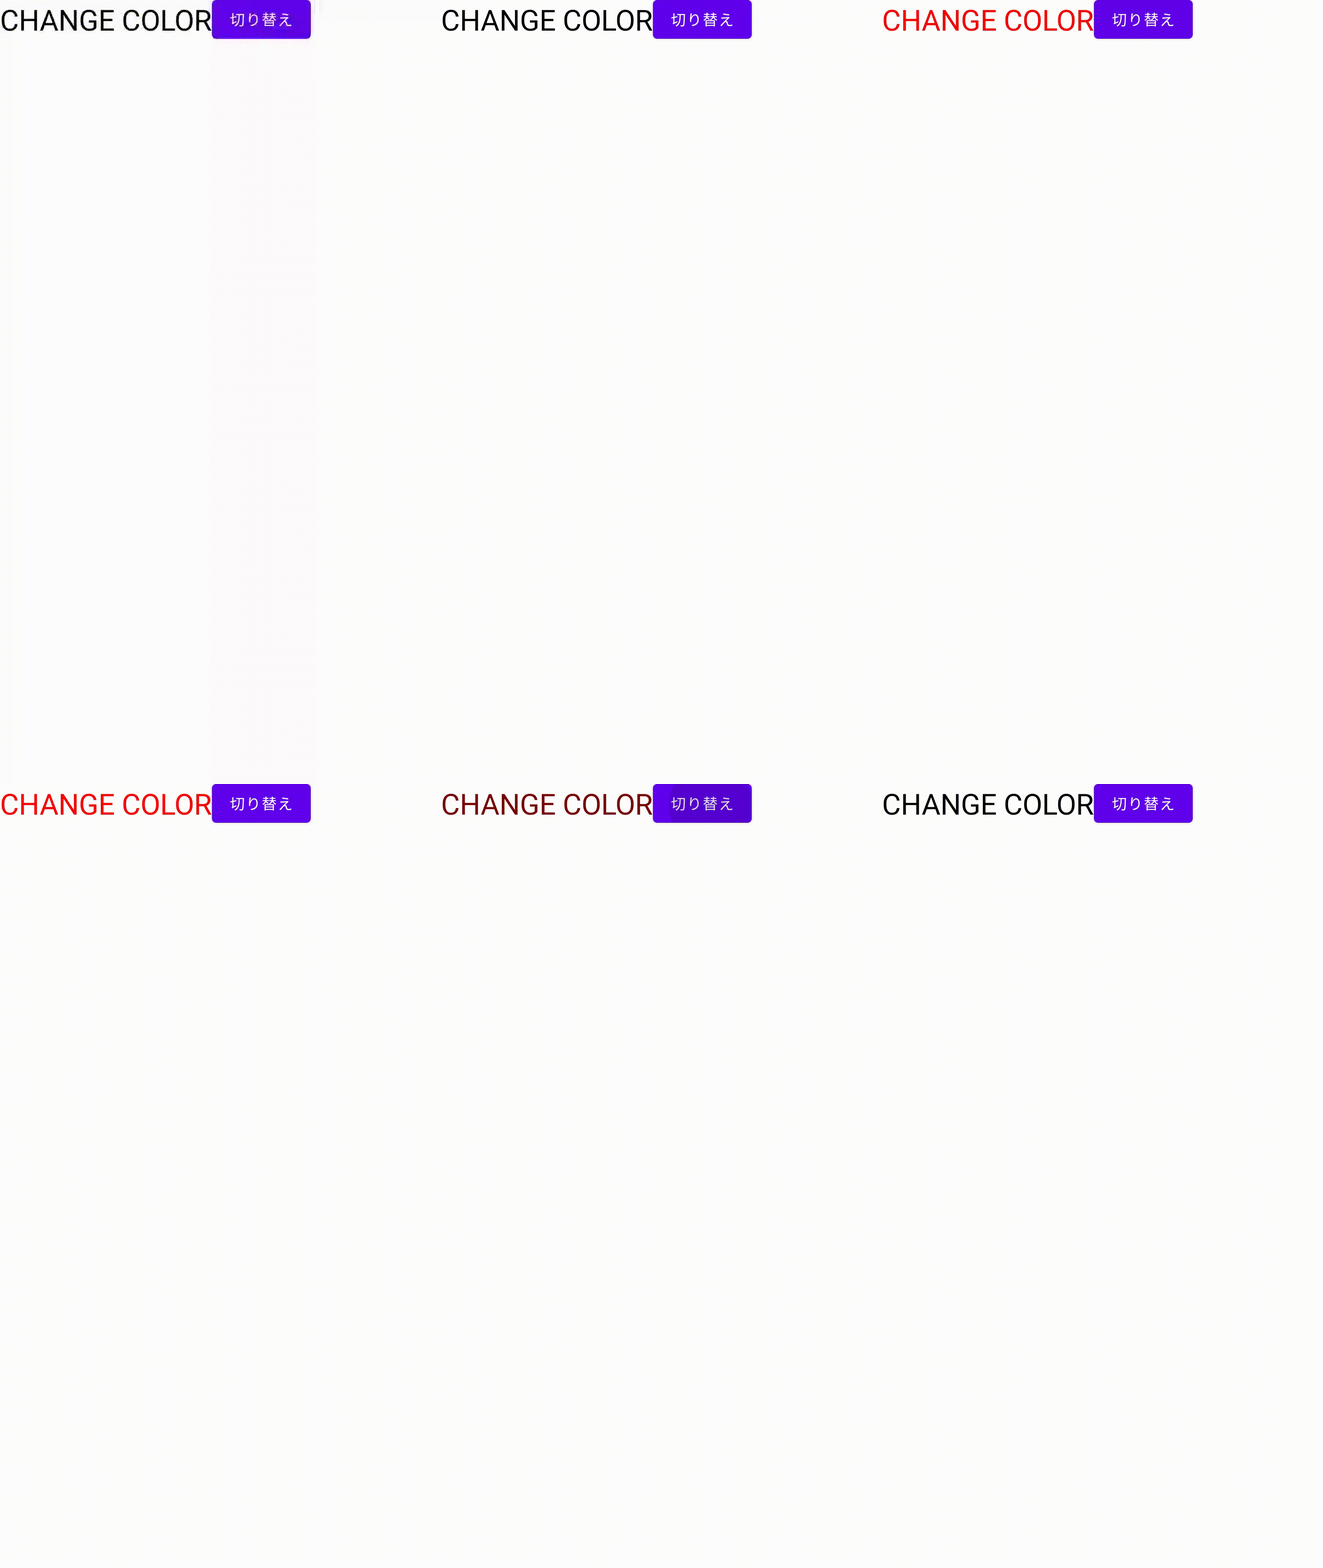
animate*AsState(簡単なアニメーション)
@Composable
fun Animation(){
    var enabled by remember { mutableStateOf(true)}
    val color:Color by animateColorAsState(if(enabled) Color.Black else Color.Red)
    //animateFloatAsState
    //animateSizeAsState
    Row(
        modifier = Modifier
            .fillMaxSize()
    ){
        Text(
            text="CHANGE COLOR",
            color = color,
            fontSize = 27.sp
        )
        Button(onClick = { enabled = !enabled }) {
            Text("切り替え")
        }
    }
}

他に、
Float,Dp,Size,Bounds,Offset,Rect,Int,IntOffset,IntSizeがある。
汎用型を受け入れるanimateValueAsStateもある
rememberInfiniteTransition(ループ)
@Composable
fun Animation(){
    val infiniteTransition = rememberInfiniteTransition()
    val colors = arrayListOf<Color>()
    var delay = 0
    for(i in 0..11) {
    	val color by infiniteTransition.animateColor(
    		initialValue = Color.LightGray,
    		targetValue = Color.White,
    		animationSpec = infiniteRepeatable(
    			animation = tween(1200, delay, easing = LinearEasing),
    			repeatMode = RepeatMode.Reverse
    		)
    	)
    	colors.add(color)
    	delay += 100
    }
    val top = Offset(550F,900F)
    val bottom = Offset(550F,1100F)
    val radius:Float  = (bottom.y - top.y) / 2F
    val left = Offset(top.x - radius,top.y + radius)
    val right = Offset(top.x + radius, top.y + radius)

    val offsets:List<Offset> = arrayListOf(
        top,
        Offset(top.x+radius/2F,right.y-radius*sqrt(3F)/2F),
        Offset(top.x+radius*sqrt(3F)/2F,right.y-radius/2F),
        right,
        Offset(top.x+radius*sqrt(3F)/2F,right.y+radius/2F),
        Offset(top.x+radius/2F,right.y+radius*sqrt(3F)/2F),
        bottom,
        Offset(bottom.x-radius/2F,left.y+radius*sqrt(3F)/2F),
        Offset(bottom.x-radius*sqrt(3F)/2F,left.y+radius/2F),
        left,
        Offset(bottom.x-radius/2F,left.y-radius*sqrt(3F)/2F),
        Offset(bottom.x-radius*sqrt(3F)/2F,left.y-radius/2F),
    )
    Box(
    	modifier = Modifier
            .fillMaxSize()
    ){
        Canvas(modifier = Modifier.fillMaxSize()){
            for((index,offset) in offsets.withIndex()){
                drawCircle(
                    color = colors[index],
                    radius = 20F,
                    center = offset
                )
            }
        }
    }
}
一旦ここで終了します。
まだまだドキュメントがあるので近いうちにその2を投稿したいと思います。
参考文献
公式ドキュメント


