■ 経緯
実務でNuxt2を使用しており、Nuxt3に興味を持ったので自作アプリを作成してみた。
■ アプリ概要
画面
- トップ画面…名前を入力させる
- ルーム作成画面…チャットのスレッドをたてる
- ルーム一覧画面…チャットのスレッドを検索する
- チャット画面…スレッド内でチャットする
テーブル
- room…部屋(スレッド)を保存する
- chat…部屋内の会話を保存する
■ 前提
npmはインストール済みであること( 16.15.0以上)
※作成時点では16.15.0で確認してます。
■ プロジェクト作成
こちらを参考にプロジェクト作成する。
プロジェクトを作成したいフォルダに移動し、以下コマンドを実行する。
npx nuxi init chatApp
cd chatApp
npm install
■ cssライブラリのインストール
tailwindcssは、サンプルをコピるだけでいい感じの見た目になってくれる他のcssライブラリとは異なり、自力で各部品を作りこむ必要がある。
手間がかかるのと、大量のクラス指定によりコードが追いづらくなるので、tailwindcssベースでかつコピペでいい感じの部品が使えるdaisyUIを導入する。
・tailwind
コマンドを実行
npm install --save-dev @nuxtjs/tailwindcss
設定ファイルに追記
+ modules: ['@nuxtjs/tailwindcss'],
コマンド実行でtailwind.config.jsを作成する
npx tailwindcss init
・daisyui
コマンドを実行
npm i daisyui
tailwindの設定ファイルに追記
module.exports = {
  content: [],
  theme: {
    extend: {},
  },
+  plugins: [require("daisyui")],
}
■ トップ画面作成
app.vueを削除する。
pages\index.vueを作成する。(chatApp配下にpagesディレクトリを作成)
Nuxtではファイルシステムベースのルーティングを採用しており、pagesディレクトリ配下の構造でルートマッピング決まるため、各ページはpages配下に作成する。[参考]
<template>
    <div>
        <div class="grid place-content-center h-48">
            <div class="flex space-x-4">
                <input type="text" class="input input-bordered w-full max-w-xs" placeholder="お名前を入力してください" />
                <button class="btn btn btn-primary">入力</button>
            </div>
        </div>
    </div>
</template>
トップページが表示されるか確認する。
以下コマンドでビルドを行う。
npm run dev
localhost:3000にアクセス。トップページが表示されることを確認する。
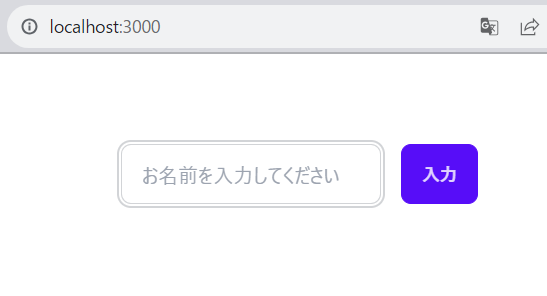
解説
tailwindcssは独自でクラスを作ったり、style指定させないよう配慮された設計になっている。例えばトップページでフォームの高さを192pxに設定するのをh-48というクラス指定で記述しています。その他のクラスについては以下の通りです。
-
place-content-center…中央ぞろえ -
space-x-4…要素同士の横の間隔を4×4=16px分開ける
使用部品
-
daisyUIのtext input -
daisyUIのbutton
■ ログイン処理
composablesについて
store(状態管理)といわれるもので、複数の画面から共通で使用するデータ(例:ログインユーザの情報)へのアクセスを担います。
Nuxt2ではvuexがstoreとしてデフォルトで含まれていましたが、Nuxt3では代わりにcomposables等を使用します。
トップ画面で入力された名前を他の画面でも持ち回るために、composablesを追加します。
const userName = ref("")
export function user(name: string) {
  userName.value = name
  return {
    userName,
  };
}
export const getUser = () => {
  return userName.value
}
上部がコンストラクタのような役割で、user(ユーザ名)でユーザ名が登録されます。
下部がユーザ名の呼び出しで、getUser()でユーザ名を取得します。
■ トップ画面編集
-   <input type="text" class="input input-bordered w-full max-w-xs" placeholder="お名前を入力してください" />
+   <input type="text" v-model="name" class="input input-bordered" placeholder="お名前を入力してください" />
-   <button class="btn btn btn-primary">入力</button>
+   <button class="btn btn-primary" @click="login">入力</button>
:
</template>
+ <script setup>
+ const name = ref("")
+ const router = useRouter();
+ const login = () => {
+     user(name)
+     router.push({ path: "/room/roomList" })
+ }
+ </script>
処理について
- loginメソッド…
storeに入力した名前を登録し、ルーム一覧画面に遷移する。 -
useRouter…optionsAPIのthis.$router.push("hoge")を用いた遷移のCompositionAPIでの書き方になります。
■ ルーム一覧画面作成
部屋の検索・表示を行う画面を実装します。
<template>
  <div class="join py-4">
    <input v-model="inputTitle" class="input input-bordered join-item" placeholder="タイトルで検索" />
    <button @click="search" class="btn join-item rounded-r-full">検索</button>
  </div>
  <div class="flex space-x-4">
    <div class="card w-64 bg-base-100 shadow-xl" v-for="room in rooms">
      <div class="card-body">
        <h2 class="card-title">{{ room.title }}</h2>
        <p>作成ユーザ:{{ room.name }}</p>
        <p>{{ room.description }}</p>
        <div class="card-actions justify-end">
          <NuxtLink :to="`/chat/${room.id}`">
            <button class="btn btn-primary">開く</button>
          </NuxtLink>
        </div>
      </div>
    </div>
  </div>
</template>
<script setup>
const inputTitle = ref("")
// 初期表示処理。すべてのチャットルームを表示する
const { data: rooms } = useFetch('/api/model/room/selectAll')
// 検索時処理。部屋タイトル名の部分一致で検索を行う
const search = async() => {
  const {data: res} = await useFetch('/api/model/room/selectByTitle', {
    method: 'post',
    body: {title: inputTitle.value}
  })
  rooms.value = res.value
}
definePageMeta({
  layout: "custom",
})
</script>
使用部品
処理について
NuxtLink…toで指定したパスへ遷移する。
useFetch…axiosより簡単に使えるNuxt3でのAPI呼び出し。
definePageMeta…後述のナビバー部品を持つcustomレイアウトを適用
■ ナビゲーションバーの実装
トップ画面以外はナビゲーションバーを表示したい。複数ページで共通のレイアウトを適用させるためlayoutsフォルダを使用する。
レイアウトを作成する。
<template>
  <div>
    <Navbar />
    <div class="container mx-auto px-4 py-4">
      <slot />
    </div>
  </div>
</template>
ナビバー自体は部品化するため、componentsフォルダに作成する。
<template>
  <div class="drawer">
    <input id="my-drawer-3" type="checkbox" class="drawer-toggle"/>
    <div class="drawer-content flex flex-col">
      <!-- Navbar -->
      <div class="w-full navbar bg-base-300">
        <div class="flex-none lg:hidden">
          <label for="my-drawer-3" class="btn btn-square btn-ghost">
            <svg xmlns="http://www.w3.org/2000/svg" fill="none" viewBox="0 0 24 24"
              class="inline-block w-6 h-6 stroke-current">
              <path stroke-linecap="round" stroke-linejoin="round" stroke-width="2" d="M4 6h16M4 12h16M4 18h16"></path>
            </svg>
          </label>
        </div>
        <div class="flex-1 px-2 mx-2">チャットアプリ</div>
        <div class="flex-none hidden lg:block">
          <ul class="menu menu-horizontal">
            <!-- Navbar menu content here -->
            <li><NuxtLink :to="{ name: 'room-roomList' }">ルーム一覧</NuxtLink></li>
            <li><NuxtLink to="/room/roomReg">ルーム作成</NuxtLink></li>
          </ul>
        </div>
      </div>
      <!-- Page content here -->
    </div>
    <div class="drawer-side z-10">
      <label for="my-drawer-3" class="drawer-overlay"></label>
      <ul class="menu p-4 w-80 h-full bg-base-200" @click="toggle">
        <!-- Sidebar content here -->
        <li><NuxtLink :to="{ name: 'room-roomList' }">ルーム一覧</NuxtLink></li>
        <li><NuxtLink to="/room/roomReg">ルーム作成</NuxtLink></li>

      </ul>

    </div>
  </div>
</template>
<script setup>
  const toggle = () => {document.getElementById('my-drawer-3').click()}
</script>
こちらはみんな大好きナビバー+ハンバーガーメニューです。画面サイズに応じてタブ化します。ほぼ公式のまんまです。[参考]
処理について
-
toggle()…メニュー選択した際にメニューを閉じる
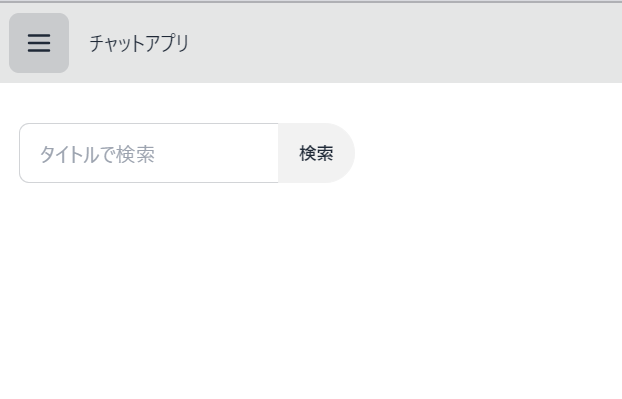
動作確認
トップ画面で「入力」ボタンを押下すると以下の画面に遷移することを確認する。
■ ルーム作成画面作成
部屋をたてる画面を実装します。
<template>
    <div class="flex justify-center">
        <div class="w-full max-w-xs">
            <label class="label">
                <span class="label-text">タイトル</span>
            </label>
            <input v-model="inputForm.title" type="text" class="input input-bordered w-full max-w-xs" />
            <label class="label">
                <span class="label-text">説明文</span>
            </label>
            <textarea v-model="inputForm.description" type="text" class="textarea textarea-bordered w-full max-w-xs" />
            <div class="flex justify-end">
                <button class="btn btn btn-primary" @click="create">作成</button>
            </div>
        </div>
    </div>
</template>
<script setup>
const router = useRouter()
const inputForm = ref({})
const user = getUser()
const create = () => {
    if (user === null || user === "") {
        router.push('/')
    } else {
        inputForm.value.name = user
        inputForm.value.date = new Date().toLocaleDateString('ja-JP')
        const { data } = useFetch('/api/model/room/create', {
            method: 'post',
            body: inputForm.value
        })
        router.push({ path: "/room/roomList" })
    }
    inputForm.value = []
}
definePageMeta({
    layout: "custom",
})
</script>
処理について
「作成」ボタンが押下された際に以下の処理を行う。
- ルームを作成するために、作成ユーザを取得する。
- 以下の項目をパラメータとし、登録APIを投げる
- ユーザ名が取得できなかった場合、ホーム画面に遷移しユーザ名を入力させる。
- 登録完了したら、フォームを空にする。
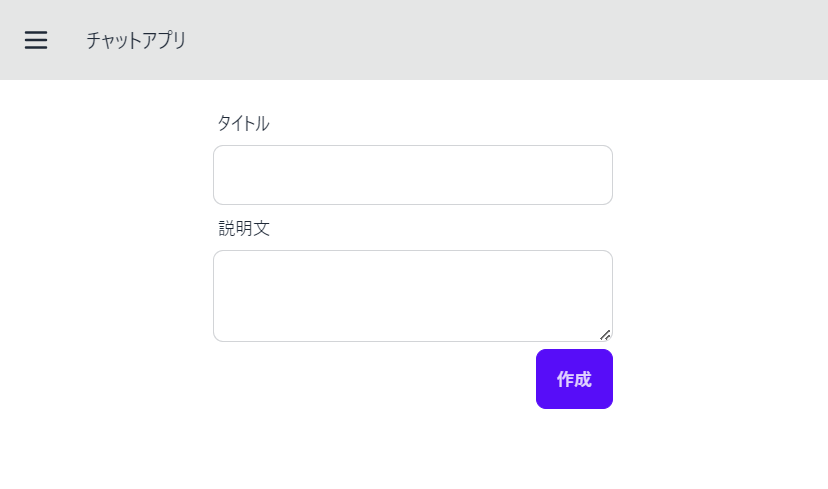
動作確認
ナビバーのルーム作成を押下すると以下の画面に遷移することを確認する。
■ チャット画面作成
チャットを行う画面を実装します。
<template>
    <div>
        <template v-for="chat in chats">
            <!-- チャットユーザ名とログインユーザ名を比較し、自分のチャットは右に来るようにする -->
            <div class="chat" :class="{ 'chat-start': user !== chat.name, 'chat-end': user === chat.name }">
                <div class="chat-bubble">{{ chat.text }}</div>
                <div class="chat-header">
                    {{ chat.name }}
                    <span class="text-xs opacity-50">{{ chat.date }}</span>
                </div>
            </div>
        </template>
        <div class="flex space-x-4 my-2">
            <textarea v-model="text" type="text" class="textarea textarea-bordered w-full max-w-xs" />
            <div class="self-end">
                <button class="btn btn btn-primary" @click="post">投稿</button>
            </div>
        </div>
    </div>
</template>
<script setup>
const user = getUser()
const text = ref("")
const route = useRoute()
const router = useRouter()
// チャット一覧取得
const { data: chats, refresh } = useFetch('/api/model/chat/selectByRoomId', {
    method: 'post',
    body: { id: parseInt(route.params.id) }
})
// 投稿
const post = async () => {
    console.log(getUser())
    if (user === null || user === "") {
        router.push('/')
    } else {
        const { data } = await useFetch('/api/model/chat/create', {
            method: 'post',
            body: {
                text: text.value,
                roomid: parseInt(route.params.id),
                name: user,
                date: new Date().toLocaleDateString('ja-JP')
            }
        })
    }
    text.value = ""
    refresh()
}
definePageMeta({
    layout: "custom",
})
</script>
解説
[id]というファイル名はルーム一覧画面で選択した部屋のroomIdを受け取り、動的にルーディングを行うDynamicルーティングという仕組み。[参考]
使用部品
-
daisyUIのChat bubble
処理について
- 初期表示時にチャット履歴を取得する。
- 「投稿」ボタンを押した際に以下の処理を行う。
- ユーザが空の場合、トップ画面へ遷移する。
- ユーザ名、テキスト、部屋id、投稿時刻をパラメータに、チャット登録APIを呼び出す。
- 初期表示時処理を呼び出し、チャットを再取得する。
ここまで、画面の作成を行いました。
次章ではAPI作成、テーブル作成を行っていきます。