概要
Youtubeチャンネル『トラハックのエンジニア学習ゼミ【とらゼミ】』の『日本一わかりやすいReact入門【実践編】』の学習備忘録。
#6~9までの記事はこちら。
#10...Cloud FunctionsでAPIを作ってFirestoreを利用しよう
REST APIを作る
今まではローカル上で管理していたdataset.jsを、クラウドDBであるCloud Functionsで管理する。Cloud Functionで扱うデータ形式はJSONのため、dataset.jsに対応するJSONファイルをgithubからコピーする。
{
  "init": {
      "answers": [
          {"content": "仕事を依頼したい", "nextId": "job_offer"},
          {"content": "エンジニアのキャリアについて相談したい", "nextId": "consultant"},
          {"content": "学習コミュニティについて知りたい", "nextId": "community"},
          {"content": "お付き合いしたい", "nextId": "dating"}
      ],
      "question": "こんにちは!🐯トラハックへのご用件はなんでしょうか?"
  },
  "job_offer": {
      "answers": [
          {"content": "Webサイトを制作してほしい", "nextId": "website"},
          {"content": "Webアプリを開発してほしい", "nextId": "webapp"},
          {"content": "自動化ツールを作ってほしい", "nextId": "automation_tool"},
          {"content": "その他", "nextId": "other_jobs"}
      ],
      "question": "どのようなお仕事でしょうか?"
  },
  "website": {
      "answers": [
          {"content": "問い合わせる", "nextId": "contact"},
          {"content": "最初の質問に戻る", "nextId": "init"}
      ],
      "question": "Webサイト細作についてですね。コチラからお問い合わせできます。"
  },
  "webapp": {
      "answers": [
          {"content": "問い合わせる", "nextId": "contact"},
          {"content": "最初の質問に戻る", "nextId": "init"}
      ],
      "question": "Webアプリ開発についてですね。コチラからお問い合わせできます。"
  },
  "automation_tool": {
      "answers": [
          {"content": "問い合わせる", "nextId": "contact"},
          {"content": "最初の質問に戻る", "nextId": "init"}
      ],
      "question": "自動化ツール開発についてですね。コチラからお問い合わせできます。"
  },
  "other_jobs": {
      "answers": [
          {"content": "問い合わせる", "nextId": "contact"},
          {"content": "最初の質問に戻る", "nextId": "init"}
      ],
      "question": "その他についてですね。コチラからお問い合わせできます。"
  },
  "consultant": {
      "answers": [
          {"content": "YouTubeで動画を見る", "nextId": "https://www.youtube.com/channel/UC-bOAxx-YOsviSmqh8COR0w"},
          {"content": "学習コミュニティについて知りたい", "nextId": "community"},
          {"content": "最初の質問に戻る", "nextId": "init"}
      ],
      "question": "トラハックは普段からYouTubeでキャリアについて発信しています。また、僕が運営するエンジニア向け学習コミュニティ内でも相談に乗っていますよ。"
  },
  "community": {
      "answers": [
          {"content": "どんな活動をしているの?", "nextId": "community_activity"},
          {"content": "コミュニティに参加したい", "nextId": "https://torahack.web.app/community/"},
          {"content": "最初の質問に戻る", "nextId": "init"}
      ],
      "question": "2020年3月から学習コミュニティを始めました!🎉Webエンジニアへの転職を目指す人向けに、プログラミングを教えたりキャリアの相談に乗っています。"
  },
  "community_activity": {
      "answers": [
          {"content": "さらに詳細を知りたい", "nextId": "https://youtu.be/tIzE7hUDbBM"},
          {"content": "コミュニティに参加したい", "nextId": "https://torahack.web.app/community/"},
          {"content": "最初の質問に戻る", "nextId": "init"}
      ],
      "question": "フロントエンド向けの教材の提供、キャリアや勉強法に関するメルマガの配信、週1のオンライン作業会などを開催しています!\n詳細はYouTube動画で紹介しています。"
  },
  "dating": {
      "answers": [
          {"content": "DMする", "nextId": "https://twitter.com/torahack_"},
          {"content": "最初の質問に戻る", "nextId": "init"}
      ],
      "question": "まずは一緒にランチでもいかがですか?DMしてください😘"
  }
}
JSON形式のため、dataset.jsとは書き方が少し異なるが、中身のデータは同じものを保有している。
次に、Clound Functinon用のhttp関数を作成します。これは、リクエストに乗って送信されたJSON形式のデータを、DBに適切に保存するための関数です。
import * as functions from 'firebase-functions';
import * as admin from "firebase-admin";
admin.initializeApp();
const db = admin.firestore();

const sendResponse = (response: functions.Response, statusCode: number, body: any) => {
  response.send({
    statusCode,
    body: JSON.stringify(body)
  })
}

export const addDataset = functions.https.onRequest(async (req: any, res: any) => {
  // リクエストメソッドがPOSTでないときは、エラーを返す
  if (res.method !== 'POST') {
    sendResponse(res, 405, {error: 'Invalid Request'})
  } else {
    const dataset = req.body
    for (const key of Object.keys(dataset)) {
      const data = dataset[key]  // 'init'や'job_offer'などが入る

      // 'question'というcollectionの中に'init'や'job_offer'というdocumentがあり、
      // 各documentの中に具体的なデータが入っている。
      await db.collection('questions').doc(key).set(data)
    }
    sendResponse(res, 200, {error: 'Successfully added dataset'})
  }
})
リクエストが適切であるかどうか(POSTかどうか)で条件分岐を行い、適切であればdbの中に、リクエストのbodyの値(すなわちDBへ保存したいJSONデータ)を入れる、という処理を定義しています、
では、実際にこの関数が機能するかどうかを確かめます。一度デプロイし、先ほど作成したfunctions/src/index.tsを本番環境に含めます。
$ firebase deploy
デプロイが完了したら、ブラウザでFirebaseを開き、コンソールから「Function」→「ダッシュボード」と進んで、先ほど定義したhttp関数(今回はaddDataset関数)のリクエストURLを取得します。
dataset.jsonが置かれているディレクトリに移動し、curlコマンドで、APIを叩く
$ curl -X POST -H "Content-Type:application/json" -d @dataset.json https://YOUR_REGION-YOUR_PROJECT_NAME.cloudfunctions.net/addDataset
https://YOUR_REGION-YOUR_PROJECT_NAME.cloudfunctions.net/addDatasetのところが、先ほどコンソールから調べたリクエストHTTPです。
これにより、database.jsonのデータがFirestoreのDBに入る・・・予定だったのですが、しかしここでAPIより以下のメッセージが返ってきました。
<html><head>
<meta http-equiv="content-type" content="text/html;charset=utf-8">
<title>403 Forbidden</title>
</head>
<body text=#000000 bgcolor=#ffffff>
<h1>Error: Forbidden</h1>
<h2>Your client does not have permission to get URL <code>/addDataset</code> from this server.</h2>
<h2></h2>
</body></html>
どうやらCloud Functionへの書き込みをする権限が認められていないらしいです(動画ではこのエラーは出ていませんでした)
自力で調べてみた結果、Google Cloud Console上での権限付与が必要らしいです。こちらの『Firebase functionsで 403 error "Your client does not have permission to get URL /** from this server" となった場合の解決策』という記事が参考になりました。
権限付与を無事終え、再度curlコマンドを実行すると、
{"statusCode":200,"body":"{\"message\":\"Successfully added dataset!\"}"}%
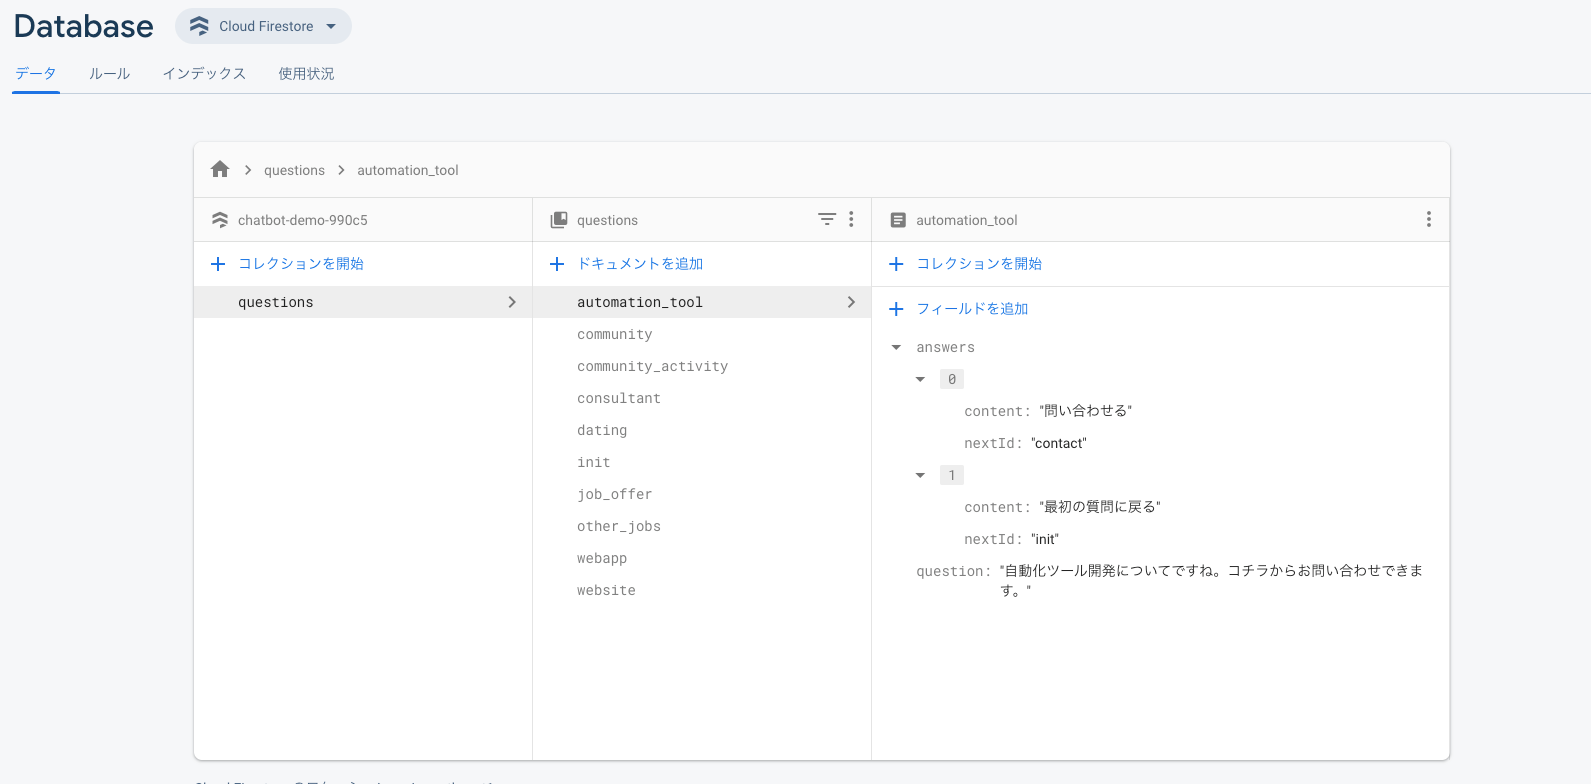
上手くいったそう! Firebase Console -> Databaseを見てみると、
dataset.jsonの中身が、Cloud Functionに保存されているのが確認できました!
この一連の権限付与の手順は動画内では行われていないので、もしかしたら必要ないものだったかもしれませんが、念のため残しておきます。
Firestoreの設定
Firebase Console -> Settings -> 全般より、Firebase SDK snippetを取得します(トグルは構成を選択)。srcディレクトリにfirebase/config.jsを作り、これを貼り付けます。
const firebaseConfig = {
  apiKey: "**********************************",
  authDomain: "**********************************",
  databaseURL: "**********************************",
  projectId: "**********************************",
  storageBucket: "**********************************",
  messagingSenderId: "**********************************",
  appId: "**********************************",
  measurementId: "**********************************"
};

export default firebaseConfig
この設定はファイル外部でも使うため、最後にexport文も入れています。
次に、上記の設定値をもとにFirestore内のDBを引っ張ってくるファイルとして、src/firebase/index.js を作ります。
import firebase from "firebase/app"
import "firebase/firestore";
import firebaseConfig from "./config";

firebase.initializeApp(firebaseConfig);
export const db = firebase.firestore();
以降、このsrc/firebase/index.jsをimportしたコンポーネントでは、dbという定数でFirestore上のDBの中身を扱えるようになりました。
これをApp.jsxでimportする。
import React from 'react';
// import defaultDataset from "./dataset";
import './assets/styles/style.css';
import {AnswersList, Chats, FormDialog} from "./components/index"
import {db} from "./firebase/index"   // dbをimportする

export default class App extends React.Component {
  constructor(props) {
    super(props);
    this.state = {
      answers: [],
      chats: [],
      currentId: "init",
      // dataset: defaultDataset,
      dataset: {},
      open: false
    }
...

  componentDidMount() {
    // async付きの即時関数を用いて、dbを読み込む
    (async() => {
      const dataset = this.state.dataset
      // awaitの処理が終わるまでは、次の処理が実行されない
      await db.collection('questions').get().then(snapshots => {
        snapshots.forEach(doc => {
          dataset[doc.id] = doc.data()
        })
      })
      this.setState({dataset: dataset})

      // db読み込みが完了してから、初期Answerの生成を開始する。
      const initAnswer = "";
      this.selectAnswer(initAnswer, this.state.currentId)
    })()
  }

...
- reactでは、データベースからデータを持ってくるような処理は、大体componentDidMount()に書く。
- Firestoreの読み込みは非同期処理のため、読み込みの途中で次の処理が進んでしまいエラーとなるケースがある。そのため、javascriptの即時関数を用いて、読み込みが完了するまで次に進まないよう制御する。
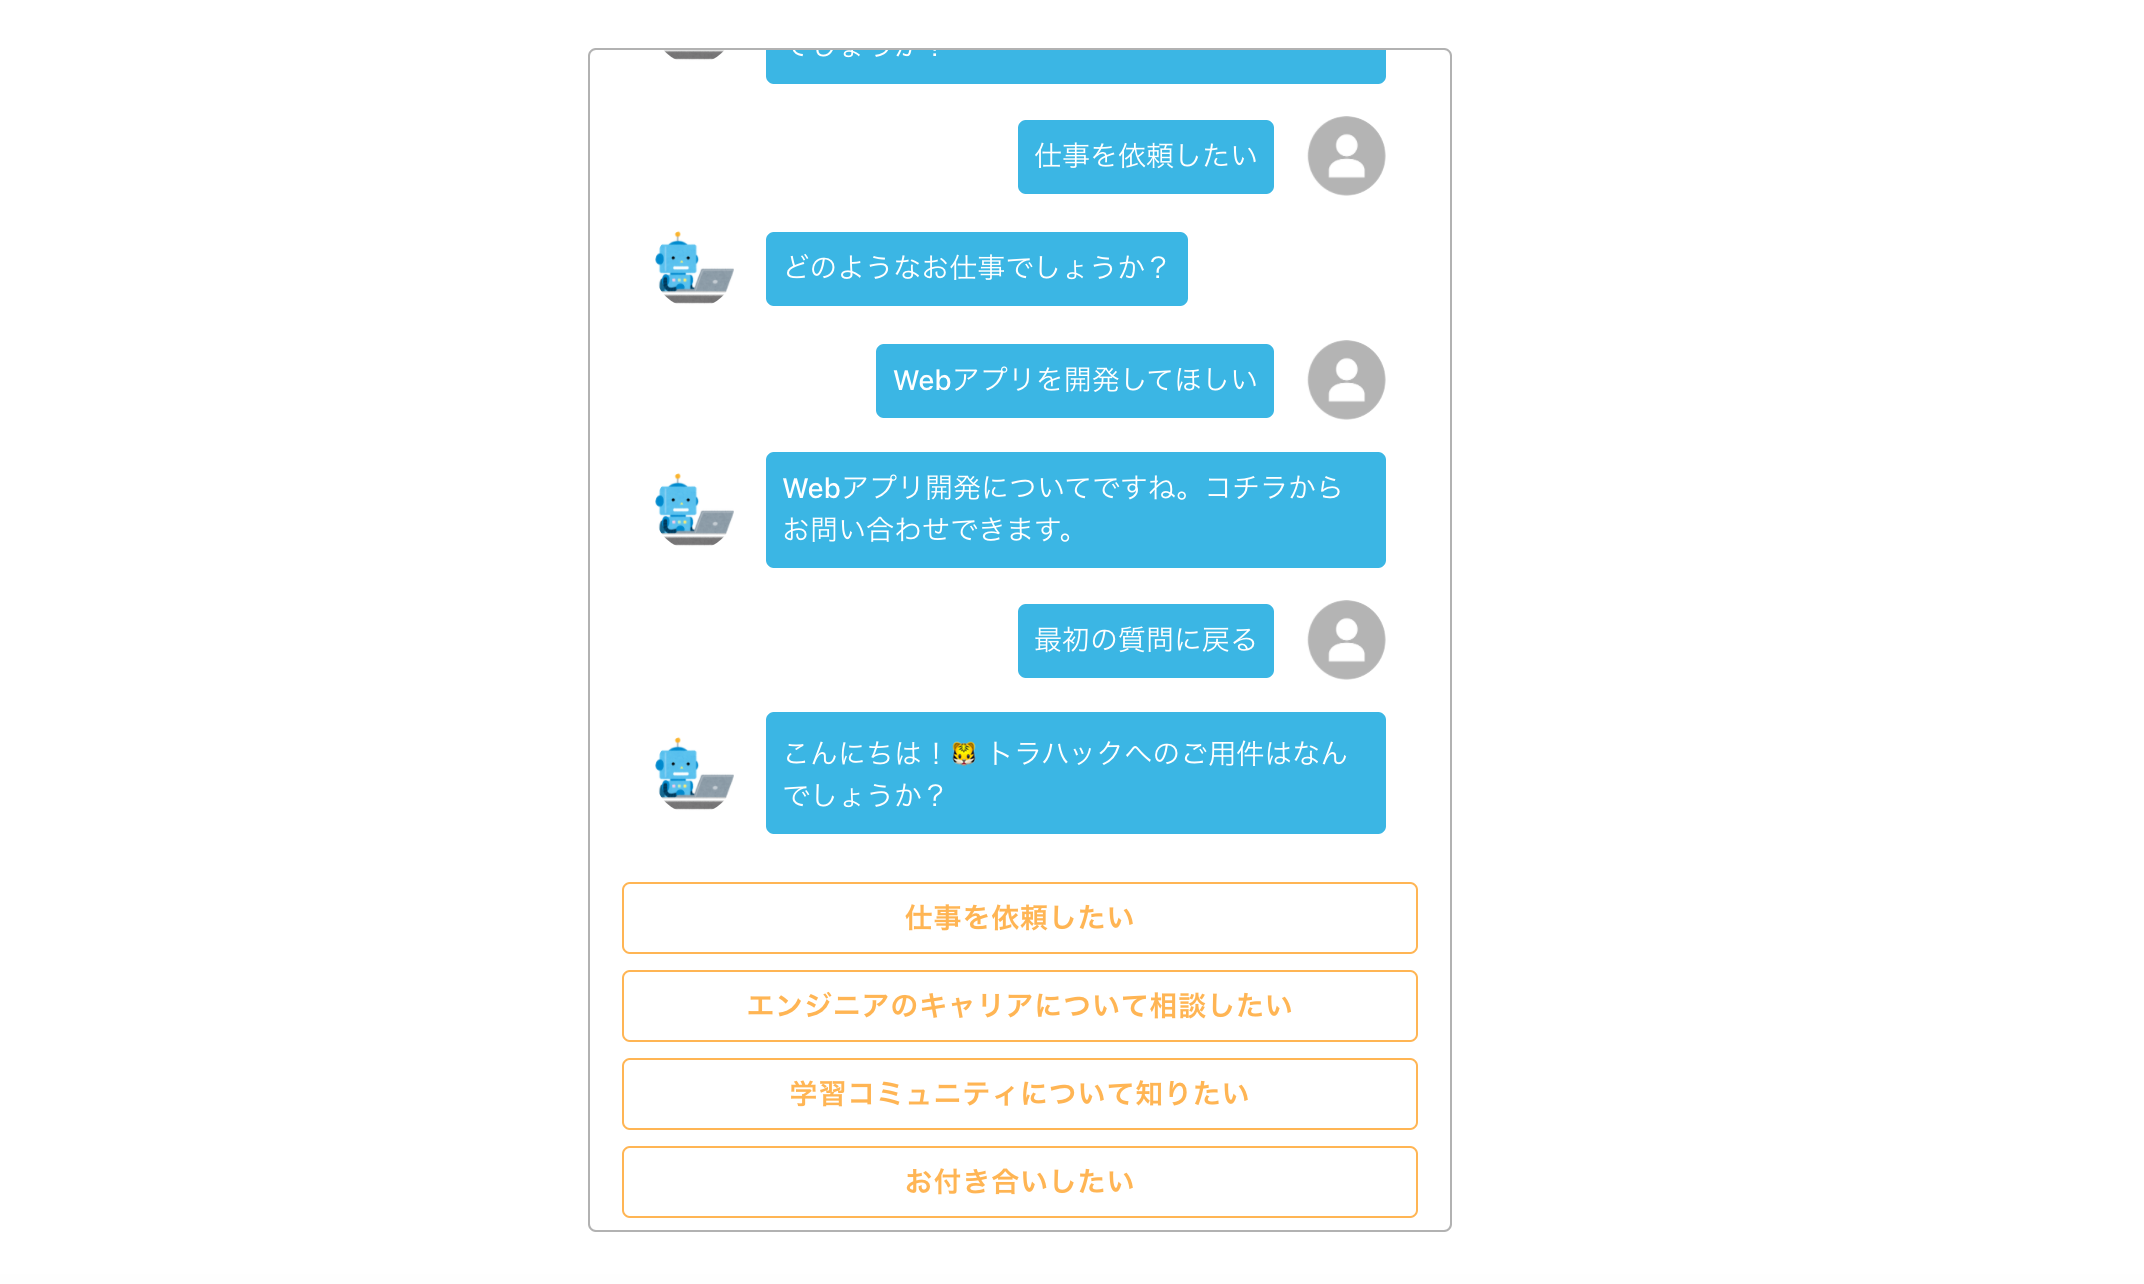
localhost:3000で動作を確認し、問題なく挙動していればOK!
これで目的のチャットボットアプリは完成しました!
#11...useCallbackでパフォーマンスを向上させよう
これまでは、Class Componentを用いてstateの管理を行っていました。
しかし昨今のreactでは、なるべくClass Componentの使用を避け、Functional Componentをメインとして開発することが望まれています。
理由はいくつかあると思いますが、「Functional Componentの方が記述がシンプルかつ読みやすいから」というのが大きな理由の一つです。
ここからは、React Hooksを用いて、Class Componentと全てFunctional Componentに書き換えることを目指します。
React Hooksを使う
React Hooksとは、一言で言えばFunctional Componentでもstateを扱えるようにするライブラリです。今回の開発アプリでは、Class Componentは全て「stateを管理すること」を目的として作られたものでしたので、React Hooksを用いれば、Class Componentを全てFunctional Componentに置き換えることができます。
React Hooksをimportすることで、以下の3つのメソッドが使用できるようになります。
-
useState():Functinal Componentでstateを定義、保持する役割 -
setEffect(): 各種ライフサイクルメソッドの代替 -
useCallback(): 定義した関数を子コンポーネントに渡す役割(bind関数の代替)
修正するのは、Class Componentとなっている以下の2つ。
- src/App.jsx
- components/Forms/FormDialog.jsx
import React, {useState, useEffect,useCallback} from 'react';
import './assets/styles/style.css';
import {AnswersList, Chats, FormDialog} from "./components/index"
import {db} from "./firebase/index"

const App = () =>  {
  const [answers, setAnswers] = useState([]);
  const [chats, setChats] = useState([]);
  const [currentId, setCurrentId] = useState("init");
  const [dataset, setDataset] = useState({});
  const [open, setOpen] = useState(false);

  const displayNextQuestion = (nextQuestionId, nextDataset) => {
    addChats({
      text: nextDataset.question,
      type: 'question'
    })

    setAnswers(nextDataset.answers)
    setCurrentId(nextQuestionId)
  }

  const selectAnswer = (selectedAnswer, nextQuestionId) => {
    switch(true) {
      case (nextQuestionId === 'contact'):
        handleClickOpen()
        break;

      case (/^https:*/.test(nextQuestionId)):
        const a = document.createElement('a');
        a.href = nextQuestionId;
        a.target = '_blank';
        a.click();
        break;

      default:
        addChats({
          text: selectedAnswer,
          type: 'answer'
        })
        setTimeout(() => displayNextQuestion(nextQuestionId,dataset[nextQuestionId]), 1000);
        break;
    }
  }

  const addChats = (chat) => {
    /// prevChatsで、更新前のchatsも取得できる
    setChats(prevChats => {
      return [...prevChats, chat]
    })
  }

  const handleClickOpen = () => {
    setOpen(true)
  };

  const handleClose = useCallback(() => {
    setOpen(false)
  }, [setOpen]);

  // componentDidMountの役割。初回render時に1回だけ実行したいので、第2引数に[]を渡す。
  useEffect(() => {
    (async() => {
      const initDataset = {};

      await db.collection('questions').get().then(snapshots => {
        snapshots.forEach(doc => {
          initDataset[doc.id] = doc.data()
        })
      })

      setDataset(initDataset)
      displayNextQuestion(currentId, initDataset[currentId])
    })()
  },[])

  // componentDidUpdateの役割。再renderの度に繰り返し実行したいので、第2引数には何も渡さない。
  useEffect(() => {
    const scrollArea = document.getElementById("scroll-area")
    if (scrollArea) {
      scrollArea.scrollTop = scrollArea.scrollHeight
    }
  })

  return (
    <section className="c-section">
      <div className="c-box">
        <Chats chats={chats}/>
        <AnswersList answers={answers} select={selectAnswer} />
        <FormDialog open={open} handleClose={handleClose} />
      </div>
    </section>
  );
}

export default App
- handleClose()はFormDialogへ渡すため、userCallbackを使用する。一方、handleOpen()はApp.jsxないでしか使わないので、通常の関数として定義する。
- useState()では、更新前にあたる今現在のstateの値を
prev○○○○ => {}の形で利用することができる。今回のchatsのように、現在の値に対して新しい値を追加していくようなときは非常に便利。 - useStateによるstateの更新は、少しだけ時間がかかる。そのため、初期Answerの表示をさせるときは、displayNextQuestion()に対して、stateのdatasetではなく、firestoreから読み込んだ
initDataset[currentId]を直接渡している。
全体的にClass Componentよりもすっきりとした印象です。個人的にはthisを使わなくて済むので、読みやすくなったと感じます。
同じように、FormDialogコンポーネントの方も修正します。
import React, {useState, useCallback} from 'react';
import Button from '@material-ui/core/Button';
import Dialog from '@material-ui/core/Dialog';
import DialogActions from '@material-ui/core/DialogActions';
import DialogContent from '@material-ui/core/DialogContent';
import DialogTitle from '@material-ui/core/DialogTitle';
import {TextInput} from "../index"

const FormDialog = (props) => {
  const [name,setName] = useState("")
  const [email,setEmail] = useState("")
  const [description,setDescription] = useState("")

  const inputName = useCallback((event) => {
    setName(event.target.value)
  },[]);

  const inputEmail = useCallback((event) => {
    setEmail(event.target.value)
  },[]);

  const inputDescription = useCallback((event) => {
    setDescription(event.target.value)
  },[]);

  const submitForm = () => {
    const payload = {
      text: 'お問い合わせがありました\n' +
            'お名前: ' + name + '\n' +
            'Email: ' + email + '\n' +
            'お問い合わせ内容:\n' + description
    }

    const url = 'WebHookURLをここに書く'

    fetch(url, {
      method: 'POST',
      body: JSON.stringify(payload)
    }).then(() => {
      alert('送信が完了しました!しばらくお待ちください')
      setName("")
      setEmail("")
      setDescription("")
      return props.handleClose()
    })
  };

  return (
    <Dialog
      open={props.open}
      onClose={props.handleClose}
      aria-labelledby="alert-dialog-title"
      aria-describedby="alert-dialog-description"
    >
      <DialogTitle id="alert-dialog-title">{"お問い合せフォーム"}</DialogTitle>
      <DialogContent>

        <TextInput
          label={"お名前"}
          multiline={false}
          rows={1}
          value={name}
          type={"text"}
          onChange={inputName}
        />

        <TextInput
          label={"メールアドレス"}
          multiline={false}
          rows={1}
          value={email}
          type={"email"}
          onChange={inputEmail}
        />

        <TextInput
          label={"お問い合わせ内容"}
          multiline={true}
          rows={5}
          value={description}
          type={"text"}
          onChange={inputDescription}
        />

      </DialogContent>
      <DialogActions>
        <Button onClick={props.handleClose} color="primary">
          キャンセル
        </Button>
        <Button onClick={submitForm} color="primary" autoFocus>
          送信する
        </Button>
      </DialogActions>
    </Dialog>
  );
}

export default FormDialog
以上で完成です!!!
おまけ 本番環境へのデプロイ
動画としてはここでおしまいですが、せっかくなので、本番環境へデプロイします。
といっても、以下の2コマンドを実行するだけです。この手軽さがfirebaseのすごいところですね〜
$ npm run build
$ firebase deploy
本番環境でも無事動きました!
本動画の感想
とても分かりやすい教材でした!
なぜこれが無料で見れるのか?と思えるほどのクオリティだと感じました。
元々は自分の復習用に備忘録を書き溜めていたのですが、私と同じように「これからreactを勉強したい!」と志す方々に少しでも広まればいいなと思い、公開記事として投稿した次第です。
次は、「React+ReduxでEC2サイトを作る」という講座も始められているみたいですので、そちらもチェックしたいと思います!

