
Amazon Location Serviceでルート検索機能を構築してみました 
先日Amazon Location Serviceが正式に一般公開されました。
Amazon Location Serviceとは、AWS内で利用できる位置情報アプリケーションを構築するためのサービスになります。現時点の機能として、地図表示機能・住所検索機能・ルート検索機能・ジオフェンス機能・トラッキング機能の5種類を利用できます。今回は、ルート検索機能を追加しマップアプリケーションを構築してみました!
事前準備
- Amazon Location Serviceの地図表示機能までの設定
以前書いた記事からの続きで説明します。
Amazon Location ServiceとMapLibre GL JSとAWS AmplifyとVue.jsを組み合わせてマップアプリケーションを構築してみた
Amazon Location Route calculatorsの設定
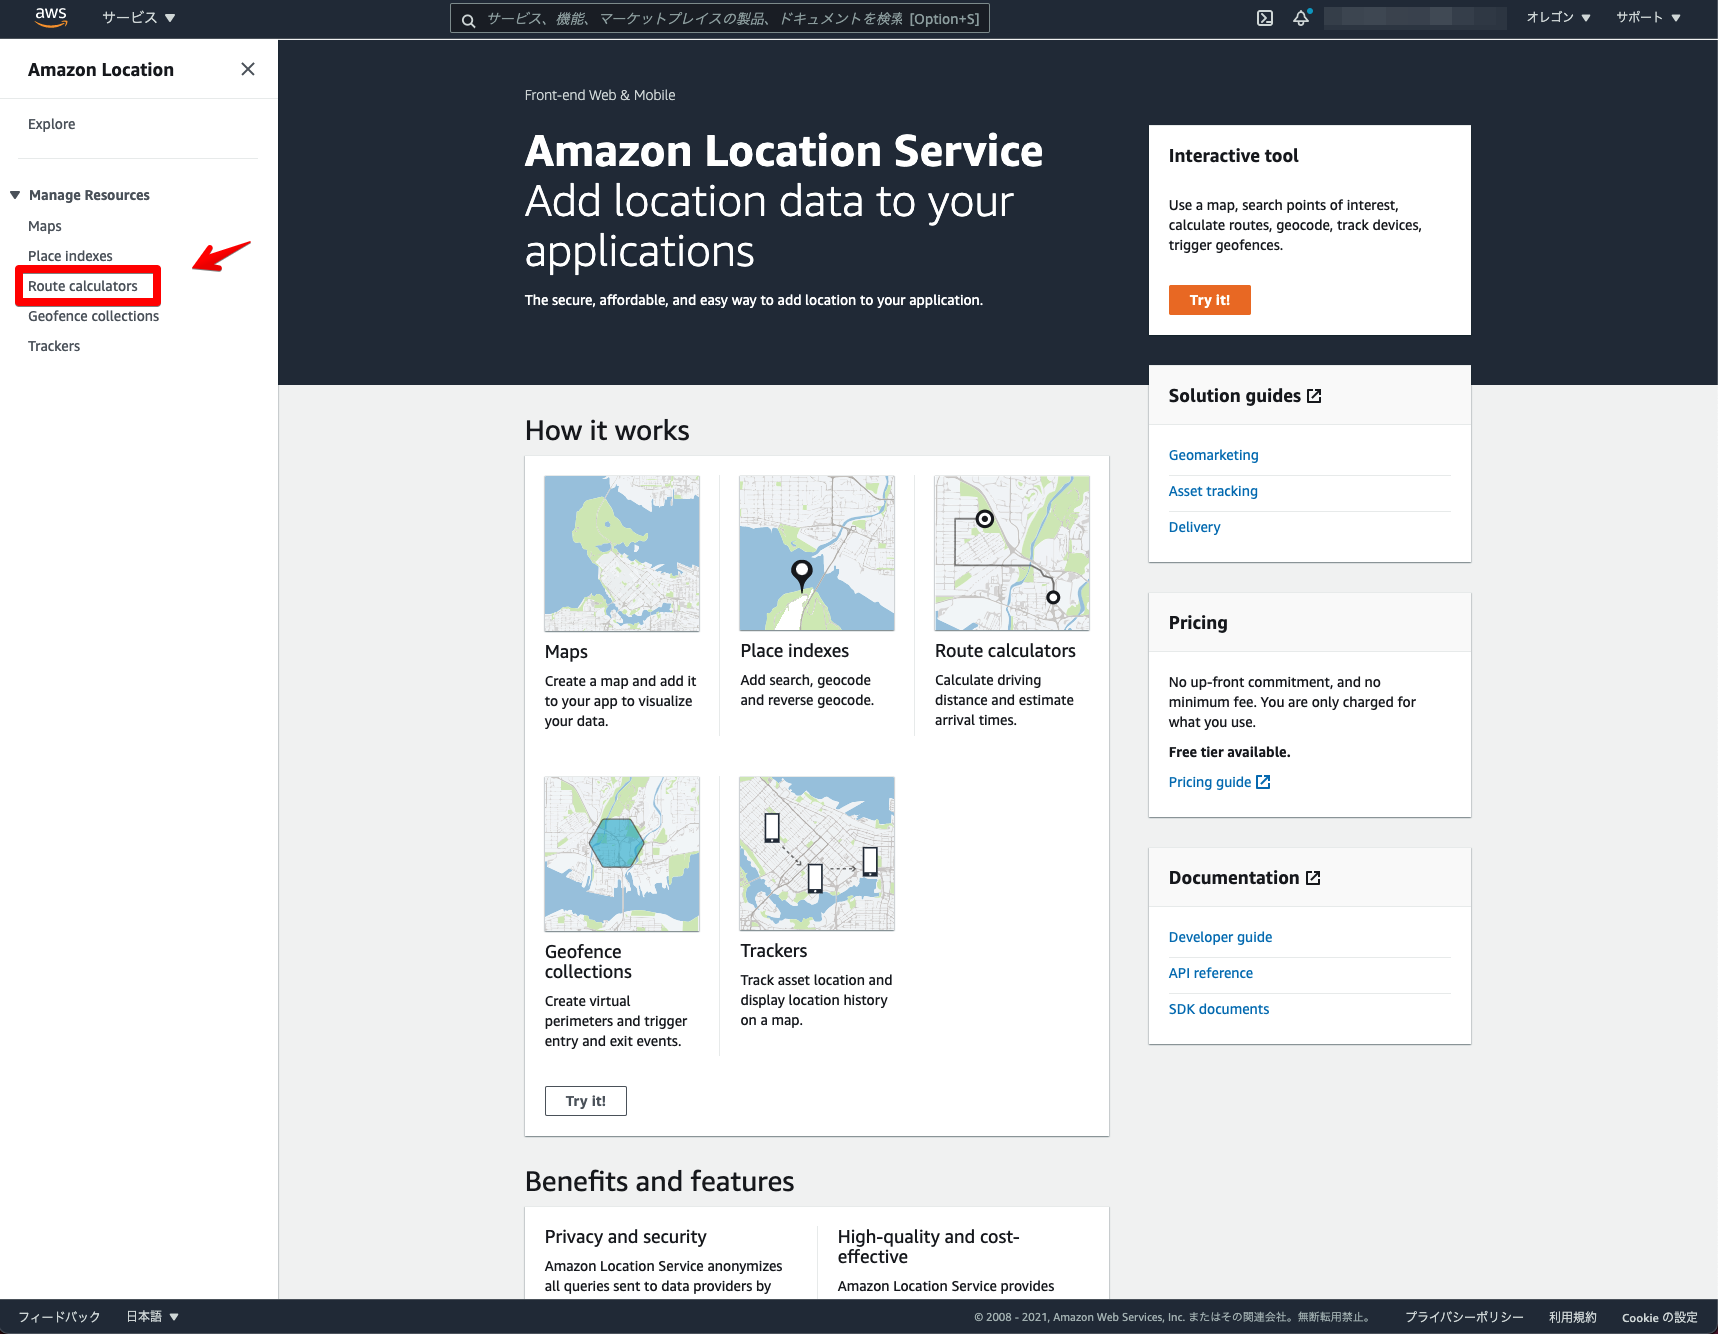
はじめに、AWSコンソールでAmazon Location Route calculatorsの設定をします。
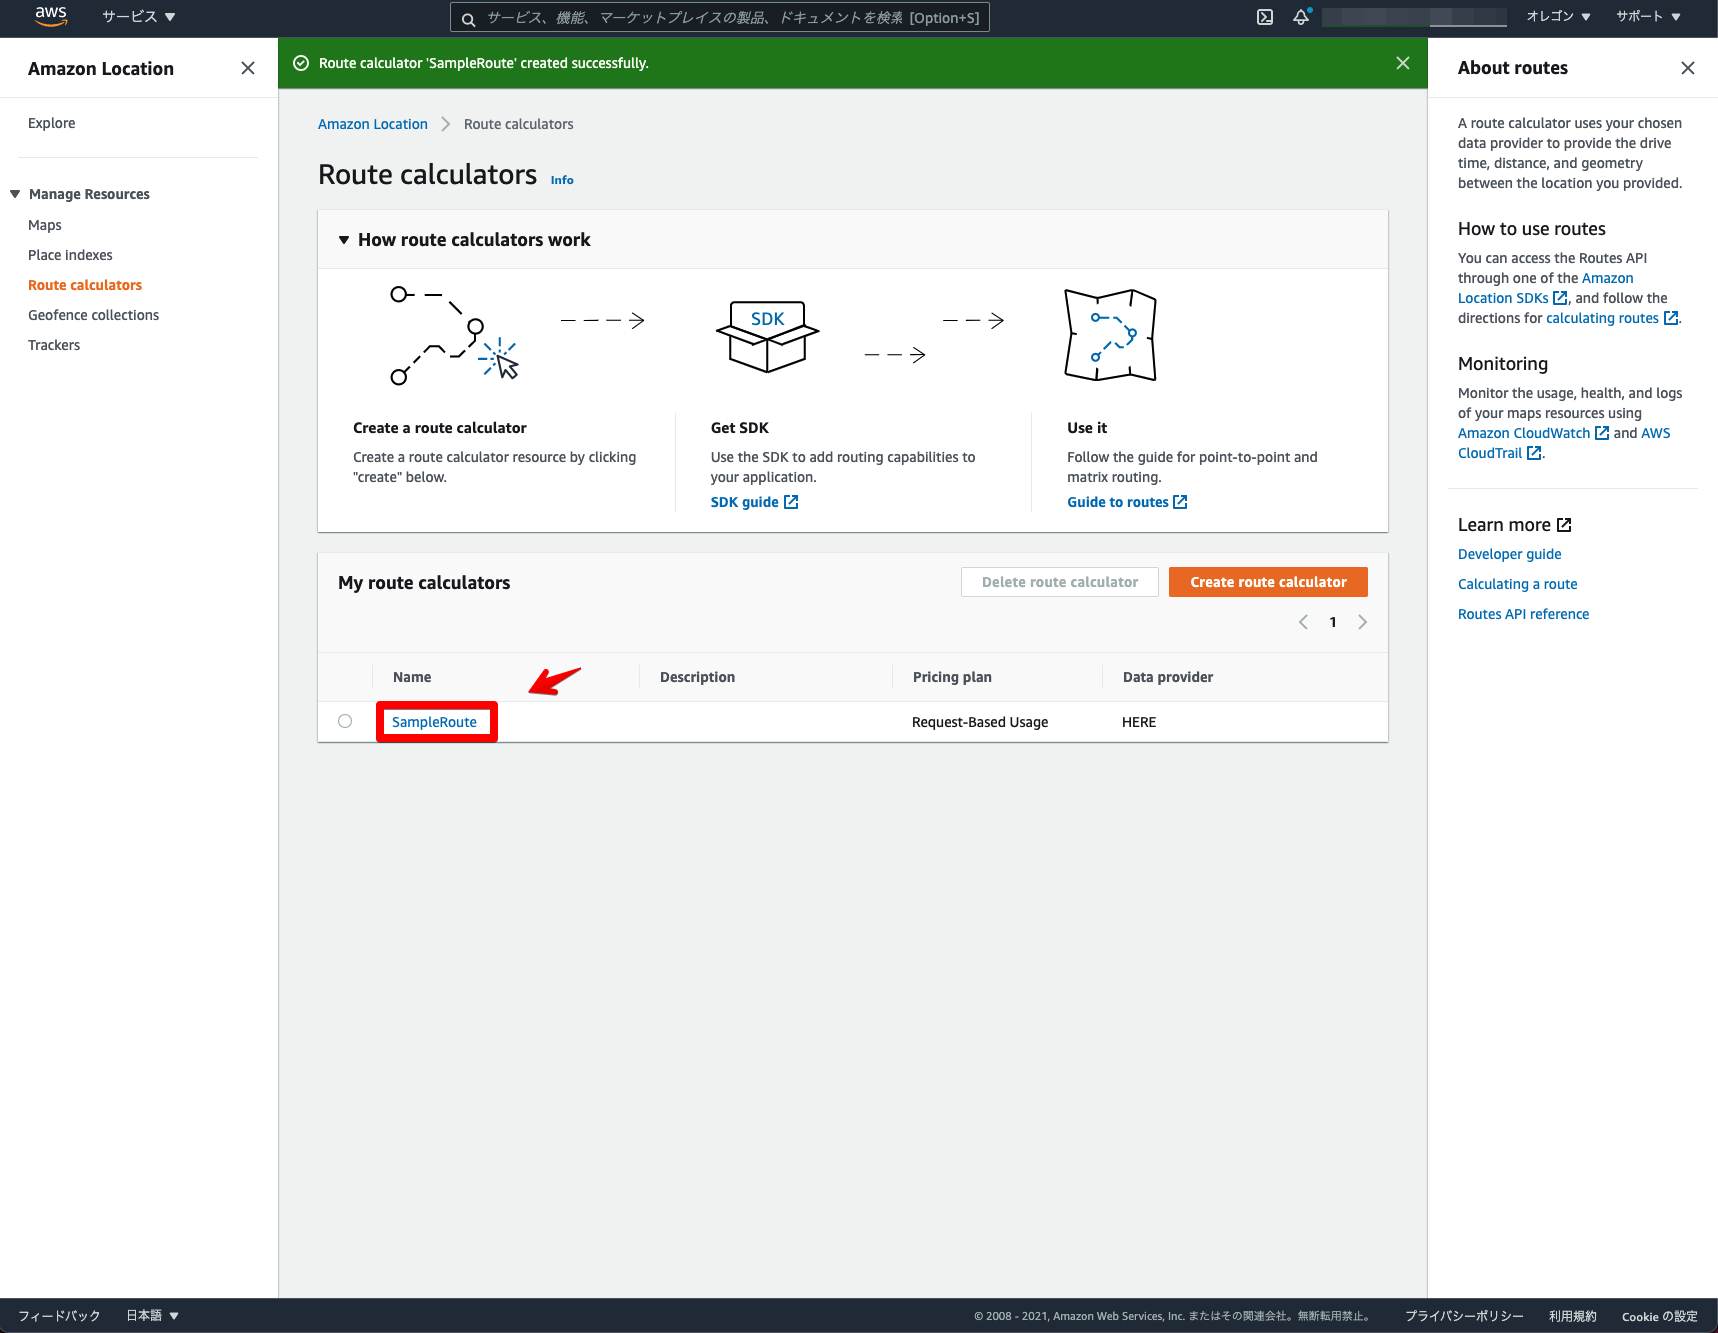
「Route calculators」をクリックします。
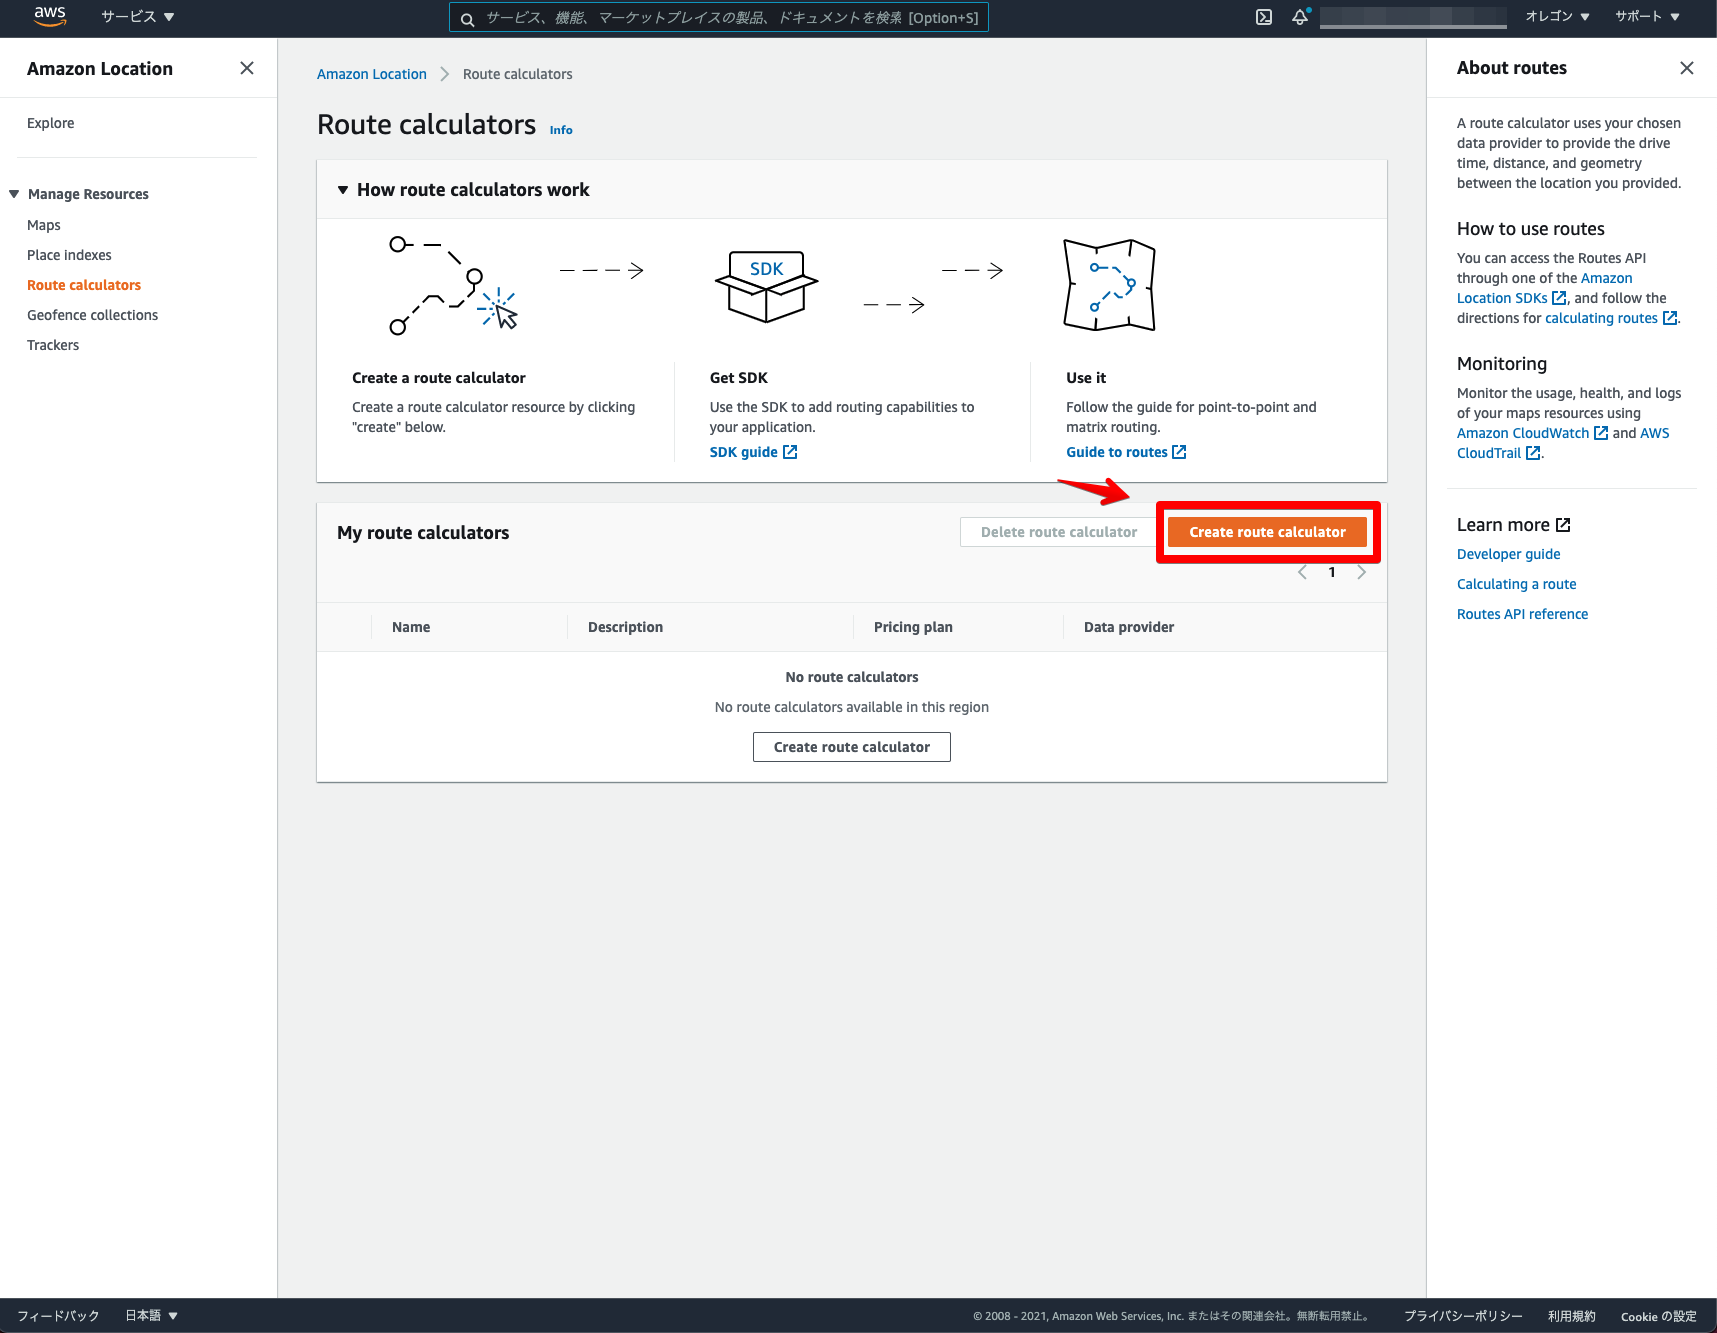
「Create route calculator」をクリックします。
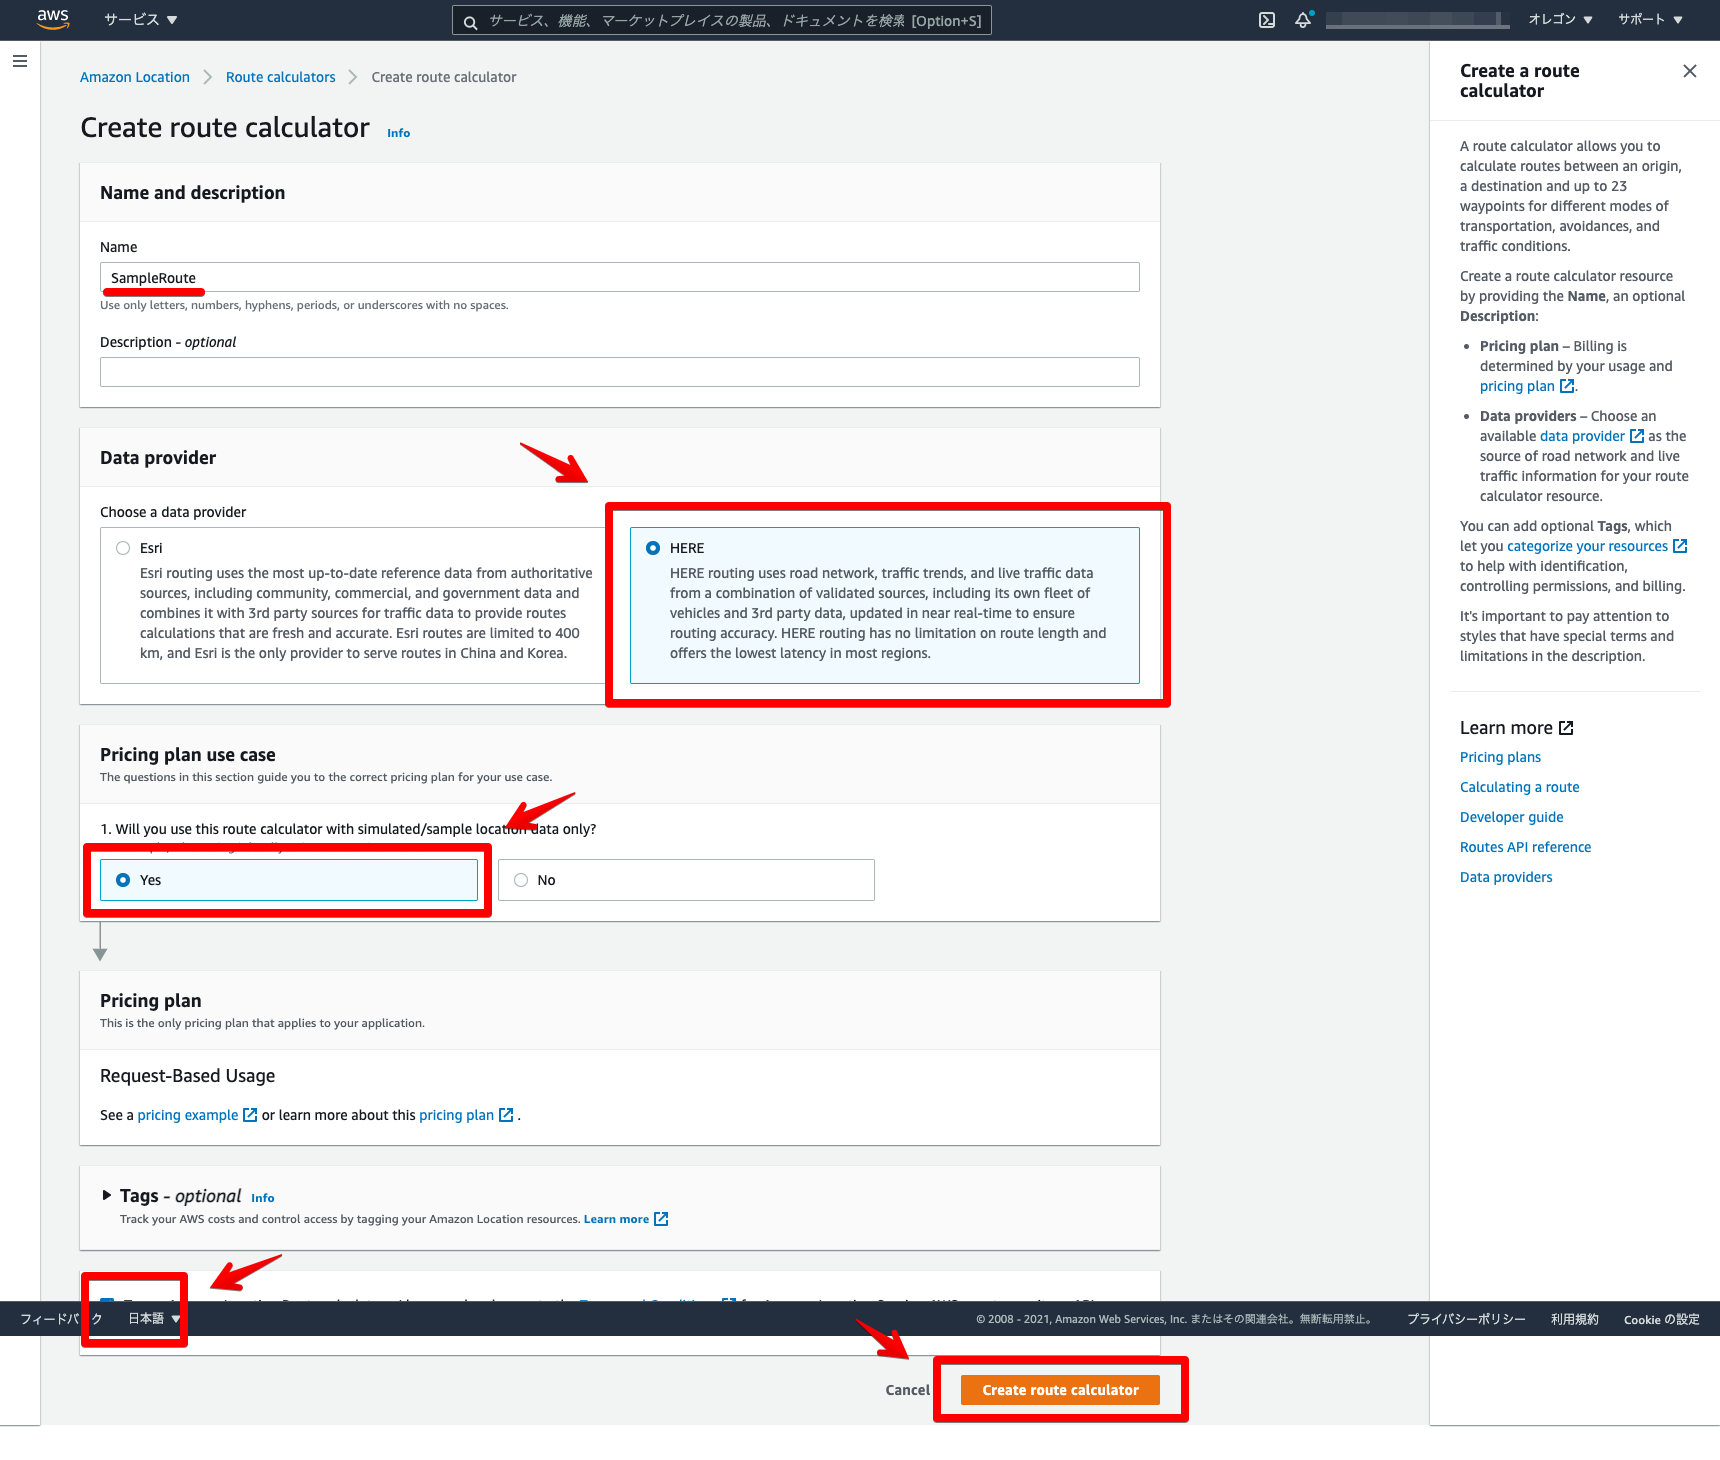
ルート検索名の入力と利用データを選択します。今回は「SampleRoute」としました。
作成されたルート検索をクリックします。
ここで表示されている「Name」と「ARN」を今後の設定で利用するのでコピーしておきます。
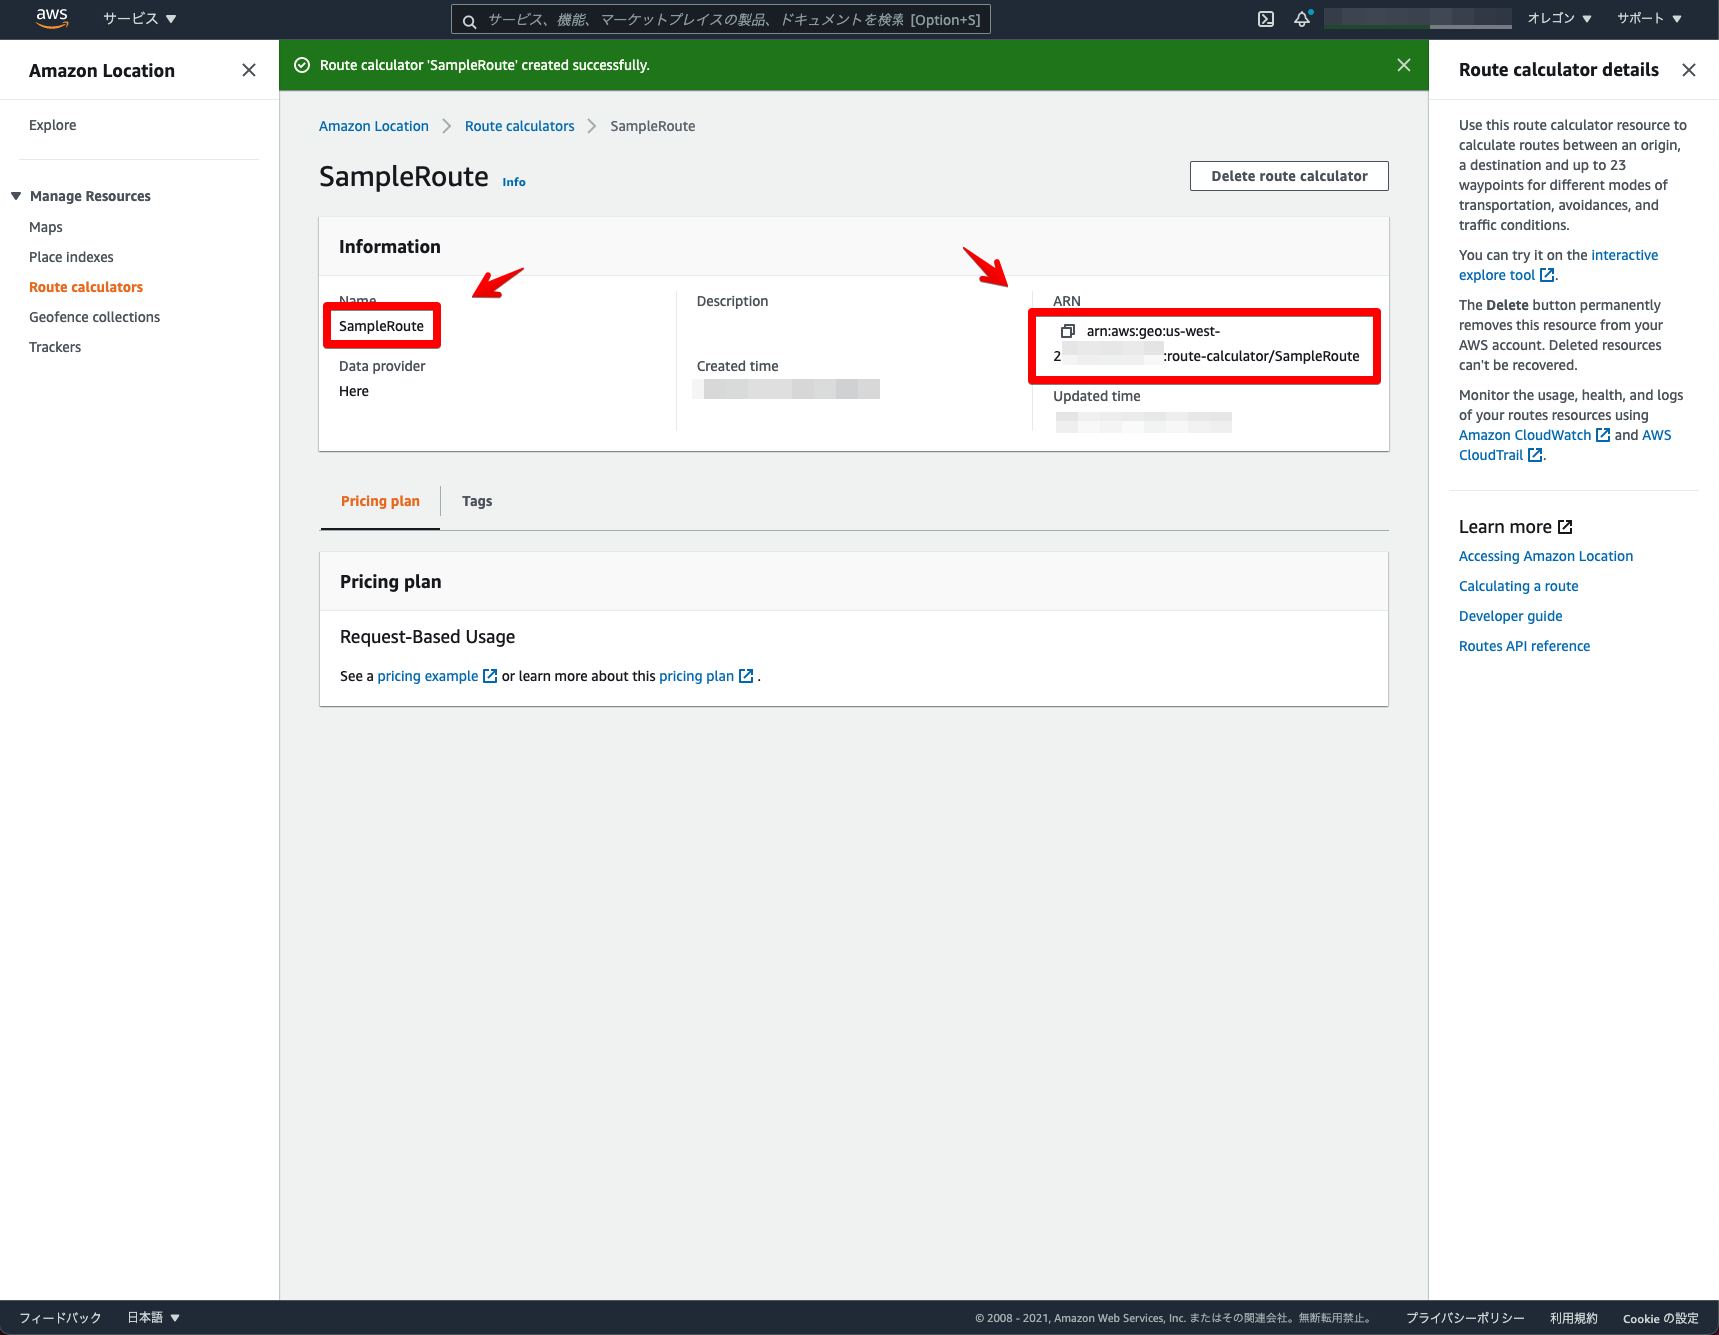
これでAmazon Location Route calculatorsの設定は完了になります ![]()
フロントエンド
次に、実際にマップアプリケーションを構築していきます。
Amazon Location Serviceの地図表示機能の構成ができていると、基本的には「MapPane.vue」の変更のみになります。
実行環境
- node v16.3.0
- npm v7.15.1
事前に、AWS SDK for JavaScriptのパッケージをインストールします。
npm install aws-sdk
全体構成

package.json
{
  "name": "amazon-location-app",
  "version": "0.1.0",
  "private": true,
  "scripts": {
    "serve": "vue-cli-service serve",
    "build": "vue-cli-service build",
    "lint": "vue-cli-service lint"
  },
  "dependencies": {
    "@aws-amplify/ui-vue": "^1.0.12",
    "aws-amplify": "^4.1.1",
    "aws-sdk": "^2.935.0",
    "core-js": "^3.6.5",
    "maplibre-gl": "^1.14.1-rc.2",
    "vue": "^2.6.11",
    "vue-router": "^3.2.0",
    "vuetify": "^2.4.0",
    "vuex": "^3.4.0"
  },
  "devDependencies": {
    "@vue/cli-plugin-babel": "~4.5.0",
    "@vue/cli-plugin-eslint": "~4.5.0",
    "@vue/cli-plugin-router": "~4.5.0",
    "@vue/cli-plugin-vuex": "~4.5.0",
    "@vue/cli-service": "~4.5.0",
    "babel-eslint": "^10.1.0",
    "eslint": "^6.7.2",
    "eslint-plugin-vue": "^6.2.2",
    "sass": "~1.32.0",
    "sass-loader": "^10.0.0",
    "vue-cli-plugin-vuetify": "~2.4.1",
    "vue-template-compiler": "^2.6.11",
    "vuetify-loader": "^1.7.0"
  },
  "eslintConfig": {
    "root": true,
    "env": {
      "node": true
    },
    "extends": [
      "plugin:vue/essential",
      "eslint:recommended"
    ],
    "parserOptions": {
      "parser": "babel-eslint"
    },
    "rules": {}
  },
  "browserslist": [
    "> 1%",
    "last 2 versions",
    "not dead"
  ]
}
/src/components
MapPane.vue
<!--マップコンポーネント-->
<template>
    <div class='mapPane'>
        <!--マップ表示-->
        <div id='map'></div>
    </div>
</template>

<script>
    // MapLibre GL JSを読み込み
    import maplibregl from 'maplibre-gl'
    // Amplify読み込み
    import { Auth, Signer } from 'aws-amplify'
    import awsconfig from '../aws-exports'
    // Amazon Location Service読み込み
    import Location from 'aws-sdk/clients/location'
    // マップオブジェクト定義
    let map;

    export default {
        name: 'MapPane',
        data() {
            return {
                credentials: null,
                client: null,
                params: null,
            }
        },
        mounted: async function () {
            // 認証情報取得
            this.credentials = await Auth.currentCredentials()
            // マップオブジェクト生成
            this.mapCreate()
            // ルート検索
            this.addRouteSearch()
        },
        methods: {
            // マップオブジェクト生成
            mapCreate: function() {
                // Amazon Location Maps読み込み
                map = new maplibregl.Map({
                    container: 'map',
                    style: 'sample',
                    center: [139.7648, 35.6794],
                    zoom: 15,
                    bearing: 64.8,
                    pitch: 60,
                    hash: true,
                    transformRequest: this.transformRequest,
                });

                // コントロール関係表示
                map.addControl(new maplibregl.NavigationControl());
            },
            // Amazon Location Maps設定
            transformRequest: function (url, resourceType) {
                if (resourceType === 'Style' && !url.includes('://')) {
                    // スタイル設定
                    url = `https://maps.geo.${awsconfig.aws_project_region}.amazonaws.com/maps/v0/maps/${url}/style-descriptor`
                }
                if (url.includes('amazonaws.com')) {
                    return {
                        url: Signer.signUrl(url, {
                            access_key: this.credentials.accessKeyId,
                            secret_key: this.credentials.secretAccessKey,
                            session_token: this.credentials.sessionToken,
                        }),
                    }
                }
                return { url }
            },
            // Amazon Location Route calculators設定
            addRouteSearch : function() {
                // Amazon Location Service設定
                this.client = new Location({
                    credentials: this.credentials,
                    region: awsconfig.aws_project_region
                });
                // ルート検索設定
                this.params = {
                    CalculatorName: 'SampleRoute',
                    DeparturePosition: [139.7558, 35.6767],
                    DestinationPosition: [139.8160, 35.6830],
                    IncludeLegGeometry: true,
                }
                // ルート検索
                this.client.calculateRoute (this.params, (err, data) => {
                    // ルートデータ取得
                    const routes = data.Legs[0].Geometry.LineString
                    // ルートデータ表示
                    map.on('load', function () {
                        // ライン設定
                        map.addSource('route_sample', {
                            'type': 'geojson',
                            'data': {
                                'type': 'Feature',
                                'properties': {},
                                'geometry': {
                                    'type': 'LineString',
                                    'coordinates': routes
                                }
                            }
                        });
                        // スタイル設定
                        map.addLayer({
                            'id': 'route_sample',
                            'type': 'line',
                            'source': 'route_sample',
                            'layout': {
                                'line-join': 'round',
                                'line-cap': 'round'
                            },
                            'paint': {
                                'line-color': '#FF0000',
                                'line-width': 10,
                                'line-opacity': 0.5
                            }
                        });
                    });
                })
            }
        }
    }
</script>

<style scoped>
    #map {
        z-index: 0;
        height: 800px;
    }
</style>
Amazon Location Serviceを読み込みます。
// Amazon Location Service読み込み
import Location from 'aws-sdk/clients/location'
Amazon Location Serviceの設定とルート検索の設定をします。CalculatorNameに作成したルート検索の「Name」を指定します。今回は東京駅周辺に始点と終点を設定しました。
// Amazon Location Service設定
this.client = new Location({
    credentials: this.credentials,
    region: awsconfig.aws_project_region
});
// ルート検索設定
this.params = {
    CalculatorName: 'SampleRoute',
    DeparturePosition: [139.7558, 35.6767],
    DestinationPosition: [139.8160, 35.6830],
    IncludeLegGeometry: true,
}
Amazon Location Route calculatorsを利用し、ルート検索結果を地図上に描画します。
// ルート検索
this.client.calculateRoute (this.params, (err, data) => {
    // ルートデータ取得
    const routes = data.Legs[0].Geometry.LineString
    // ルートデータ表示
    map.on('load', function () {
        // ライン設定
        map.addSource('route_sample', {
            'type': 'geojson',
            'data': {
                'type': 'Feature',
                'properties': {},
                'geometry': {
                    'type': 'LineString',
                    'coordinates': routes
                }
            }
        });
        // スタイル設定
        map.addLayer({
            'id': 'route_sample',
            'type': 'line',
            'source': 'route_sample',
            'layout': {
                'line-join': 'round',
                'line-cap': 'round'
            },
            'paint': {
                'line-color': '#FF0000',
                'line-width': 10,
                'line-opacity': 0.5
            }
        });
    });
})
Amplifyのロール設定
最後にAmplifyのロールにAmazon Location Route calculatorsのポリシーを追加します。
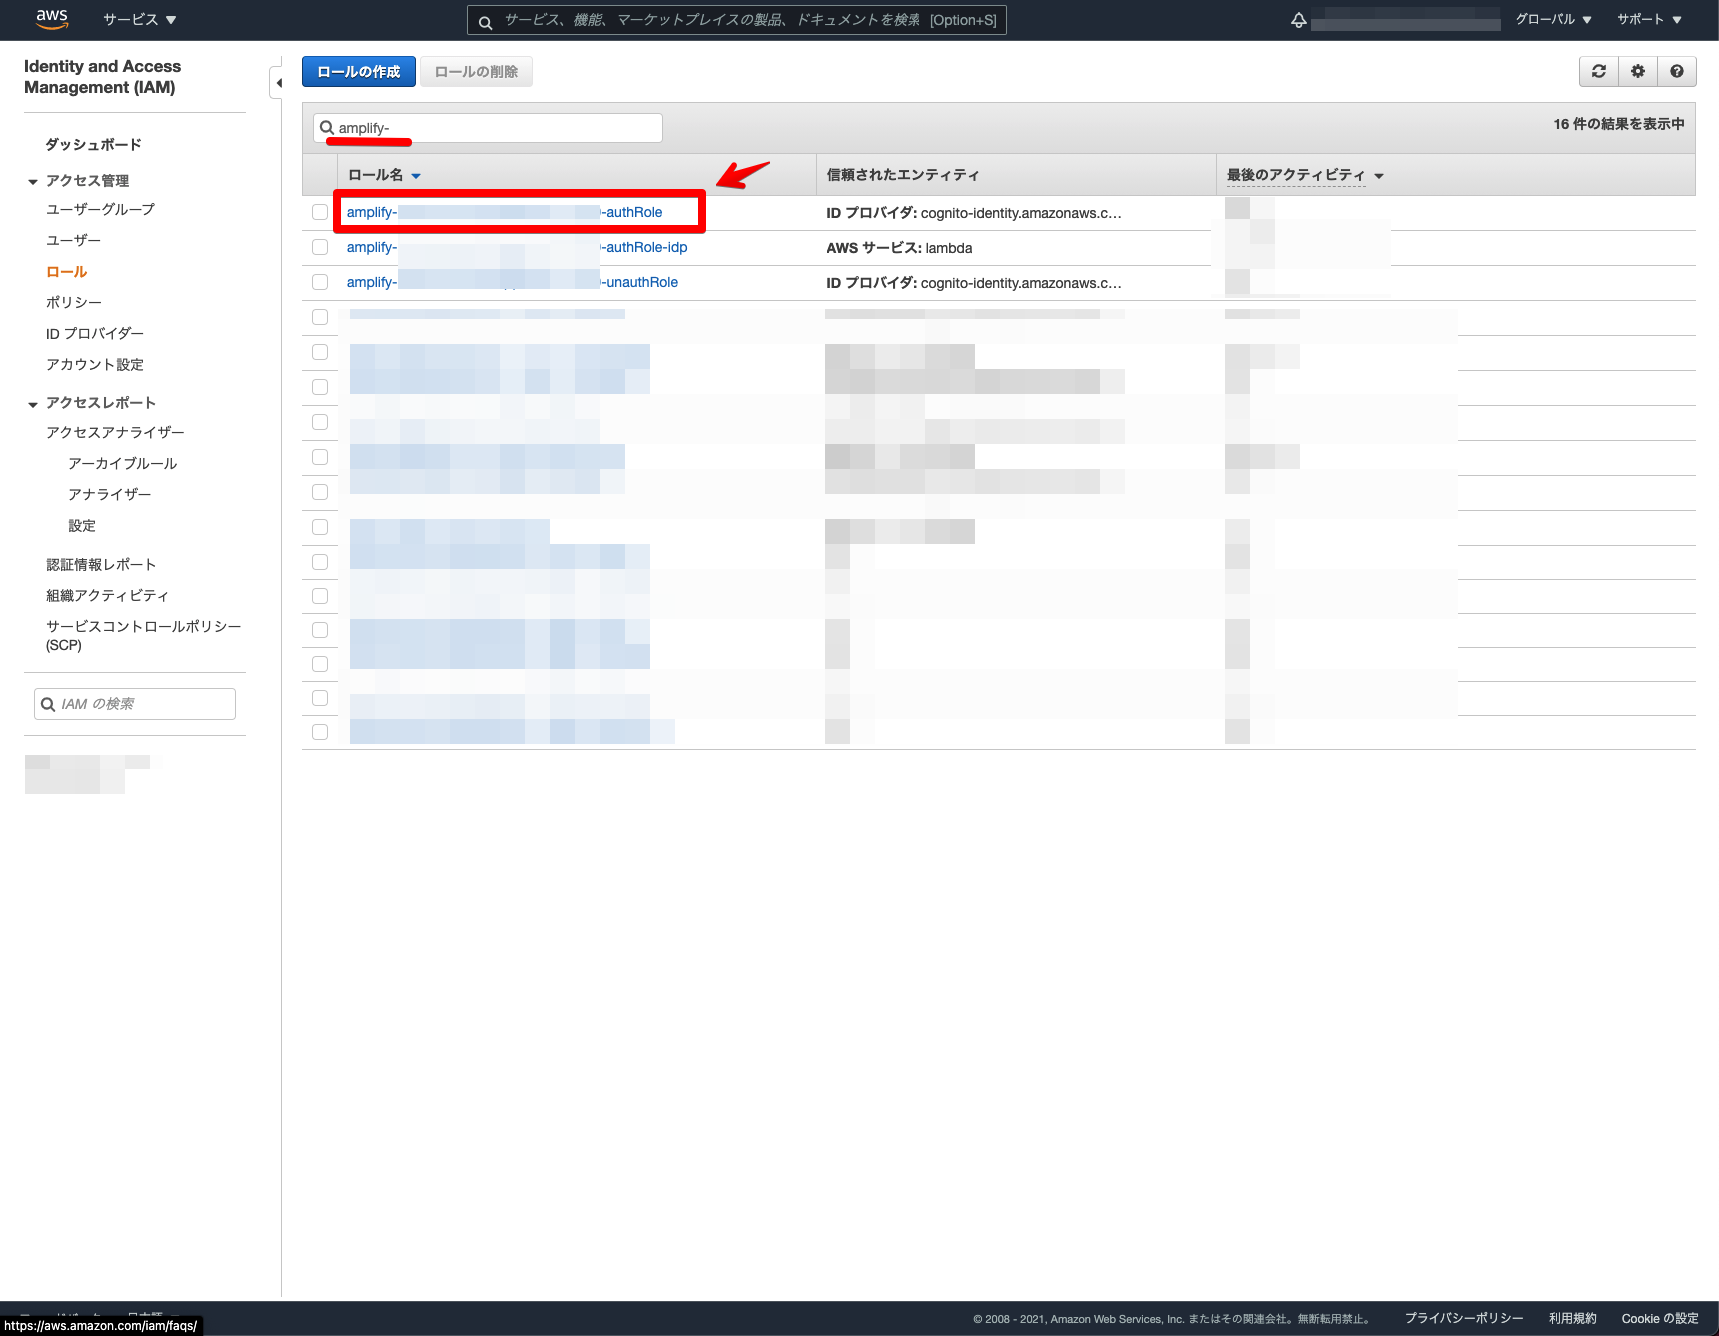
ログイン機能で利用しているロールを検索します。「amplify-xxxxx-authRole」を選択します。
「インラインポリシーの追加」をクリックします。
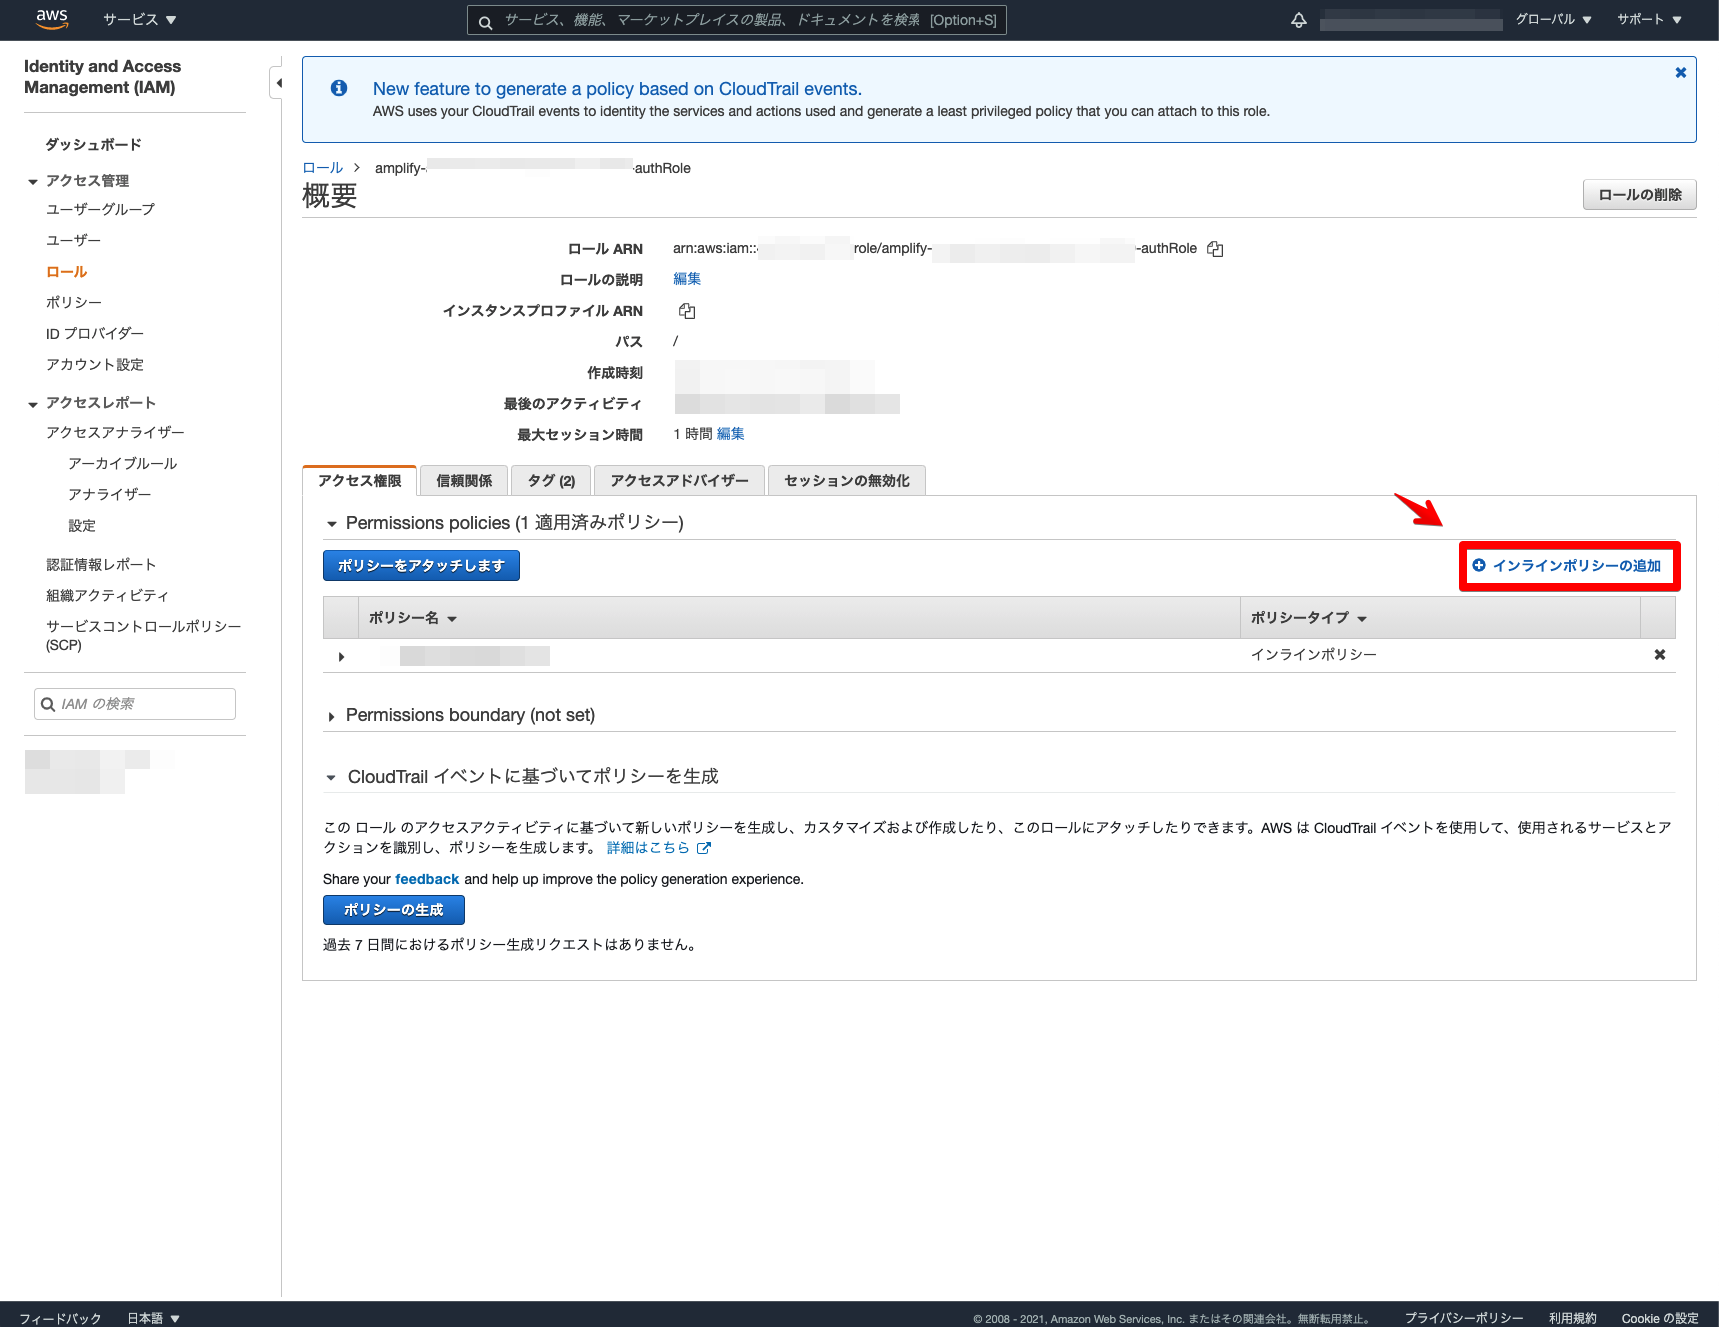
「JSON」を選択しポリシーを設定します。Resourceは作成したマップの「ARN」を設定します。
{
    "Version": "2012-10-17",
    "Statement": [
        {
            "Sid": "Routes",
            "Effect": "Allow",
            "Action": "geo:CalculateRoute",
            "Resource": "arn:aws:geo:us-west-2:xxxxx:route-calculator/SampleRoute"
        }
    ]
}
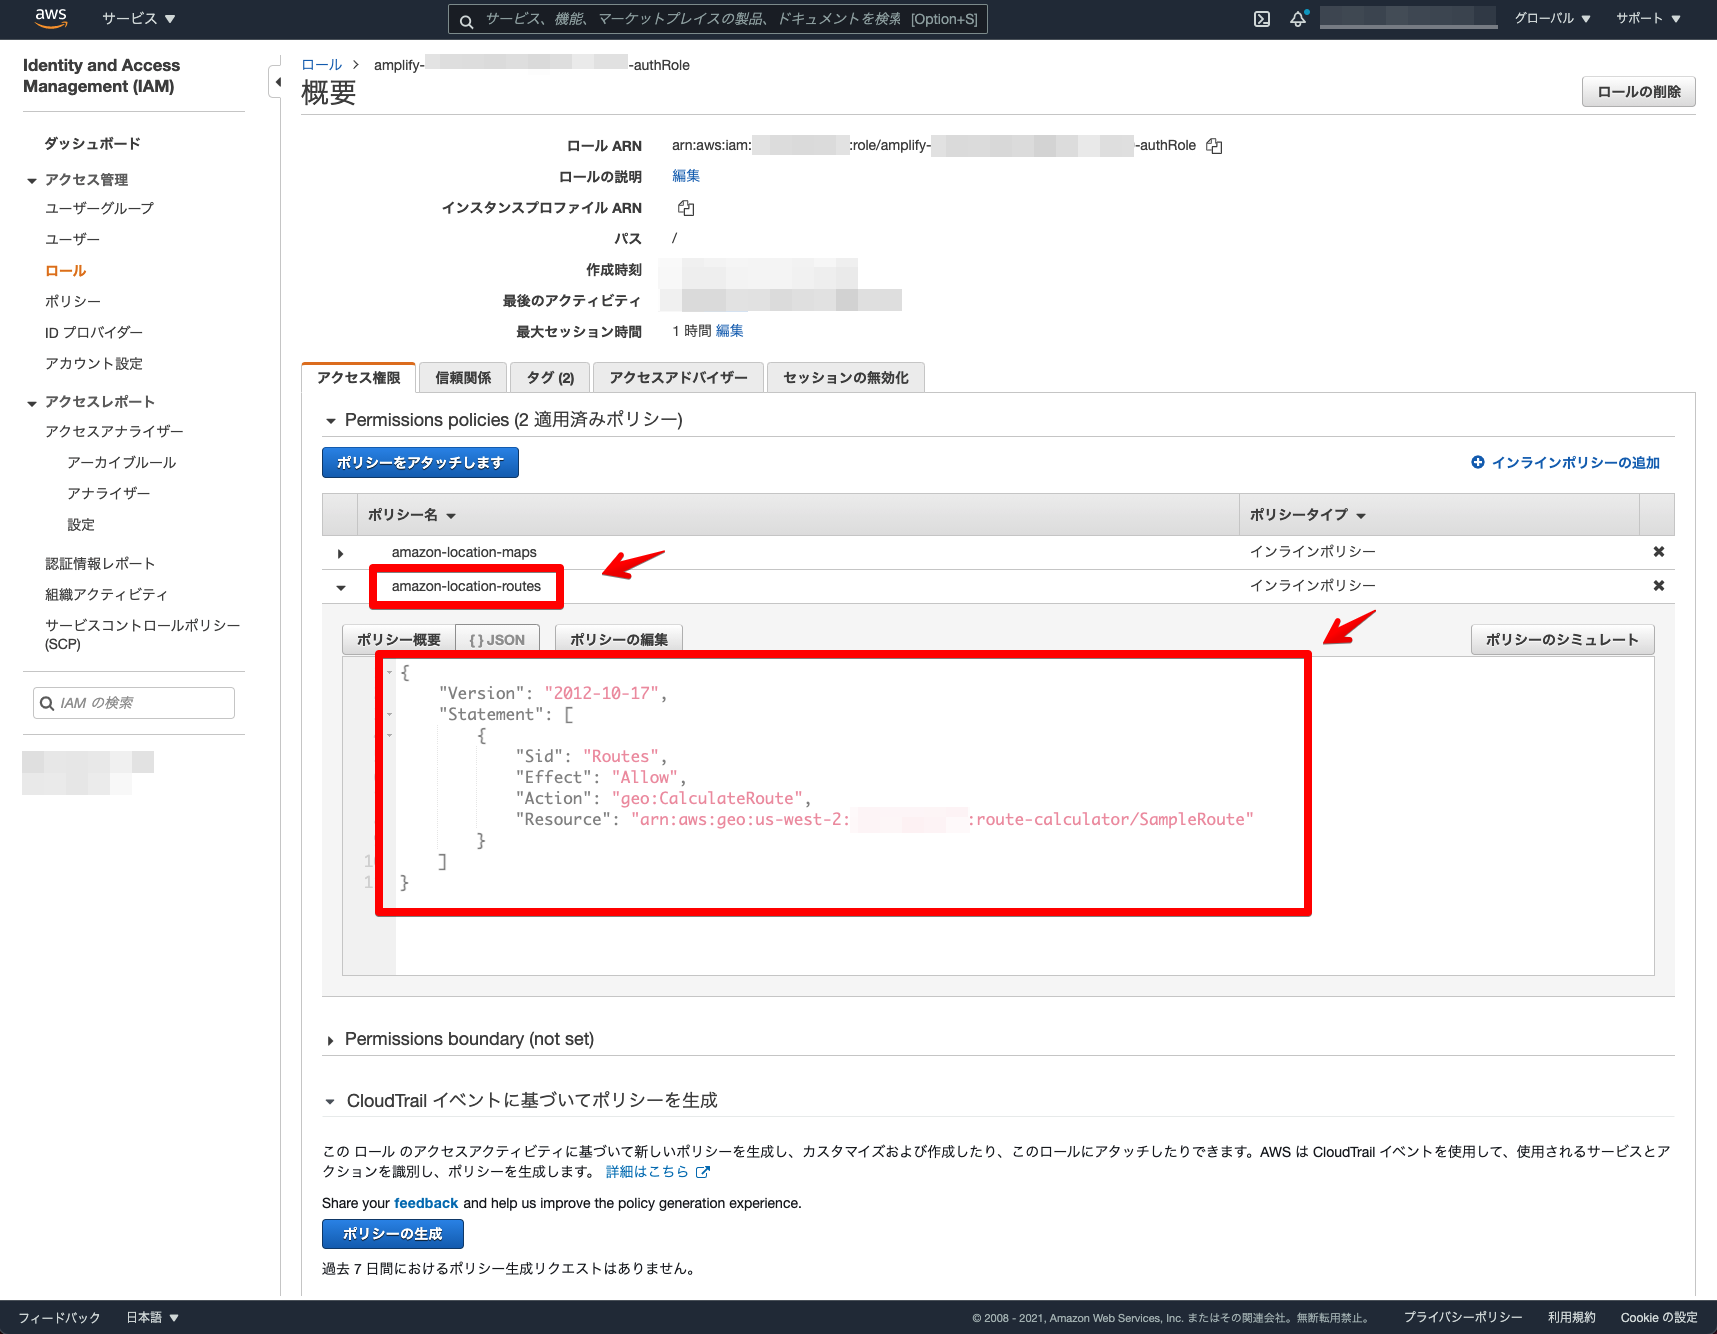
これでAmplifyのロール設定は完了になります ![]()
簡易ローカルサーバーで確認してみます。
npm run serve
ローカルサーバーを立ち上げて、ログインしてみます。Amazon Location Route calculatorsの表示を確認できました ![]()
Amazon Location Serviceでルート検索機能を構築できました 
Amazon Location Serviceを利用すると、手軽にルート検索が構築できることを確認できました。オプションも色々とあったりするので、このサンプルを参考にゼヒ色々と試して頂ければと思います。他の機能についても引き続き探っていきたいと思います ![]()
MapLibre GL JSとVue.jsについて、他にも記事を書いています。よろしければぜひ。
tags - MapLibre GL JS
tags - Vue.js
やってみたシリーズ ![]()
tags - Try
AWS AmplifyとAmplify UI VueとVue.jsでログイン機能を構築してみた
Amazon Location ServiceとMapLibre GL JSとAWS AmplifyとVue.jsを組み合わせてマップアプリケーションを構築してみた