
この記事は、「AWS Amplify Advent Calendar 2020」の13日目の記事です。
AWS AmplifyとVue.jsでGraphQLのデータ登録取得機能を構築してみました 
事前準備
- AWS AmplifyとVue.jsのログイン機能までの設定
以前書いた記事からの続きで説明します。
AWS AmplifyとVue.jsでログイン機能を構築してみた
バックエンド
まずは、バックエンドを構築していきます。
以前の記事で、認証機能までを追加したので今回はAppSyncを利用したGraphQLの環境を設定します。
API機能のみであれば2コマンドで実装可能です!
amplify add api
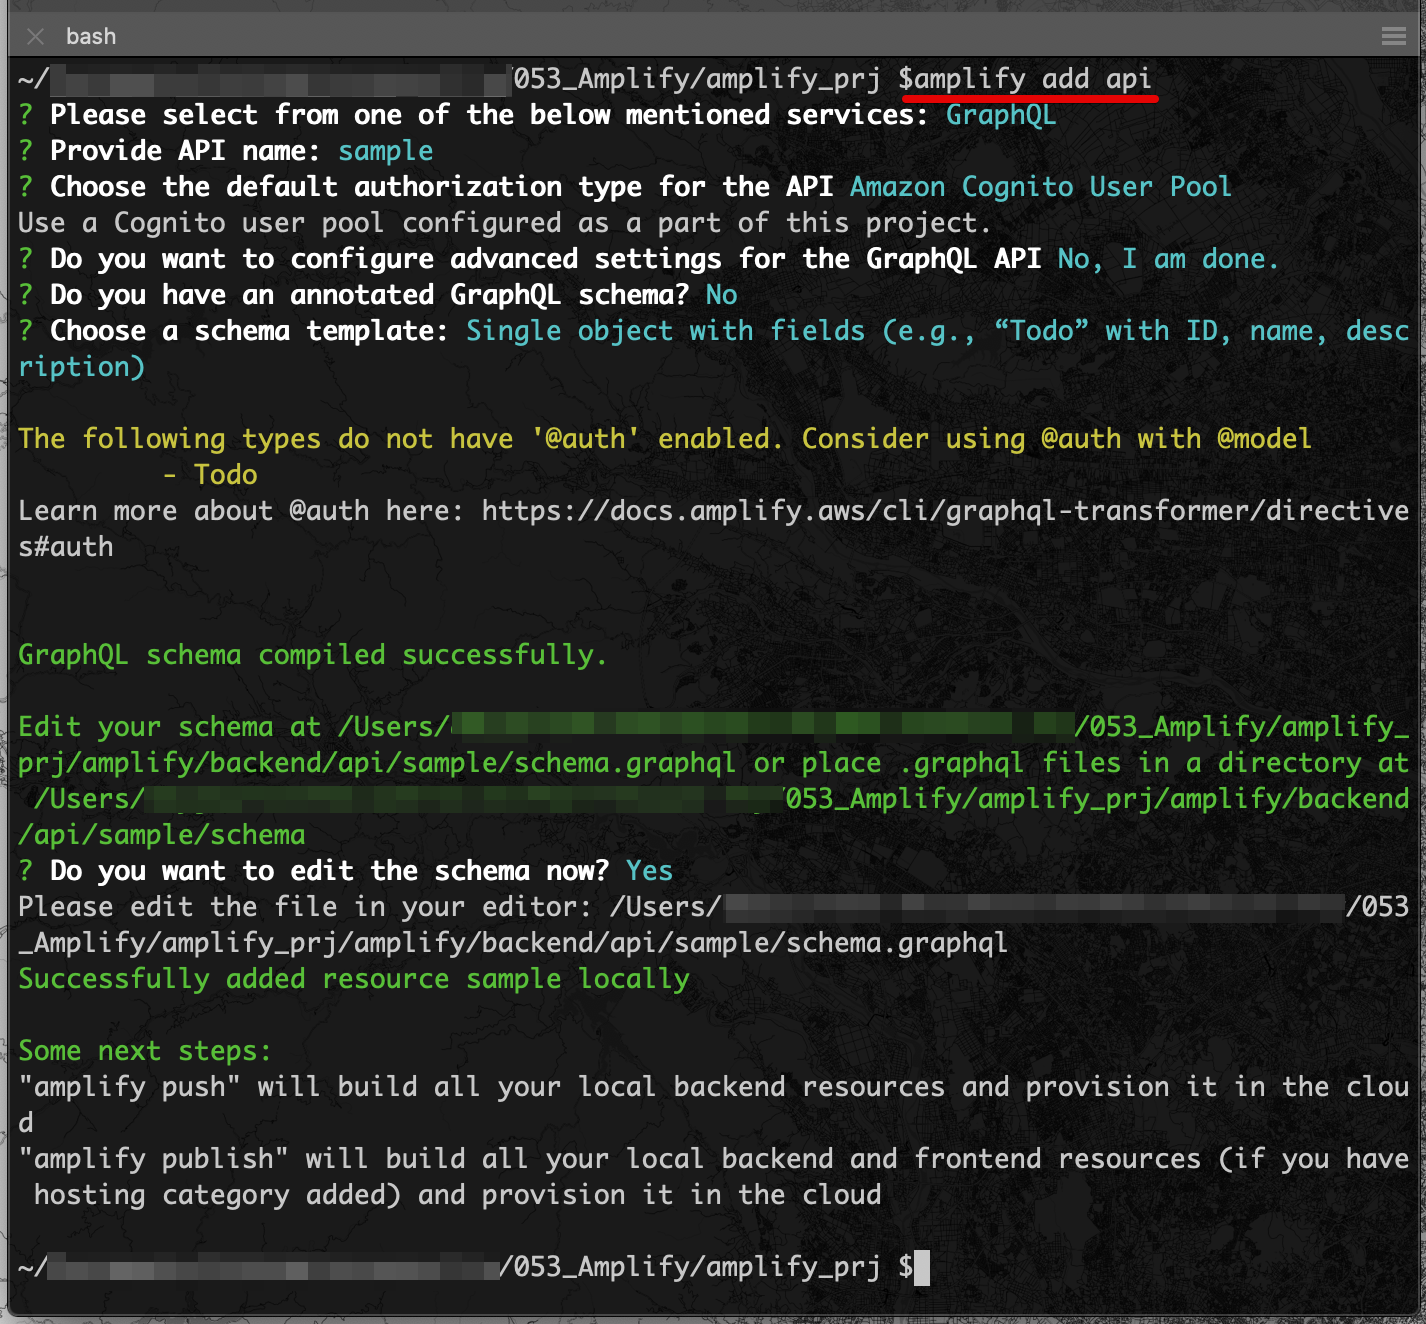
API作成後、ひな形ができるのでスキーマをサンプル用に修正します。
../amplify/backend/api/sample
schema.graphql
type Sample @model {
    id: ID!
    name: String!
}
amplify push
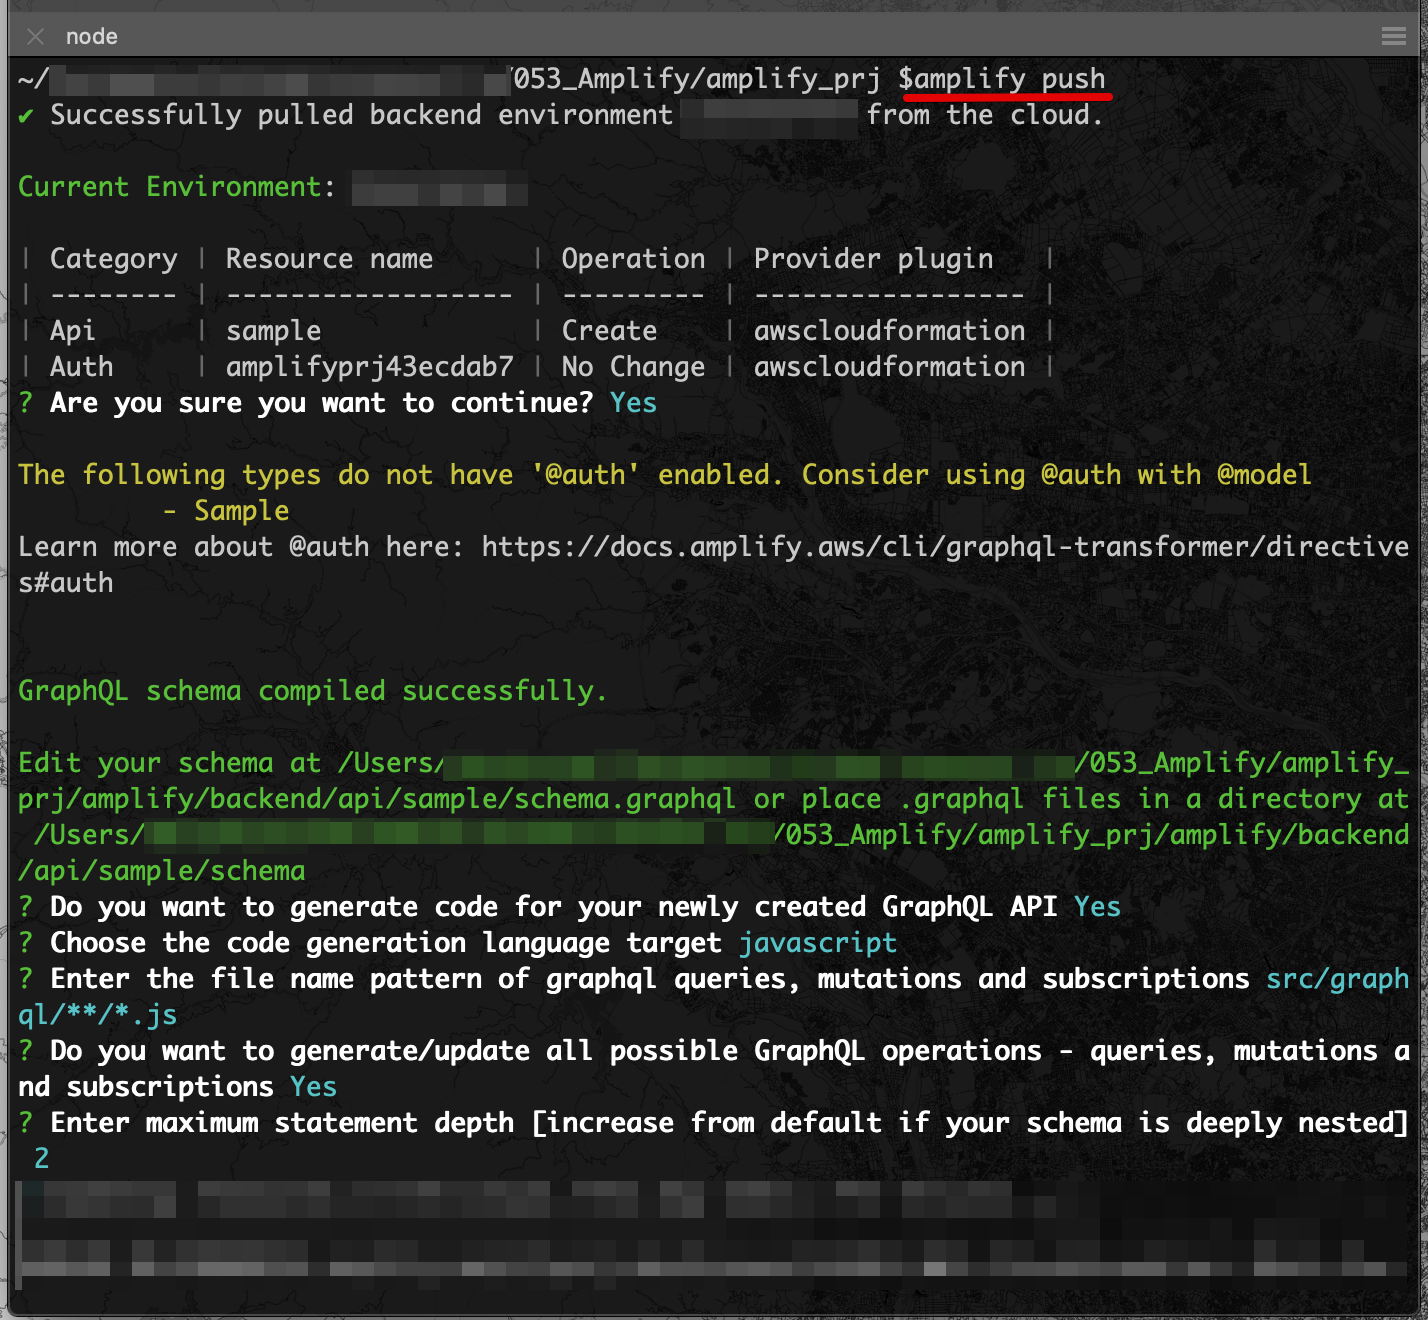
処理が完了すると、APIの設定がほぼ自動で作成されているのが確認できます!
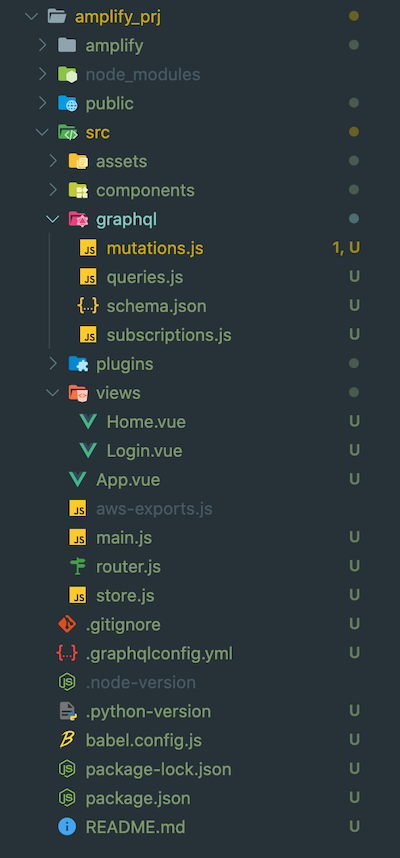
src/graphql
mutations.js
export const createSample = /* GraphQL */ `
  mutation CreateSample(
    $input: CreateSampleInput!
    $condition: ModelSampleConditionInput
  ) {
    createSample(input: $input, condition: $condition) {
      id
      name
      createdAt
      updatedAt
    }
  }
`;
export const updateSample = /* GraphQL */ `
  mutation UpdateSample(
    $input: UpdateSampleInput!
    $condition: ModelSampleConditionInput
  ) {
    updateSample(input: $input, condition: $condition) {
      id
      name
      createdAt
      updatedAt
    }
  }
`;
export const deleteSample = /* GraphQL */ `
  mutation DeleteSample(
    $input: DeleteSampleInput!
    $condition: ModelSampleConditionInput
  ) {
    deleteSample(input: $input, condition: $condition) {
      id
      name
      createdAt
      updatedAt
    }
  }
`;
src/graphql
queries.js
export const getSample = /* GraphQL */ `
  query GetSample($id: ID!) {
    getSample(id: $id) {
      id
      name
      createdAt
      updatedAt
    }
  }
`;
export const listSamples = /* GraphQL */ `
  query ListSamples(
    $filter: ModelSampleFilterInput
    $limit: Int
    $nextToken: String
  ) {
    listSamples(filter: $filter, limit: $limit, nextToken: $nextToken) {
      items {
        id
        name
        createdAt
        updatedAt
      }
      nextToken
    }
  }
`;
これだけでバックエンドの構築は完了になります ![]()
フロントエンド
次に、フロントエンドを構築していきます。
実行環境
- node v12.7.0
- npm v6.13.4
全体構成
package.json
{
  "name": "amplify_prj",
  "version": "0.1.0",
  "private": true,
  "scripts": {
    "serve": "vue-cli-service serve",
    "build": "vue-cli-service build",
    "lint": "vue-cli-service lint"
  },
  "dependencies": {
    "@aws-amplify/cli": "^4.37.1",
    "aws-amplify": "^1.3.3",
    "aws-amplify-vue": "^0.2.17",
    "bootstrap-vue": "^2.0.0-rc.19",
    "core-js": "^2.6.5",
    "vue": "^2.6.10",
    "vue-router": "^3.0.3",
    "vuex": "^3.0.1"
  },
  "devDependencies": {
    "@babel/polyfill": "^7.4.4",
    "@vue/cli-plugin-babel": "^3.8.0",
    "@vue/cli-plugin-eslint": "^3.8.0",
    "@vue/cli-service": "^3.8.0",
    "babel-eslint": "^10.0.1",
    "bootstrap": "^4.3.1",
    "eslint": "^5.16.0",
    "eslint-plugin-vue": "^5.0.0",
    "mutationobserver-shim": "^0.3.3",
    "node-sass": "^4.12.0",
    "popper.js": "^1.15.0",
    "portal-vue": "^2.1.4",
    "sass-loader": "^7.1.0",
    "vue-cli-plugin-bootstrap-vue": "^0.4.0",
    "vue-template-compiler": "^2.6.10"
  },
  "eslintConfig": {
    "root": true,
    "env": {
      "node": true
    },
    "extends": [
      "plugin:vue/essential",
      "eslint:recommended"
    ],
    "rules": {},
    "parserOptions": {
      "parser": "babel-eslint"
    }
  },
  "postcss": {
    "plugins": {
      "autoprefixer": {}
    }
  },
  "browserslist": [
    "> 1%",
    "last 2 versions"
  ]
}
src/views
Home.vue
<template>
    <div class='home'>
        <b-container>
            <b-row>
                <b-col sm='12' class='mb-3'>
                    <h3>ログイン済</h3>
                    <hr>
                </b-col>
                <b-col sm='3' class='mx-auto mb-3'>
                    <b-form-input v-model='id' placeholder='id'></b-form-input>
                    <b-form-input v-model='name' placeholder='name'></b-form-input>
                </b-col>
                <b-col sm='12' class='mb-5'>
                    <b-button variant='primary' v-on:click='postData'>登録</b-button>
                </b-col>
                <b-col sm='3' class='mx-auto mb-3'>
                    <b-table striped hover :items='items'></b-table>
                    <b-form-input v-model='text' placeholder='id'></b-form-input>
                </b-col>
                <b-col sm='12' class='mb-5'>
                    <b-button variant='success' v-on:click='getData'>表示</b-button>
                    <hr>
                </b-col>
                <b-col sm='12' class='mb-5'>
                    <!--ログアウトコンポーネント-->
                    <amplify-sign-out></amplify-sign-out>
                </b-col>
            </b-row>
        </b-container>
    </div>
</template>

<script>
    // API機能読み込み
    import { API, graphqlOperation } from 'aws-amplify'
    import { createSample } from '../graphql/mutations'
    import { getSample } from '../graphql/queries'

    export default {
        name: 'home',
        components: {
        },
        data() {
            return {
                id: '',
                name: '',
                text: '',
                items: []
            }
        },
        methods: {
            getData: async function () {
                // データ取得
                await API.graphql(graphqlOperation(getSample, {id: this.text}))
                .then(response => {
                    // テーブル表示
                    this.items = [
                        {
                            id: response.data.getSample.id,
                            name: response.data.getSample.name
                        }
                    ];
                }).catch(error => {
                    // テーブルリセット
                    this.items = [];
                });
            },
            postData: async function () {
                // オプション
                const myInit = {
                    id: Number(this.id),
                    name: String(this.name)
                };
                // データ登録
                await API.graphql(graphqlOperation(createSample, {input: myInit}))
                .then(response => {
                    console.log(response);
                }).catch(error => {
                    console.log(error)
                });
            }
        }
    }
</script>

<style scoped>

</style>
AmplifyのAPI機能を読み込みます。
// API機能読み込み
import { API, graphqlOperation } from 'aws-amplify'
import { createSample } from '../graphql/mutations'
import { getSample } from '../graphql/queries'
データ取得用の関数を設定します。
getData: async function () {
     // データ取得
    await API.graphql(graphqlOperation(getSample, {id: this.text}))
    .then(response => {
        // テーブル表示
        this.items = [
            {
                id: response.data.getSample.id,
                name: response.data.getSample.name
            }
        ];
    }).catch(error => {
        // テーブルリセット
        this.items = [];
    });
},
データ登録用の関数を設定します。
postData: async function () {
    // オプション
    const myInit = {
        id: Number(this.id),
        name: String(this.name)
    };
    // データ登録
    await API.graphql(graphqlOperation(createSample, {input: myInit}))
    .then(response => {
        console.log(response);
    }).catch(error => {
        console.log(error)
    });
}
簡易ローカルサーバーで確認してみます。
npm run serve
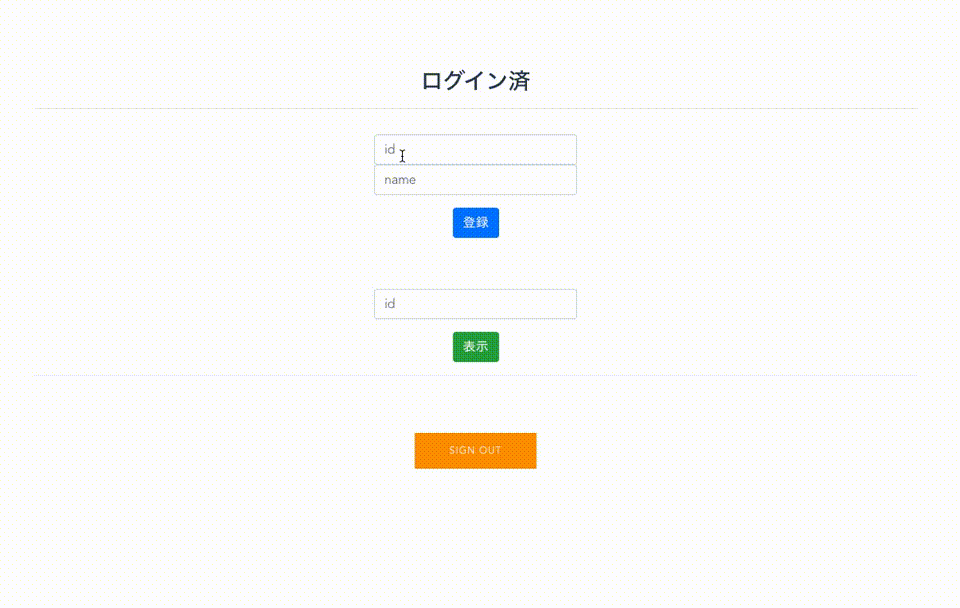
ローカルサーバーを立ち上げて、ログインしてみます。データの登録と取得ができるようになっています ![]()
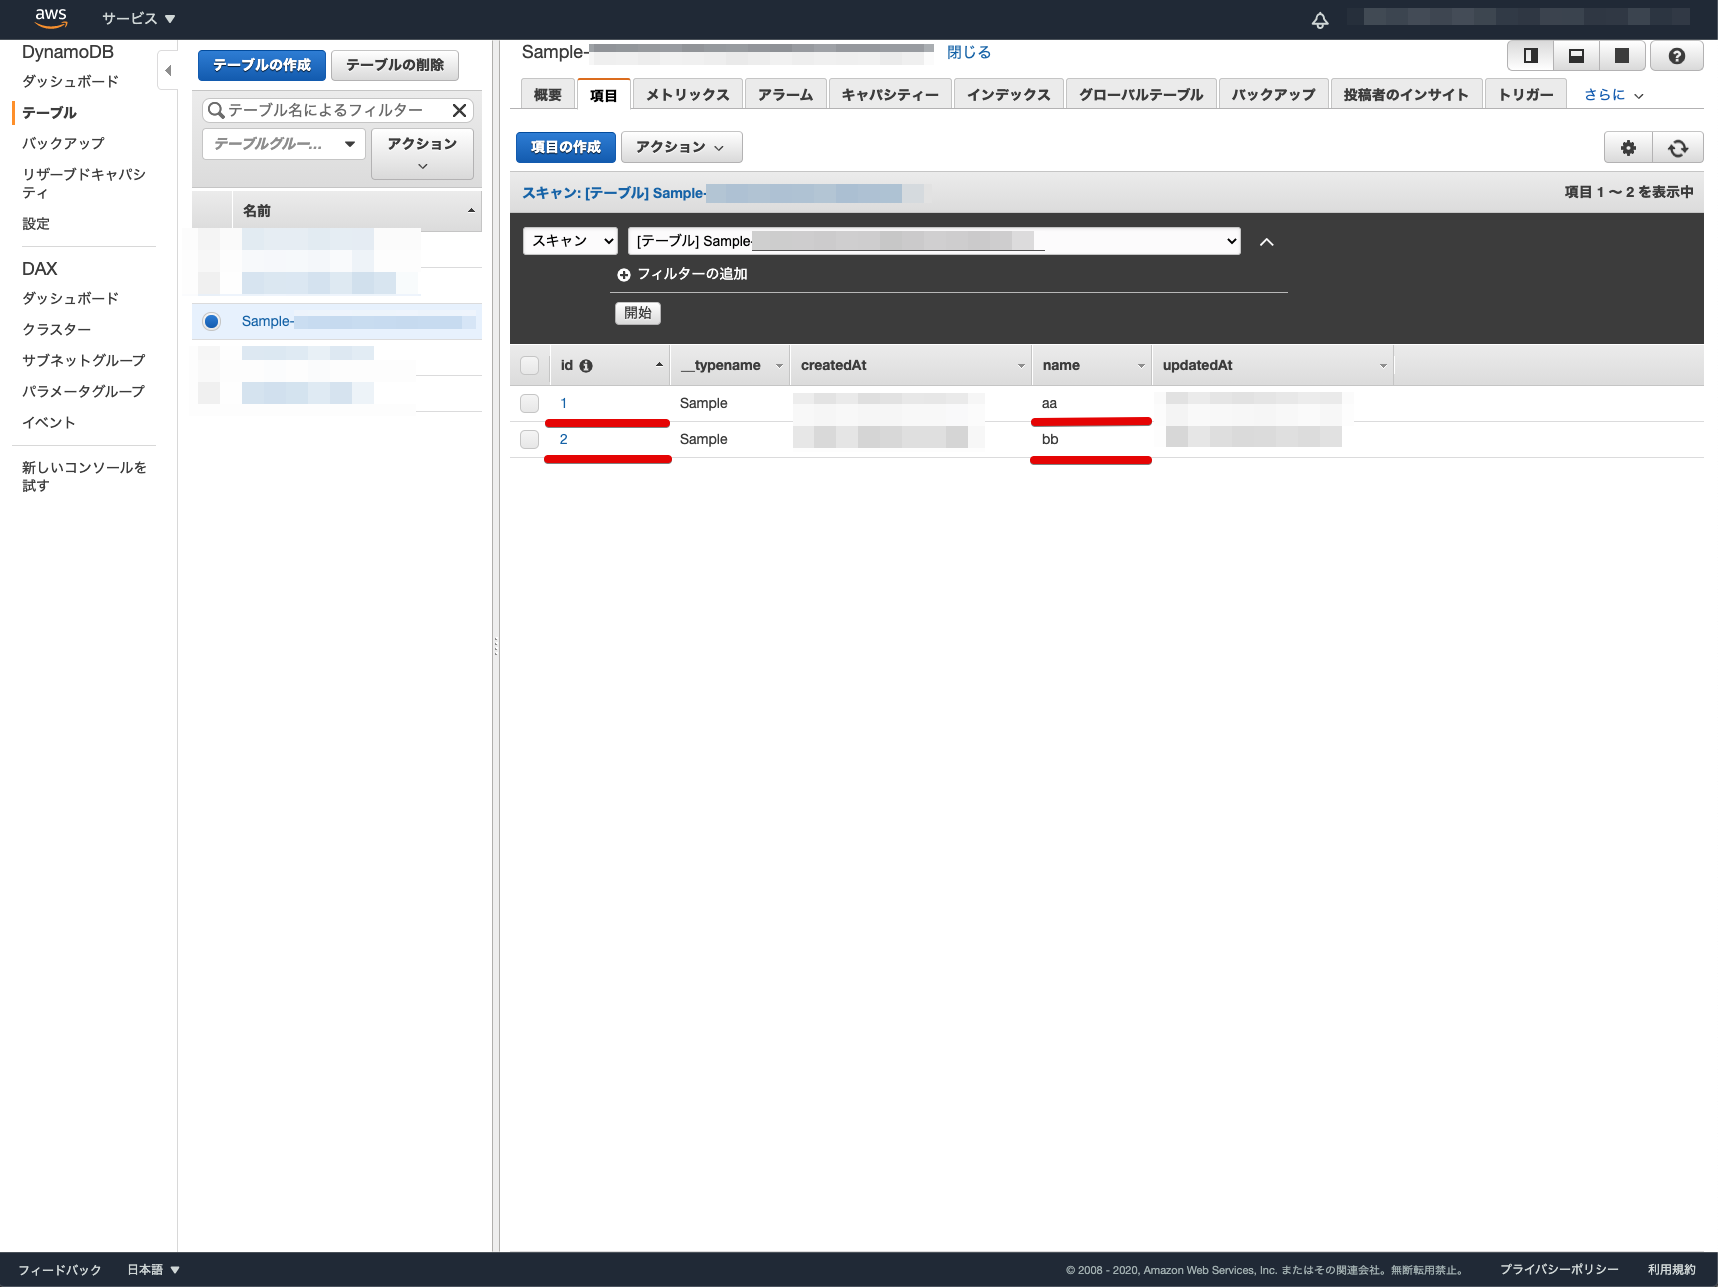
AWSのコンソールでDynamoDBを選択し登録できているか確認してみます。
AWS AmplifyとVue.jsでGraphQLのデータ登録取得機能の構築ができました 
AmplifyでAppSyncを利用したGraphQLのAPIを構築して表示してみました。細かい設定はまだまだあったり、Amplifyの詳しい使い方を覚える必要はありますが、覚えてしまうと手軽にデータの登録取得機能も構築できるので、Firebaseと同じくサーバーレスアプリケーションを構築する時にとても便利です ![]()
以前のREST APIでの記事、「AWS AmplifyとVue.jsでデータ登録取得機能を構築してみた」とも比べてみて頂ければと思います ![]()
Vue.jsについて、他にも記事を書いています。よろしければぜひ ![]()
tags - Vue.js
やってみたシリーズ ![]()
tags - Try