(バックエンド編: https://qiita.com/daitai-daidai/items/a5e744120492bcc2c591 )
Vue.jsとTypeScriptの練習のために、Nuxt.jsとNestJSでTodoリストを作ってみました。使用技術は以下の通り
- フロントエンド: Nuxt.js (UIフレームワークはVuetify、言語はTypeScript)
- バックエンド: NestJS + TypeORM(mySQL)
「よくわかんないけどNuxt.jsとTypeScriptって今アツいんでしょ?」 っていう駆け出しエンジニアの安易な発想で選びました。(つよつよのみなさまコメントお待ちしております)
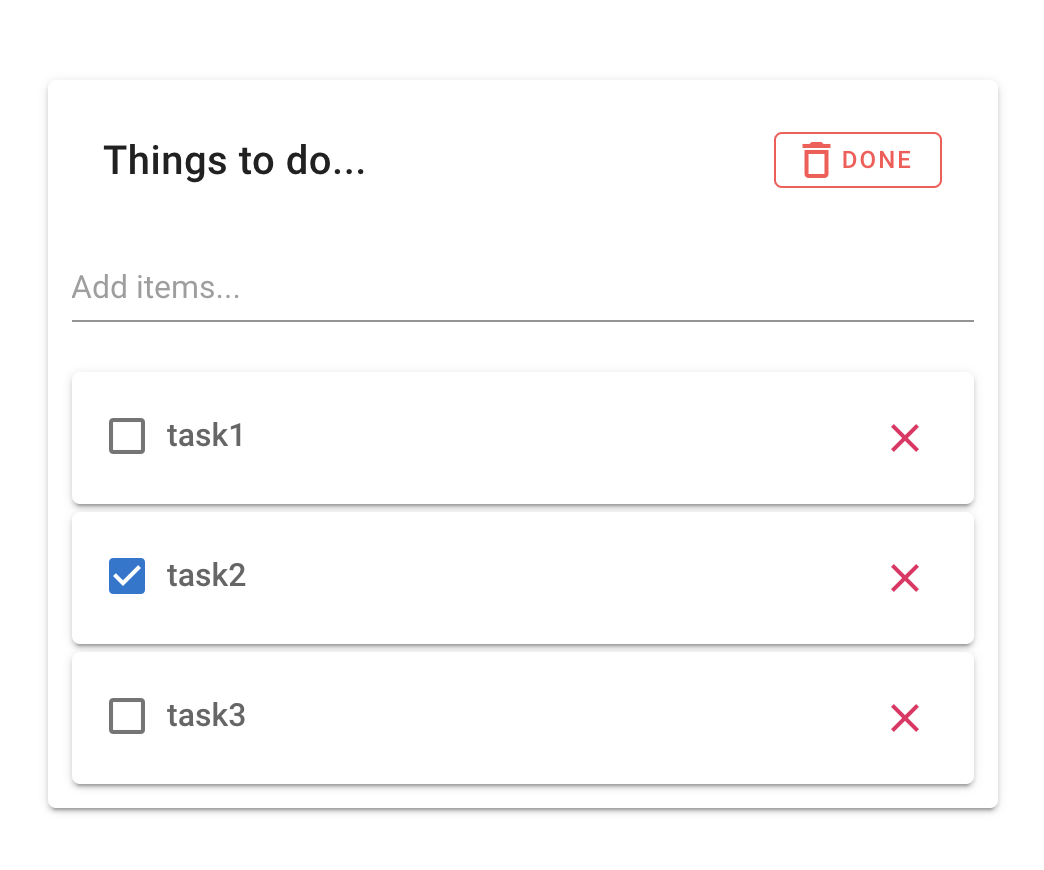
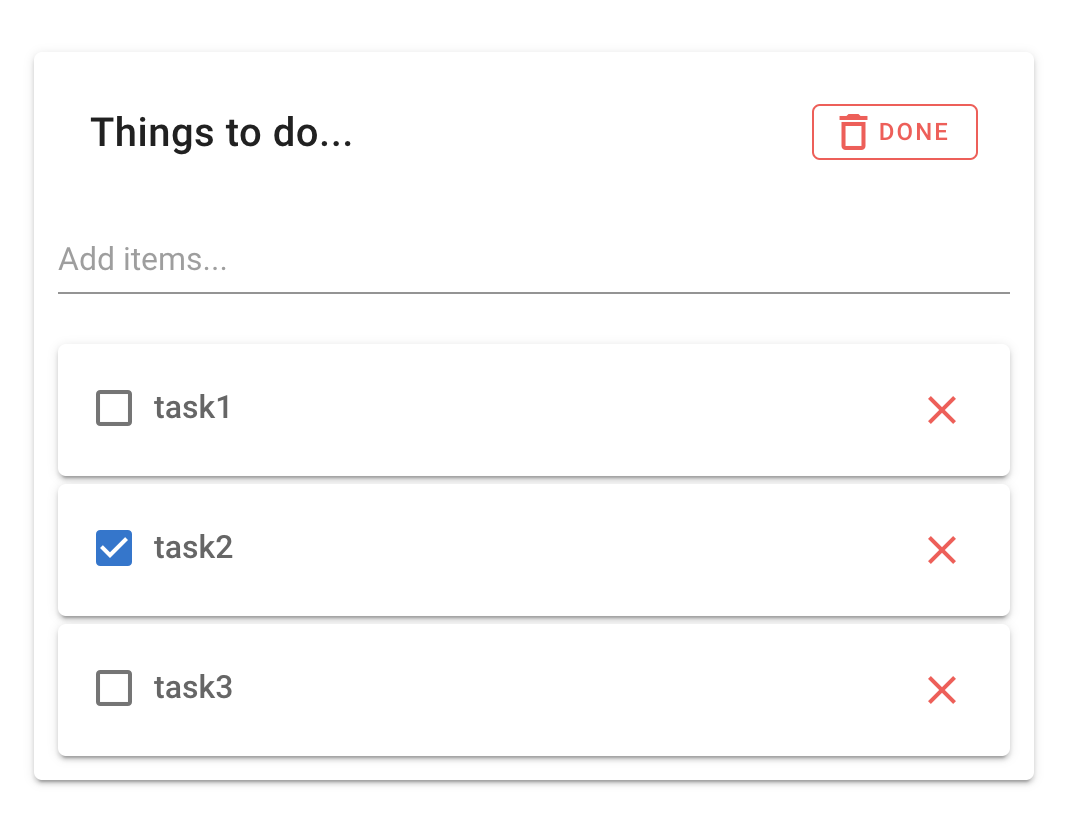
今回はフロント編。完成形はこんな感じ。(https://dai65527.github.io/nuxttodo/ )

環境
- MacOS Catalina v10.15.6
- Node.JS v14.10.1
- Nuxt.js v2.14.5
- create-nuxt-app v3.3.0
create-nuxt-appでプロジェクト作成
Nuxt.jsのプロジェクトを作成する際に便利なcreate-nuxt-appというツールが用意されています。これを使えば、超カンタンにNuxt.jsのプロジェクトが作成できます。
下のように実行。
% npx create-nuxt-app tstodo-client
質問に負けない
create-nuxt-appを実行すると、いろいろ聞かれます。初心者なので面食らいますが、こちらの記事に助けながら完答。
create-nuxt-app v3.3.0
✨  Generating Nuxt.js project in tstodo-client
? Project name: tstodo-client
? Programming language: TypeScript
? Package manager: Npm
? UI framework: Vuetify.js
? Nuxt.js modules: Axios
? Linting tools: ESLint, Prettier
? Testing framework: None
? Rendering mode: Single Page App
? Deployment target: Server (Node.js hosting)
? Development tools:
? Version control system: Git
- 言語はTypeScript。なんか人気らしいという安易な思想で選んであとで後悔する。
- UIフレームワークはVuetifyを選択。なんか人気らしいという理由で選択したが、こちらは後悔しなかった。
- サーバサイドとの通信は
axiosを使うため、Nuxt.js modulesで忘れずに選択します。(あとから追加も簡単ですが) - その他はいい感じに選んだ。たぶんいい感じ。
実行してみる
create-nuxt-appが終了すると、既に雛形が実行できる状況で用意されています。
% ls
tstodo-client
立ち上げてみます。
% cd tstodo-client
% npm run dev

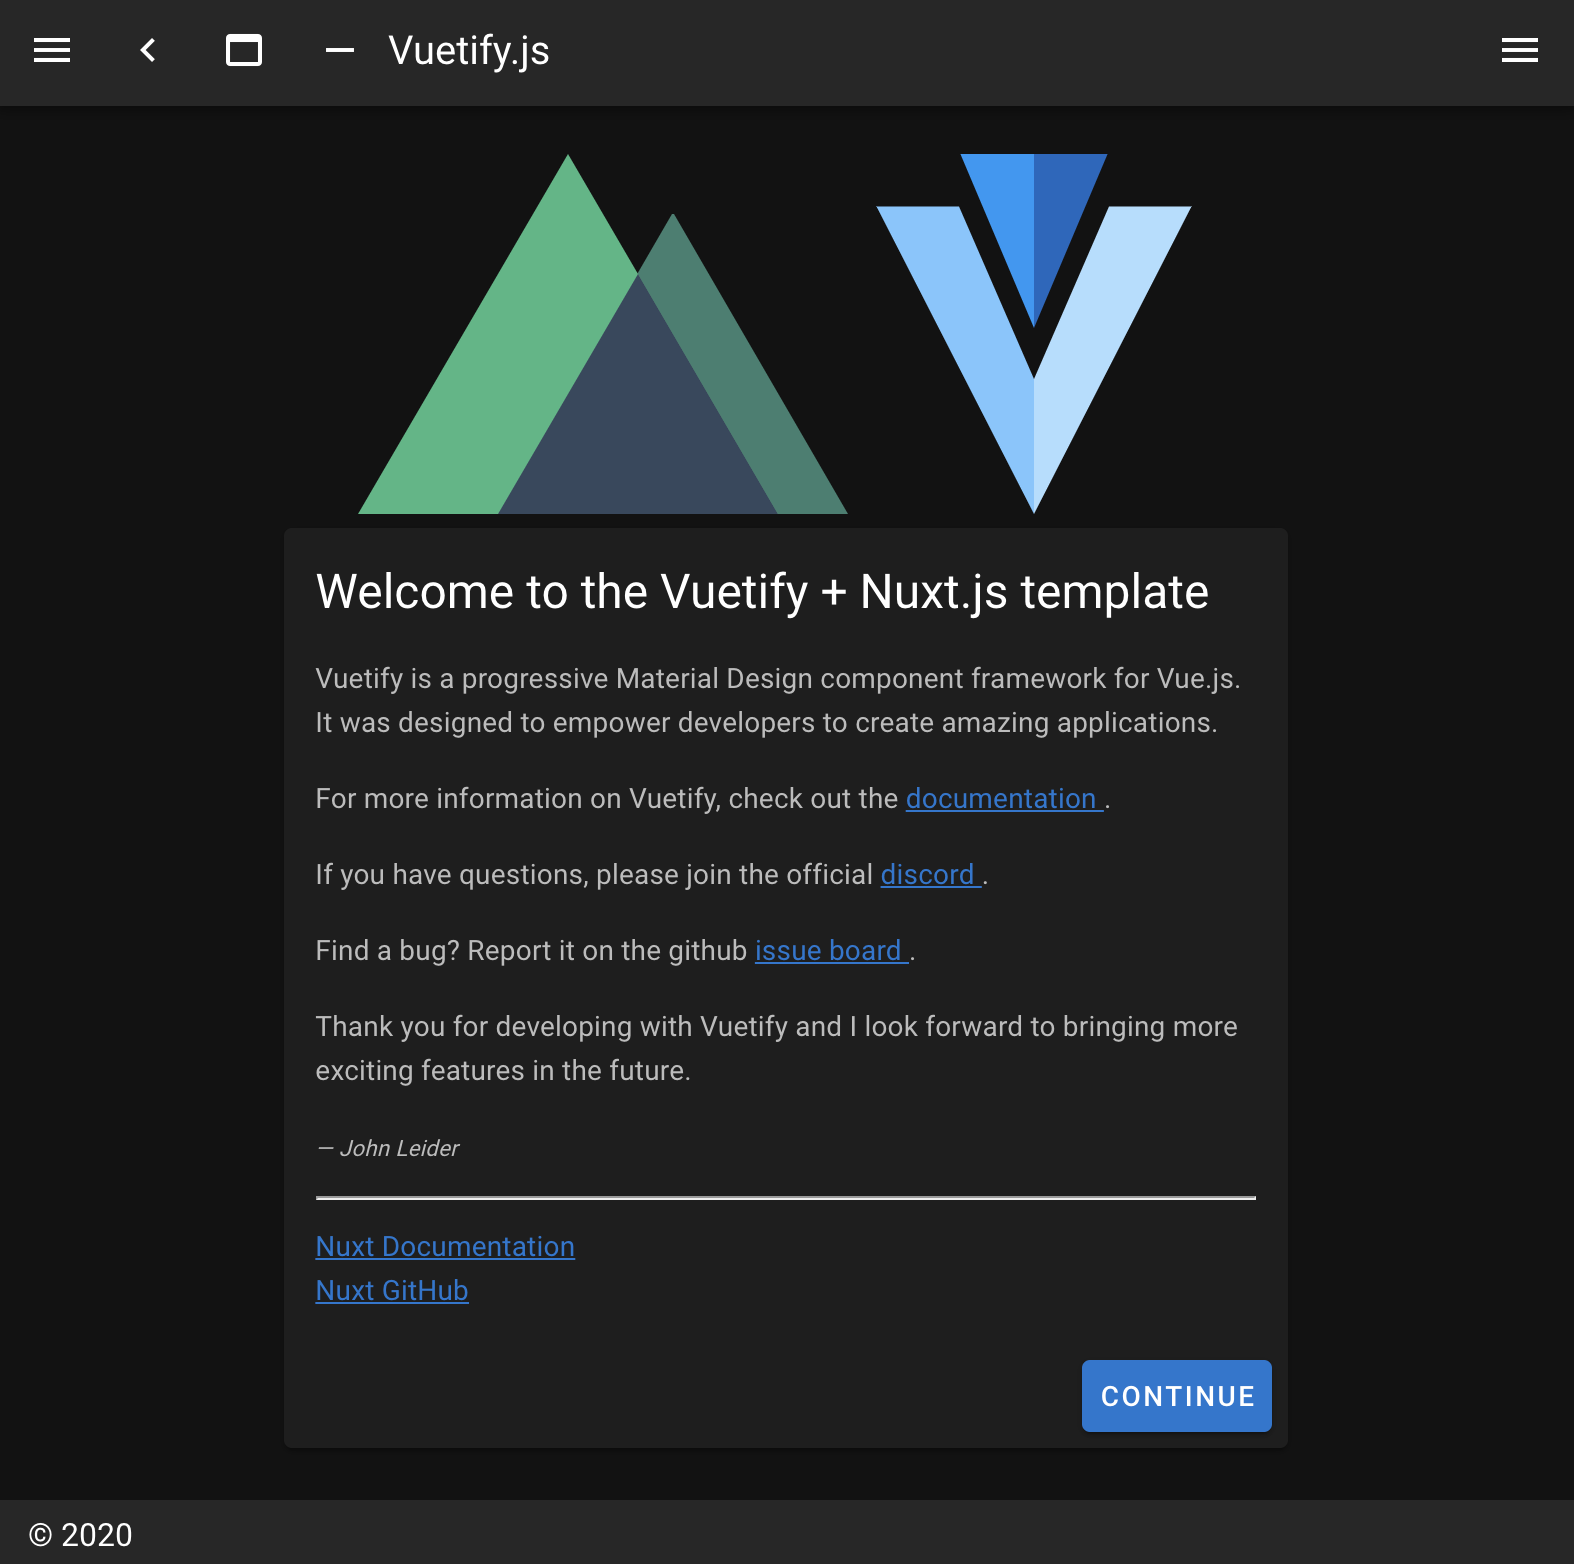
表示されました! (デフォルトではlocalhost:3000で起動します。)
初心者にも超カンタン。何もしてないのにここまでやってくれるなんて、、、至れり尽せりです。
ディレクトリ構造
デフォルト
Nuxt.jsのプロジェクトは下記のディレクトリで構成されています。適切な場所に.vueやら.tsやらをすれば、あとはNuxt.js側で良い感じにルーティングしてバンドルしてくれます。
% tree tstodo-client -L 1
tstodo-client
├── README.md
├── assets
├── components
├── layouts
├── middleware
├── node_modules
├── nuxt.config.js
├── package-lock.json
├── package.json
├── pages
├── plugins
├── static
├── store
└── tsconfig.json
各ディレクトリの意味はドキュメント参照。(ちなみに.gitignore等のファイルも同時に生成されます)
ちなみに私は半分くらい意味わからんって感じでしたが、今回はケースでは以下のディレクトリにファイルを作成orファイルを編集していけばOK。
- layouts: レイアウトを記述するためのファイルを配置。
- pages: アプリケーションのビュー及びルーティングを記述したファイルを配置。このディレクトリの構造を元に勝手にNuxtがルーティングしてくれます。(が、今回はルートURLのみ)
- components: アプリケーションを構成するコンポーネントファイルを配置。
- static: faviconなど変更されないで使われるファイルを配置。(今回はデフォルトのfavicon.ico以外使わない)
- assets: スタイルシートや画像等を配置。(今回はいじらない)
- nuxt.config.js: Nuxt.jsの設定ファイル
- tsconfig.json: TypeScriptの設定ファイル
- package.json: 略。
- package-lock.json: 略。
- node_modules: 略。
middleware、plugin、storeフォルダと余計なREADME等は削除します。
最終的な構造
不要なもの消して、いろいろファイル作ったらこうなりました。
% tree tstodo-client
tstodo-client
├── README.md
├── assets
│   └── variables.scss
├── components
│   ├── ItemCard.vue
│   └── List.vue
├── layouts
│   └── default.vue
├── models
│   └── Item.ts
├── node_modules
│   └── (略)
├── nuxt.config.js
├── package-lock.json
├── package.json
├── pages
│   └── index.vue
├── static
│   └── favicon.ico
└── tsconfig.json
ソースコード
各ソースについて見ていきます。
なお、パス中の@はプロジェクトのルートディレクトリを指します。
.vueファイルはTypeScriptでこう書く
今回はTypeScriptを採用しているので、scriptタグ内の様子がJavaScriptの.vueファイルと異なります。
まず、scriptタグのプロパティとして、lang="ts"を含めることでTypeScriptを使えるようにします。タグ内の基本構造は以下のようにするのがよいっぽい。
<script lang="ts">
import Vue from 'vue'

export default Vue.extend({
  // script
})
</script>
export default Vue.extendの部分はいろいろ方法はあるようですが、これが一番JSの場合と差が小さいように思います。(公式のドキュメントでもこの方法となっています。)
modelsディレクトリ
todoの各アイテムの構造を記述するItem.tsを作成しました。新しくmodelsディレクトリを作成して、その配下に配置。
export interface IItem {
  id: number
  name: string
  done: boolean
}

export default class Item {
  private _props: IItem

  constructor(props: IItem) {
    this._props = props
  }

  get id(): number {
    return this._props.id
  }

  get name(): string {
    return this._props.name
  }

  set name(value: string) {
    this._props.name = value
  }

  get done(): boolean {
    return this._props.done
  }

  set done(value: boolean) {
    this._props.done = value
  }

}
せっかく勉強したのでinterfaceとかsetterとかgetterとか使ってみました。
layoutsディレクトリ
ページ全体のレイアウト(ヘッダー、フッター、コンテンツなど)はここで記述します。今回は、コンテンツ(Todoリスト)だけなので、こんな感じに。
<template>
  <v-app>
    <nuxt />
  </v-app>
</template>
nuxtタグ内にpagesディレクトリの内容がレンダリングされます。
また、vuetifyのクラス等を使う際は、v-appタグで囲わないと効きませんので注意してください。(僕はこれで半日悩みました。) 何も考えずに全体を囲んでしまいます。
pagesディレクトリ
@/layouts/default.vue内のnuxtタグの内容はこのpagesディレクトリの内容になります。ページのルートにアクセスした場合、表示されるのが以下の@/index.vueになります。
<template>
  <v-container class="pt-10">
    <List
      :items="items"
      @add-item="addItem"
      @change-done="changeDone"
      @delete-item="deleteItem"
      @delete-done="deleteDone"
    />
  </v-container>
</template>

<script lang="ts">
import Vue from 'vue'
import Item from '@/models/Item'
import List from '@/components/List.vue'

export default Vue.extend({
  components: {
    List,
  },
  data: () => ({
    items: [
      new Item({
        id: 1,
        name: 'task1',
        done: false,
      }),
      new Item({
        id: 2,
        name: 'task2',
        done: true,
      }),
      new Item({
        id: 3,
        name: 'task3',
        done: false,
      }),
    ],
    newItemId: 4,
  }),
  methods: {
    addItem(itemName: string) {
      this.items.push(
        new Item({
          id: this.newItemId++,
          name: itemName,
          done: false,
        })
      )
    },
    changeDone(id: number) {
      // will access to database
    },
    deleteItem(id: number) {
      this.items = this.items.filter((item) => item.id !== id)
    },
    deleteDone() {
      this.items = this.items.filter((item) => !item.done)
    },
  },
})
</script>
Todoリストのアイテムのデータはここに配置します。現状データはベタ打ちしていますが、次回サーバから引っ張ってくるように改造します。
Todoアイテムを操作する関数もここに書いていきます。基本機能として、
- addItem: アイテム追加
- changeDone: アイテムのステータス変更(実行済/未実行)
- deleteItem: アイテム削除
- deleteDone: 実行済みアイテム削除
を用意しました。
関数内はとりあえず見た目だけ動作するようになってますが、こちらも次回サーバー側のデータベースとやりとりをするように改造します。
(なお、データの場所については、Vuexを使ってもよいのでしょうが、今回はコンポーネント間データの受け渡しの練習としてこうしました。)
Todoリスト自体の中身はListコンポーネントに記述します。
各関数を実行するボタン類もこの中に配置します。そのため、Listにカスタムイベントを作成して、コンポーネント内で$emitするようにします。
componentsディレクトリ
リストのコンポーネントList.vueとリスト内の各アイテムを収納するItemCard.vueを作成しました。
<template>
  <div>
    <v-card class="mx-auto px-3 py-2" width="95%" max-width="500px">
      <v-card-title class="d-flex justify-space-between">
        <p class="ma-0">Things to do...</p>
        <v-btn small outlined color="error" class="pl-2" @click="deleteDone"
          ><v-icon>mdi-delete-outline</v-icon>Done</v-btn
        >
      </v-card-title>
      <v-form @submit.prevent="addItem">
        <v-text-field
          v-model="newItemName"
          placeholder="Add items..."
        ></v-text-field>
      </v-form>
      <div v-for="item in items" :key="item.id">
        <ItemCard
          :item="item"
          @delete-item="deleteItem"
          @change-done="changeDone"
        />
      </div>
    </v-card>
  </div>
</template>

<script lang="ts">
import Vue from 'vue'
import ItemCard from '@/components/ItemCard.vue'

export default Vue.extend({
  components: {
    ItemCard,
  },
  props: {
    items: {
      required: true,
      type: Array,
    },
  },
  data: () => ({
    newItemName: '',
  }),
  methods: {
    addItem() {
      if (this.newItemName.length !== 0) {
        this.$emit('add-item', this.newItemName)
        this.newItemName = ''
      }
    },
    changeDone(id: number) {
      this.$emit('change-done', id)
    },
    deleteItem(id: number) {
      this.$emit('delete-item', id)
    },
    deleteDone() {
      this.$emit('delete-done')
    },
  },
})
</script>
Listにはvuetifyのv-cardコンポーネントを使いました。簡単シンプルな見た目にできるので、デザイン音痴な自分としてはとてもありがたいですね。propsやclassでいろいろ指定できてcssゼロで作れるっていうのもありがたや(駆け出し並感)。
今回は他にボタンとかチェックボックスとかしか使えなかったですが、今後他のコンポーネントもどんどん使っていきたいです。
各アイテムの中身はItemCardコンポーネントに切り出してみました。
<template>
  <v-card class="my-1">
    <v-card-title class="py-0 d-flex justify-space-between">
      <v-checkbox
        v-model="item.done"
        :label="item.name"
        @change="changeDone"
      ></v-checkbox>
      <v-btn icon color="error" @click="deleteItem">
        <v-icon>mdi-close</v-icon>
      </v-btn>
    </v-card-title>
  </v-card>
</template>

<script lang="ts">
import Vue from 'vue'
export default Vue.extend({
  props: {
    item: {
      required: true,
      type: Object,
    },
  },
  methods: {
    changeDone() {
      this.$emit('change-done', this.item.id)
    },
    deleteItem() {
      this.$emit('delete-item', this.item.id)
    },
  },
})
</script>
コンポーネント名の通りここでもv-cardを使いました。汎用性高し。
気になるのはchangeDoneとdeleteItemをここで発火する。ってところです。
ItemCard→List→indexって順に発火していくので、この階層がもっと深くなったら...めんどくさそうですね。 今後はvuexを活用することにします。
nuxt.config.jsの修正
必要なファイルは全て作成したので、もう一度npm run devしてみましょう。
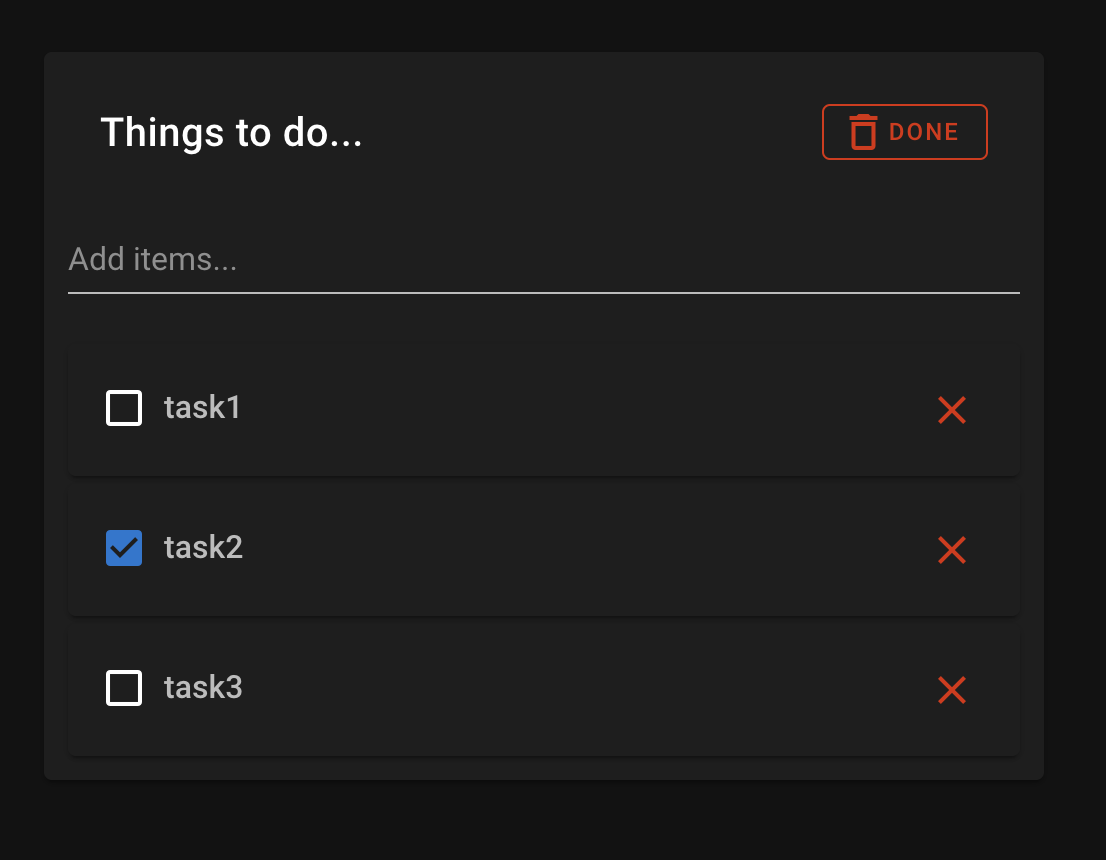
あれ、なんか思ってたんと違う。黒い。
nuxt.config.js内のvuetifyの設定を変更
create-nuxt-appで作成したvuetifyのプロジェクトの雛形はデフォルトでダークモードがオンになってたので、vuetify.theme.darkをfalseにしてダークモードを解除します。
import colors from 'vuetify/es5/util/colors'

export default {
  // (略)
  vuetify: {
    customVariables: ['~/assets/variables.scss'],
    theme: {
      dark: false,  // default: true
      themes: {
        dark: {
          primary: colors.blue.darken2,
          accent: colors.grey.darken3,
          secondary: colors.amber.darken3,
          info: colors.teal.lighten1,
          warning: colors.amber.base,
          error: colors.deepOrange.accent4,
          success: colors.green.accent3,
        },
      },
    },
  },
 // (略)
}
themeごと消しちゃってもよいです。が、変更したくなったときのために取っておきます。
また、@/assets/variables.scssを編集することでcssのカスタムもできます。(デザイン音痴なのでやめておきます)
(参考:https://go.nuxtjs.dev/config-vuetify )
htmlのheadタグの設定
htmlのheadの内容の設定なんかもnuxt.config.jsでやります。せっかくなので、titleをtstodoに修正します。
export default {
  // (中略)

  head: {
    titleTemplate: '%s - tstodo',
    title: 'tstodo',
    meta: [
      { charset: 'utf-8' },
      { name: 'viewport', content: 'width=device-width, initial-scale=1' },
      { hid: 'description', name: 'description', content: '' },
    ],
    link: [{ rel: 'icon', type: 'image/x-icon', href: '/favicon.ico' }],
  },
  // (中略)
}
(参考:https://go.nuxtjs.dev/config-head )
他にもmoduleの追加のときなどいじる場面が出てきます。
tsconfig.jsonの修正
デフォルトのtargetがES2018となっている(なぜ?)ので、ES5に修正します。
{
  "compilerOptions": {
    "target": "ES5",
    "module": "ESNext",
    "moduleResolution": "Node",
    "lib": [
      "ESNext",
      "ESNext.AsyncIterable",
      "DOM"
    ],
    (略)
}
また、axiosを使うのにも型宣言を追加する必要などもあるのですが、それは次にします。
完成
これで、フロントの見た目が完成しました!! npm run buildすればdistディレクトリにリソースが生成されます。
完成形:https://dai65527.github.io/nuxttodo/
ソース最終版:https://github.com/dai65527/tstodo-client
(githubページへのデプロイも簡単でした:https://ja.nuxtjs.org/faq/github-pages/ )
初心者でも割と簡単(?)にそれっぽいものが作ることができました。Nuxt.jsとVueはすごいですね。今後はもっと多機能なアプリを作ってみたいと思います。あとNuxt.jsとVue内部どうなってんねん、ってところも勉強したい。
バックエンド編へ続く...
あとがき
誰かお仕事ください。

