はじめに
RailsでGoogle OAuth 認証の記事を探していると devise を使っている記事が多く、 devise を使っていないGoogle OAuth 認証の記事は少なかったのと、自分のメモ用に記事を書きました。もっとこうした方がいいとか間違いがあればコメントして頂けると幸いです。
まずはGoogle APIsでプロジェクトを作成
まずは下記のURLにアクセスします。
https://console.developers.google.com
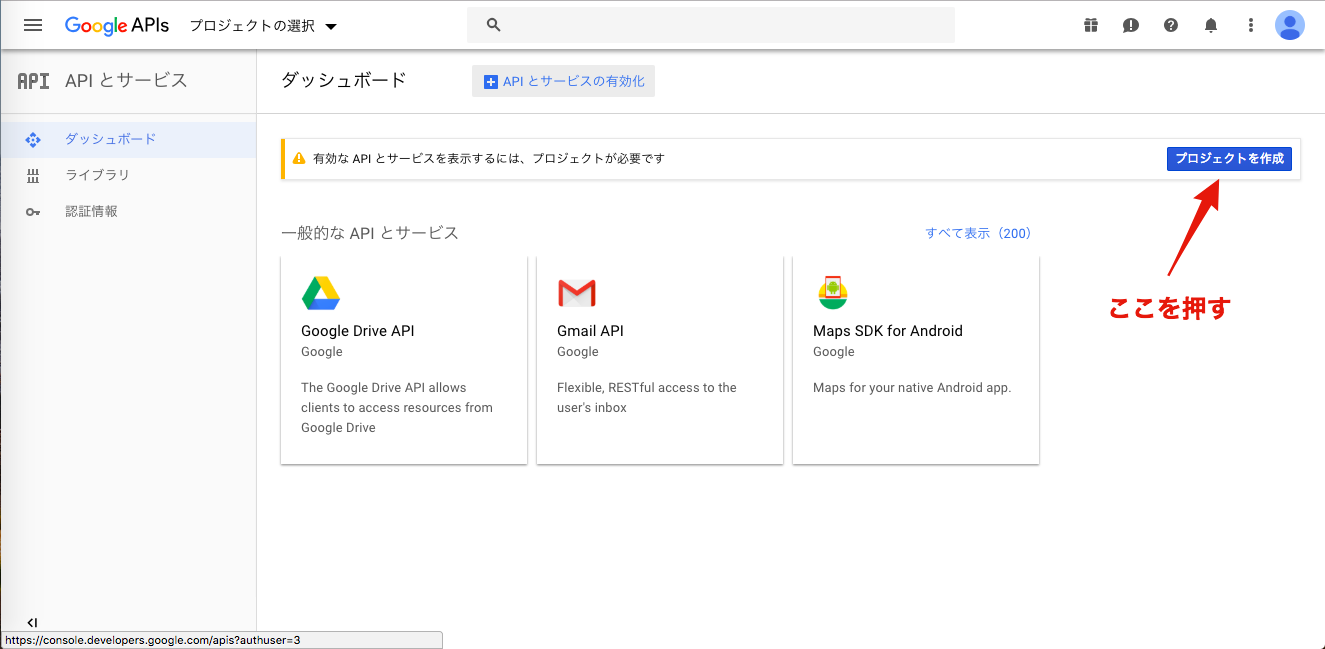
上記のURLにアクセスしたら、下記の画像のようなページに飛ぶのでそのページのプロジェクトを作成というボタンを押します。
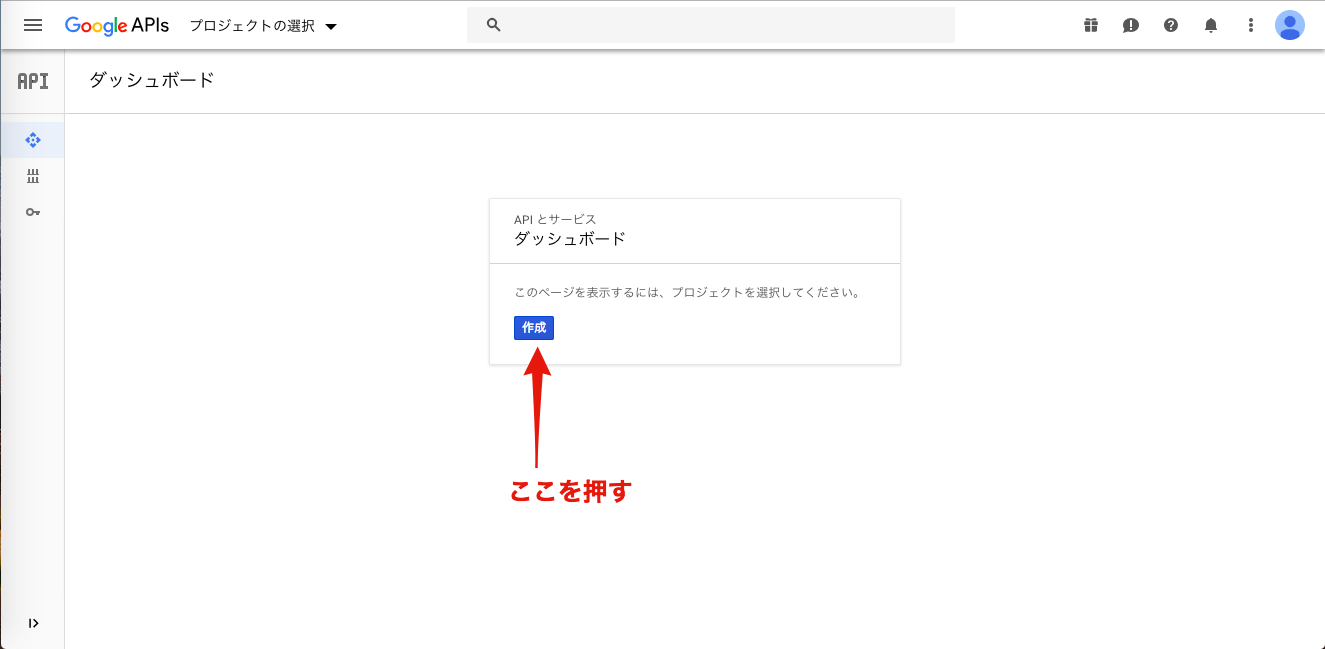
すると、下記の画像のようなページに飛ぶのでそのページの作成というボタンを押します。
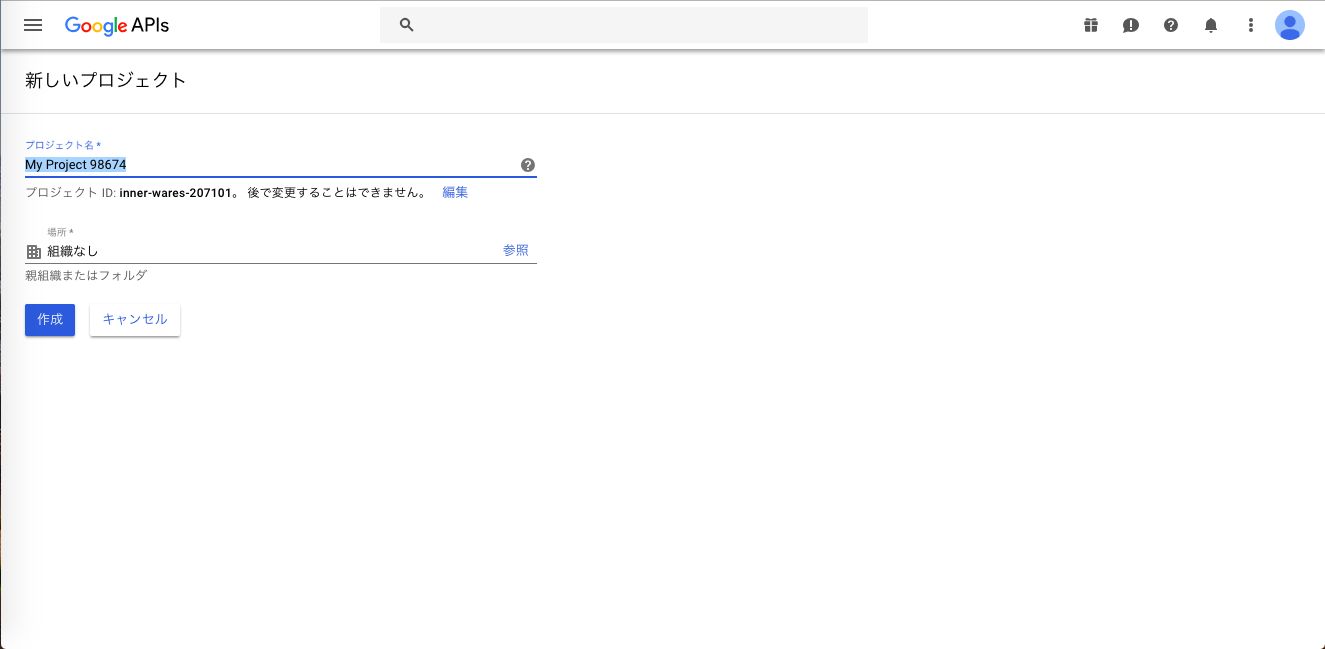
すると、下記の画像のようなページに飛ぶのでそのページでプロジェクト名を入力して作成というボタンを押します。
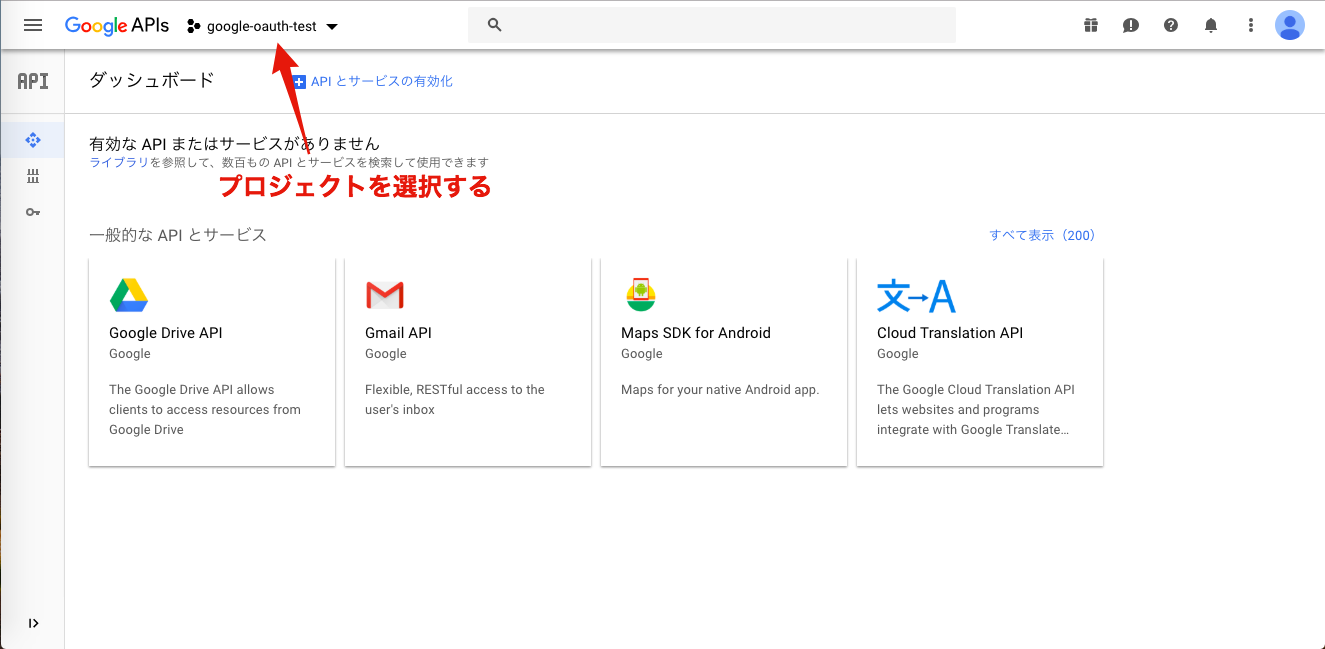
プロジェクトを作成したら、作成したプロジェクトを選択します。
認証情報の設定
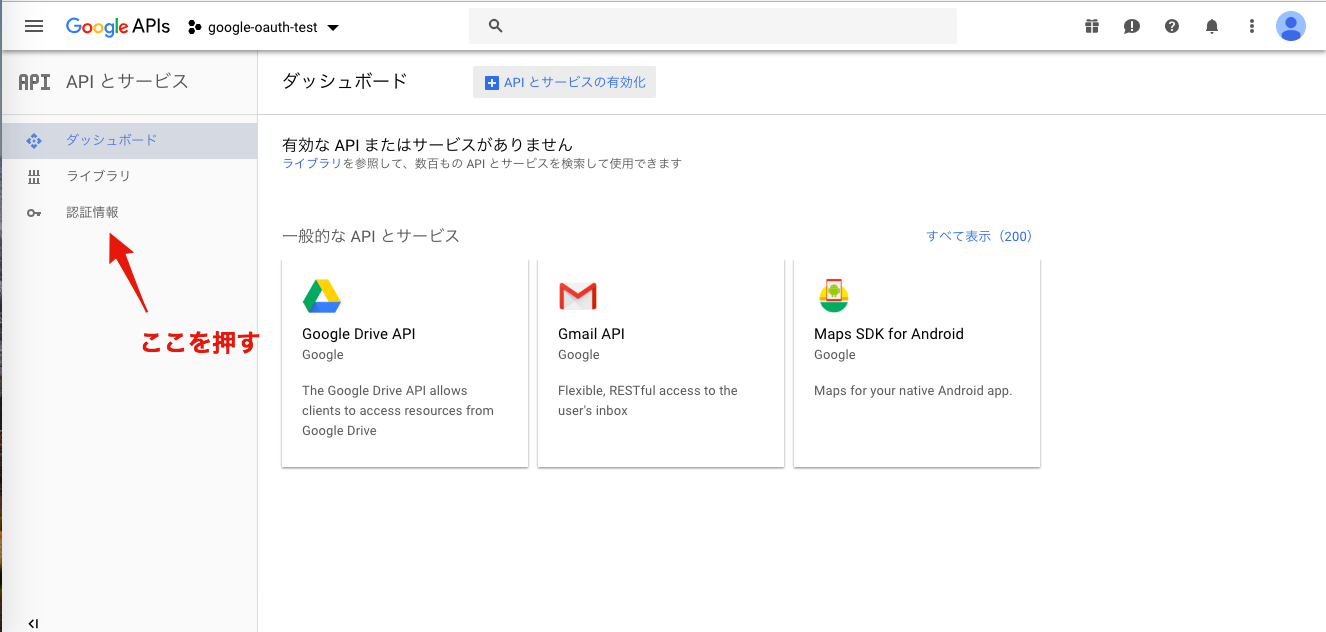
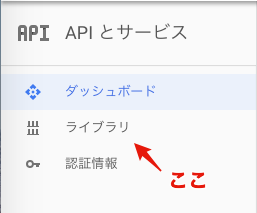
サイドメニューから認証情報を選択します。
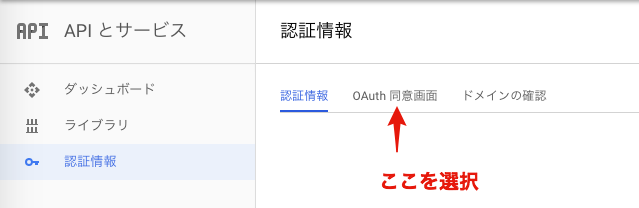
そして、OAuth 同意画面を選択します。
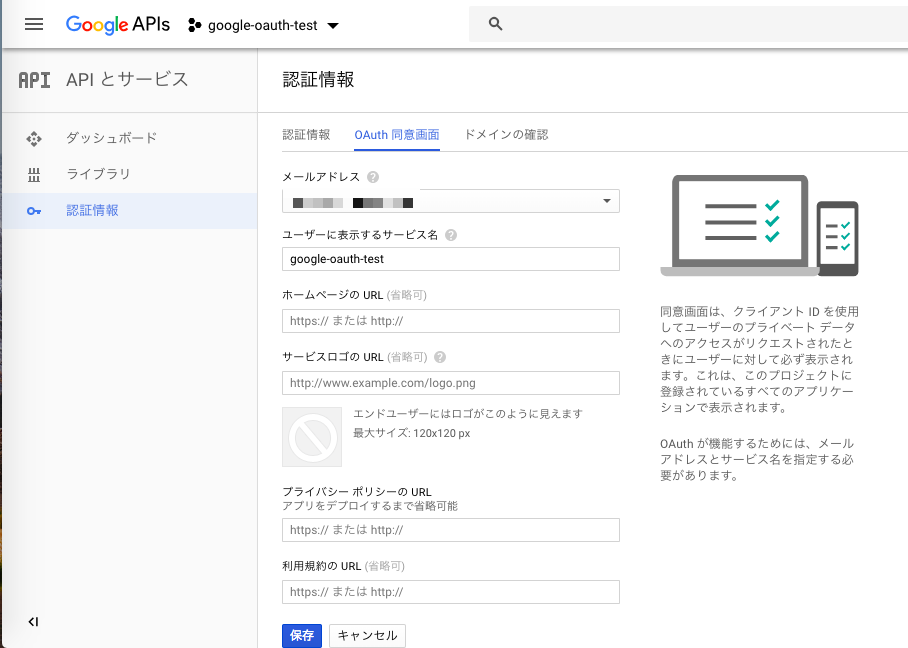
すると、下記のようなページに飛ぶので、そこでメールアドレスとサービス名を入力して保存します。
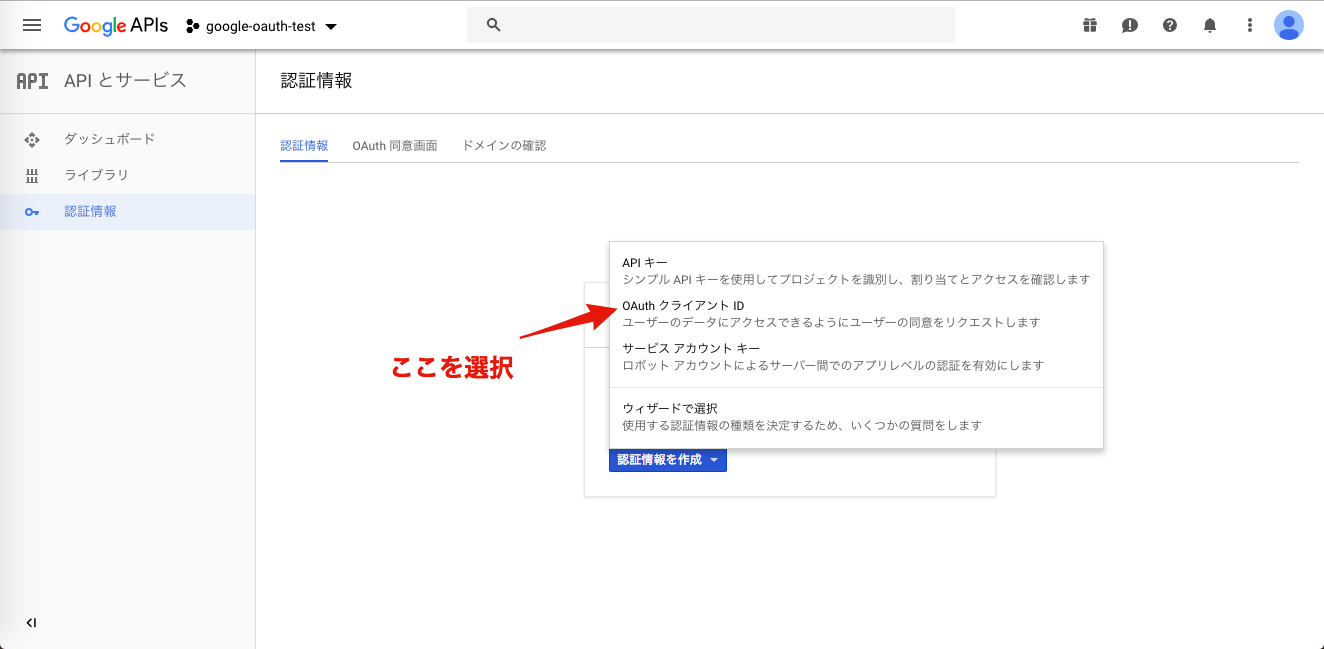
そして、今度は認証情報の画面で認証情報を作成というボタンを選択してOAuth クライアント IDを選択します。
次にアプリケーションの種類に「ウェブアプリケーション」を選択し、
承認済みのリダイレクトURlに http://localhost:3000/auth/google_oauth2/callback と入力します。
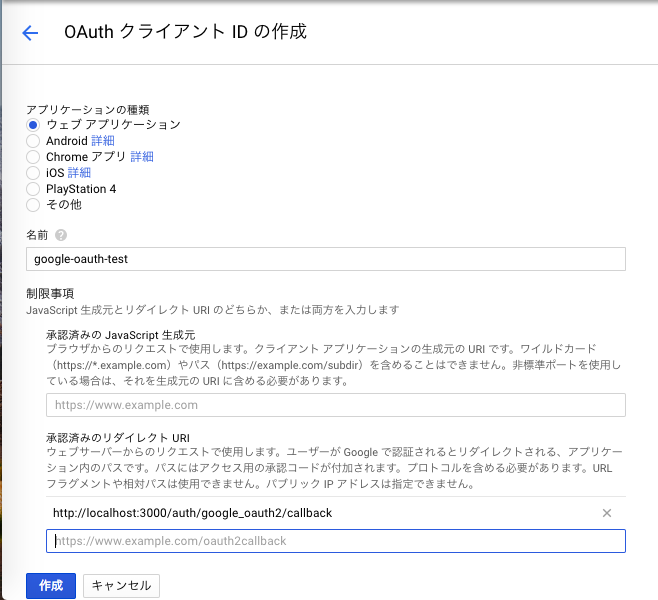
そうすると、クライアントIDとクライアントシークレットが発行されます。
Google+ api を有効にする
次にGoogle+ APIを有効にします。
そのため、まずサイドバーからライブラリを選択します。
するとブラウザの上部に検索バーが表示されるので、 Google+ api と検索します。
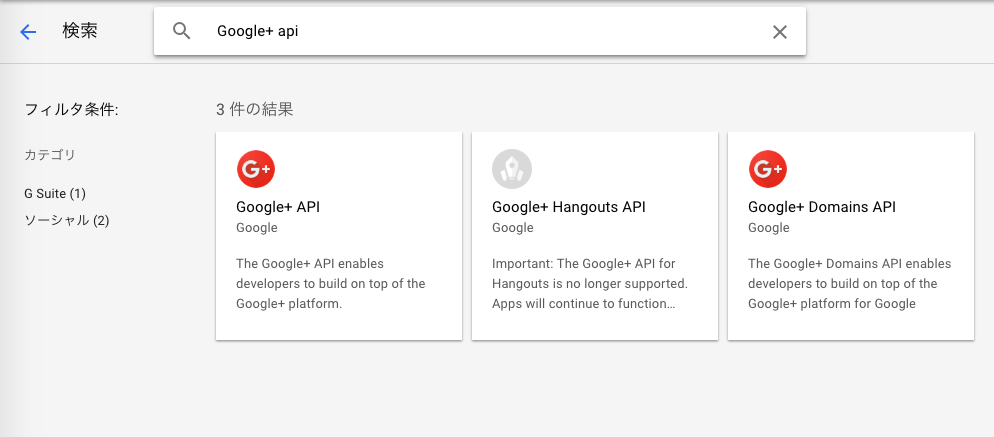
すると、 Google+ API が検索でヒットするので、 Google+ API を押して、Google+ APIを有効にします。
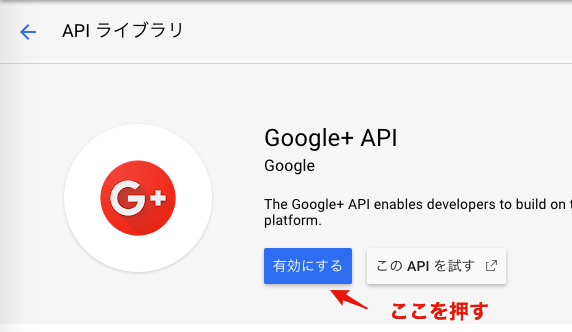
これでGoogle+ APIを有効にできます。
Railsプロジェクトの作成
Railsのプロジェクトを作成します。(今回はRailsのバージョン5.2.0でやってますが、バージョンはお手元の開発環境で問題ないです。)
$ rails _5.2.0_ new google-oauth-test -d mysql
データベースを作成する
datebase.ymlの設定に従って、データベースを作成します。
$ bundle exec rails db:create
Gemfileに追加
omniauth-google-oauth2とdotenv-railsというgemを追加します。
gem 'omniauth-google-oauth2'

group :development, :test do
  gem 'dotenv-rails'
end
bundle installをします。
$ bundle install
config/initializers/omniauth.rb を追加する
Rails.application.config.middleware.use OmniAuth::Builder do
  provider :google_oauth2, ENV['GOOGLE_CLIENT_ID'], ENV['GOOGLE_CLIENT_SECRET']
end
.envファイルにGOOGLE_CLIENT_IDとGOOGLE_CLIENT_SECRETを設定する
.envファイルを作成して、GOOGLE_CLIENT_IDとGOOGLE_CLIENT_SECRETの環境変数を設定します。
GOOGLE_CLIENT_IDとGOOGLE_CLIENT_SECRETは、Google APIsで認証情報を設定した際に発行されます。
GOOGLE_CLIENT_ID="Google APIsで認証情報で発行されたクライアントIDをここに書く"
GOOGLE_CLIENT_SECRET="Google APIsで認証情報で発行されたクライアント シークレットをここに書く"
ユーザーモデルを作成する
$ rails g model user provider uid name email image oauth_token oauth_expires_at:datetime
上記のコマンドでマイグレーションファイルも作成されるのでマイグレートします。
$ bundle exec rails db:migrate
ログイン後の画面を作成する
$ rails g controller home index
sessions controller を作成する
実際にユーザーがサインインとサインアウトできるロジックを書くsessions_controller.rbを作成します。
$ rails g controller sessions new create destroy
ルーティングを設定する
Rails.application.routes.draw do
  root to: 'home#index'

  get 'auth/:provider/callback', to: 'sessions#create'
  get 'auth/failure', to: redirect('/')
  get 'signout', to: 'sessions#destroy', as: 'signout'

  resources :sessions, only: %i(new create destroy)
  resources :home, only: %i(index)
end
User Model にクラスメソッドを追加
class User < ApplicationRecord
  def self.from_omniauth(auth)
    where(provider: auth.provider, uid: auth.uid).first_or_initialize.tap do |user|
      user.provider = auth.provider
      user.uid = auth.uid
      user.name = auth.info.name
      user.email = auth.info.email
      user.image = auth.info.image
      user.oauth_token = auth.credentials.token
      user.oauth_expires_at = Time.at(auth.credentials.expires_at)
      return user
    end
  end
end
sessions_controller.rbにサインインとサインアウトのロジックを追加
class SessionsController < ApplicationController
  def new
  end

  def create
    user = User.from_omniauth(request.env["omniauth.auth"])
    if user.save
      session[:user_id] = user.id
      redirect_to root_path
    else
      redirect_to new_session_path
    end
  end

  def destroy
    session[:user_id] = nil
    redirect_to new_session_path
  end
end
application_controller.rbにセッションが存在するか確認するメソッドを追加
class ApplicationController < ActionController::Base
  helper_method :current_user

  def current_user
    User.find(session[:user_id]) if session[:user_id]
  end
end
sign outのリンクを追加
<!DOCTYPE html>
<html>
  <head>
    <title>Google Auth Example App</title>
    <%= stylesheet_link_tag    "application", media: "all", "data-turbolinks-track" => true %>
    <%= javascript_include_tag "application", "data-turbolinks-track" => true %>
    <%= csrf_meta_tags %>
  </head>
  <body>
    <div>
      <% if current_user %>
        Signed in as <strong><%= current_user.name %></strong>!
        <%= link_to "Sign out", signout_path, id: "sign_out" %>
      <% end %>
    </div>
    <div>
    <%= yield %>
    </div>
  </body>
</html>
sign in のリンクを追加
sessions/new.html.erb にsign inのリンク追加します。
<%= link_to "Sign in with Google", "/auth/google_oauth2", id: "sign_in" %>
サーバーを起動して実際にサインインできるか確かめよう
まずサーバーを起動します。
$ bundle exec rails s
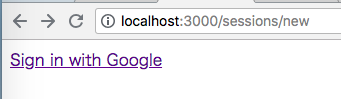
そのあと http://localhost:3000/sessions/new
にアクセスして、 Sign in with Google のリンクを押します。
そうすると下記の画像のように、googleアカウントのサインイン画面に飛ぶので、(モザイクが多くてすみません...)
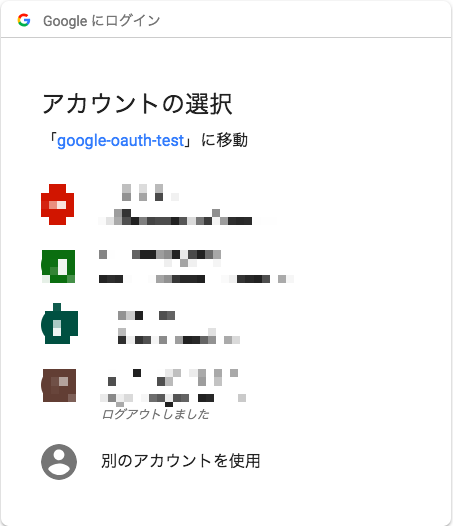
サインインしてみると、
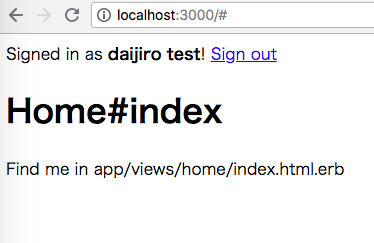
サインインできました!!
参考
Google Authentication in Ruby On Rails
爆速ッ!! gem omniauth-google-oauth2 で認証させる