背景
以前Yoloをpythonで動かすための記事を書きました。
Yoloよりもさらに高速かつ精度が上がったと言われるYolov3にトライしようとしたら、
どうやら前回記事で挙げたTensorflowベースのdarkflowは未対応らしいことがわかった・・・。
調べてみると、PyTorchというpythonの機械学習ライブラリを使ったやり方があるらしいことがわかったので、
pythonの統合開発環境であるanacondaを使ってトライしてみましたので、
そのやり方を残しておきます。
参考サイト
参考にしたのは以下のサイト。
ここを参考にさせていただくだけでそのままできました!!ありがとうございます。
以下に、実際に行った作業を記載していきます。
上記サイトをほぼ引用させてもらっています![]()
PyTorchって?
参考サイトより
YOLO V3の公式サイトのコードで物体検知をできますが、PyTorchを使った実装「A PyTorch implementation of a YOLO v3 Object Detector」が公開されており
公式コードから不要なコードが削除されておりシンプル
ドキュメントが丁寧
動画の物体検知、内蔵カメラを使ったリアルタイム物体検知のスクリプトも提供
と扱いやすい実装になっているので、今回はこちらを利用しました。
これを受けて改めてPyTorchを調べてみると、
・Facebookが開発を主導
・Python向けのオープンソース機械学習ライブラリ
・Numpyに似た扱いができる
・最近注目されているらしい
・TensorflowやKerasと比較しても後発のフレームワーク
ふむふむ。
numpyと似た操作ができるというのは入りやすくていいですね。
以下のサイトがわかりやすかったです。
とりあえず実装を進めてみます。
参考サイト:
https://www.sejuku.net/blog/64175
https://www.codexa.net/pytorch-python/
開発環境
MacBook Air (13-inch, Early 2015)
macOS Mojave 10.14.2
python 3.6.3
環境構築
anacondaの環境構築は調べると色々出てくるので、
ここでは省略します。参考までに以下のサイトをご覧ください。
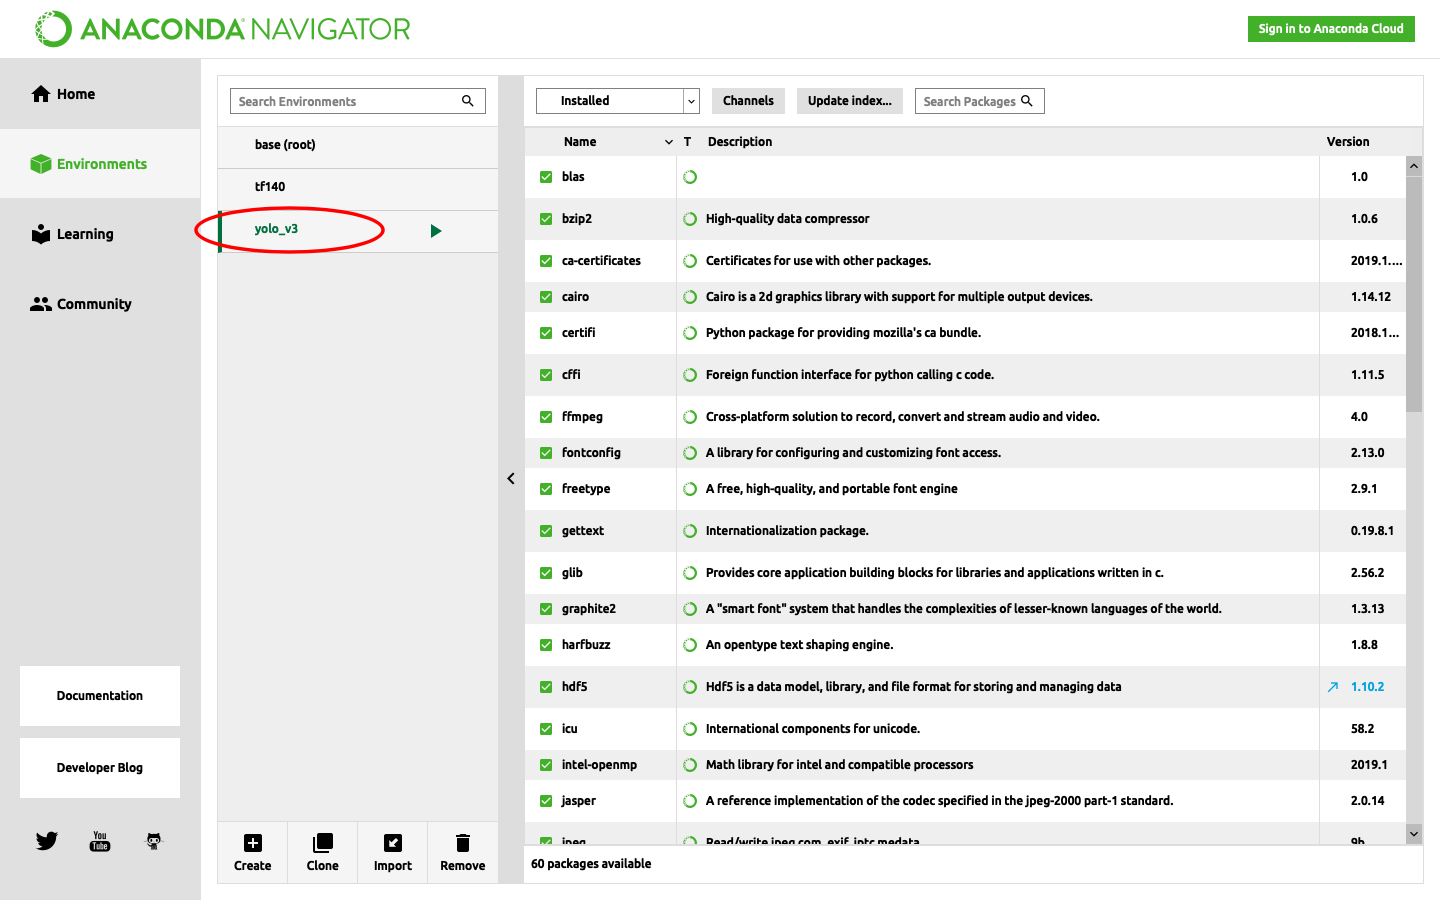
仮想環境Yolov3の作成
Yolov3用の環境をcondaを使って作成します。
$ conda create -n yolo_v3 python=3.6 pip
これで仮想環境を構築できます。
anaconda navigatorでも仮想環境ができていることがわかります。
$ source activate yolo_v3
と打つことで、作成した仮想環境(yolo_v3)に入ることができます。
ちなみに、仮想環境から抜けたいときは下記で可能です。
(yolo_v3) $ source deactivate
必要なライブラリのインストール
次いで、必要なライブラリのインストールを進めます。
(yolo_v3) $ conda install pandas opencv
(yolo_v3) $ conda install pytorch torchvision -c pytorch
(yolo_v3) $ pip install matplotlib cython
ちなみにMacの場合、matplotlibのバックエンドの影響でエラーが出てしまうようなので、
下記フォルダ内にあるmatplotlibrcファイルをテキストなどで開き、
backend : macosx
を
backend : Tkagg
に変更して保存します。
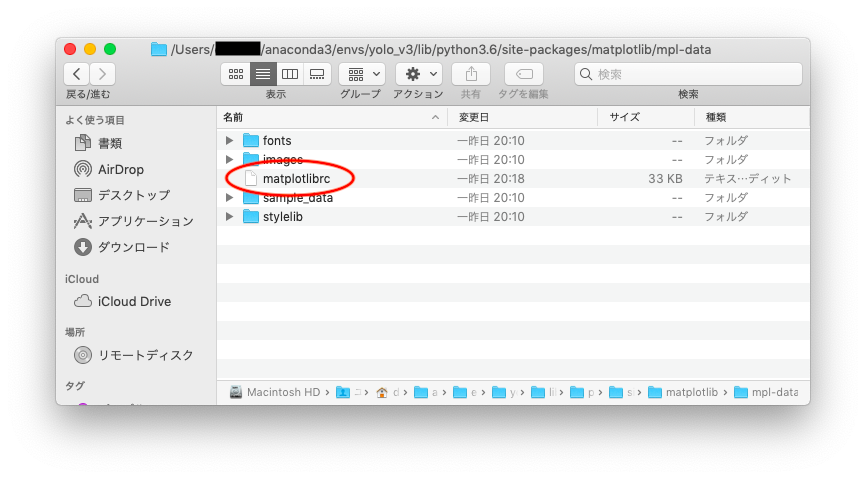
参考サイトにあるように、もちろんviコマンドなどで編集してもOKです。
Yolov3のインストールと設定
下記を実行してPyTorchでyolov3を実行する環境と、yolov3の学習の重みファイルをダウンロード。
(yolo_v3) $ git clone https://github.com/ayooshkathuria/pytorch-yolo-v3.git
(yolo_v3) $ cd pytorch-yolo-v3
(yolo_v3) $ wget https://pjreddie.com/media/files/yolov3.weights
内蔵カメラ or USBカメラを使ったリアルタイム認識
ここまでできれば、あとはサンプルコードを実行するだけでyolov3を動かせます!
(yolo_v3) $ python3 cam_demo.py
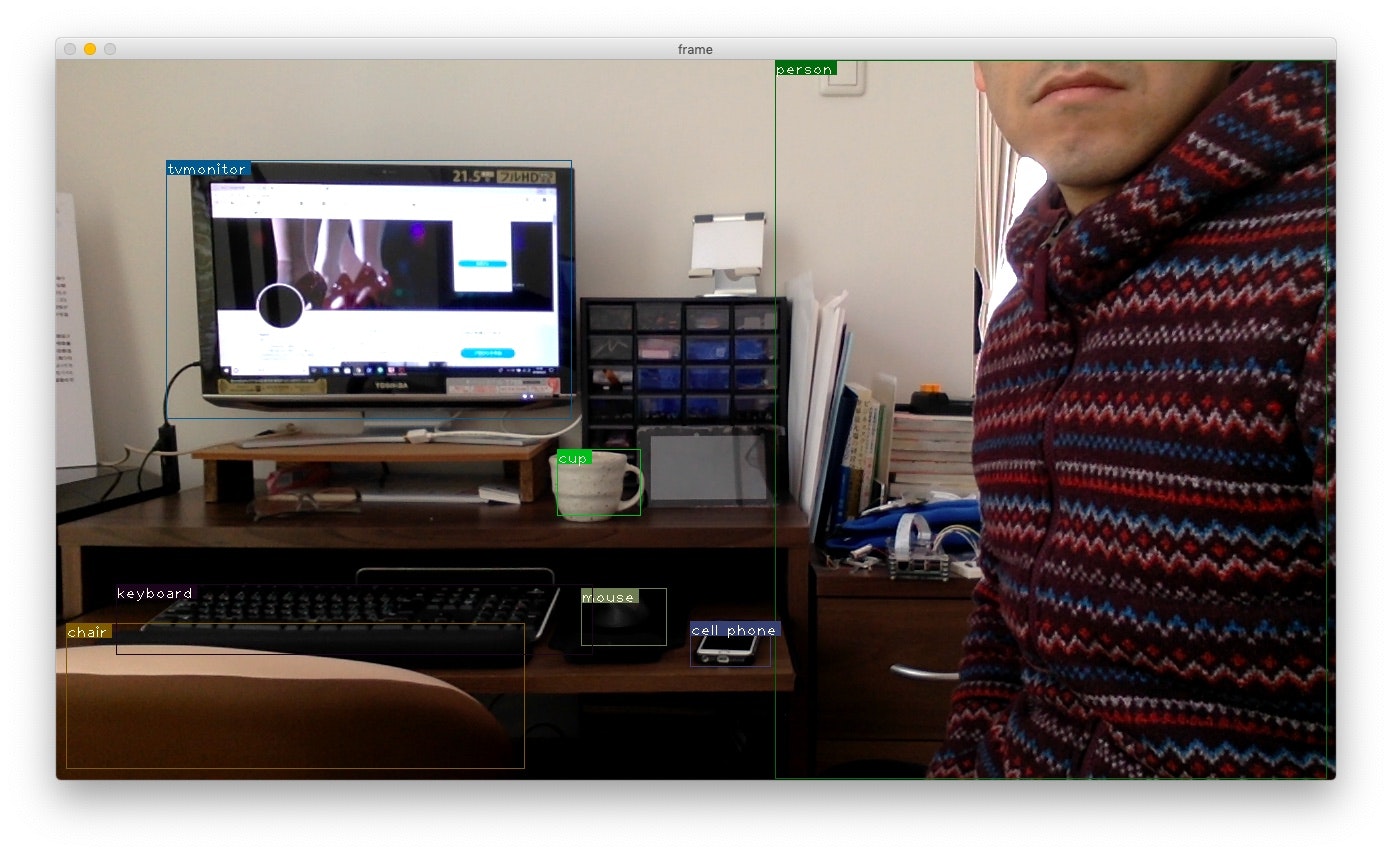
Macの内蔵カメラでリアルタイム認識できました!
・keyboard
・tvmonitor
・cup
・mouse
・cell phone
・口から下しか写っていないのにperson
・ほぼ写っていないのにchair
を認識できました!
FPS of the video is  1.27
FPS of the video is  1.53
FPS of the video is  1.60
FPS of the video is  1.65
FPS of the video is  1.70
FPS of the video is  1.73
FPS of the video is  1.73
・
・
・
FPS of the video is  1.92
FPS of the video is  1.92
FPS of the video is  1.92
FPS of the video is  1.92
2fps弱くらいですね。
CPUでこれだけの画像認識実行してくれるのはスゴイ。
実行したサンプルコードを参考に挙げておきます。
Videocapture(0)を(1)にするとMacに接続したUSBカメラを入力にできますね。
from __future__ import division
import time
import torch
import torch.nn as nn
from torch.autograd import Variable
import numpy as np
import cv2
from util import *
from darknet import Darknet
from preprocess import prep_image, inp_to_image
import pandas as pd
import random
import argparse
import pickle as pkl

def prep_image(img, inp_dim):
    """
    Prepare image for inputting to the neural network.
    Returns a Variable
    """
    orig_im = img
    dim = orig_im.shape[1], orig_im.shape[0]
    img = cv2.resize(orig_im, (inp_dim, inp_dim))
    img_ = img[:,:,::-1].transpose((2,0,1)).copy()
    img_ = torch.from_numpy(img_).float().div(255.0).unsqueeze(0)
    return img_, orig_im, dim

def write(x, img):
    c1 = tuple(x[1:3].int())
    c2 = tuple(x[3:5].int())
    cls = int(x[-1])
    label = "{0}".format(classes[cls])
    color = random.choice(colors)
    cv2.rectangle(img, c1, c2,color, 1)
    t_size = cv2.getTextSize(label, cv2.FONT_HERSHEY_PLAIN, 1 , 1)[0]
    c2 = c1[0] + t_size[0] + 3, c1[1] + t_size[1] + 4
    cv2.rectangle(img, c1, c2,color, -1)
    cv2.putText(img, label, (c1[0], c1[1] + t_size[1] + 4), cv2.FONT_HERSHEY_PLAIN, 1, [225,255,255], 1);
    return img

def arg_parse():
    """
    Parse arguements to the detect module
    """
    parser = argparse.ArgumentParser(description='YOLO v3 Cam Demo')
    parser.add_argument("--confidence", dest = "confidence", help = "Object Confidence to filter predictions", default = 0.25)
    parser.add_argument("--nms_thresh", dest = "nms_thresh", help = "NMS Threshhold", default = 0.4)
    parser.add_argument("--reso", dest = 'reso', help =
                        "Input resolution of the network. Increase to increase accuracy. Decrease to increase speed",
                        default = "160", type = str)
    return parser.parse_args()

if __name__ == '__main__':
    cfgfile = "cfg/yolov3.cfg"
    weightsfile = "yolov3.weights"
    num_classes = 80

    args = arg_parse()
    confidence = float(args.confidence)
    nms_thesh = float(args.nms_thresh)
    start = 0
    CUDA = torch.cuda.is_available()

    num_classes = 80
    bbox_attrs = 5 + num_classes

    model = Darknet(cfgfile)
    model.load_weights(weightsfile)

    model.net_info["height"] = args.reso
    inp_dim = int(model.net_info["height"])

    assert inp_dim % 32 == 0
    assert inp_dim > 32

    if CUDA:
        model.cuda()

    model.eval()

    videofile = 'video.avi'

    cap = cv2.VideoCapture(0)

    assert cap.isOpened(), 'Cannot capture source'

    frames = 0
    start = time.time()
    while cap.isOpened():

        ret, frame = cap.read()
        if ret:

            img, orig_im, dim = prep_image(frame, inp_dim)

#            im_dim = torch.FloatTensor(dim).repeat(1,2)

            if CUDA:
                im_dim = im_dim.cuda()
                img = img.cuda()

            output = model(Variable(img), CUDA)
            output = write_results(output, confidence, num_classes, nms = True, nms_conf = nms_thesh)

            if type(output) == int:
                frames += 1
                print("FPS of the video is {:5.2f}".format( frames / (time.time() - start)))
                cv2.imshow("frame", orig_im)
                key = cv2.waitKey(1)
                if key & 0xFF == ord('q'):
                    break
                continue

            output[:,1:5] = torch.clamp(output[:,1:5], 0.0, float(inp_dim))/inp_dim

#            im_dim = im_dim.repeat(output.size(0), 1)
            output[:,[1,3]] *= frame.shape[1]
            output[:,[2,4]] *= frame.shape[0]

            classes = load_classes('data/coco.names')
            colors = pkl.load(open("pallete", "rb"))

            list(map(lambda x: write(x, orig_im), output))

            cv2.imshow("frame", orig_im)
            key = cv2.waitKey(1)
            if key & 0xFF == ord('q'):
                break
            frames += 1
            print("FPS of the video is {:5.2f}".format( frames / (time.time() - start)))

        else:
            break