前提、環境
- CentOS7
- ssh接続済み
-
su -でrootユーザーに切り替えている - ドメインとIPの紐付けができている(お名前.com、VPSのコンパネから設定)
PHPをインストール
yum -y install phpだと、古いバージョンのPHPしかインストールできません。
リポジトリを追加して、yumでインストールできる対象を増やしてからインストールします。
$ yum install epel-release
$ yum -y install http://rpms.famillecollet.com/enterprise/remi-release-7.rpm
$ yum update
# php7.4をインストール 74の部分でバージョンを指定している
$ yum -y install --enablerepo=epel,remi,remi-php74 php php-devel php-mbstring php-pdo php-gd php-xml php-mcrypt
$ php -v
参考サイト
CentOS7にPHP7.3をインストールする
php-fpmをインストール
phpをnginx上で動かすにはphp-fpmが必要になります。
$ yum install -y --enablerepo=remi-php74 php-fpm
$ vi /etc/php-fpm.d/www.conf
- user = apache
- group = apache
+ user = nginx
+ group = nginx
$ systemctl start php-fpm #php-fpmを起動
$ systemctl enable php-fpm.service #サービスに追加
Nginxをインストール
PHP同様、リポジトリを追加せずにインストールすると古いバージョンがインストールされてしまうことがあるので、リポジトリの追加→インストールの順に進めます。
リポジトリを追加するためにファイルを作成
$ vim /etc/yum.repos.d/nginx.repo
[nginx]
name=nginx repo
baseurl=http://nginx.org/packages/centos/7/$basearch/
gpgcheck=0
enabled=1
$ yum info nginx #インストールできるnginxのバージョンが良い感じになっていることを確認
$ yum -y --enablerepo=nginx install nginx
$ nginx -v
$ systemctl start nginx #起動
$ systemctl enable nginx.service #自動起動設定
ブラウザでipアドレスにアクセスして、nginxの初期画面が表示されることを確認
マルチドメインの設定
hoge.com、fuga.jpの2つのドメインを利用することを想定します。
まずはそれぞれのファイルを格納するディレクトリを作成し、適当なファイルを作成
$ cd /var/www/html
$ mkdir hoge.com fuga.jp
$ vim hoge.com/index.php #<?php phpinfo(); ?> などを記述
$ vim fuga.jp/index.php #<?php phpinfo(); ?> などを記述
nginxの設定ファイル/etc/nginx/conf.d/default.confを、ドメインの数だけコピー
$ cd /etc/nginx/conf.d
$ cp default.conf hoge.com.conf
$ cp default.conf fuga.jp.conf
server {
    listen       80;
    server_name  hoge.com;
    location / {
        root   /var/www/html/hoge.com;
        index  index.html index.htm index.php;
    }
    error_page   500 502 503 504  /50x.html;
    location = /50x.html {
        root   /usr/share/nginx/html;
    }
    location ~ \.php$ {
        root           /var/www/html/hoge.com;
        fastcgi_pass   127.0.0.1:9000;
        fastcgi_index  index.php;
        fastcgi_param  SCRIPT_FILENAME  $document_root$fastcgi_script_name;
        include        fastcgi_params;
    }
}
$ systemctl restart nginx
fuga.jp.confの方も、ドメイン名の部分だけ変更して同じ内容で修正。
http://hoge.com
http://fuga.com
にアクセスして、phpのバージョンが表示されれば成功。
SSL証明書を導入
$ yum install certbot
$ sudo systemctl stop nginx #証明書の導入前にサーバーを停止(standaloneモード用のサーバーを立てるため)
# 証明書をインストール。以下の2ファイルが手に入る
# /etc/letsencrypt/live/hoge.com/fullchain.pem;
# /etc/letsencrypt/live/hoge.com/privkey.pem;
$ sudo certbot certonly --standalone -d hoge.com # メールアドレスとか聞かれるので答える
$ sudo systemctl start nginx
$ vim /etc/nginx/conf.d/hoge.com.conf
server {
    listen       80;
    server_name  hoge.com;
    return 301 https://$host$request_uri;  # 追加。httpへのリクエストをhttpsにリダイレクト
    location / {
        root   /var/www/html/hoge.com;
        index  index.html index.htm index.php;
    }
    error_page   500 502 503 504  /50x.html;
    location = /50x.html {
        root   /usr/share/nginx/html;
    }
    location ~ \.php$ {
        root           /var/www/html/hoge.com;
        fastcgi_pass   127.0.0.1:9000;
        fastcgi_index  index.php;
        fastcgi_param  SCRIPT_FILENAME  $document_root$fastcgi_script_name;
        include        fastcgi_params;
    }
}

# 以下を追加。https用の設定
server {
        listen  443 ssl;
        server_name     hoge.com;
        ssl_certificate         /etc/letsencrypt/live/hoge.com/fullchain.pem;
        ssl_certificate_key     /etc/letsencrypt/live/hoge.com/privkey.pem;
    location / {
        root   /var/www/html/hoge.com;
        index  index.html index.htm index.php;
    }
    location ~ \.php$ {
        root           /var/www/html/hoge.com;
        fastcgi_pass   127.0.0.1:9000;
        fastcgi_index  index.php;
        fastcgi_param  SCRIPT_FILENAME  $document_root$fastcgi_script_name;
        include        fastcgi_params;
    }
}
http://hoge.com
http://fuga.com
にアクセスして、httpsにリダイレクトされれば成功。
CentOS7 Nginxの導入とHTTPS化 - Narito Blog
Firewallの設定
$ systemctl start firewalld #firewallを起動
$ systemctl enable firewalld.service #firewallの自動起動設定
$ firewall-cmd --list-all # 許可されている接続を確認
$ firewall-cmd --add-service=http --permanent #http接続を許可
$ firewall-cmd --add-service=https --permanent # https接続を許可
$ firewall-cmd --reload # 設定を反映
$ firewall-cmd --list-all
$ systemctl reboot #OSを再起動
FTP接続できるようにする
ftp接続用のユーザーを作成
$ adduser ftp-user
$ passwd ftp-user #パスワードを設定
vsftpd をインストール
$ yum install vsftpd
設定ファイルを編集
$ vi /etc/vsftpd/vsftpd.conf
anonymous_enable=NO #匿名アクセス無効
chroot_local_user=YES #ホームディレクトリより上位へのアクセス禁止
chroot_list_enable=YES #ホームディレクトリより上位へのアクセス許可リストを有効化
chroot_list_file=/etc/vsftpd/chroot_list #アクセス許可リスト
listen=YES #IPv4でリッスンする
listen_ipv6=NO #IPv6はリッスンしない
userlist_enable=YES
userlist_deny=NO
userlist_file=/etc/vsftpd/user_list
rsa_cert_file=/etc/pki/tls/certs/vsftpd.pem #サーバ証明書
user_config_dir=/etc/vsftpd/vsftpd_user_conf #ユーザーごとの設定を制御するディレクトリを指定
ユーザリストにftp接続用ユーザを追加
$ vi /etc/vsftpd/user_list
ftp-user #追加
chroot_list ユーザのリスト作成
$ vi /etc/vsftpd/chroot_list
ftp-user
サーバ証明書作成
$ cd /etc/pki/tls/certs/
$ make vsftpd.pem
.
.
Country Name (2 letter code) [XX]:JP
State or Province Name (full name) []:Tokyo
Locality Name (eg, city) [Default City]:Sinagawa
Organization Name (eg, company) [Default Company Ltd]:xxx.com
Organizational Unit Name (eg, section) []:
Common Name (eg, your name or your servers hostname) []:ftp.xxx.com
Email Address []:root@xxx.com
vsftpdを起動+自動起動設定
$ systemctl start vsftpd
$ systemctl enable vsftpd
FirewallDの設定
$ firewall-cmd --add-service=ftp --permanent
$ firewall-cmd --list-services
ユーザーごとの設定を制御するファイルを作成
$ mkdir /etc/vsftpd/vsftpd_user_conf
$ vi /etc/vsftpd/vsftpd_user_conf/ftp-user
local_root=/var/www/html/
vsftpdを再起動
$ systemctl restart vsftpd
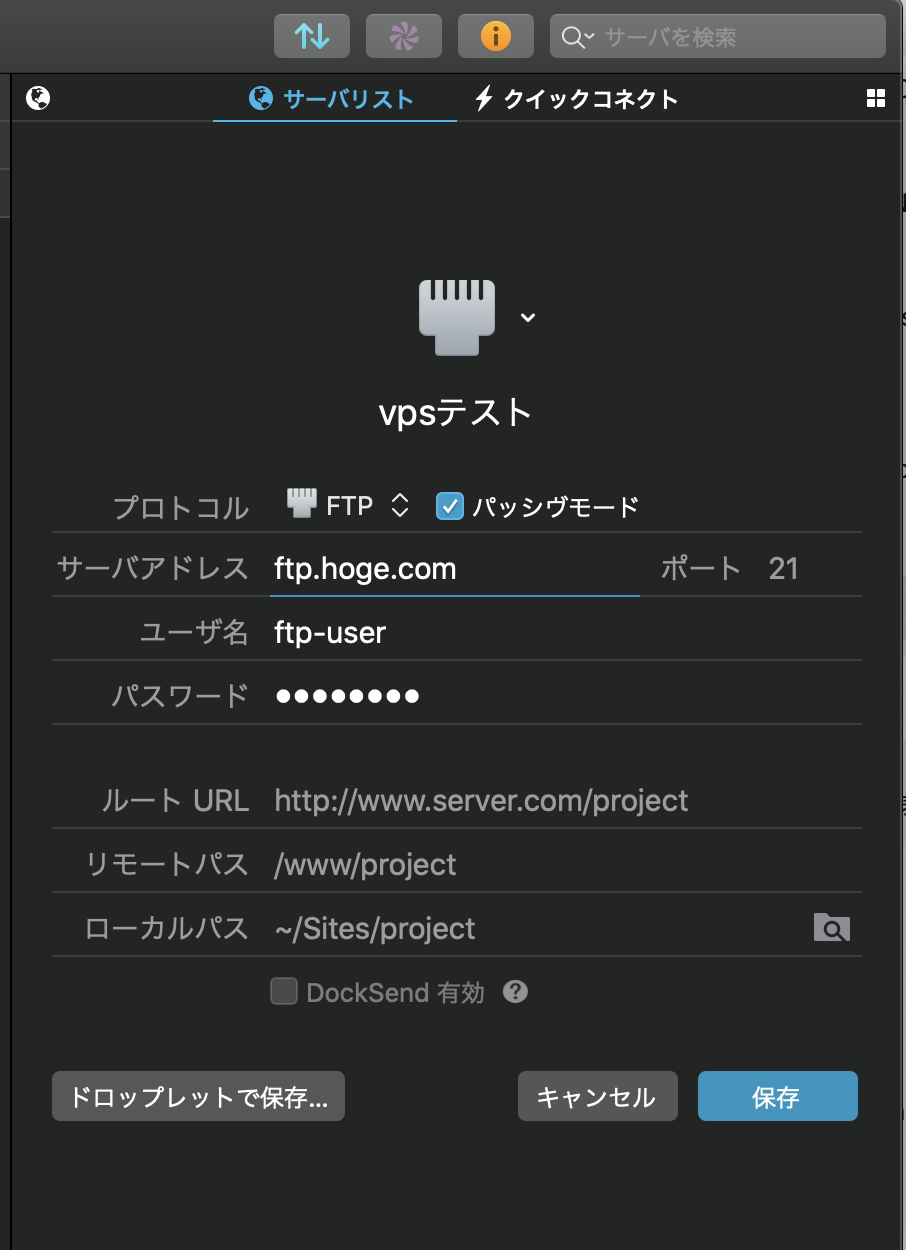
ローカルのFTPクライアントでFTP接続ができれば成功です。
add_user、passwdで設定したユーザー名、パスワードと
サーバー証明書作成時に設定したftp.xxx.comのドメインで接続します。