Spring Security5から、簡単にOpenID Connectを利用できる機能が備わっています。
(SpringのドキュメントではOAuth2.0 Loginとされています。)
特に、Google、GitHub、Facebook、Oktaとの連携については、本当に簡単な設定のみで動作します。
今回はGoogleを利用する方法を試してみたので、その内容を記載します。
ちなみに、OpenID Connectとはなんぞや?という方は、以下の記事が大変参考になります。
https://qiita.com/TakahikoKawasaki/items/498ca08bbfcc341691fe
Google側の準備
以下のページに従って、Google側のOpenID Connectの設定を行います。
https://developers.google.com/identity/protocols/OpenIDConnect
掻い摘んで説明すると、以下のような感じです。
- Google API Consoleにいく。
- 「認証情報」から「認証情報を作成」→「OAuth クライアント ID」を選択する。
- アプリケーションの種類、名前は任意でOK。
- 承認済みのリダイレクトURIに http://localhost:8080/login/oauth2/code/google を追加する。
最後のリダイレクトURIのプロトコルやホスト名、ポート番号は自身が作成するアプリケーションの環境に合わせてください。
「/login/oauth2/code/google」の部分はSpring Securityのデフォルトなので、デフォルトの動作を変更する場合は、この部分も変更する必要があります。
アプリケーションの設定
今回はSpring Bootを利用してアプリケーションを作成します。
pom.xml
<?xml version="1.0" encoding="UTF-8"?>
<project xmlns="http://maven.apache.org/POM/4.0.0" xmlns:xsi="http://www.w3.org/2001/XMLSchema-instance"
	xsi:schemaLocation="http://maven.apache.org/POM/4.0.0 http://maven.apache.org/xsd/maven-4.0.0.xsd">
	<modelVersion>4.0.0</modelVersion>

	<groupId>com.example</groupId>
	<artifactId>oidc</artifactId>
	<version>0.0.1-SNAPSHOT</version>
	<packaging>jar</packaging>

	<name>oidc</name>
	<description>Demo project for Spring Boot</description>

	<parent>
		<groupId>org.springframework.boot</groupId>
		<artifactId>spring-boot-starter-parent</artifactId>
		<version>2.0.4.RELEASE</version>
		<relativePath/> <!-- lookup parent from repository -->
	</parent>

	<properties>
		<project.build.sourceEncoding>UTF-8</project.build.sourceEncoding>
		<project.reporting.outputEncoding>UTF-8</project.reporting.outputEncoding>
		<java.version>1.8</java.version>
	</properties>

	<dependencies>
		<dependency>
			<groupId>org.springframework.boot</groupId>
			<artifactId>spring-boot-starter-security</artifactId>
		</dependency>
		<dependency>
			<groupId>org.springframework.boot</groupId>
			<artifactId>spring-boot-starter-thymeleaf</artifactId>
		</dependency>
		<dependency>
			<groupId>org.springframework.boot</groupId>
			<artifactId>spring-boot-starter-web</artifactId>
		</dependency>
		<dependency>
			<groupId>org.springframework.security</groupId>
			<artifactId>spring-security-oauth2-client</artifactId>
		</dependency>
		<dependency>
			<groupId>org.springframework.security</groupId>
			<artifactId>spring-security-oauth2-jose</artifactId>
		</dependency>
		<dependency>
			<groupId>org.thymeleaf.extras</groupId>
			<artifactId>thymeleaf-extras-springsecurity4</artifactId>
		</dependency>
	</dependencies>

	<build>
		<plugins>
			<plugin>
				<groupId>org.springframework.boot</groupId>
				<artifactId>spring-boot-maven-plugin</artifactId>
			</plugin>
		</plugins>
	</build>


</project>
Spring Security以外に、spring-security-oauth2-clientとspring-security-oauth2-joseが必要です。
これはSpring Initializrでは追加できないので、pom.xmlを手動で変更する必要があります。
また、今回は画面表示にThymeleafを使うので、ThymeleafとSpring Security用のThymeleaf拡張を依存関係に追加しています。
application.yml
今回はymlで設定しますが、propertiesでも同様の設定が可能です。
spring:
  security:
    oauth2:
      client:
        registration:
          google:
            client-id: [クライアントID]
            client-secret: [クライアントシークレット]
クライアントIDとクライアントシークレットについては、Googleで作成した認証情報にあるのでコピペしてください。
アプリケーションクラス
とりあえずデフォルトで問題ないです。OpenID Connect関連の設定も自動で設定されます。
@SpringBootApplication
public class OidcApplication {

	public static void main(String[] args) {
		SpringApplication.run(OidcApplication.class, args);
	}
}
Controller
動作を確認するために、Controllerクラスを作成します。
(メインクラス内に作成してもOKです。)
@Controller
public class HelloController {

  @GetMapping("/")
  public String index(@AuthenticationPrincipal OidcUser user, Model model) {
    model.addAttribute("username", user.getFullName());
    return "hello";
  }
認証情報はOidcUserに格納されており、getName()で一意なIDが取得できます。(Nameっていうのがしっくりきませんが。)
他にも、プロフィール画像のリンクやメールアドレスも取得できます。
OidcUserには誕生日を取得するメソッドなど、様々なものが用意されていますが、Google側がそれらに対応するデータをすべて返却するわけではないので、利用できない(nullが返却される)メソッドもあります。
Thymeleaf
認証情報を表示する画面を作成します。
<!DOCTYPE html>
<html xmlns:th="http://www.thymeleaf.org" xmlns:sec="http://www.thymeleaf.org/thymeleaf-extras-springsecurity4">
  <head>
    <title>OpenID Connect Sample</title>
    <meta charset="utf-8"/>
  </head>

  <body>
    <div>名前:<span sec:authentication="principal.attributes['name']"></span></div>
    <div>名前:<span th:text="${username}"></span></div>
    <div>ID:<span sec:authentication="principal.name"></span></div>
  </body>
</html>
ちなみに、sec:authentication="principal.fullName"ではエラーが発生します。
Controllerでは、getFullNameメソッドを使っていたのでアクセスできるやろー、と思ったのですが。。
他にもget...メソッドがあるものを試してみると、エラーが発生するものとしないものがありました。
getFullNameなどはIdTokenClaimAccessorインターフェースにデフォルト実装されているのですが、デフォルト実装されただけのメソッドは呼び出せないっぽいです。
しばらくソースコードを追いかけてみて、BeanWrapperImplがIntrospectorを利用してBeanInfoを収集して、それを利用してアクセスしていることまではわかりました。
で、以下によるとIntrospectorがインターフェースのデフォルト実装に対応していないっぽいです。
https://bugs.openjdk.java.net/browse/JDK-8071693
動作確認
アプリケーションを起動して、http://localhost:8080/ にアクセスします。
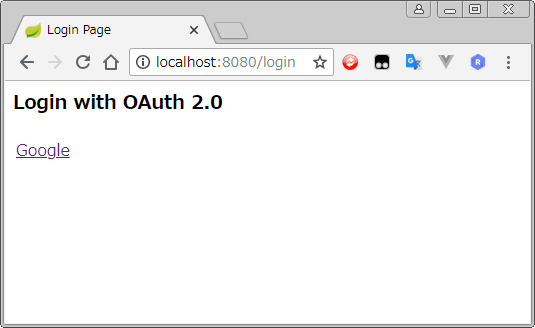
するとGoogleへのリンクが貼られた簡素な画面にリダイレクトされます。

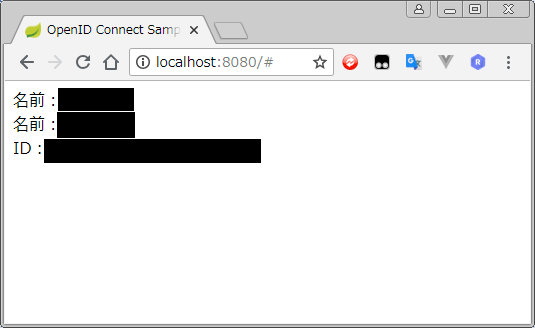
Googleの認証を終えると、リダイレクトされユーザ名やIDが表示されるはずです。

以上のようにとても簡単にOpenID Connectを実現することができます!
ユーザのパスワードを自分で管理するのは非常に面倒というか怖いですし、OpenID Connectを利用したいケースは多いかなと思います。
面倒な処理はSpring Securityが大体やってくれるので、導入するハードルも低くなりそうな気がします。