
リモートデスクトップなど、外出先から遠隔で自宅のPCを起動したい!
けど、いちいちSSH接続してコマンドを打つのは面倒くさい!ということで、Discordから「/wol」と送るだけでマジックパケットを送信できるDiscord Botを作ってみました。
1. 使用技術
- Node.js v24.11.0
- TypeScript v7系
- discord.js
- dotenv
2. 環境構築
Node.jsはv24.11.0を使用しました。
node -v
v24.11.0
2-1. モジュール・ライブラリのインストール
bot部分にはdiscord.jsを用いました。
npm install -D typescript @types/node
npm i discord.js
2-2. TypeScriptの環境構築
tsconfigを作成します。
npx tsc --init
tsconfig.jsonは以下のように設定しました。いらない設定も入っていると思いますが動くのでヨシ!
{
  // Visit https://aka.ms/tsconfig to read more about this file
  "compilerOptions": {
    // File Layout
    "rootDir": "./src", # 追記
    "outDir": "./dist", # 追記

    // Environment Settings
    // See also https://aka.ms/tsconfig/module
    "module": "nodenext",
    "target": "esnext",
    "types": ["node"], # 追記
    // Other Outputs
    "sourceMap": true,
    "declaration": true,
    "declarationMap": true,

    // Stricter Typechecking Options
    "noUncheckedIndexedAccess": true,
    "exactOptionalPropertyTypes": true,

    // Recommended Options
    "strict": true,
    "jsx": "react-jsx",
    "verbatimModuleSyntax": true,
    "isolatedModules": true,
    "noUncheckedSideEffectImports": true,
    "moduleDetection": "force",
    "skipLibCheck": true,
    "esModuleInterop": true,
  },
  "include": ["src/**/*"] # 追記
}
また、package.jsonにて、esmoduleを使用するよう変更しました。
{
...
"type": "module",
...
}
2-3. スクリプトの設定
package.jsonで、npmスクリプトを設定しました。
  "scripts": {
    "dev": "tsx watch src/index.ts", # 開発用
    "build": "tsc", # ビルド用
    "start": "node dist/index.js" # 成果物用
  },
3. Botの登録
Discord Developer Portalにて、Botを作成しました。
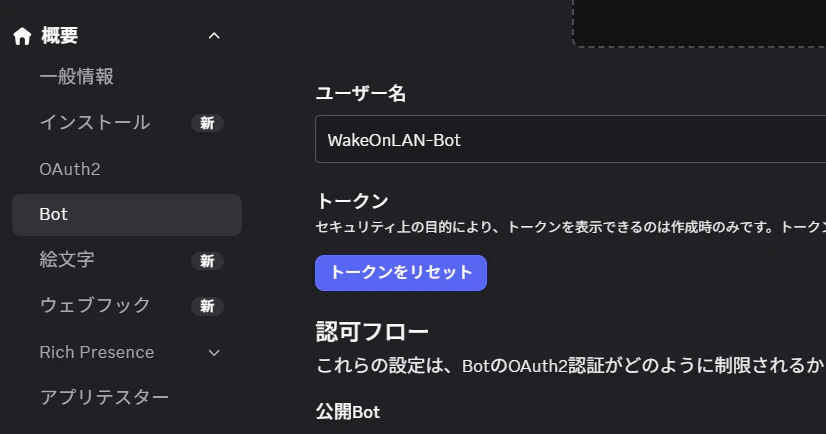
まず、Botタブに移動します。
「トークンをリセット」をクリックし、アクセストークンをコピーします。
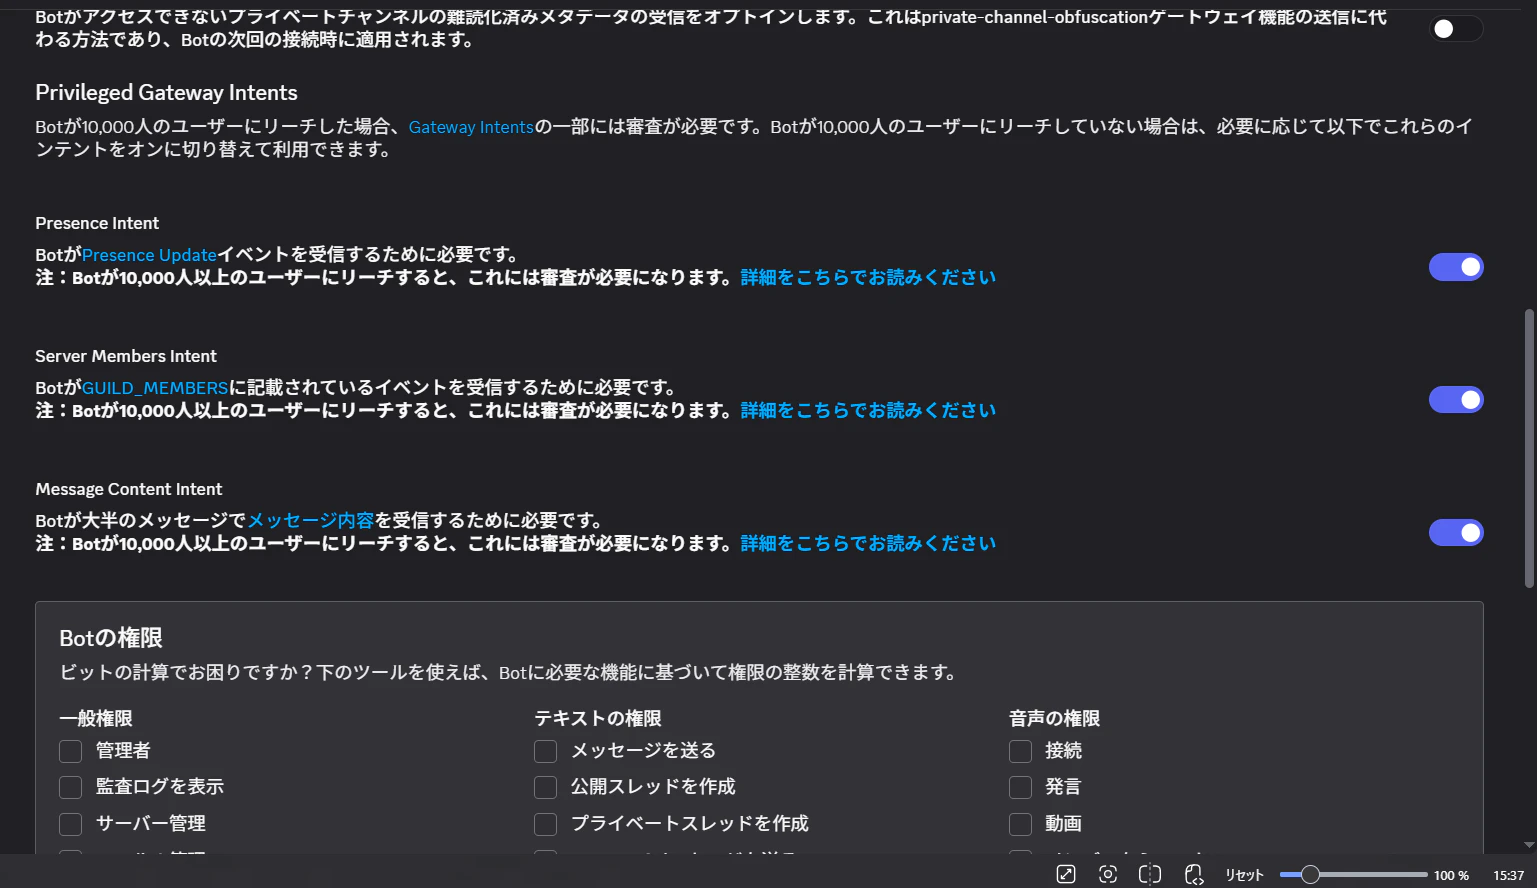
また、権限が足りない旨のエラーが出たので、Message Content Intent, Presence Intent, Server Members Intentを許可しておきます。
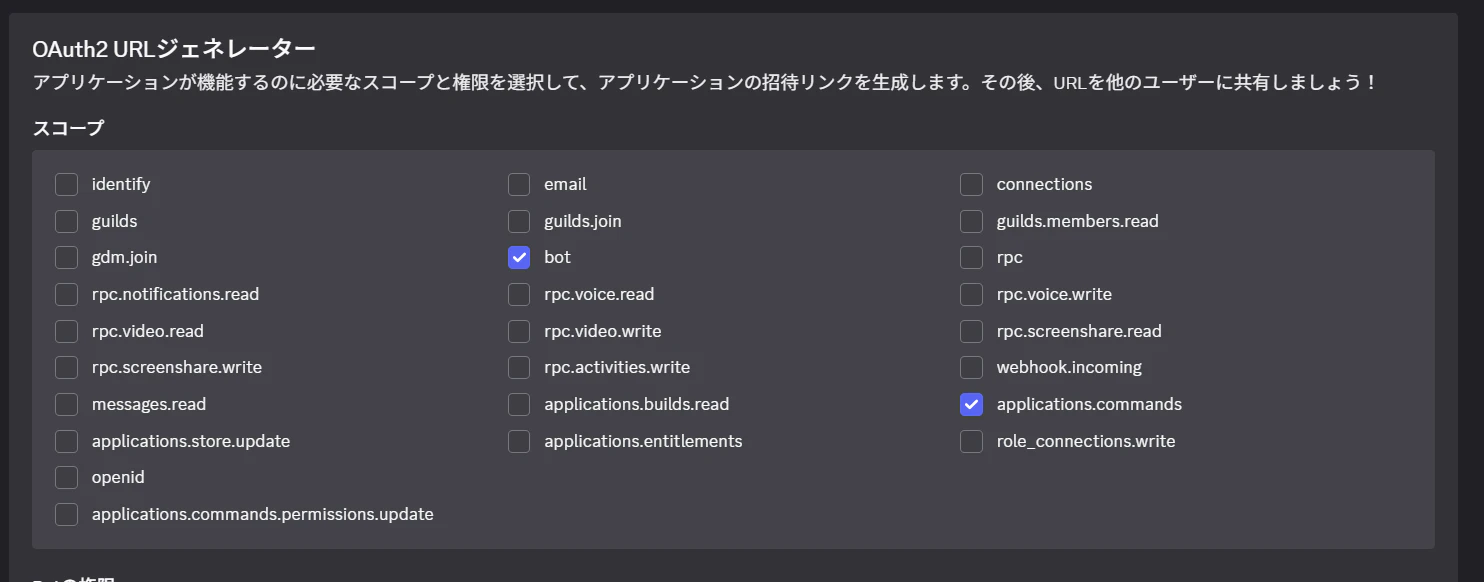
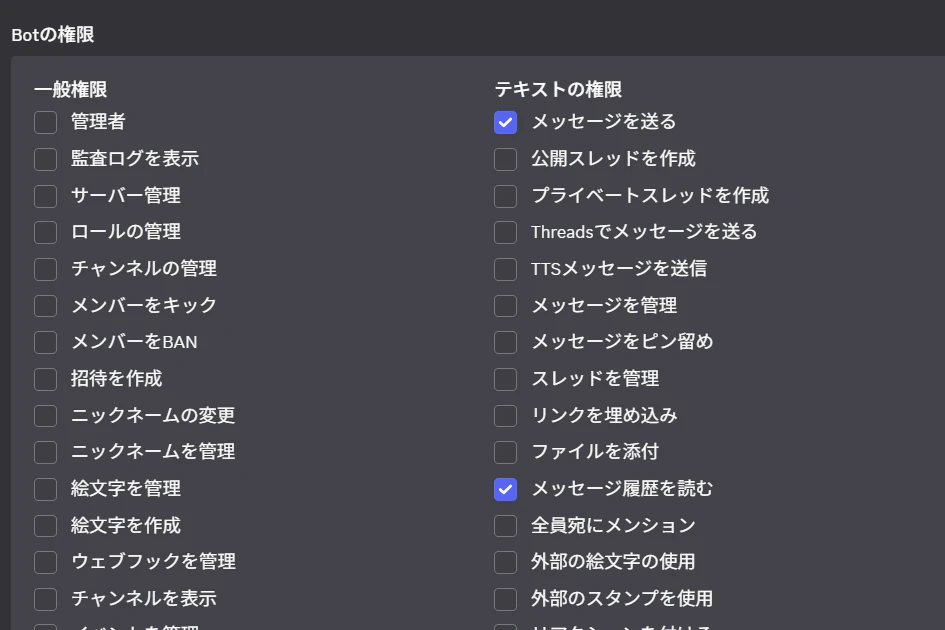
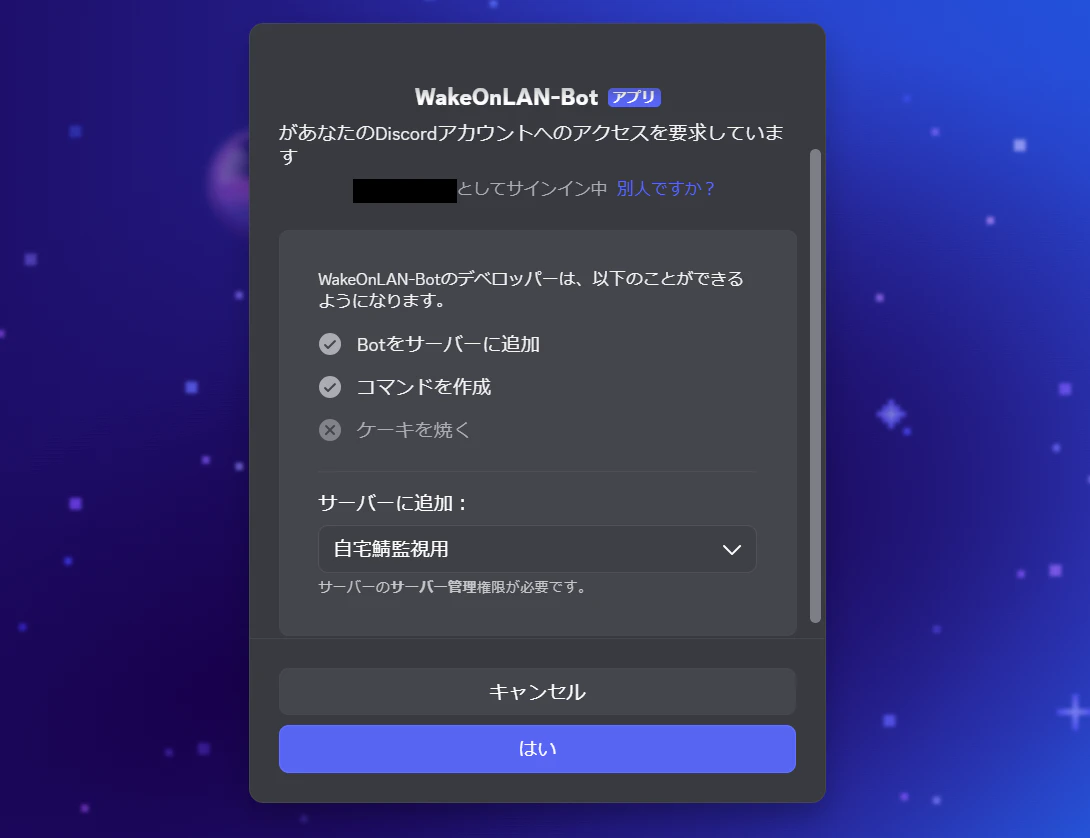
次に、OAuth2タブに移動し、必要な権限を許可します。
botとapplication.commandsにチェックを入れ、メッセージ履歴、メッセージの送信を許可します。
ページ下部に出力されたURLをブラウザで開き、サーバーにBotを参加させます。
4. Botの中身を作成
ではTypeScriptでコードを書いていきます。
事前に.envファイルをプロジェクトのルートディレクトリに作成し、DiscordのTokenとWoL先PCのMACアドレスを記述します。
# .env
DISCORD_BOT_TOKEN=xxxxxxxxxxxxxxxxxxxxxxxxxxxxxxxxxxxxxxxx
MAIN_PC_MAC_ADDR=00:00:00:00:00:00
4-1. 最小構成
まず、Botとして成立させるための最小構成はこうなります。
import { ChatInputCommandInteraction, Client, GatewayIntentBits } from "discord.js";

const client = new Client({
  intents: []
})

client.once("ready", () => {
  console.log("readyです");
});

client.login(process.env.DISCORD_BOT_TOKEN);
4-2. スラッシュコマンドの追加
そこに、スラッシュコマンドをトリガーとさせる処理を追加します。
こうすると/hoge、説明がfugaのコマンドが追加されます。
client.once("ready", () => {
  const data = [
    {
      name: "hoge",
      description: "fuga"
    }
  ]

  client.application?.commands.set(data);
});

client.on("interactionCreate", (interaction) => {
  if (!interaction.isChatInputCommand()) return; // コマンド以外は早期リターン

  // ここでやりたい処理を実行
  if (interaction.commandName == "hoge") {
  ...
});
しかし、ここからコマンドを何個も増やしていくとき、コマンド名と説明部分・実行部分が別々となってしまい、バグの温床になってしまいそうです。
そこで、コマンド名・説明・処理を一括で定義した配列を作り、そのを動的にバラしてBotに登録するよう変更しました。
interface Cmd {
  description: string;
  execute: (interaction: ChatInputCommandInteraction) => Promise<void>;
}

// ここでスラッシュコマンドを定義
const commands: Record<string, Cmd> = {
  ping: {
    description: "ぴんぐです",
    execute: async (interaction) => {
      // /pingの処理
    }
  },
  wol: {
    description: "WOLパケットを送信します",
    execute: async (interaction) => {
      // /wolの処理
    }
  }
}

client.once("ready", () => {
  // コマンドを登録
  const data = Object.entries(commands).map(([name, config]) => ({
    name,
    description: config.description,
  }));
});

client.on("interactionCreate", (interaction) => {
  // 送信されたコマンド別に、処理を分ける
  if (!interaction.isChatInputCommand()) return;

  const command = commands[interaction.commandName];
  if (command) {
    command.execute(interaction);
  };
});
4-3. WakeOnLAN処理
まず、WoLするためのパケット、「マジックパケット」と言われるパケットの中身は次のようになっているようです。
FF:FF:FF:FF:FF:FF[MACアドレス]*6回繰り返す
FFを6回書いた後、MACアドレスを6回書きます。
また、それをLAN内のすべての端末に送信するようです。
その理由としては、対象のPCは電源が切れておりIPアドレス等を取得できないため、その端末に向けて送ることができないからだそう。確かに。結構強引なんだなぁ()
よって、以下のように書けました。
const formatted_macAddr = process.env.MAIN_PC_MAC_ADDR?.replace(/:/g, "").toLowerCase();
const macAddrBuffer = Buffer.from(formatted_macAddr!, "hex");

const wolPacket = Buffer.concat([
Buffer.alloc(6, 0xff),
Buffer.alloc(96, macAddrBuffer),
])
送信部分も追加し、コマンドとして組み込むと、完成です。
wol: {
    description: "WOLパケットを送信します",
    execute: async (interaction) => {

      // (...省略)

      const socket = dgram.createSocket("udp4");

      socket.on("error", (err) => {
        console.error(`WOLクライアントでエラーが発生しました: ${err}`);
        interaction.followUp(
          `WOLパケットの送信中にエラーが発生しました\nエラーメッセージ:\n${err}`,
        );
        socket.close();
      });

      socket.bind(() => {
        socket.setBroadcast(true);

        socket.send(wolPacket, 0, wolPacket.length, 9, "255.255.255.255", (err) => {
          if (err) {
            console.error(`WOLパケットの送信中にエラーが発生しました: ${err}`);
            interaction.followUp(`WOLパケットの送信中にエラーが発生しました\nエラーメッセージ:\n${err}`);
          } else {
            console.log(`WOLパケットを送信しました: ${wolPacket.toString("hex")}`);
            interaction.followUp(`WOLパケットを送信しました`);
          }
          socket.close();
        })
  }
最終的には以下のコードになりました。
import { ChatInputCommandInteraction, Client, GatewayIntentBits } from "discord.js";
import dotenv from "dotenv";
import dgram from "dgram";

dotenv.config();

const client = new Client({
  intents: [
    GatewayIntentBits.Guilds,
    GatewayIntentBits.GuildMessages,
    GatewayIntentBits.MessageContent,
  ]
})

interface Cmd {
  description: string;
  execute: (interaction: ChatInputCommandInteraction) => Promise<void>;
}

// ここでスラッシュコマンドを定義
const commands: Record<string, Cmd> = {
  ping: {
    description: "ぴんぐです",
    execute: async (interaction) => {
      await interaction.reply("ぽんぐです!");
    }
  },
  wol: {
    description: "WOLパケットを送信します",
    execute: async (interaction) => {
      await interaction.reply(`${process.env.MAIN_PC_MAC_ADDR} にWOLパケットを送信しました`);

      const formatted_macAddr = process.env.MAIN_PC_MAC_ADDR?.replace(/:/g, "").toLowerCase();
      const macAddrBuffer = Buffer.from(formatted_macAddr!, "hex");

      const wolPacket = Buffer.concat([
        Buffer.alloc(6, 0xff),
        Buffer.alloc(96, macAddrBuffer),
      ])

      const socket = dgram.createSocket("udp4");

      socket.on("error", (err) => {
        console.error(`WOLクライアントでエラーが発生しました: ${err}`);
        interaction.followUp(
          `WOLパケットの送信中にエラーが発生しました\nエラーメッセージ:\n${err}`,
        );
        socket.close();
      });

      socket.bind(() => {
        socket.setBroadcast(true);

        socket.send(wolPacket, 0, wolPacket.length, 9, "255.255.255.255", (err) => {
          if (err) {
            console.error(`WOLパケットの送信中にエラーが発生しました: ${err}`);
            interaction.followUp(
              `WOLパケットの送信中にエラーが発生しました\nエラーメッセージ:\n${err}`,
            );
          } else {
            console.log(`WOLパケットを送信しました: ${wolPacket.toString("hex")}`);
            interaction.followUp(`WOLパケットを送信しました: ${wolPacket.toString("hex")}`);
          }
          socket.close();
        })
      })
    }
  }
}

client.once("ready", () => {
  console.log(`${client.user?.tag} でログインしました`);

  const data = Object.entries(commands).map(([name, config]) => ({
    name,
    description: config.description,
  }));

  console.log(data);

  client.application?.commands.set(data);
  console.log("readyです");
});

client.on("interactionCreate", (interaction) => {
  if (!interaction.isChatInputCommand()) return;

  const command = commands[interaction.commandName];
  if (command) {
    command.execute(interaction);
  };
});

client.login(process.env.DISCORD_BOT_TOKEN);
5. 動作確認
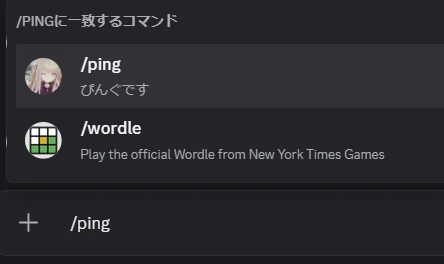
/pingと送信すると、先ほど書いた処理が実行され、疎通確認を行うことができました。
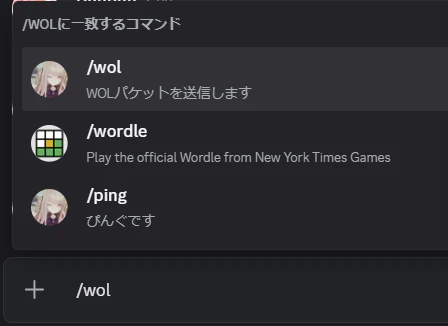
/wolと送信すると、正常に処理が実行され、実際にPCが起動したことを確認できました。

6. ホストする
MACアドレスを送らないといけないので、自宅内に置いておく必要があります。
私はProxmox VEでUbuntuのLXCコンテナを作成して、プログラムを走らせておきました。
7. 感想
マジックパケットの構造や送信方法など、知らなかった部分が多かったので勉強になりました。
さらに、Discord Botの処理をNode.jsで書くことができるということに可能性を感じました。
いつも使っているツール上で自分の作ったものが動くというのはなかなか楽しいので、是非やってみはいかがでしょうか。