Rancher 2.0 Technical PreviewでGKE Kubernetes Clusterをインポートしてみるに続いてBluemix Kubernetes Clusterをインポートしてみようと思います。
1.Bluemix Kubernetes Clusterの構築
1.Bluemix申し込み
以下からBluemixの申し込みを行います。
2.Bluemixにログインして、クラスタの作成
「コンテナーでのアプリのデプロイ」をクリックします。

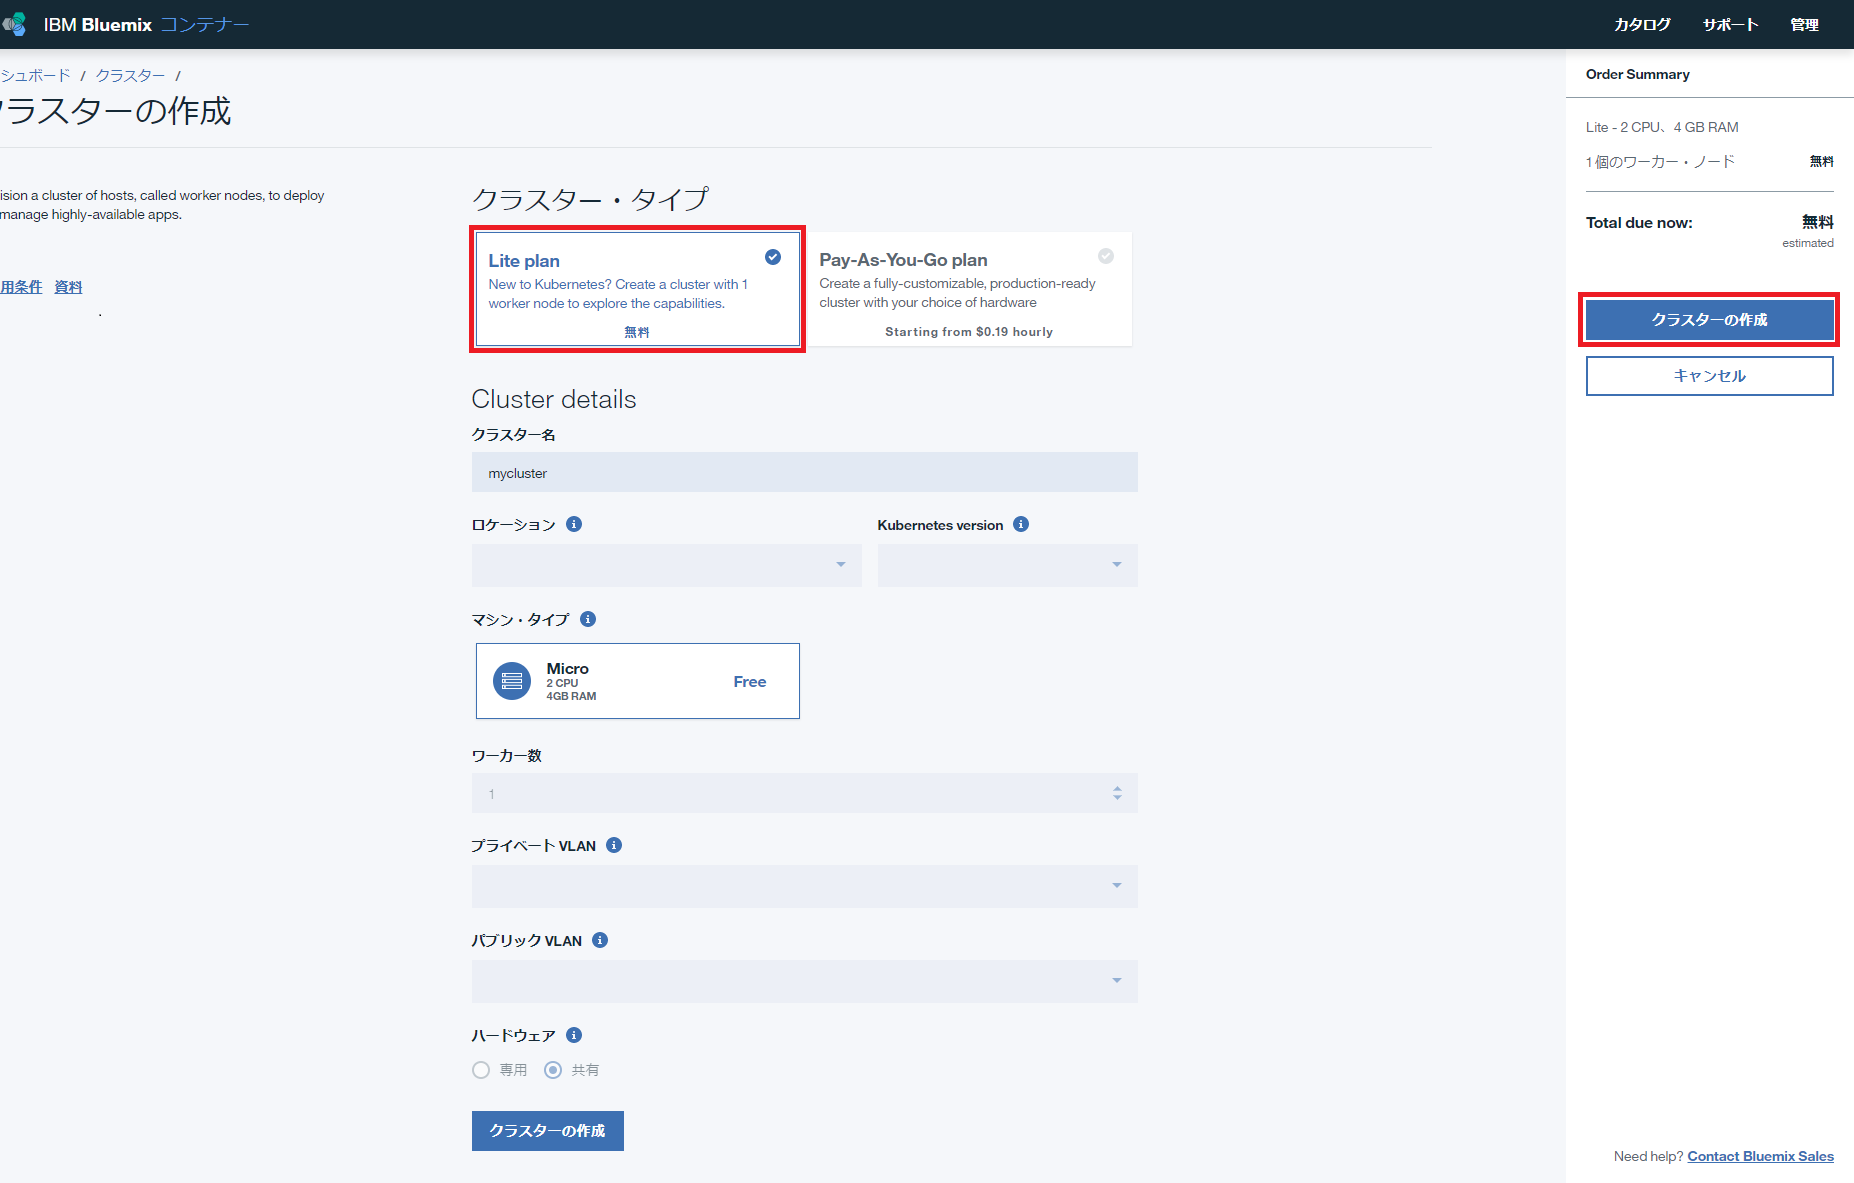
3.「Lite plan」を選択して、「クラスターの作成」ボタンをクリックします。
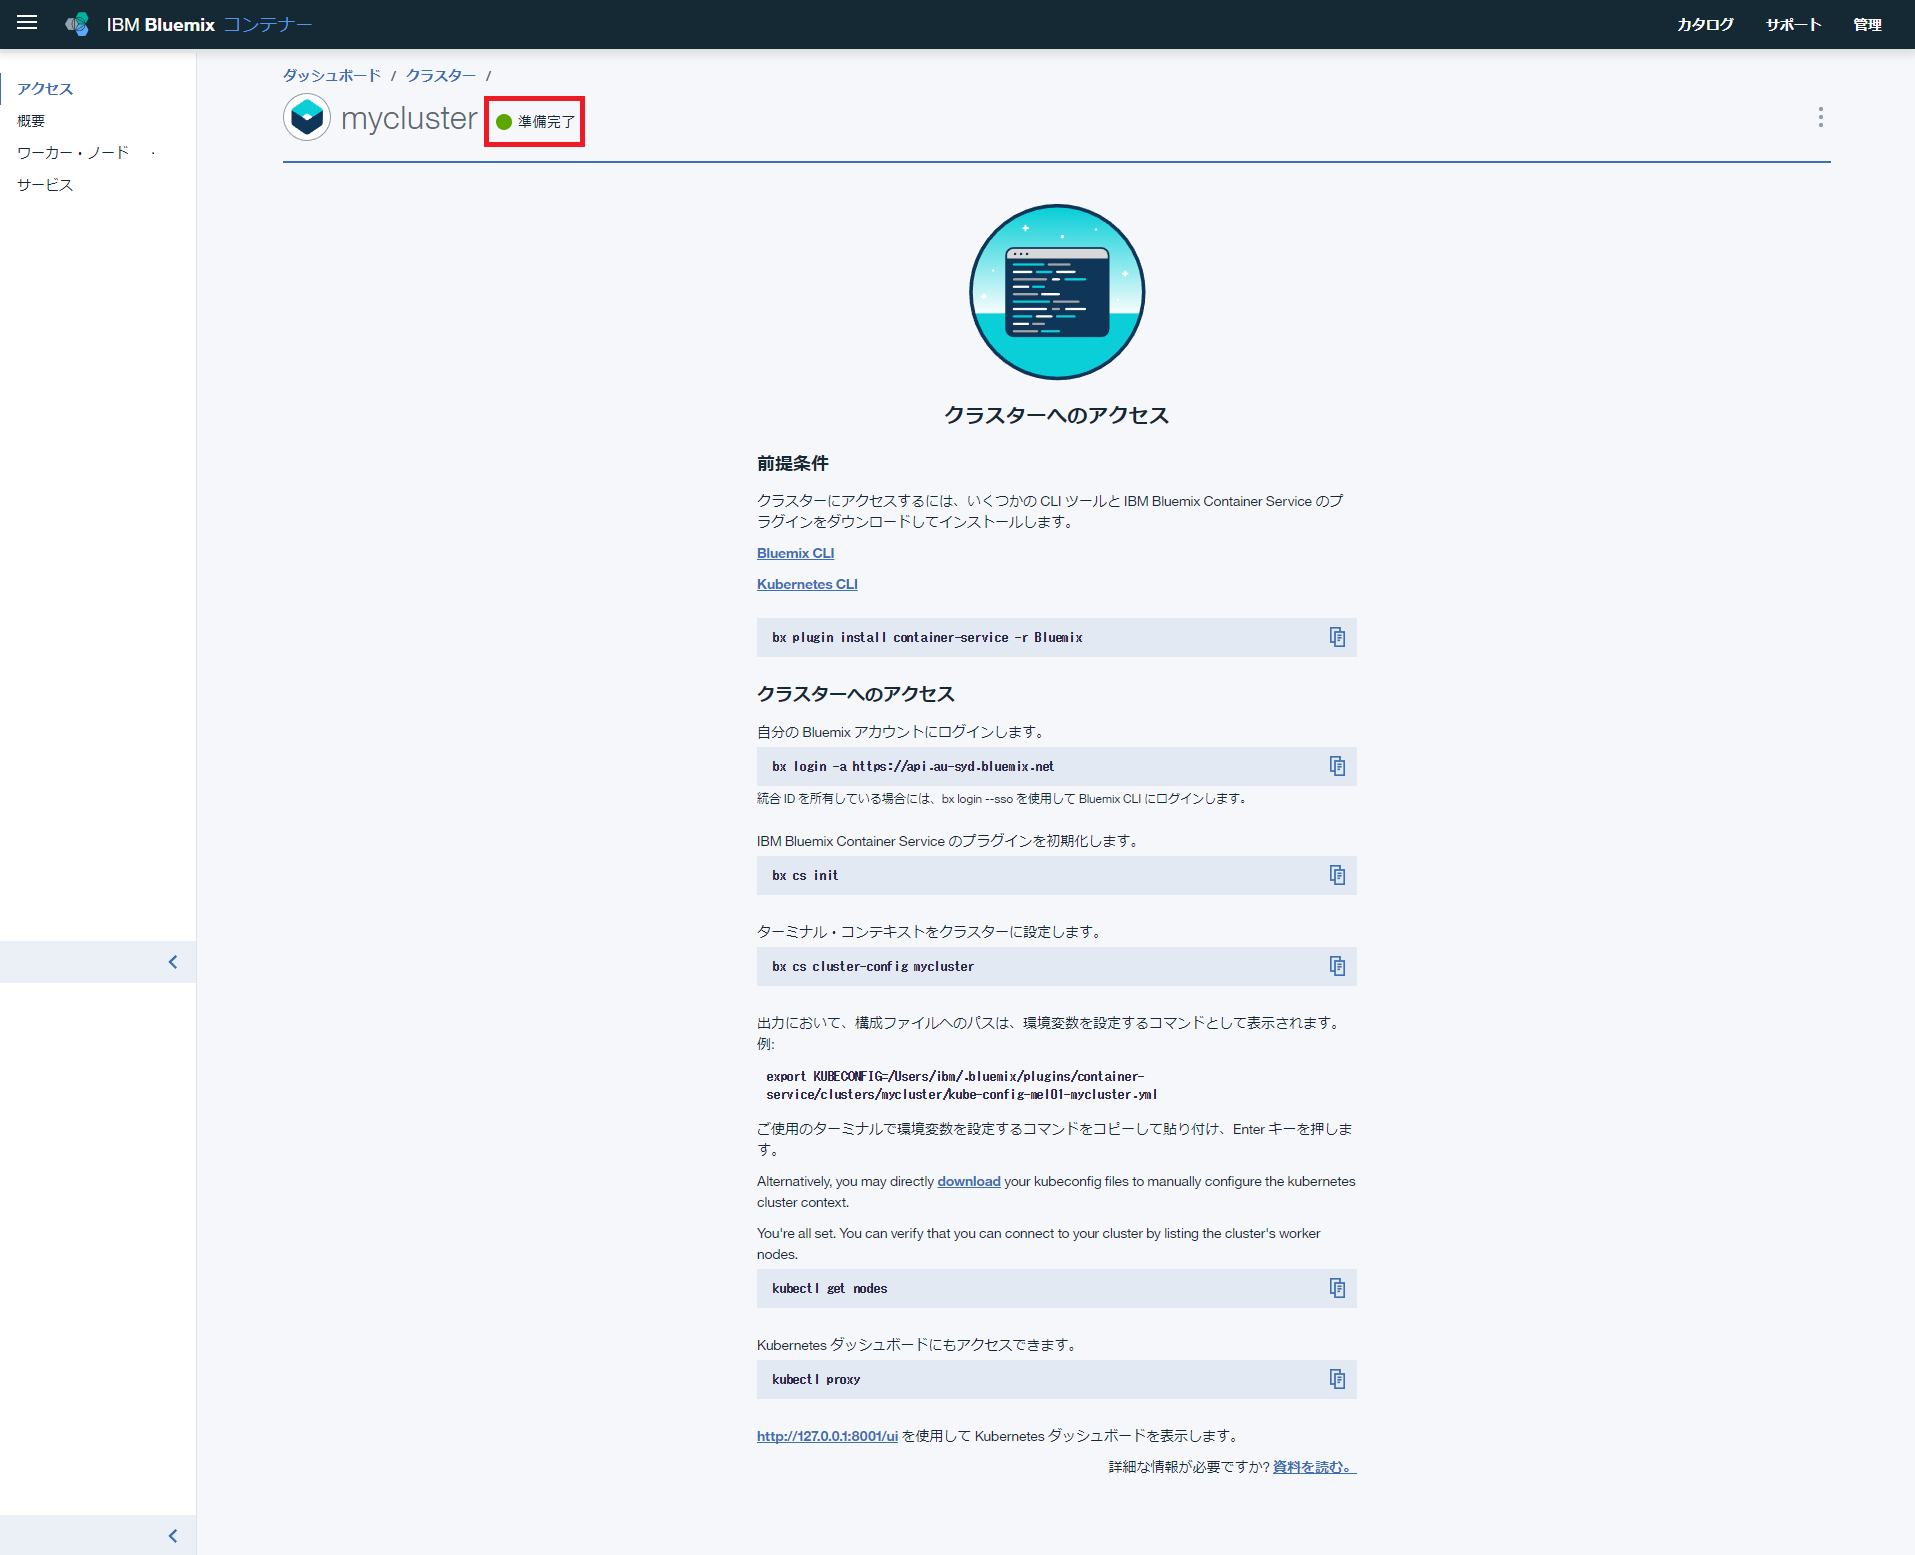
「準備完了」であることを確認します。
4.Bluemix CLI と kubernetes CLIをダウンロードしてインストールします。
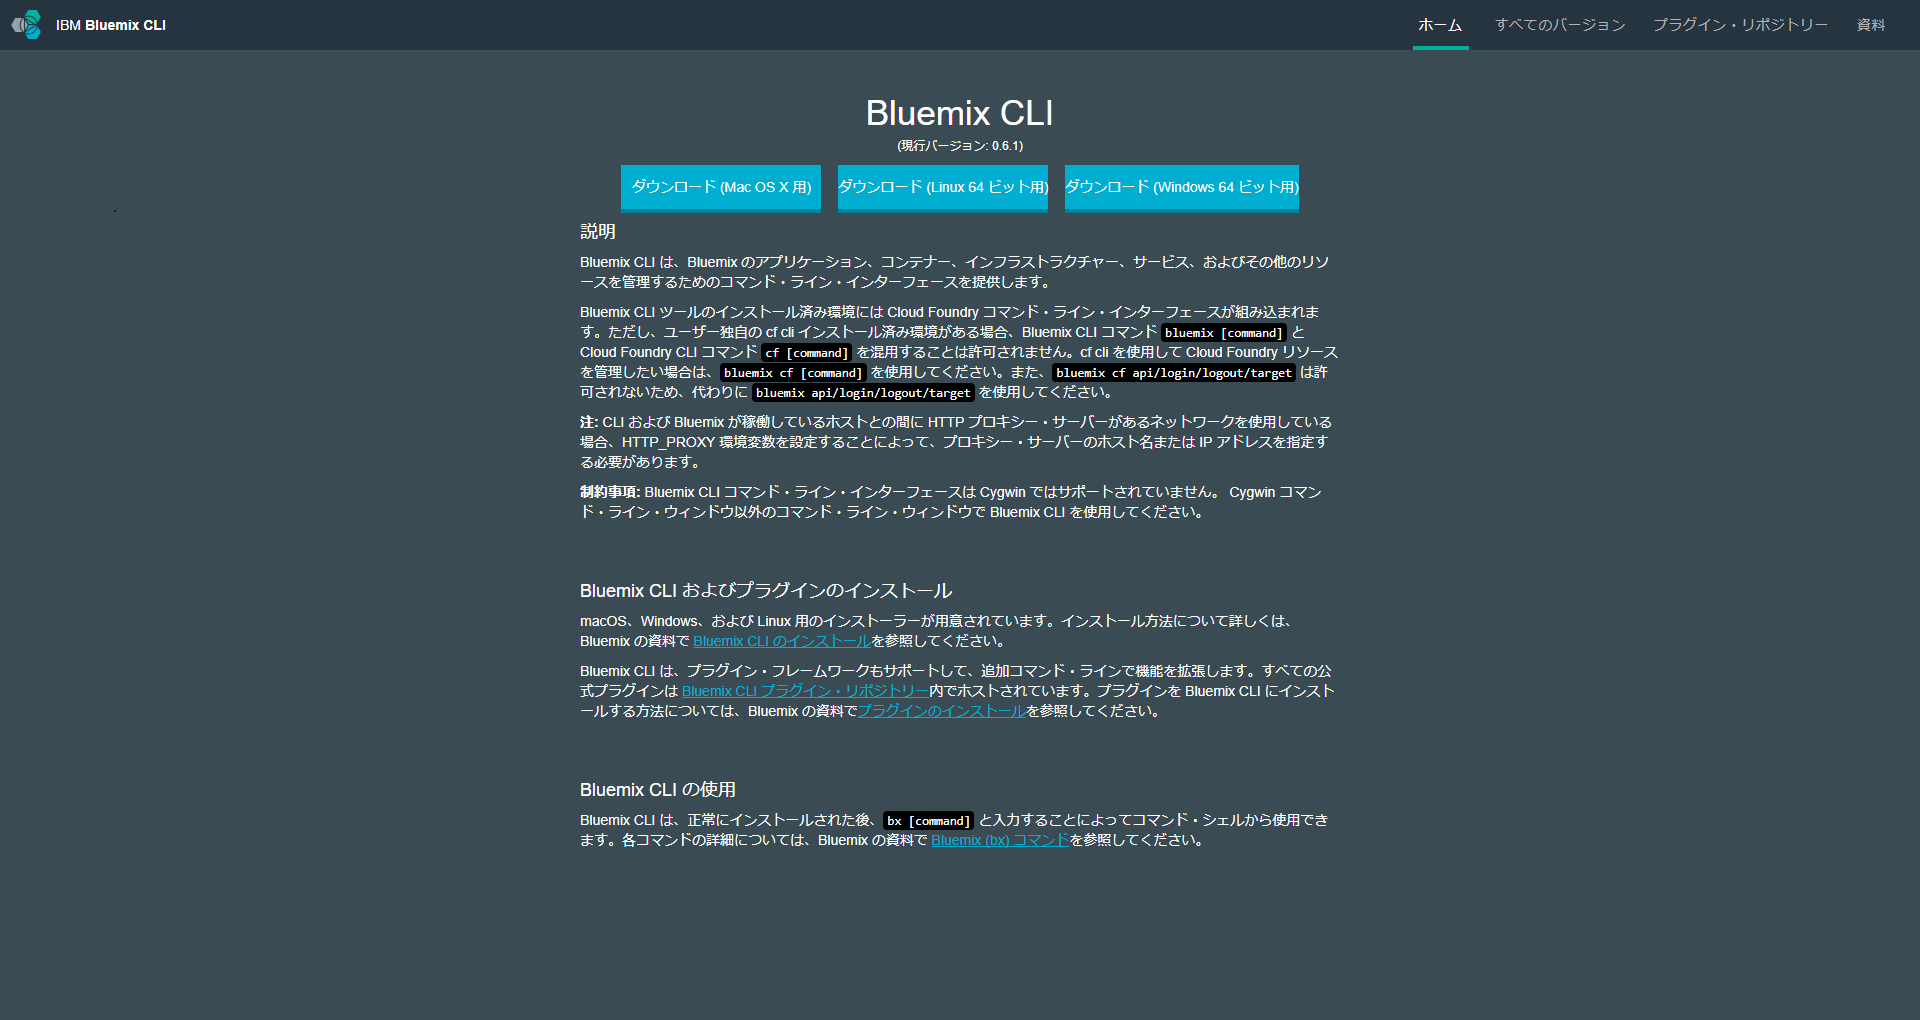
Bluemix CLI(Mac,Linux,Windows)をダウンロードしてインストールします。今回はWindows版を利用します。
https://clis.ng.bluemix.net/ui/home.html
kubernetes.exeをダウンロードします。
https://storage.googleapis.com/kubernetes-release/release/v1.8.0/bin/windows/amd64/kubectl.exe
ダウンロード後に「C:\Program Files\IBM\Bluemix\bin」にkubernetes.exeを移動します。
5.Bluemix CLIから以下のコマンドを実行します。
> bx plugin install container-service -r Bluemix
自分の Bluemix アカウントにログインします。
> bx login -a https://api.au-syd.bluemix.net
Email >
Password >
アカウントを選択します (または Enter キーを押してスキップします):
1.アカウント名's Account (aa1a87213f3f04723ea30ef1451088ae)
数値を入力してください> 1
ターゲットのアカウントアカウント名's Account (aa1a87213f3f04723ea30ef1451088ae)

ターゲットのリソース・グループ Default

API エンドポイント:   https://api.au-syd.bluemix.net (API バージョン: 2.75.0)
地域:                 au-syd
ユーザー:           Email address
アカウント:        アカウント名's Account (aa1a87213f3f04723ea30ef1451088ae)
リソース・グループ:   Default
組織:
スペース:

Tip: If you are managing Cloud Foundry applications and services
- Use 'bx target --cf' to target Cloud Foundry org/space interactively, or use 'bx target -o ORG -s SPACE' to target the org/space.
- Use 'bx cf' if you want to run the Cloud Foundry CLI with current Bluemix CLI context.
IBM Bluemix Container Service のプラグインを初期化します。
> bx cs init
Using default API endpoint: https://ap-south.containers.bluemix.net
OK
ターミナル・コンテキストをクラスターに設定します。
> bx cs cluster-config mycluster
OK
mycluster の構成は正常にダウンロードされました。 環境変数をエクスポートして Kubernetes の使用を開始してください。

SET KUBECONFIG=C:\Users\y.ichikawa\.bluemix\plugins\container-service\clusters\mycluster\kube-config-mel01-mycluster.yml

> SET KUBECONFIG=C:\Users\y.ichikawa\.bluemix\plugins\container-service\clusters\mycluster\kube-config-mel01-mycluster.yml
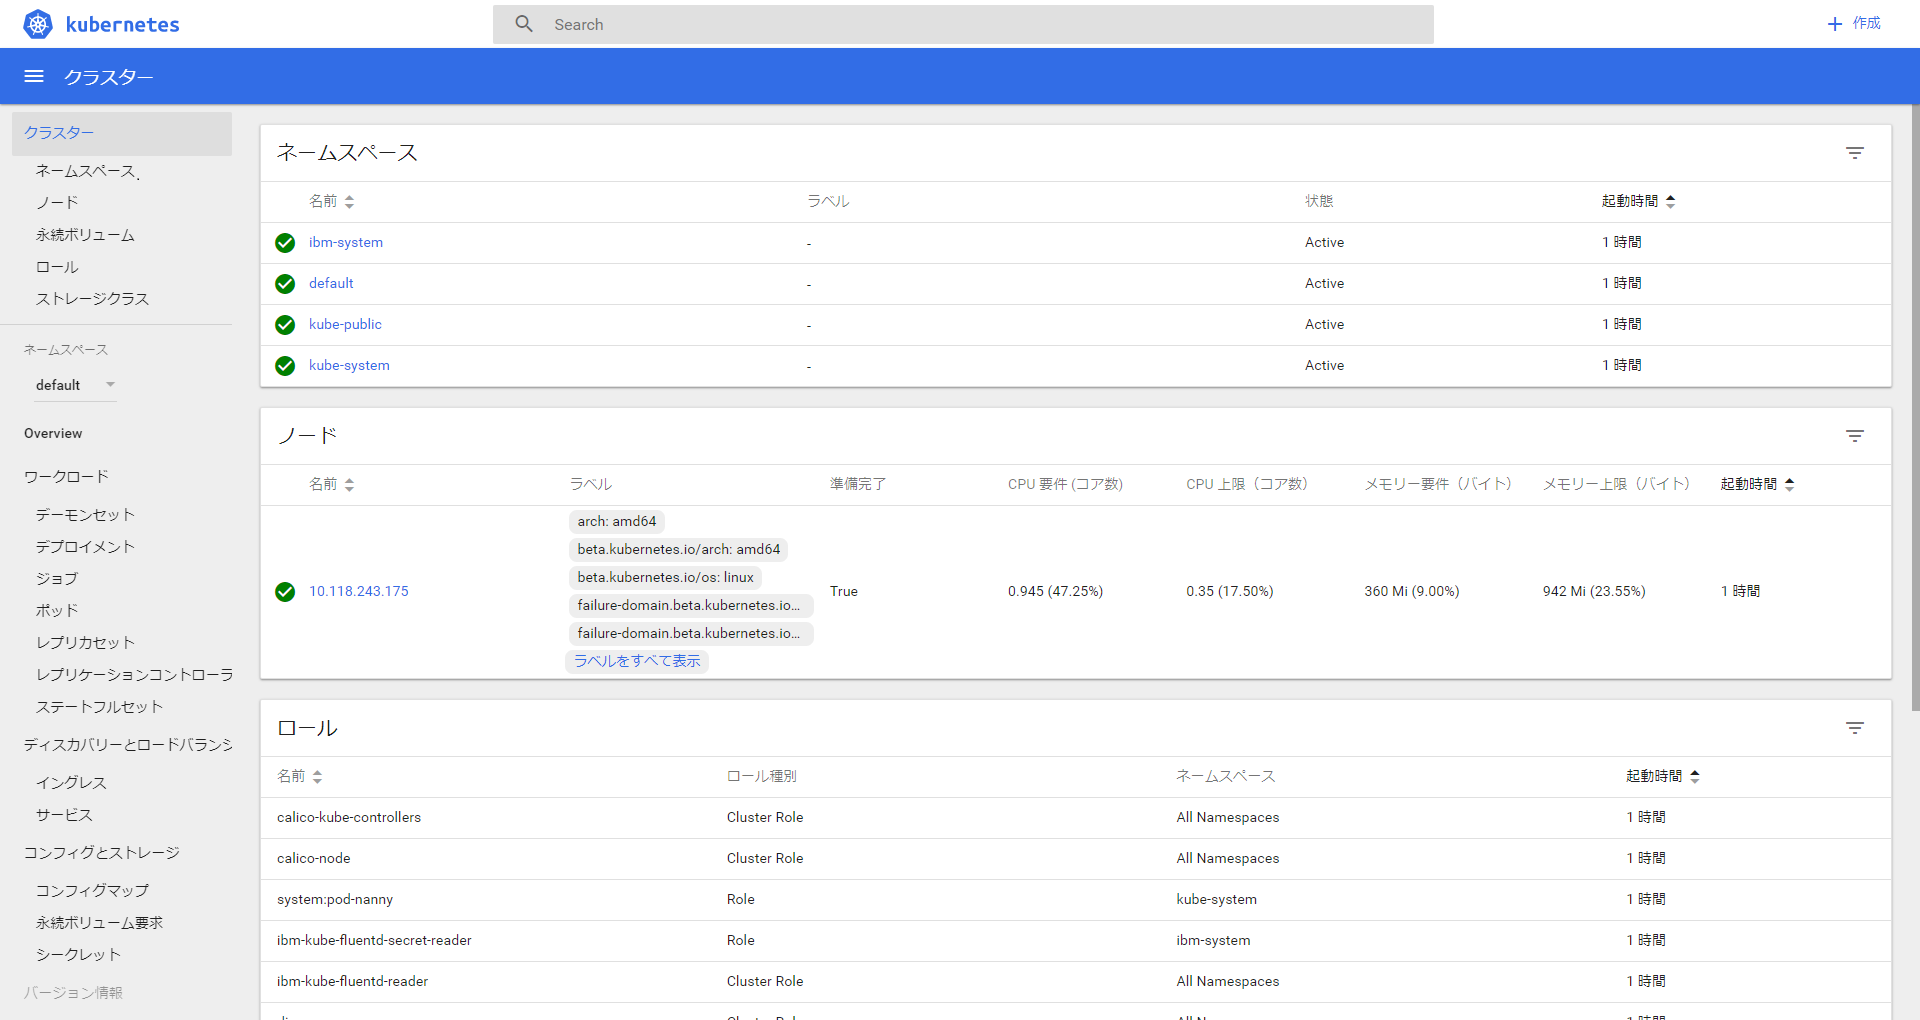
Kubectlコマンドを実行します。
> kubectl get nodes
NAME             STATUS    AGE       VERSION
10.118.243.175   Ready     1h        v1.7.4-1+1540c973d4ff9d
Kubernetes Dashboardも起動できます。
> kubectl proxy
Starting to serve on 127.0.0.1:8001
2.Rancher2.0 Serverの構築
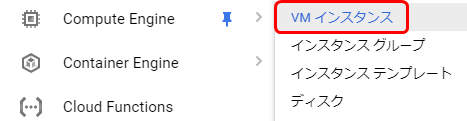
1. Compute Engineから「VMインスタンス」を選択します。
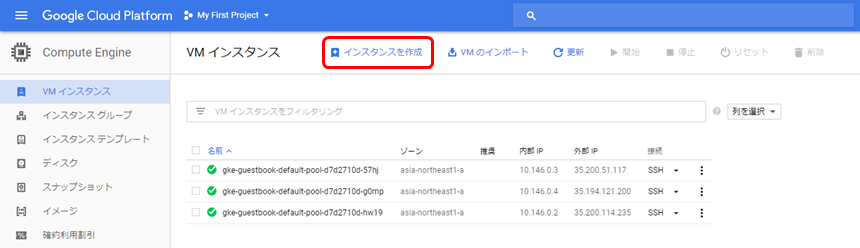
2.「インスタンスを作成」をクリックします。
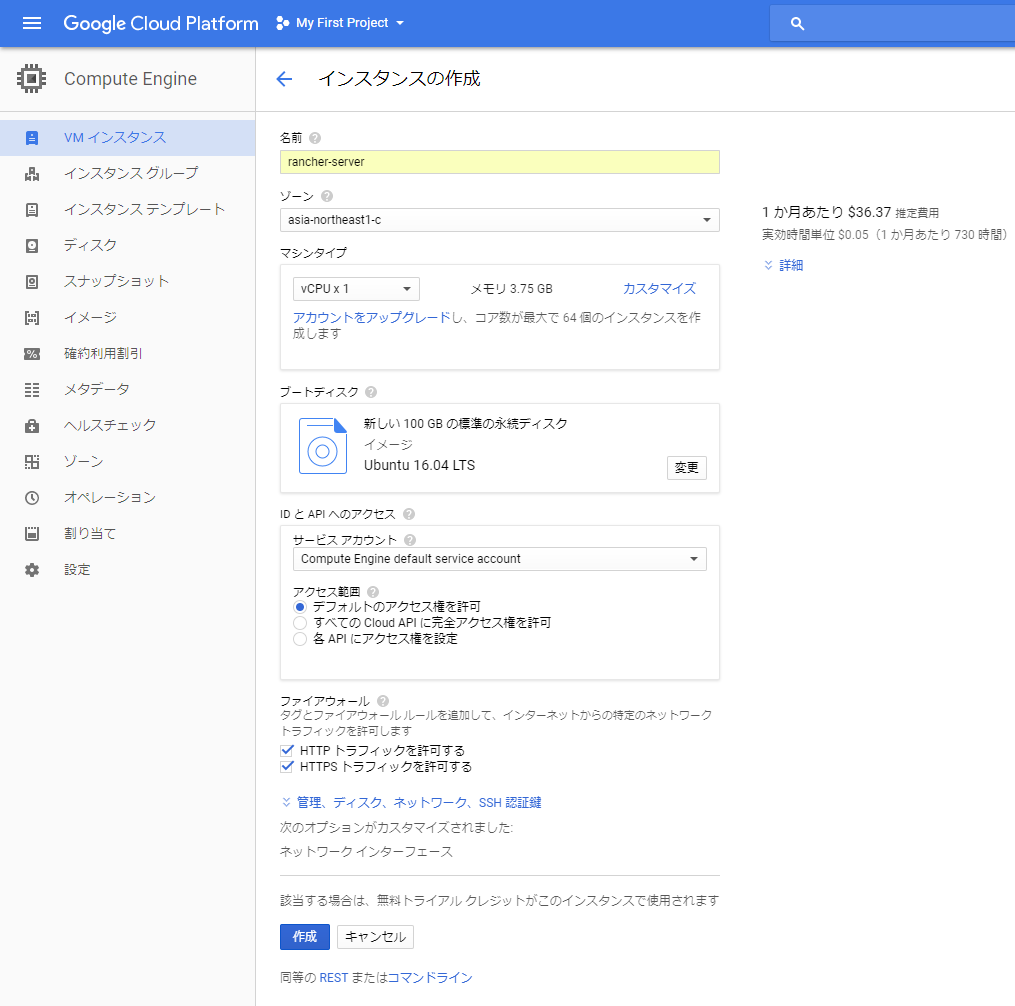
3. 以下の内容でインスタンスを作成します。
設定を入力後、「作成」ボタンをクリックします。
| 項目 | 入力概要 |
|---|---|
| 名前 | rancher-server |
| ゾーン | asia-northeast1-c |
| ブートディスク | Ubuntu 16.04 LTS |
| ディスクサイズ | 100GB |
| ファイアウォール | 「HTTPトラフィックを許可する」と「HTTPSトラフィックを許可する」にチェックを入れます。 |
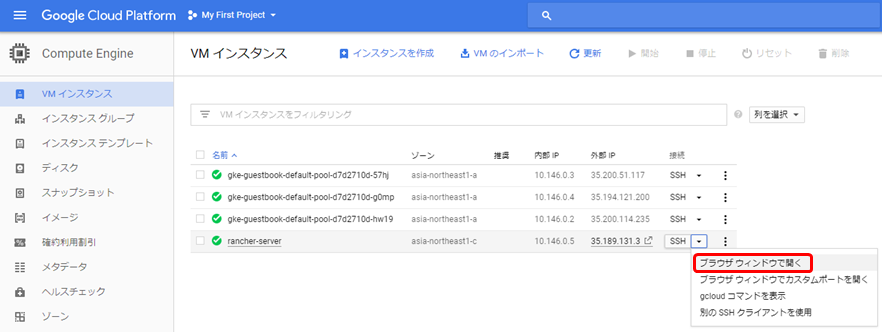
4. 作成したインスタンスにSSH接続します。
「ブラウザウィンドウで開く」を選択します。
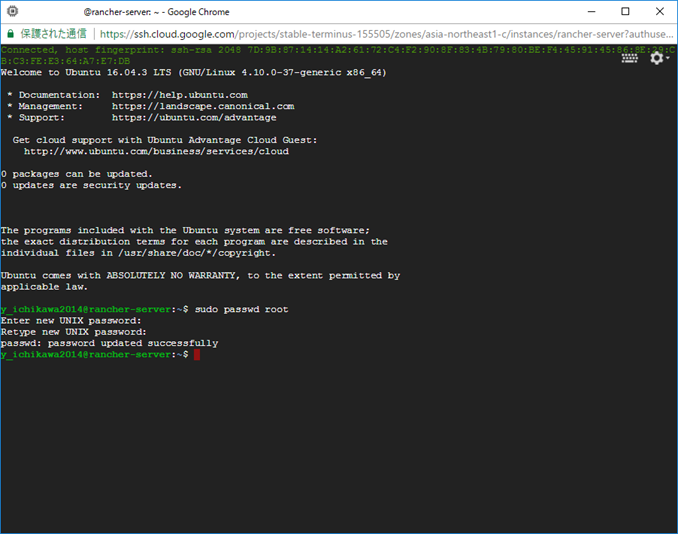
5. rootのパスワードを設定します。
$ sudo passwd root
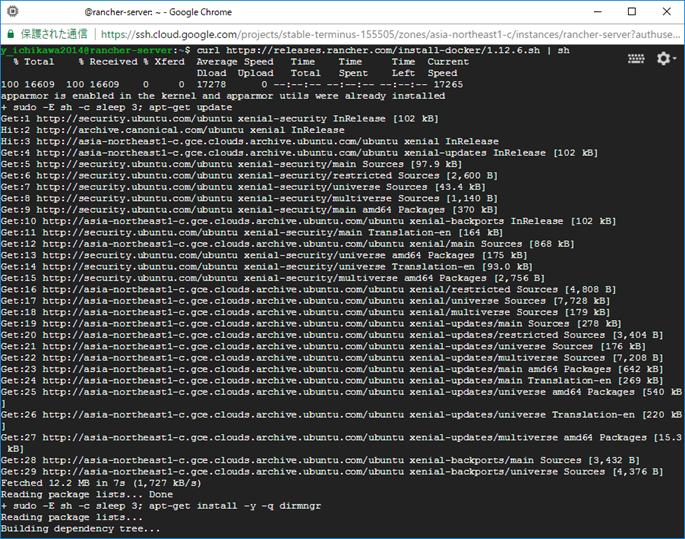
6. Dockerをインストールします。
$ curl https://releases.rancher.com/install-docker/1.12.6.sh | sh
7. Rancher2.0 Serverをインストールします。
$ sudo docker run -d --restart=unless-stopped -p 8080:8080 rancher/server:preview

8. ブラウザでRancher2.0 Serverの管理画面にアクセスします。
3. Rancher2.0 ServerにBluemix kubernetes clustersをインポート
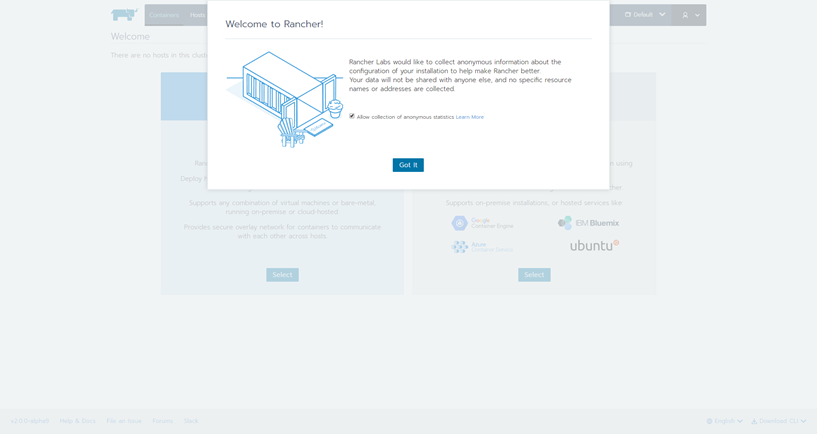
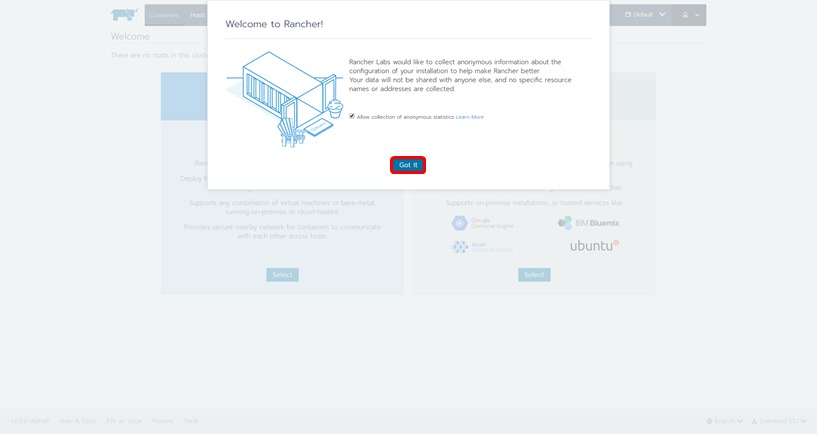
1. Welcome to Rancher! の「Got It」をクリックします。
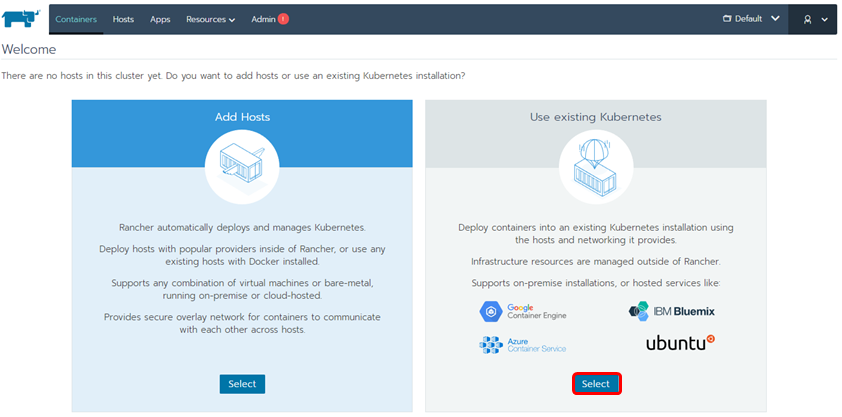
2. Use existing Kubernetesの「Select」ボタンをクリックします。
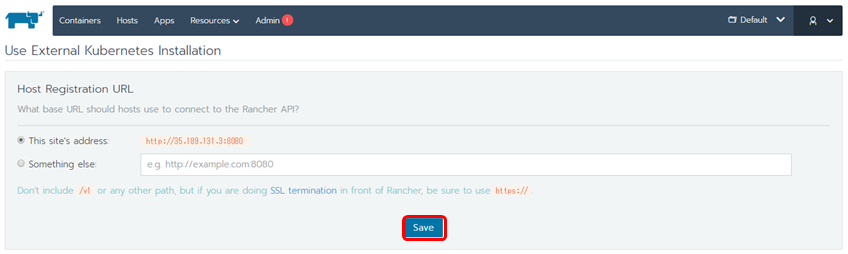
3. 「Save」ボタンをクリックします。
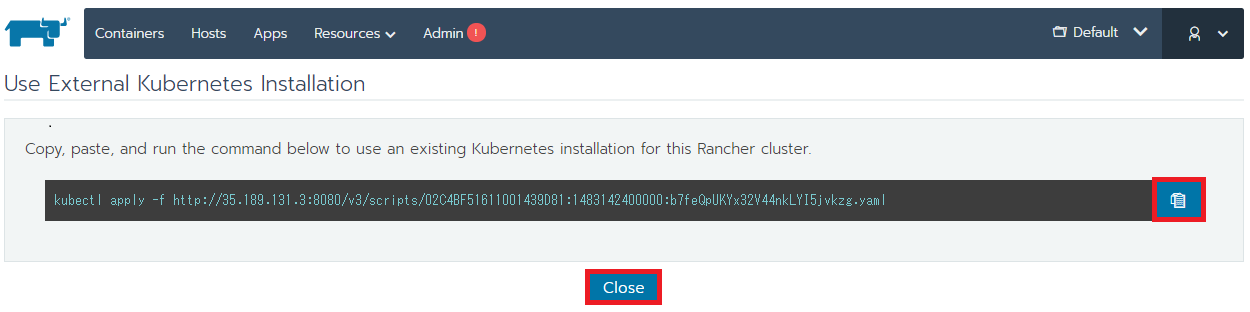
4. 表示されているkubectlコマンドをコピーして、Bluemix K8Sクラスタで実行します。
a.kubectlコマンドをコピーします。
b.コマンドプロンプトでコピーしたkubectlコマンドを実行します。
c.「Close」ボタンをクリックします。

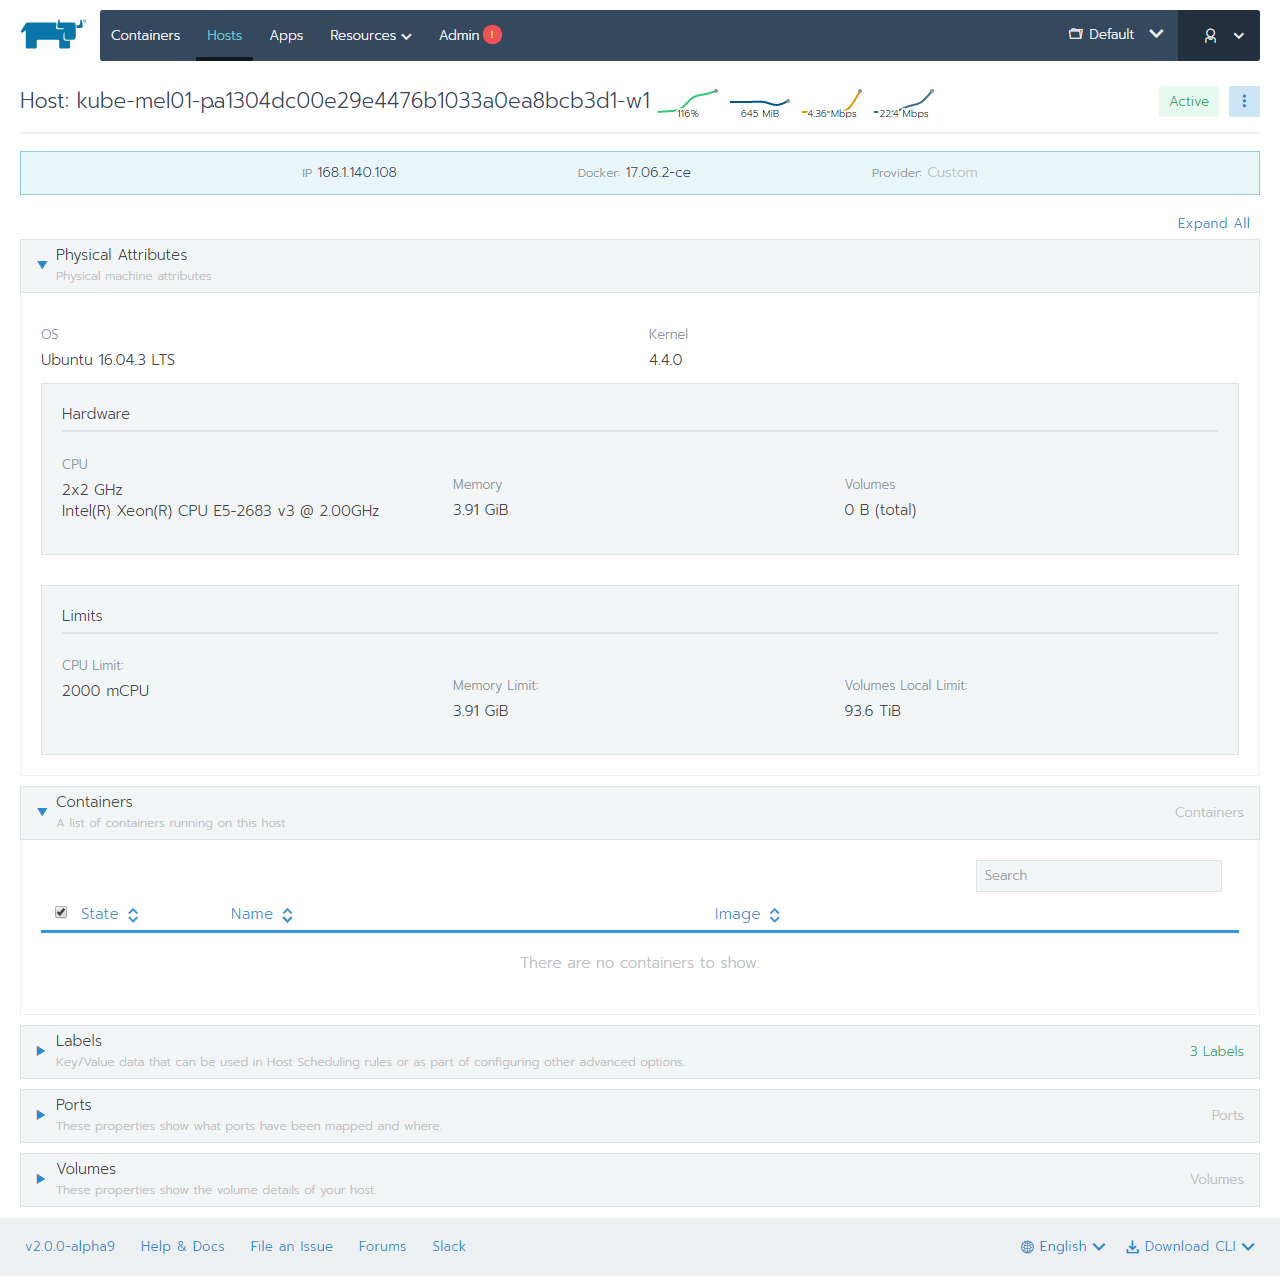
5. Bluemixのk8s Clusterがインポートできていることを確認します。
Rancher2.0では、簡単にBluemixをはじめとする既存のKubernetes Clusterをインポートして管理することができます。
Document of Rancher2.0
Rancher 2.0に関する情報は以下となります。(2017年10月時点)
Press Release
Rancher 2.0 Special Site
Others
インポートしたBluemix Kubernetes ClusterにRancherのカタログ機能からいくつかのアプリをデプロイしてみましたが、コンテナーが起動しなかったりしました。GAでは改善されていることを期待します。
Rancher Serverは、IBM Bluemix infrastructureで構築する方がよかったかもしれませんね。。