RancherのKubernetesクラスタインポート機能とカタログ機能を利用して、GKEのGPUクラスタをインポートしてKubeflowをデプロイしてみたいと思います。
以下の環境を構築してみます。
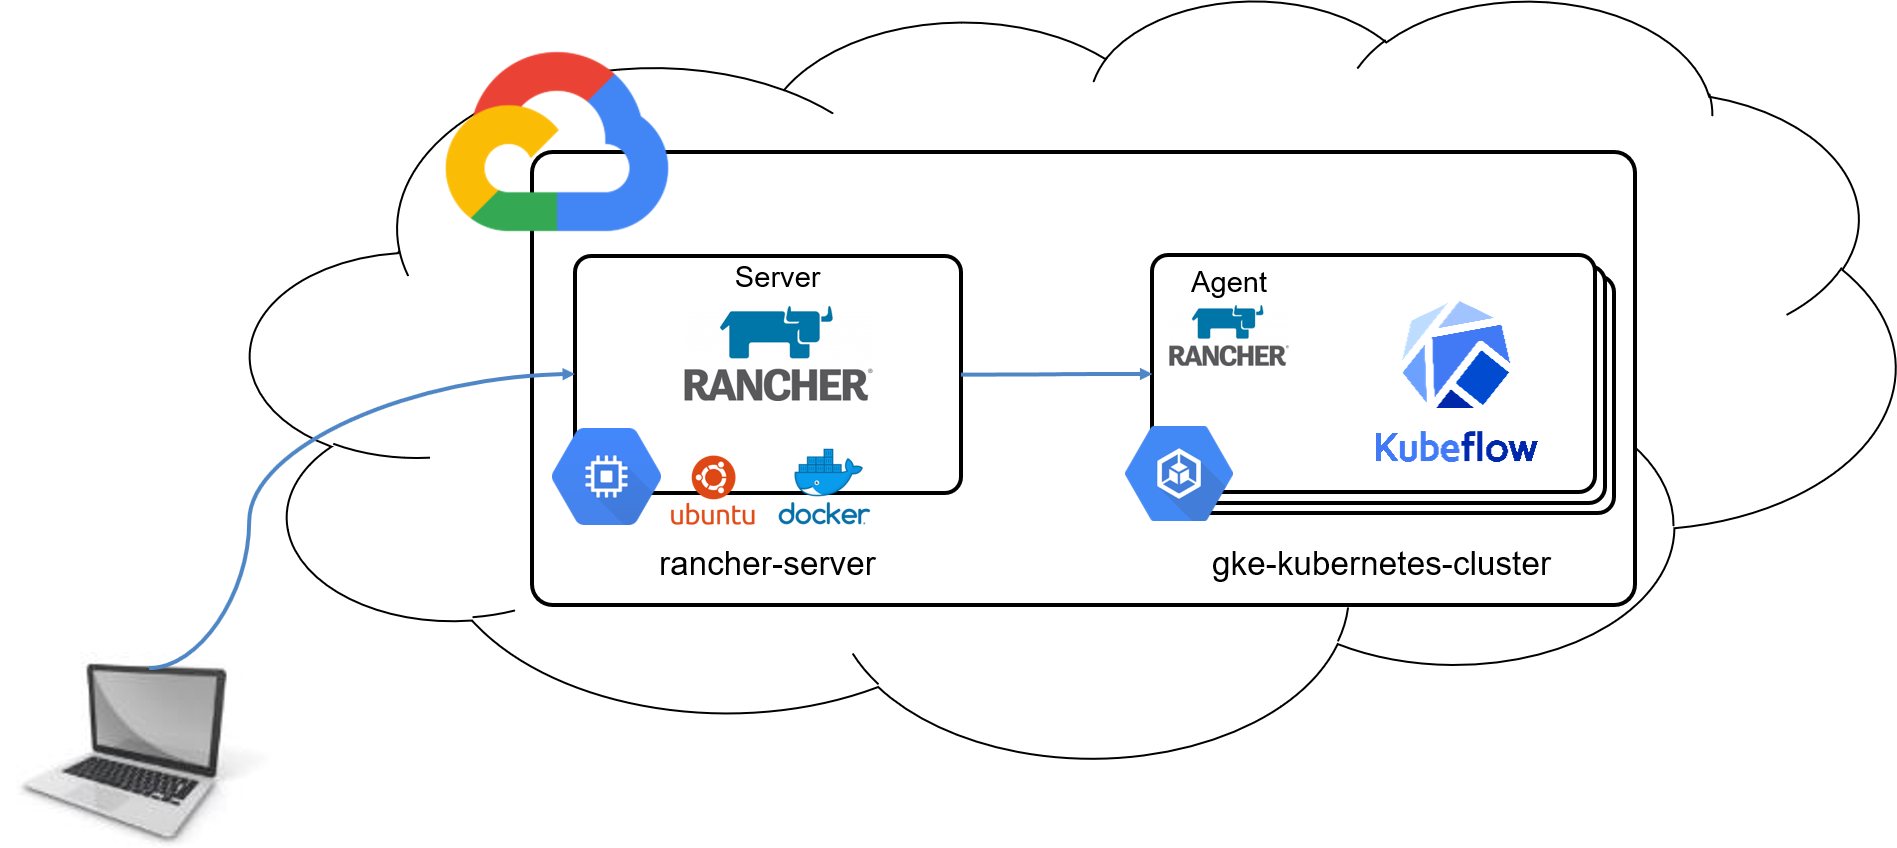
1.Rancher Server Setup
1.Instance準備
GCE(Google Compute Engine)で以下のインスタンスを作成します。
| 項目 | 入力概要 |
|---|---|
| 名前 | rancher-server |
| リージョン | asia-northeast1(東京) |
| ゾーン | asia-northeast1-b |
| マシンタイプ | vCPUx1 |
| ブートディスク | Ubuntu 16.04 LTS ディスクサイズ80GB |
| ファイアウォール | HTTP トラフィックを許可する、HTTPS トラフィックを許可するの両方をチェックします。 |
2.Dockerのインストール
コマンド
$ curl https://releases.rancher.com/install-docker/18.09.sh | sh
・
・(省略)
・
+ sudo -E sh -c docker version
Client:
 Version:           18.09.3
 API version:       1.39
 Go version:        go1.10.8
 Git commit:        774a1f4
 Built:             Thu Feb 28 06:40:58 2019
 OS/Arch:           linux/amd64
 Experimental:      false

Server: Docker Engine - Community
 Engine:
  Version:          18.09.3
  API version:      1.39 (minimum version 1.12)
  Go version:       go1.10.8
  Git commit:       774a1f4
  Built:            Thu Feb 28 05:59:55 2019
  OS/Arch:          linux/amd64
  Experimental:     false

If you would like to use Docker as a non-root user, you should now consider
adding your user to the "docker" group with something like:

  sudo usermod -aG docker iyutaka2018

Remember that you will have to log out and back in for this to take effect!

WARNING: Adding a user to the "docker" group will grant the ability to run
         containers which can be used to obtain root privileges on the
         docker host.
         Refer to https://docs.docker.com/engine/security/security/#docker-daemon-attack-surface
         for more information.
3.Rancher Serverのインストール
コマンド
$ sudo docker run -d --restart=unless-stopped -p 80:80 -p 443:443 rancher/rancher
Unable to find image 'rancher/rancher:latest' locally
latest: Pulling from rancher/rancher
38e2e6cd5626: Pull complete
705054bc3f5b: Pull complete
c7051e069564: Pull complete
7308e914506c: Pull complete
0cfcb3cfb94b: Pull complete
49cb3551f487: Pull complete
8856f5defe68: Pull complete
d50abe29b623: Pull complete
297145c80f79: Pull complete
b6b66b1777e8: Pull complete
7edf8d37c2b7: Pull complete
511c877e7916: Pull complete
Digest: sha256:924b8acaa169821c86b840c33e1d79d87db0dfbb84dae6c102cc7c196811230f
Status: Downloaded newer image for rancher/rancher:latest
c0fb3caa9f608ef25f38b60f67fcb0fb2e567e53b72c5aef58e5f800943359f6
4.ブラウザを起動して、RancherUIにアクセス
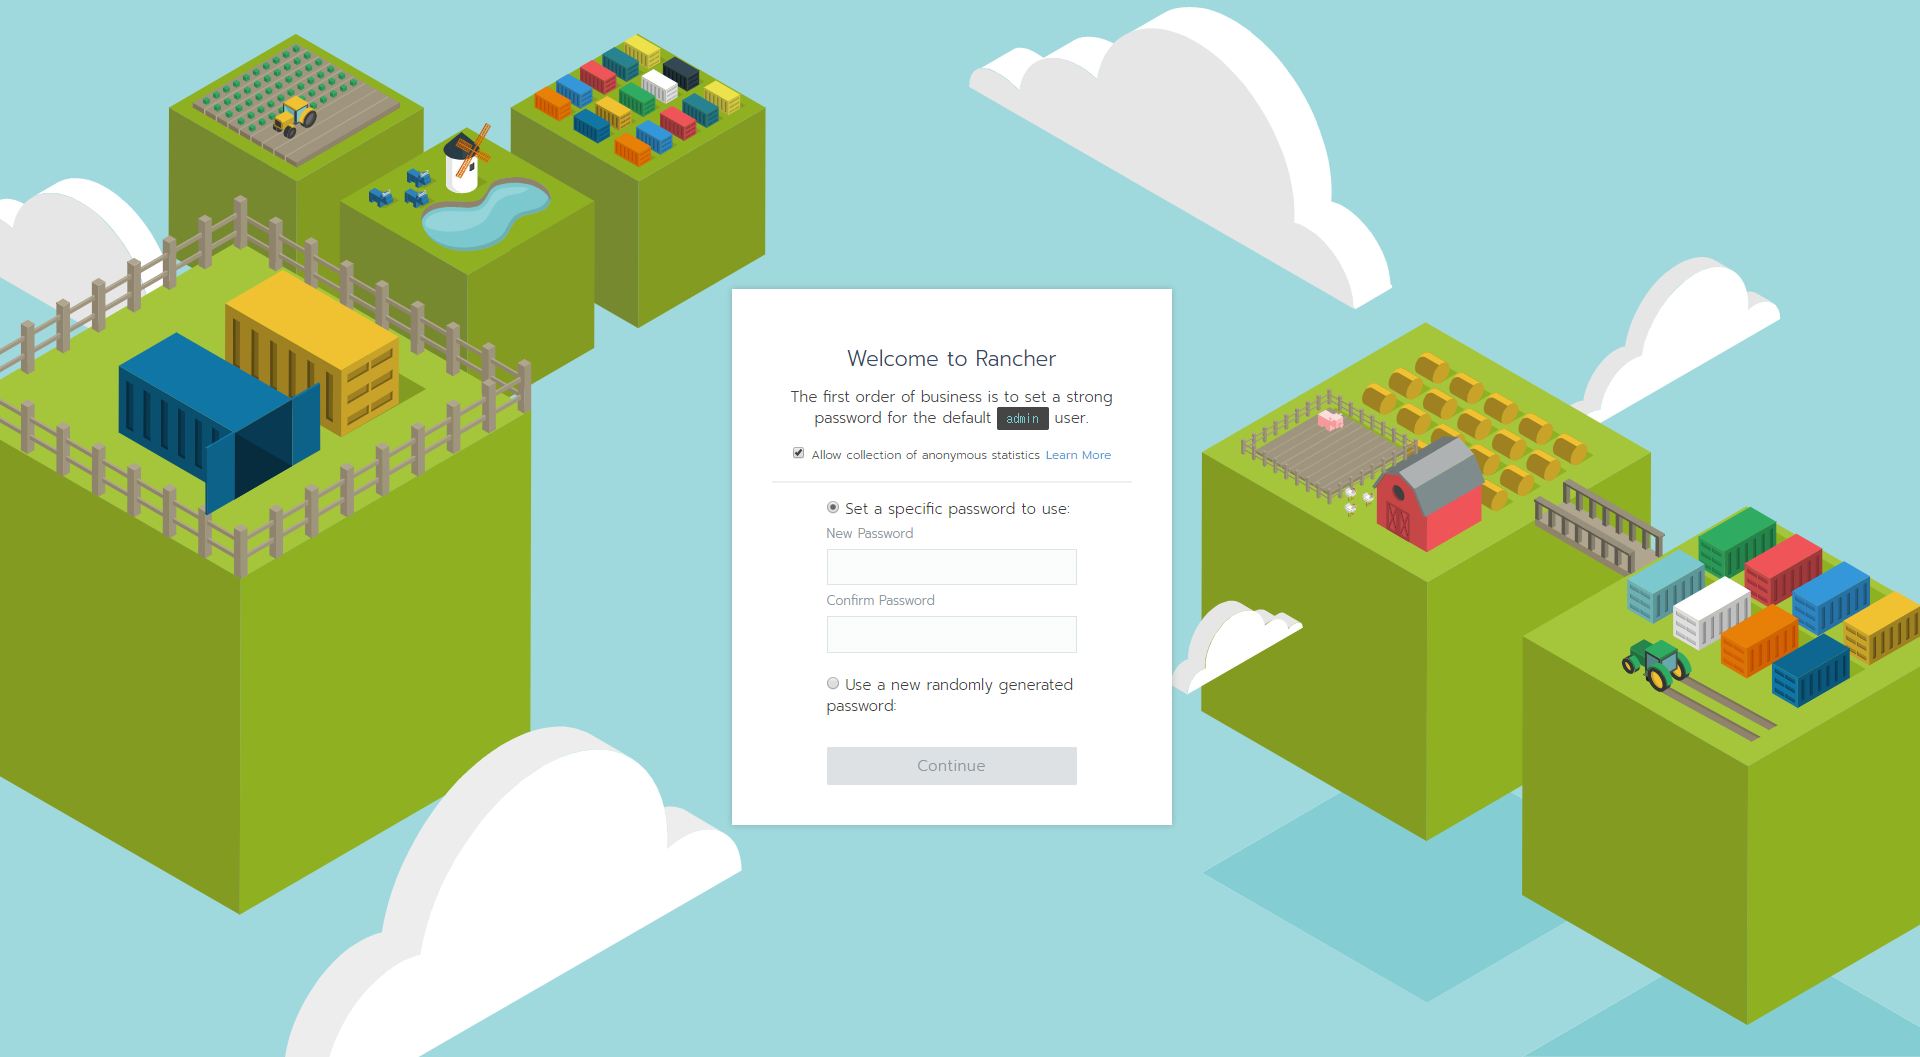
5.初回ログイン
a.adminユーザのパスワード作成
任意のパスワードを入力
b.Rancher Server URLの登録
「Save URL」ボタンを押下

c.ログイン完了
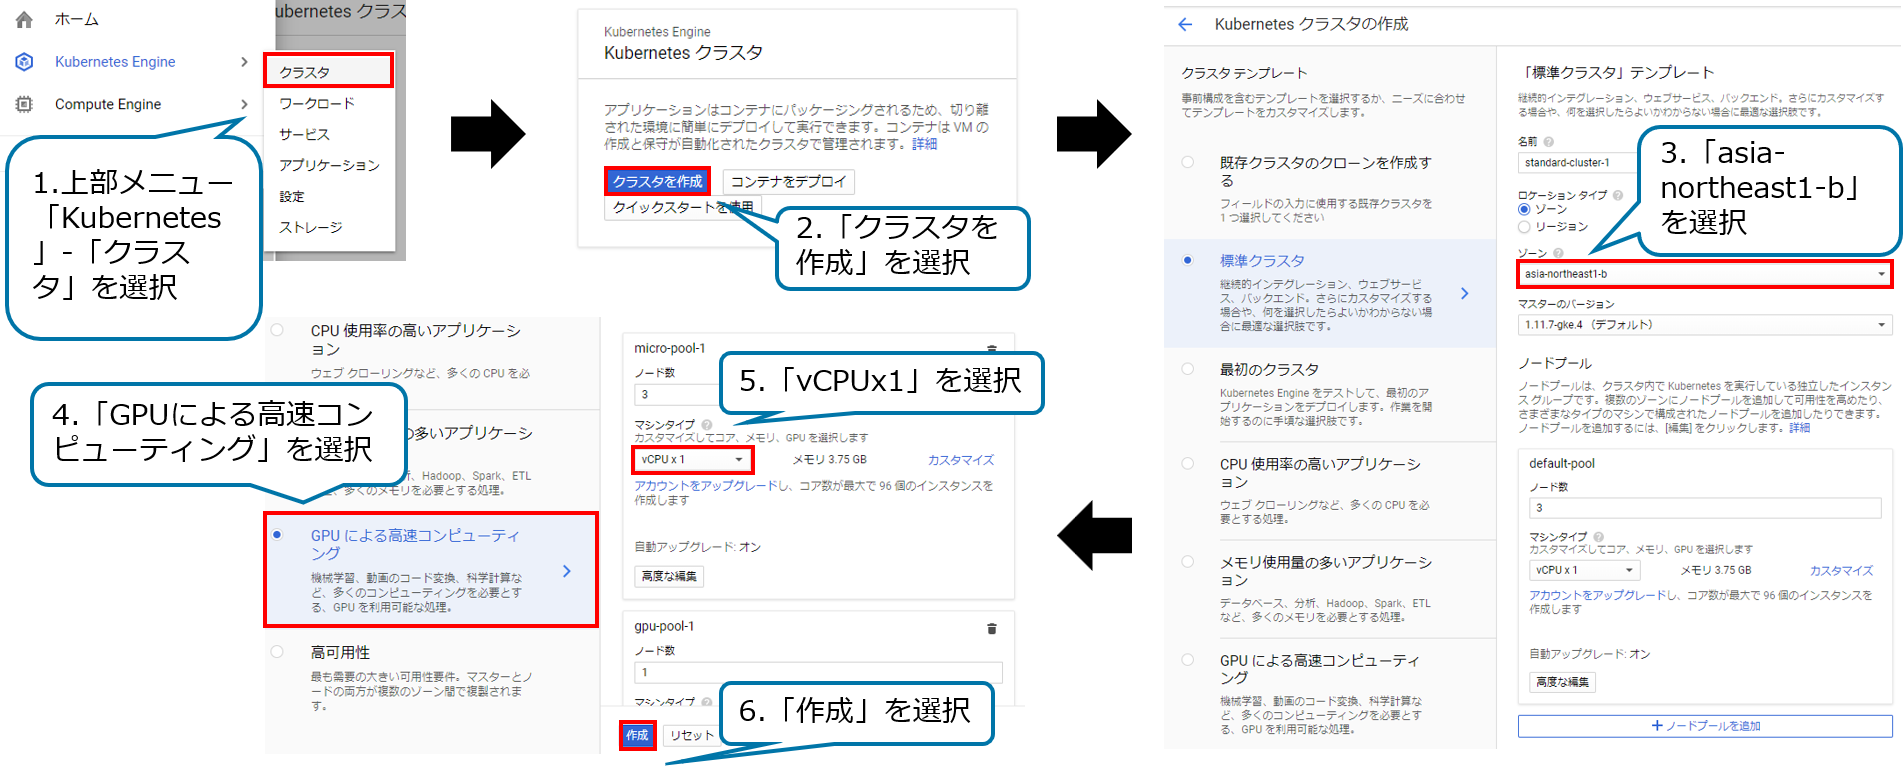
3.GKE GPU Cluster Set up
GCPのダッシュボードでクラスタを作成します。
クラスタが完成したことを確認します。

4.GKE Kubernetes Cluster Import
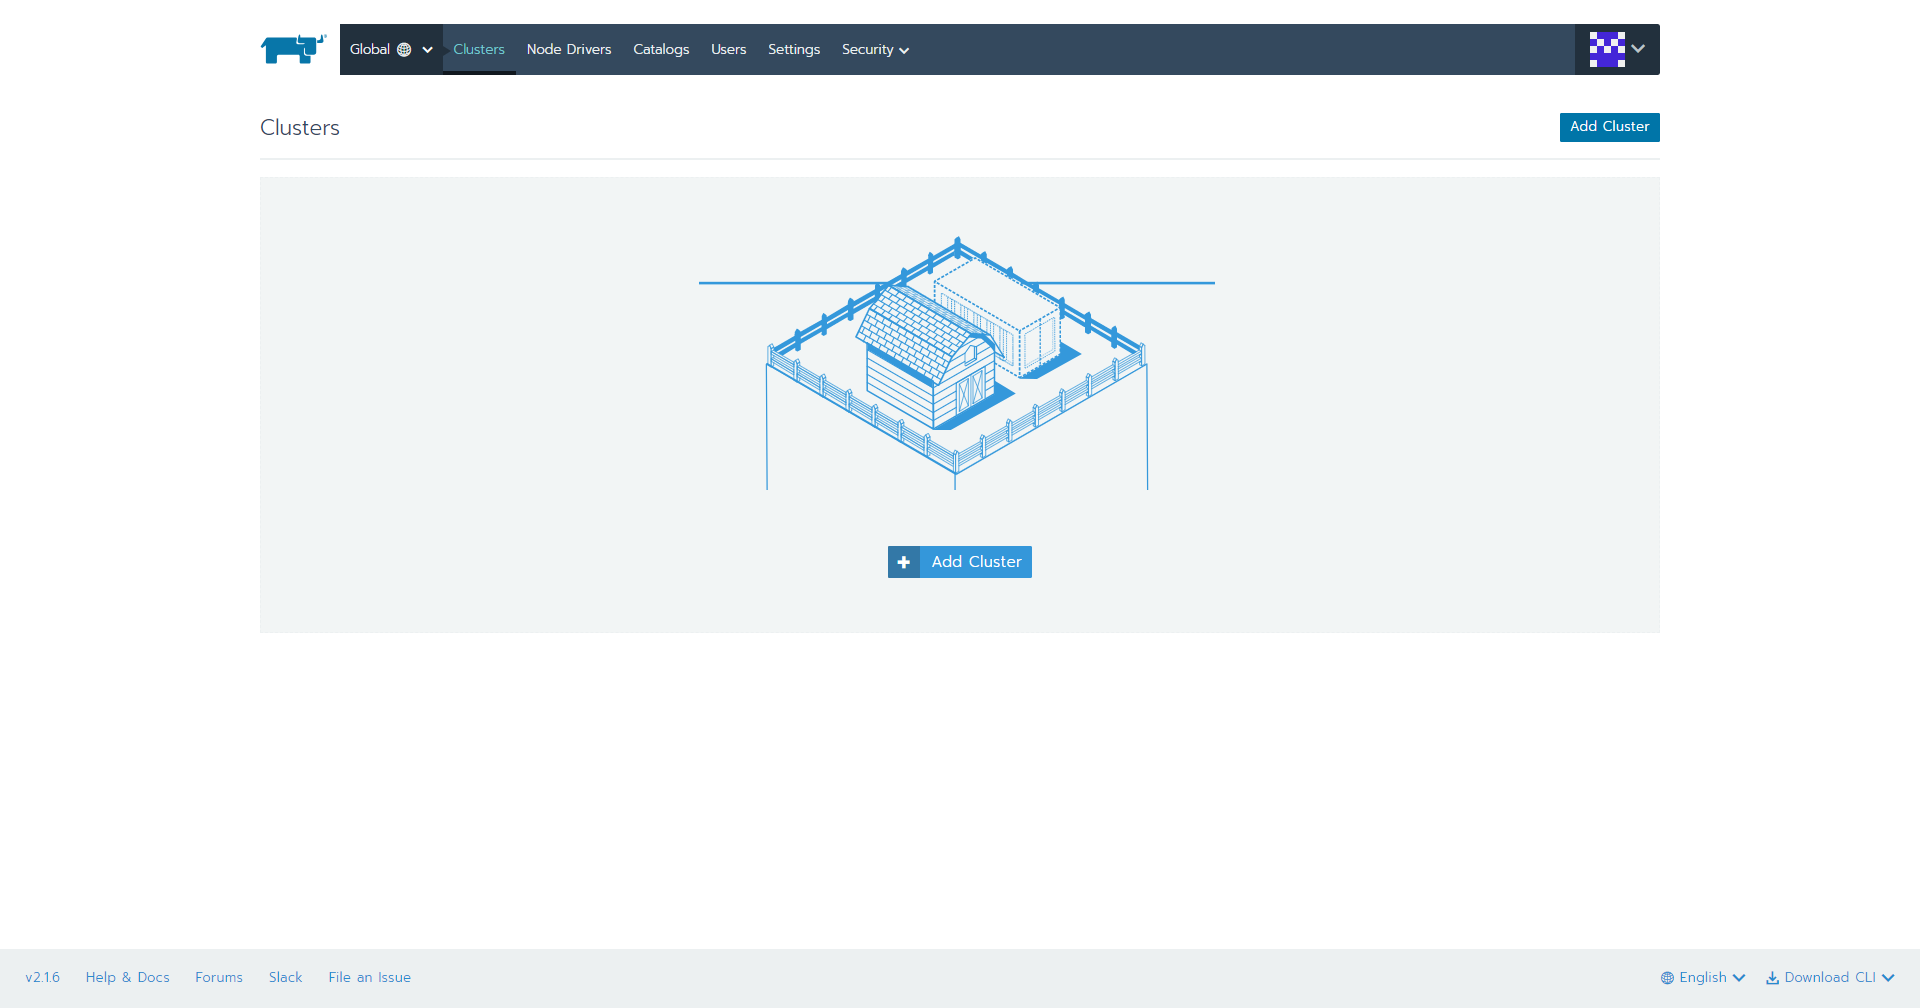
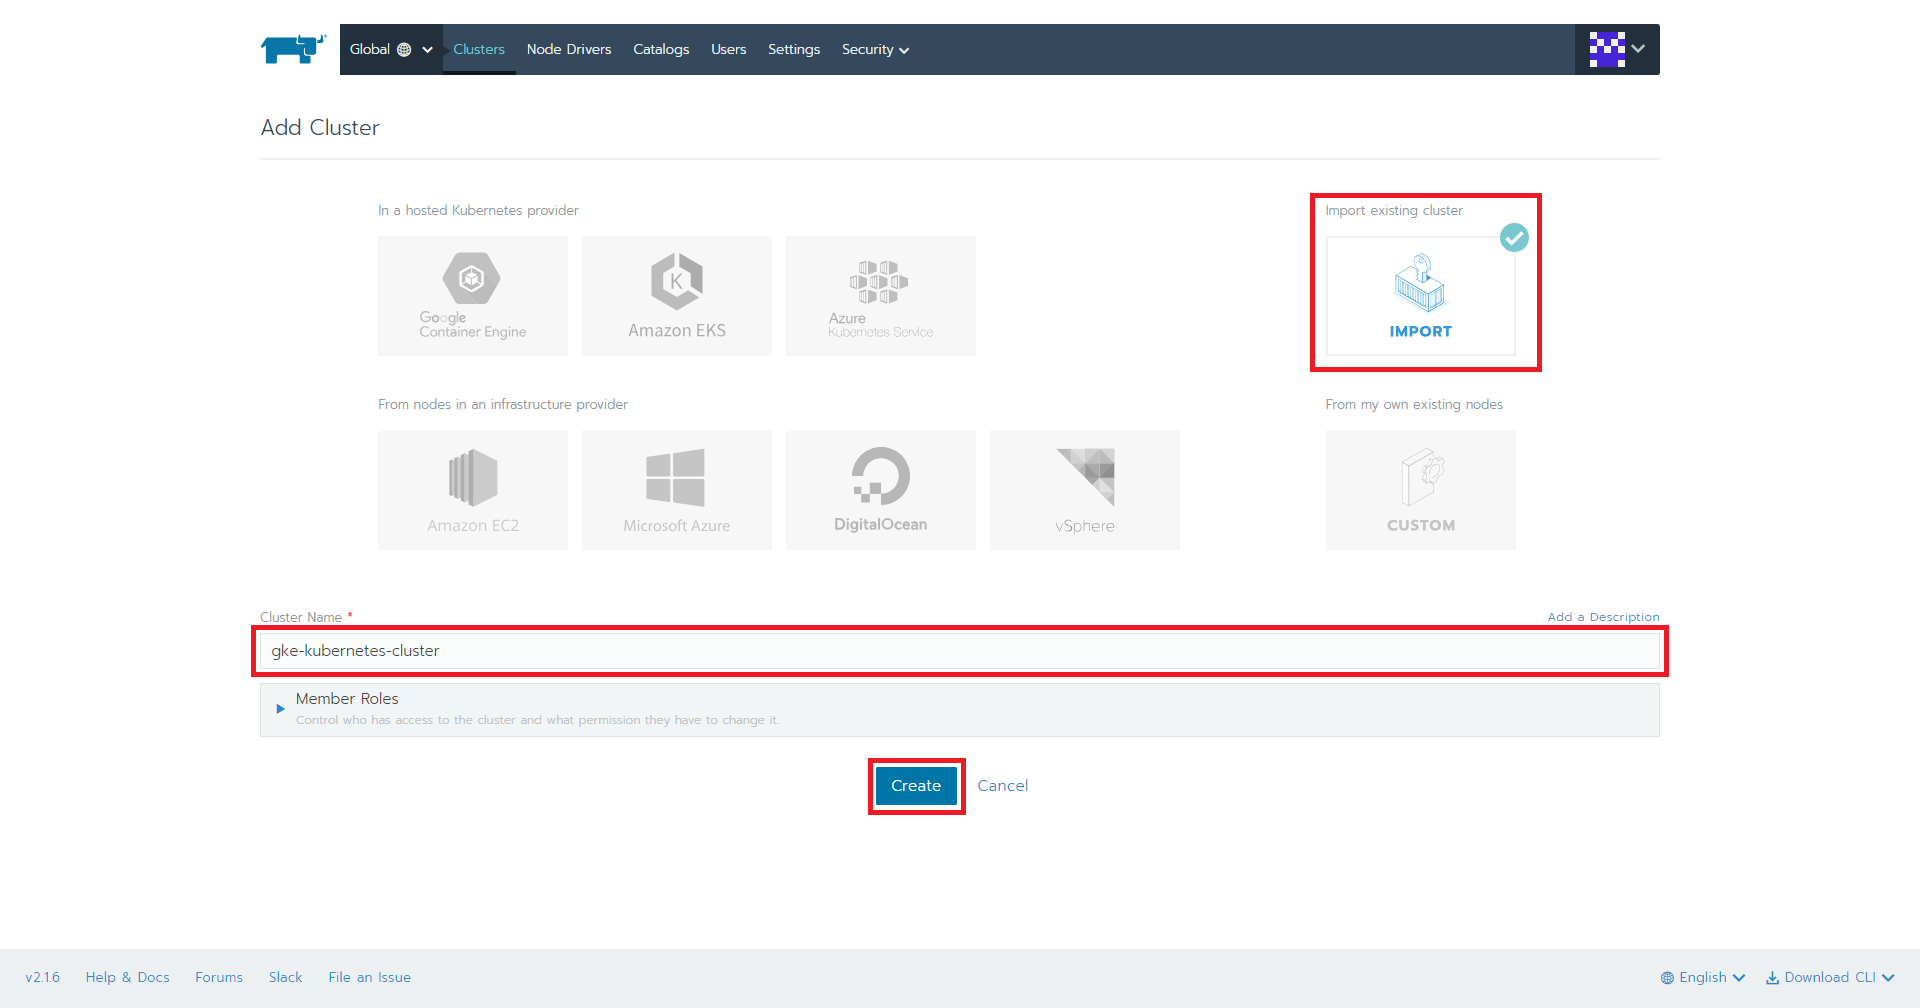
1.「Add Cluster」ボタンを押下

2.「Import」を選択して、Nameに任意名を入力して、「Create」ボタンを押下
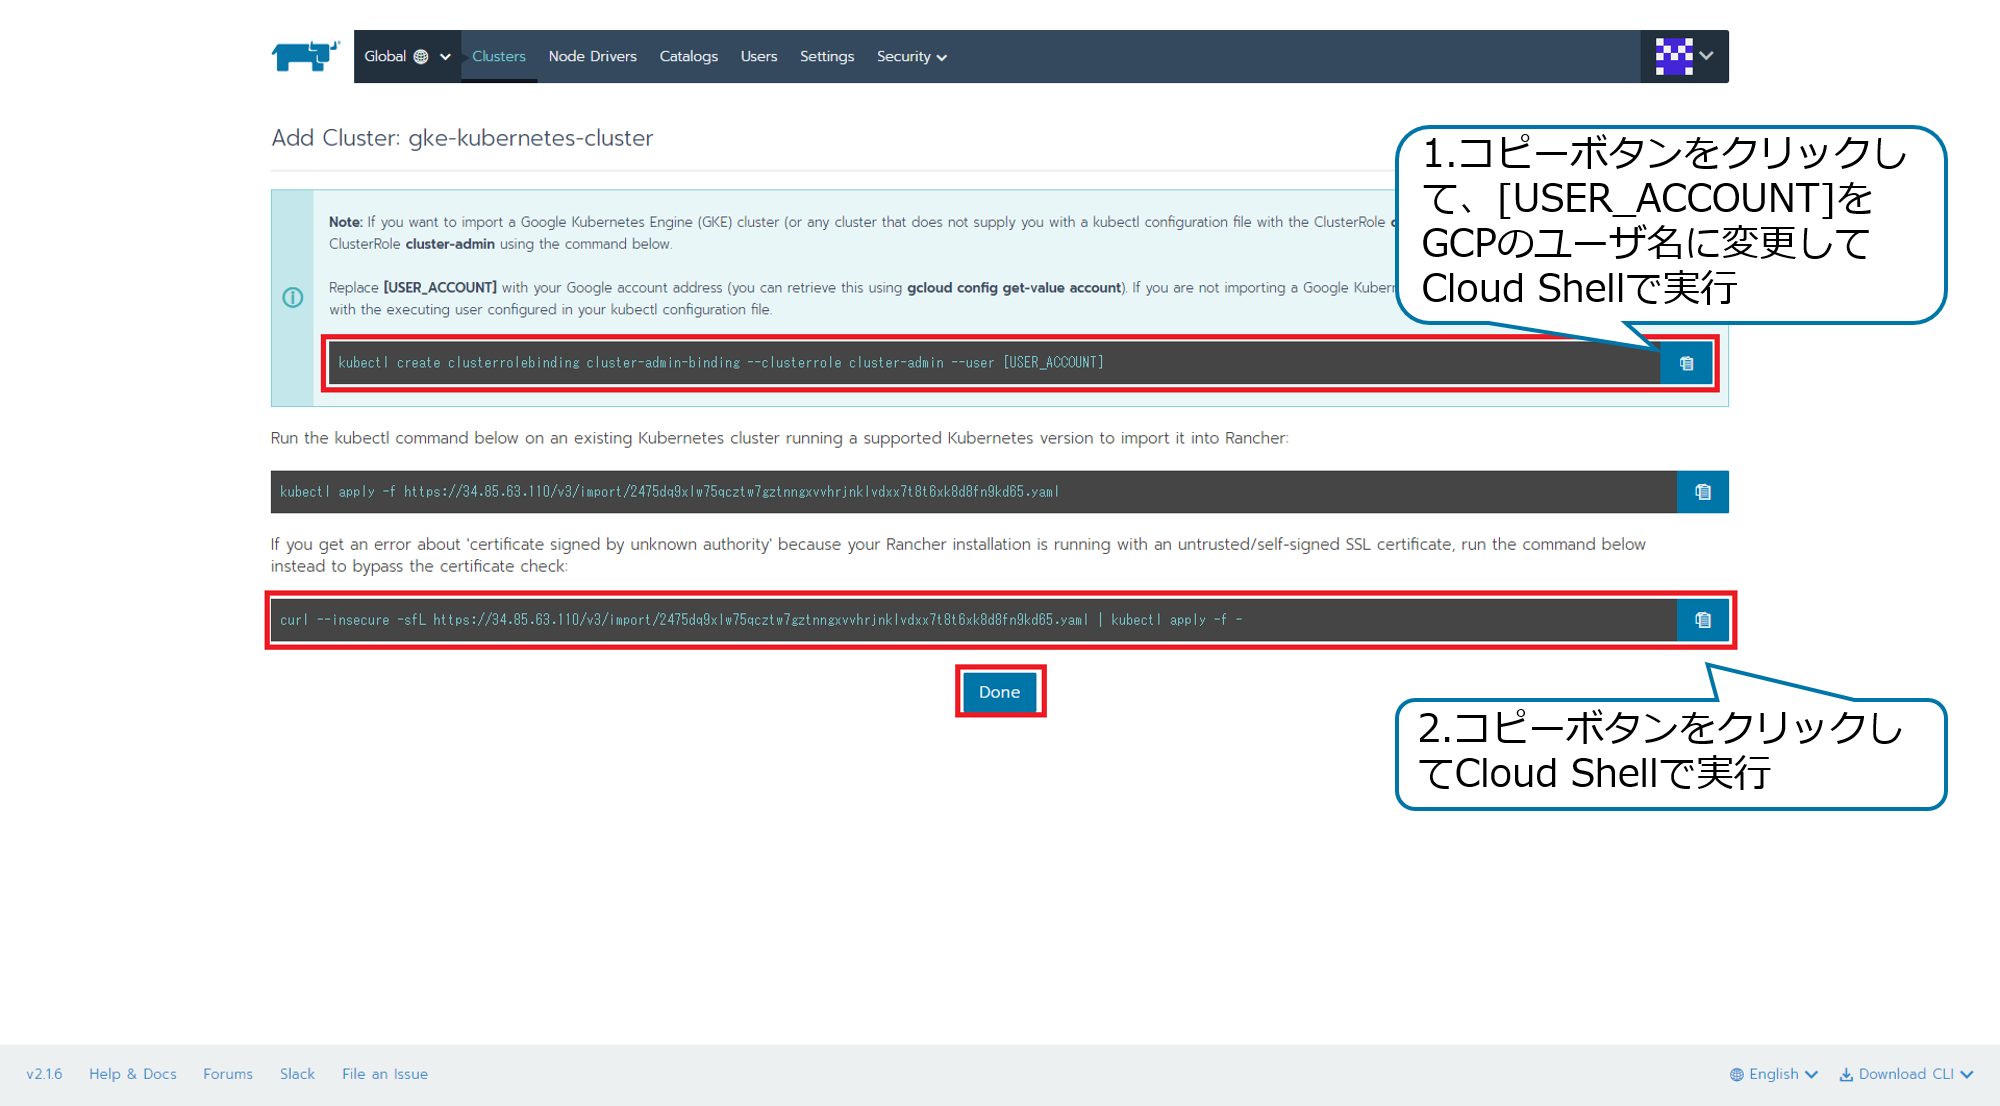
3.1,2をGCPのCloud Shellで実行後、「Done」ボタンを押下
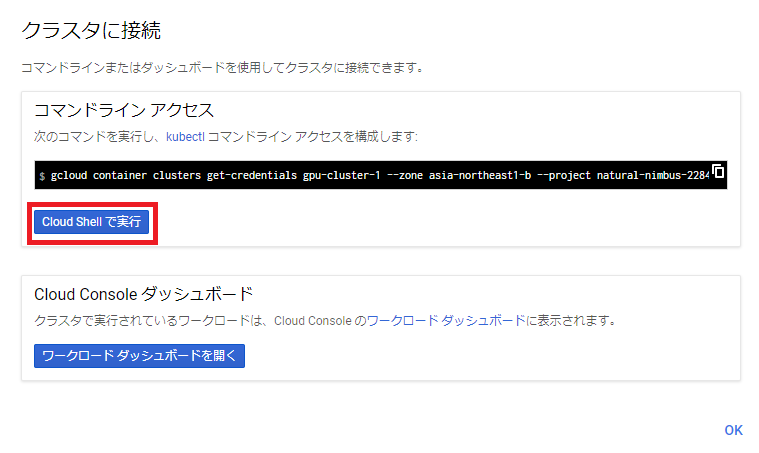
4.GCPでCloud Shellを起動
「接続」ボタンを押下

「Cloud Shellで実行」ボタンを押下
コマンド
Your Cloud Platform project in this session is set to natural-nimbus-228405.
Use “gcloud config set project [PROJECT_ID]” to change to a different project.
$ gcloud container clusters get-credentials gpu-cluster-1 --zone asia-northeast1-b --project natural-nimbus-xxxxxxx ←Enterキーを押下
Fetching cluster endpoint and auth data.
kubeconfig entry generated for gpu-cluster-1.
[USER_ACCOUNT]は、GCPのアカウントになります。
コマンド
$ kubectl create clusterrolebinding cluster-admin-binding --clusterrole cluster-admin --user [USER_ACCOUNT]
clusterrolebinding.rbac.authorization.k8s.io "cluster-admin-binding" created
インポートコマンドを実行
コマンド
$ curl --insecure -sfL https://34.85.63.110/v3/import/2475dq9xlw75qcztw7gztnngxvvhrjnklvdxx7t8t6xk8d8fn9kd65.yaml | kubectl apply -f -
namespace "cattle-system" created
serviceaccount "cattle" created
clusterrolebinding.rbac.authorization.k8s.io "cattle-admin-binding" created
secret "cattle-credentials-2c8898b" created
clusterrole.rbac.authorization.k8s.io "cattle-admin" created
deployment.extensions "cattle-cluster-agent" created
daemonset.extensions "cattle-node-agent" created
5.クラスタ名をクリック
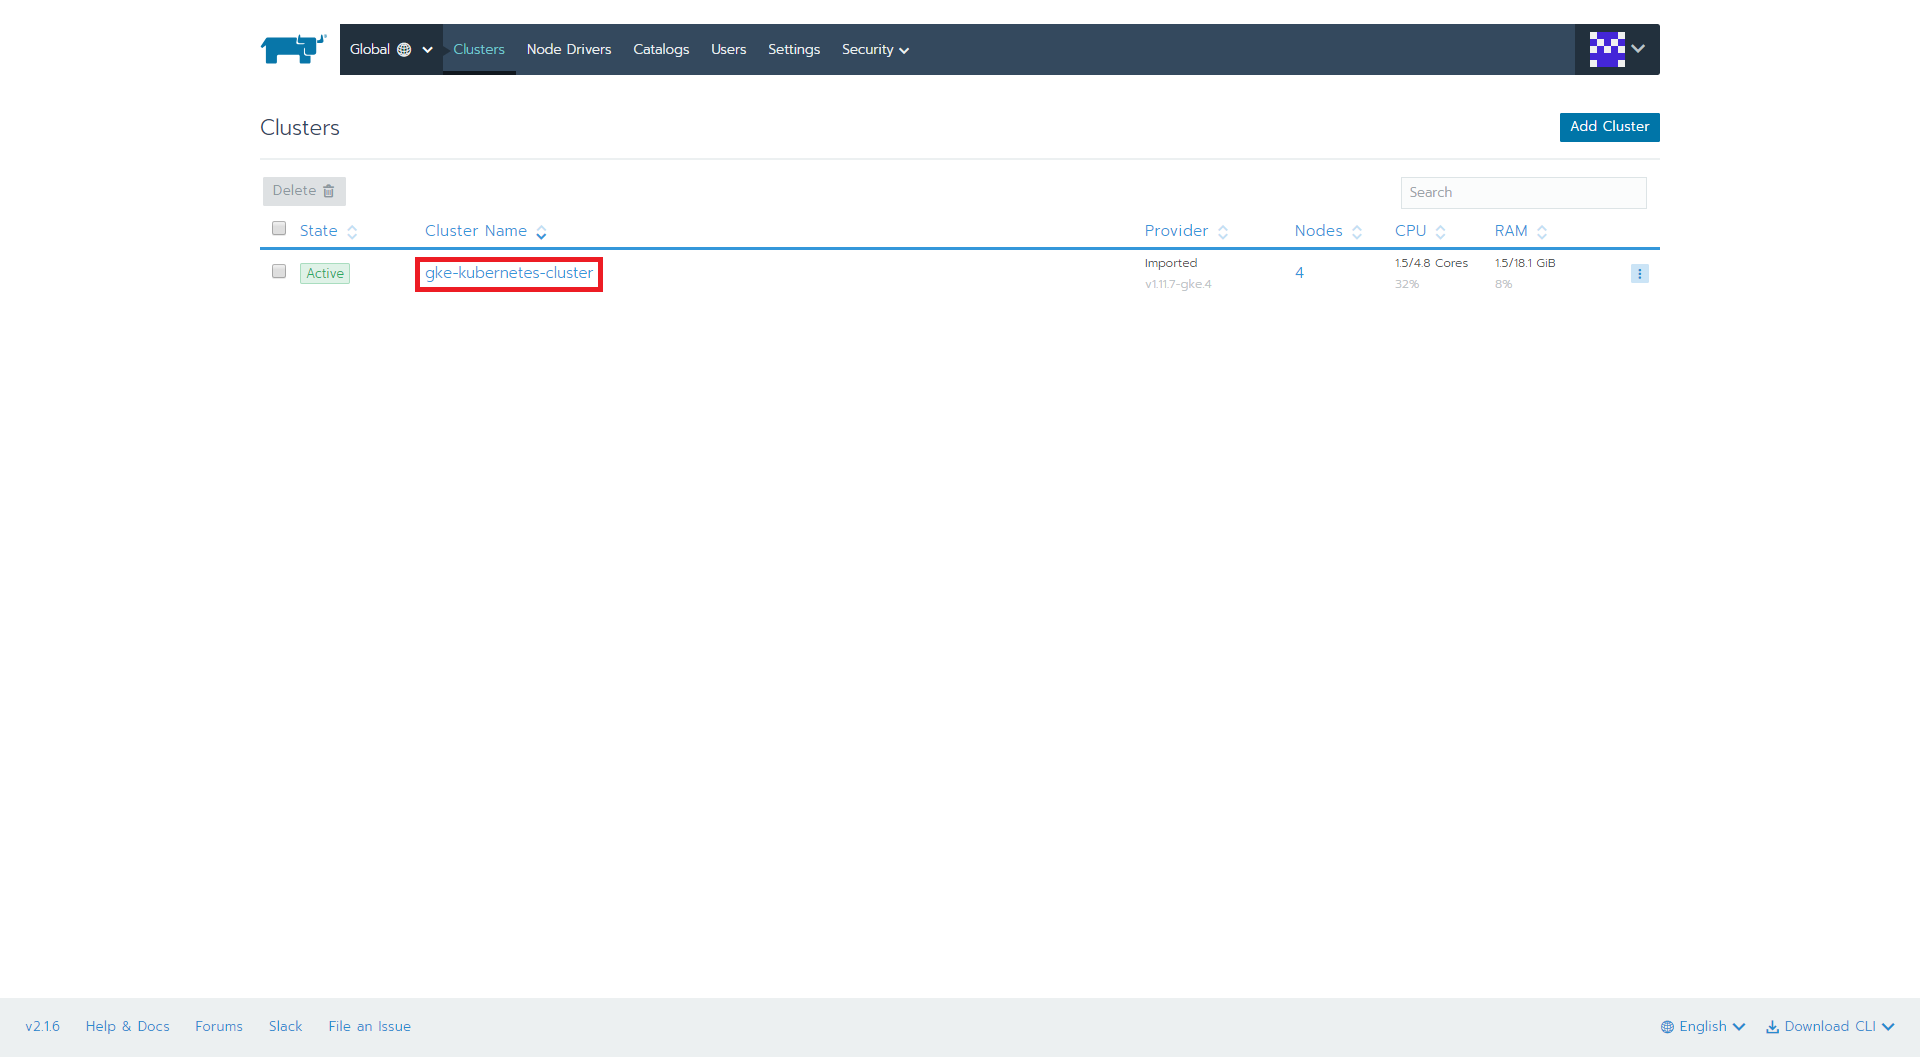
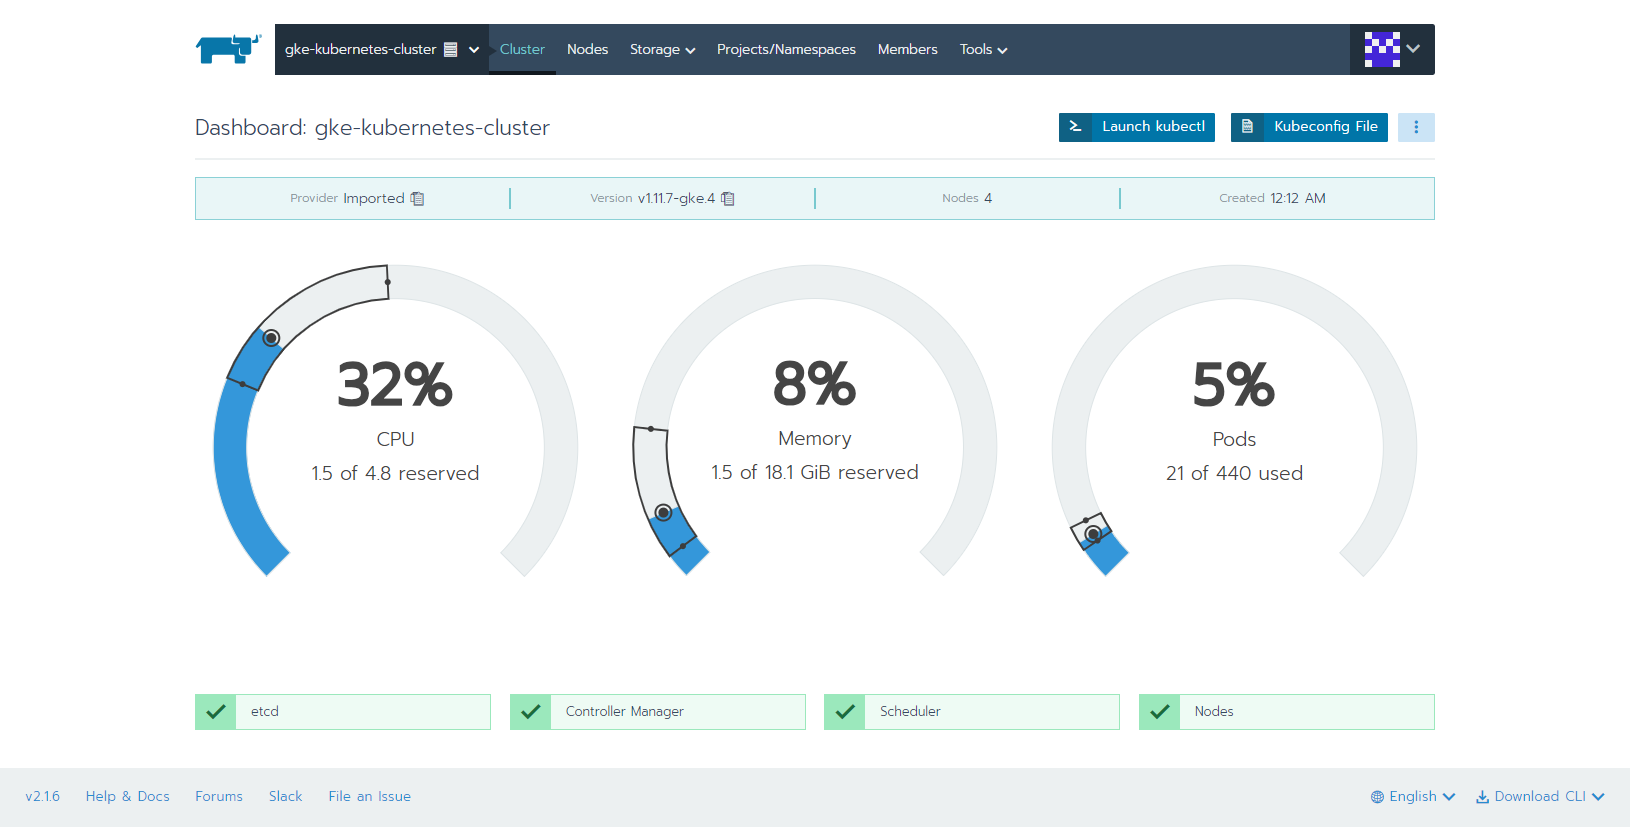
6.リソース状況を確認
5.Kubeflow Deploy from Catalog
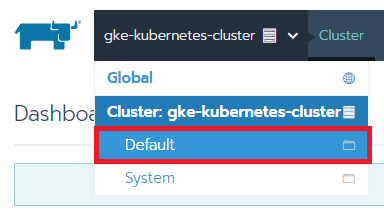
1.上部メニュー「gke-kubernetes-cluster」-「Default」を選択
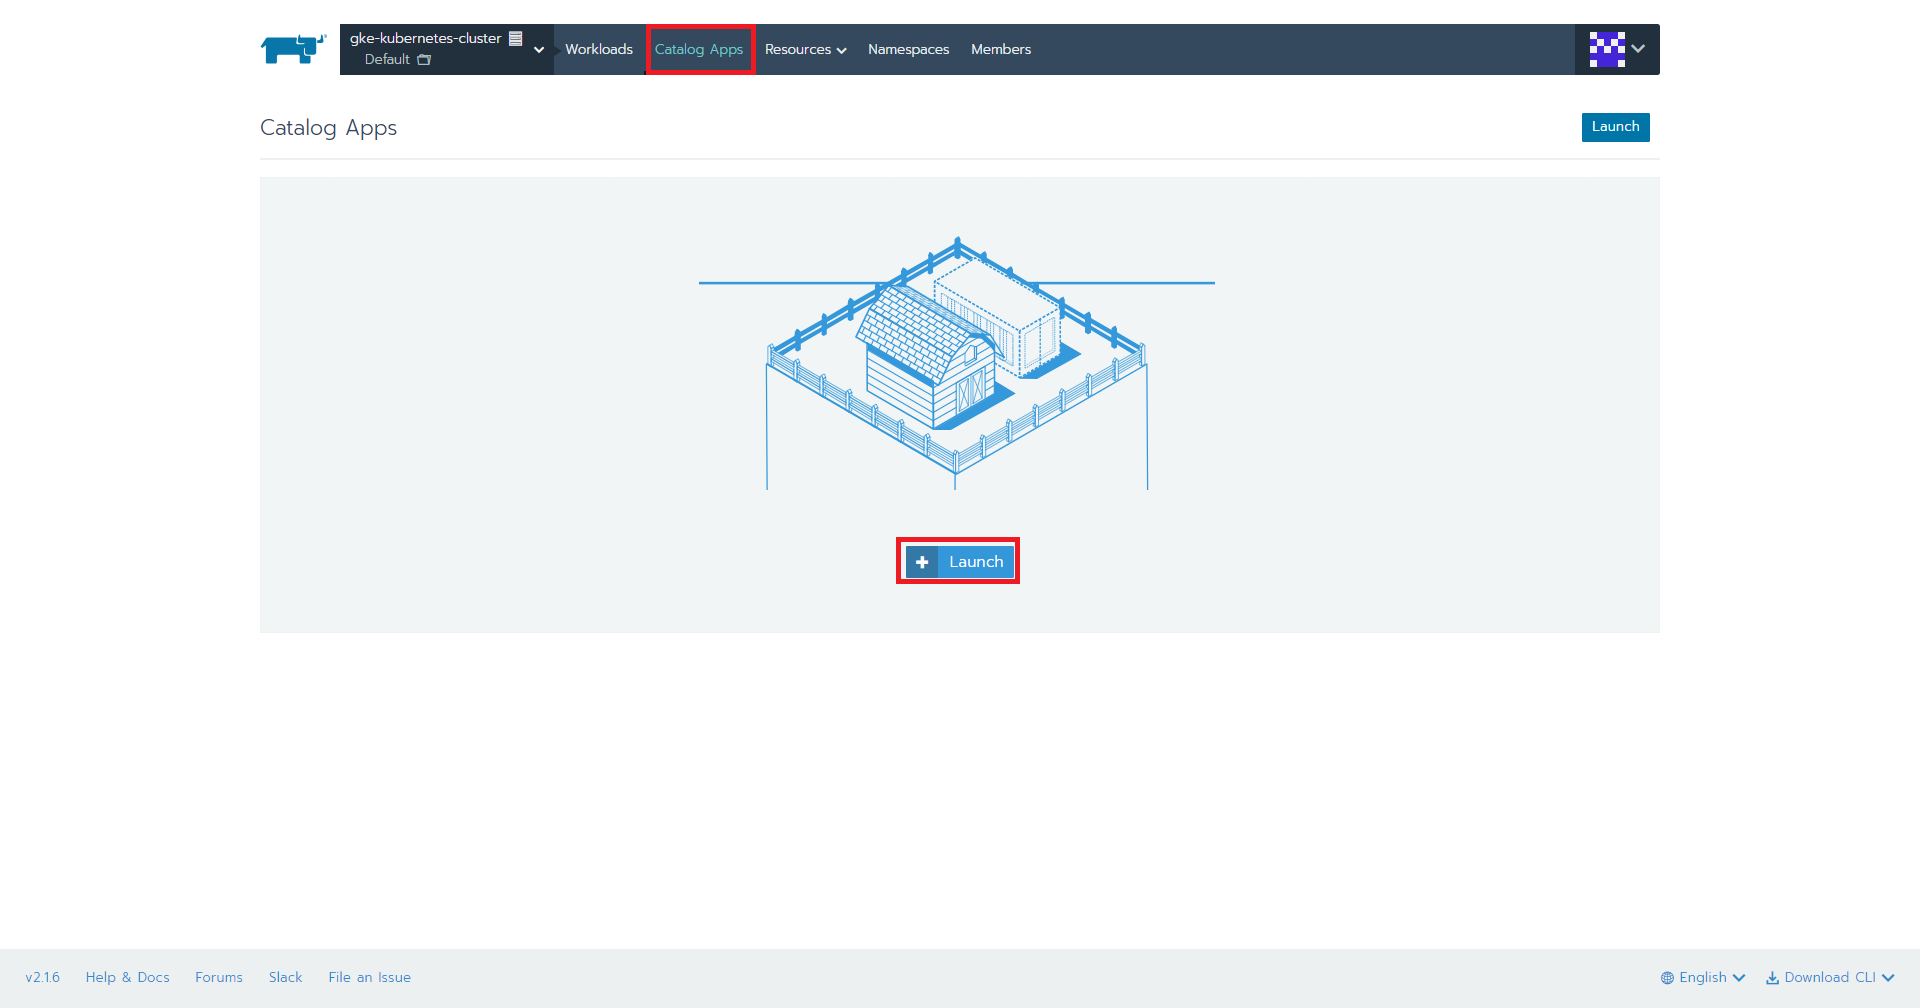
2.上部メニュー「Catalog Apps」を選択して、「Launch」ボタンを押下
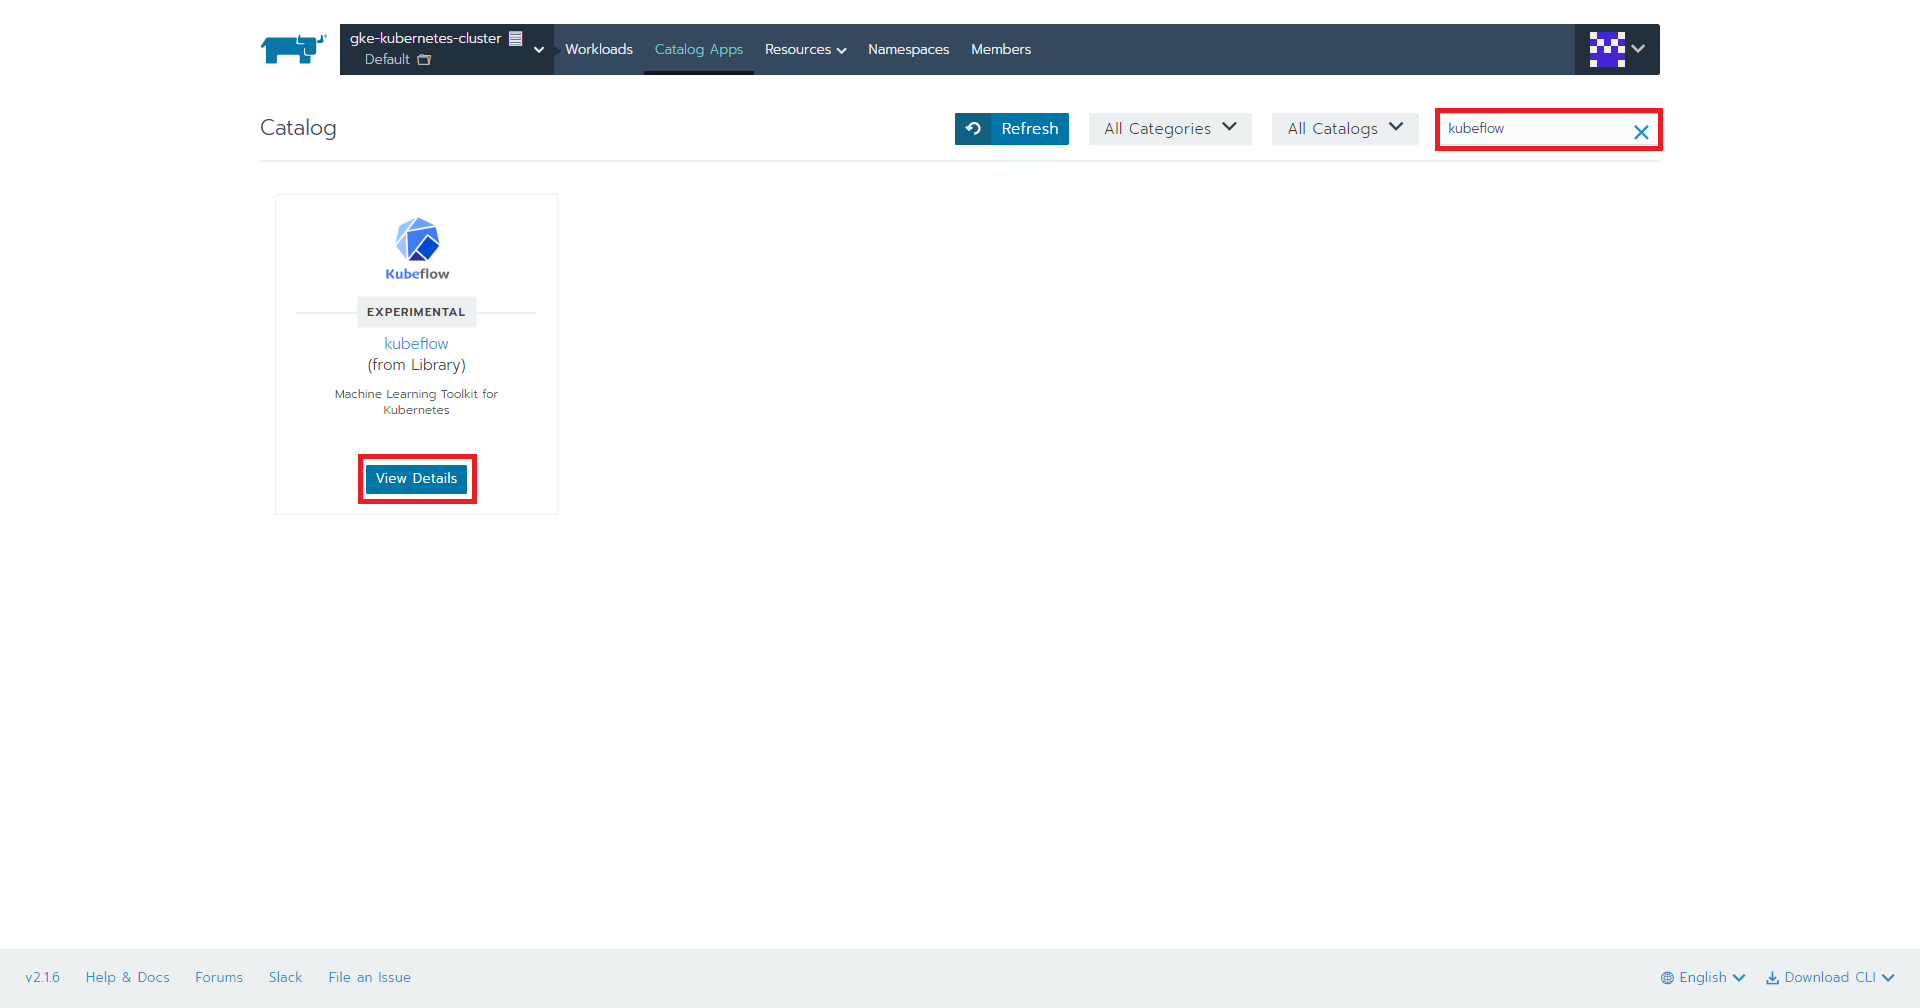
3.検索フィールドで「kubeflow」と入力して、「View Details」ボタンを押下
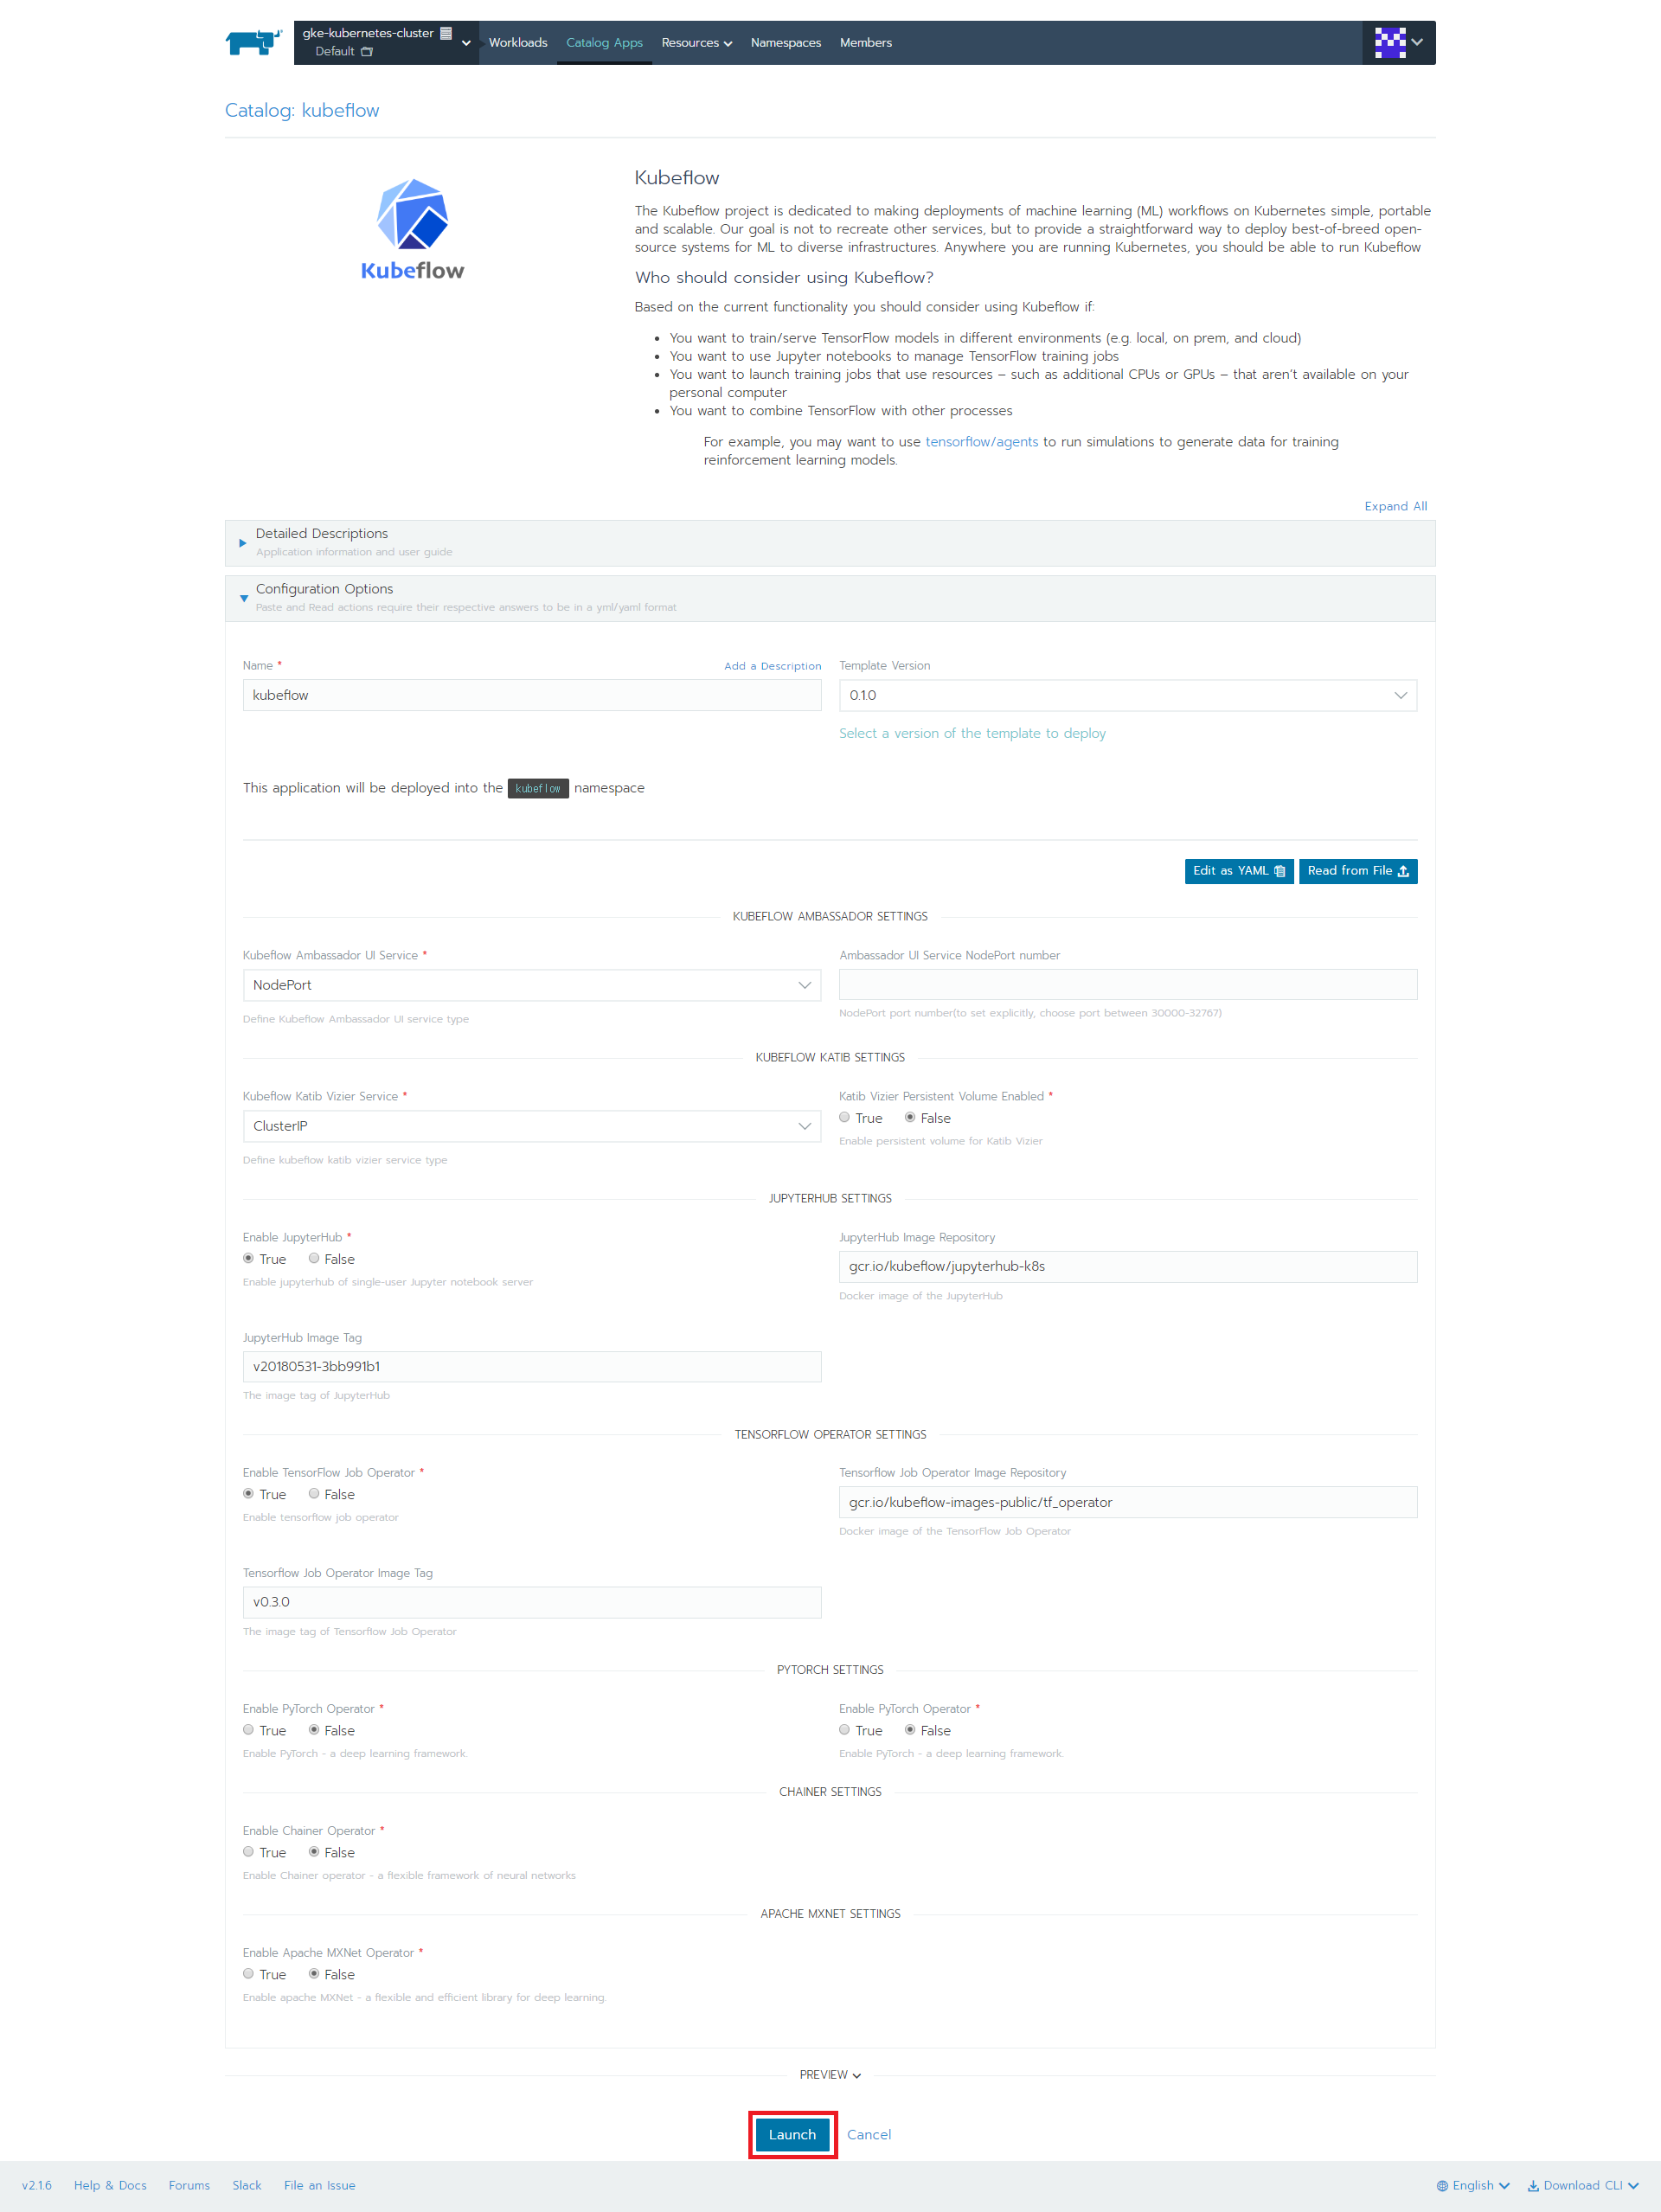
4.全てデフォルト設定のまま「Launch」ボタンを押下
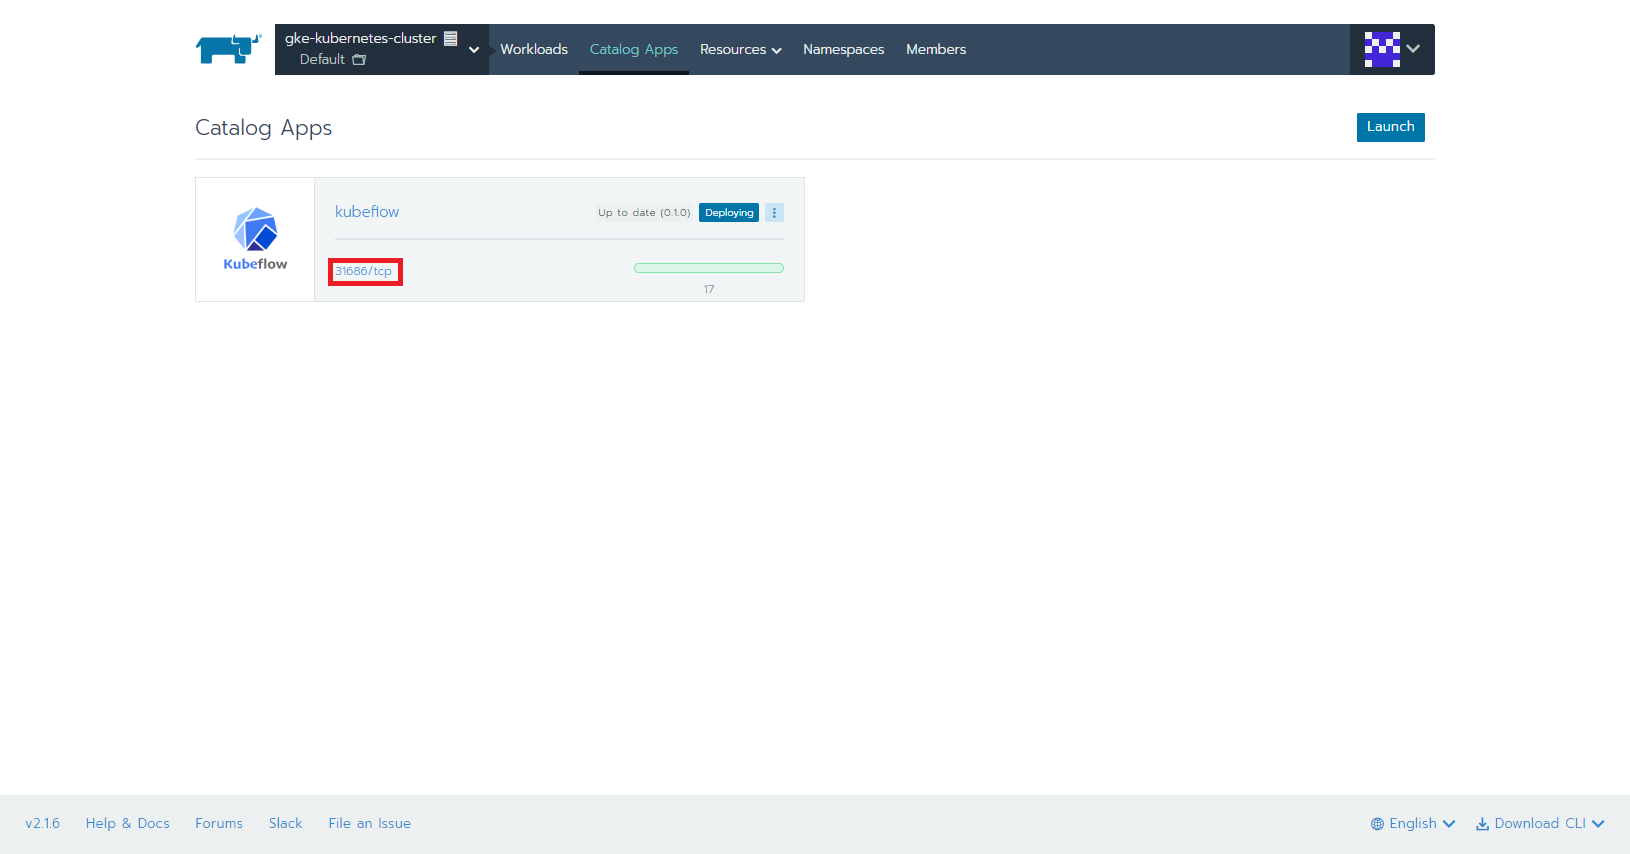
5.デプロイ完了後、ポート番号/tcpをクリック

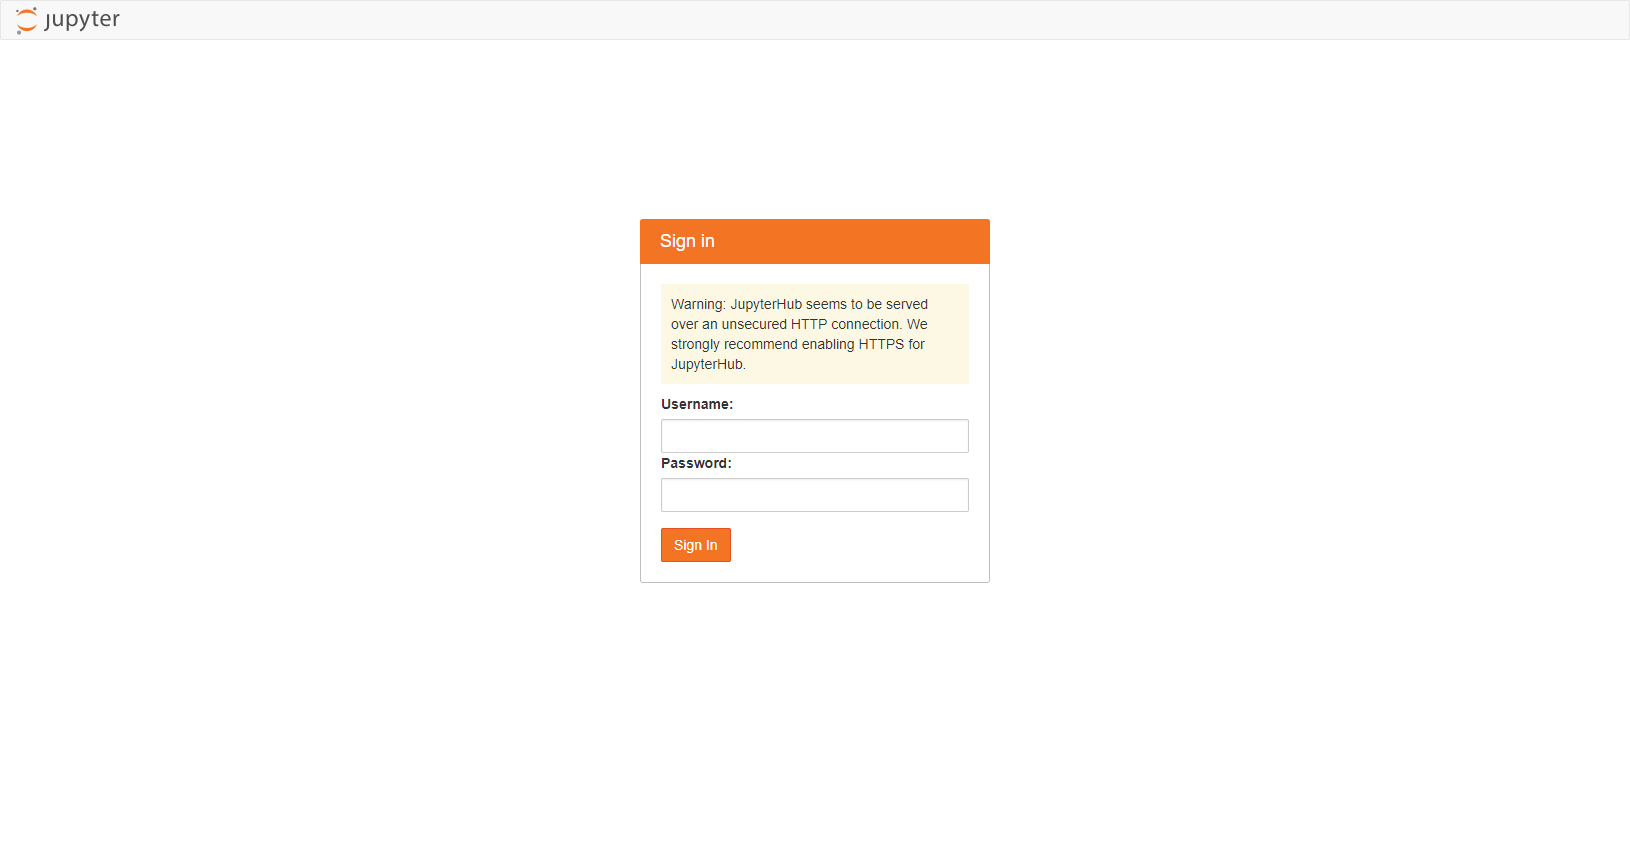
6.Kubeflowダッシュボード表示後、「JUPTERHUB」を選択

7.「Username」,「Password」に任意のものを入力して、「Sign In」ボタンを押下
8.「gcr.io/kubeflow-images-public/tensorflow-1.10.1-notebook-cpu:v0.3.1」を選択して「Spawn」ボタンを押下

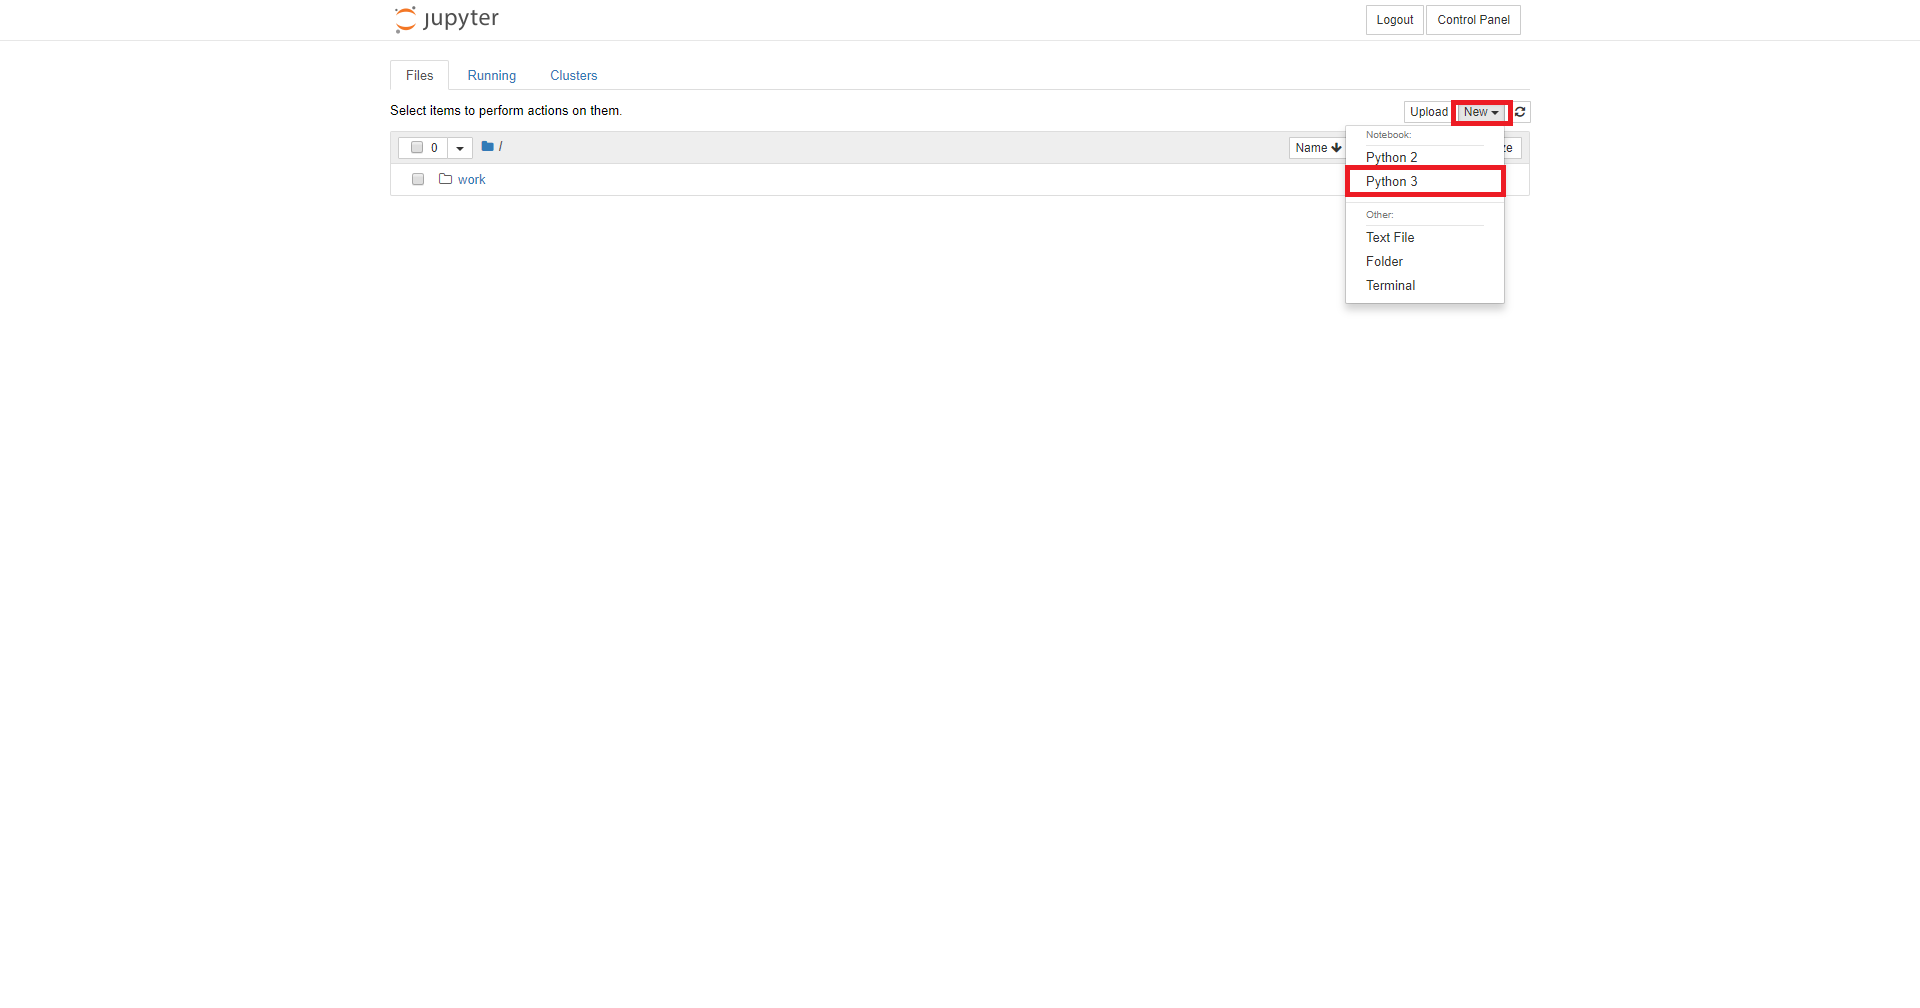
9.「New」-「Python3」を選択
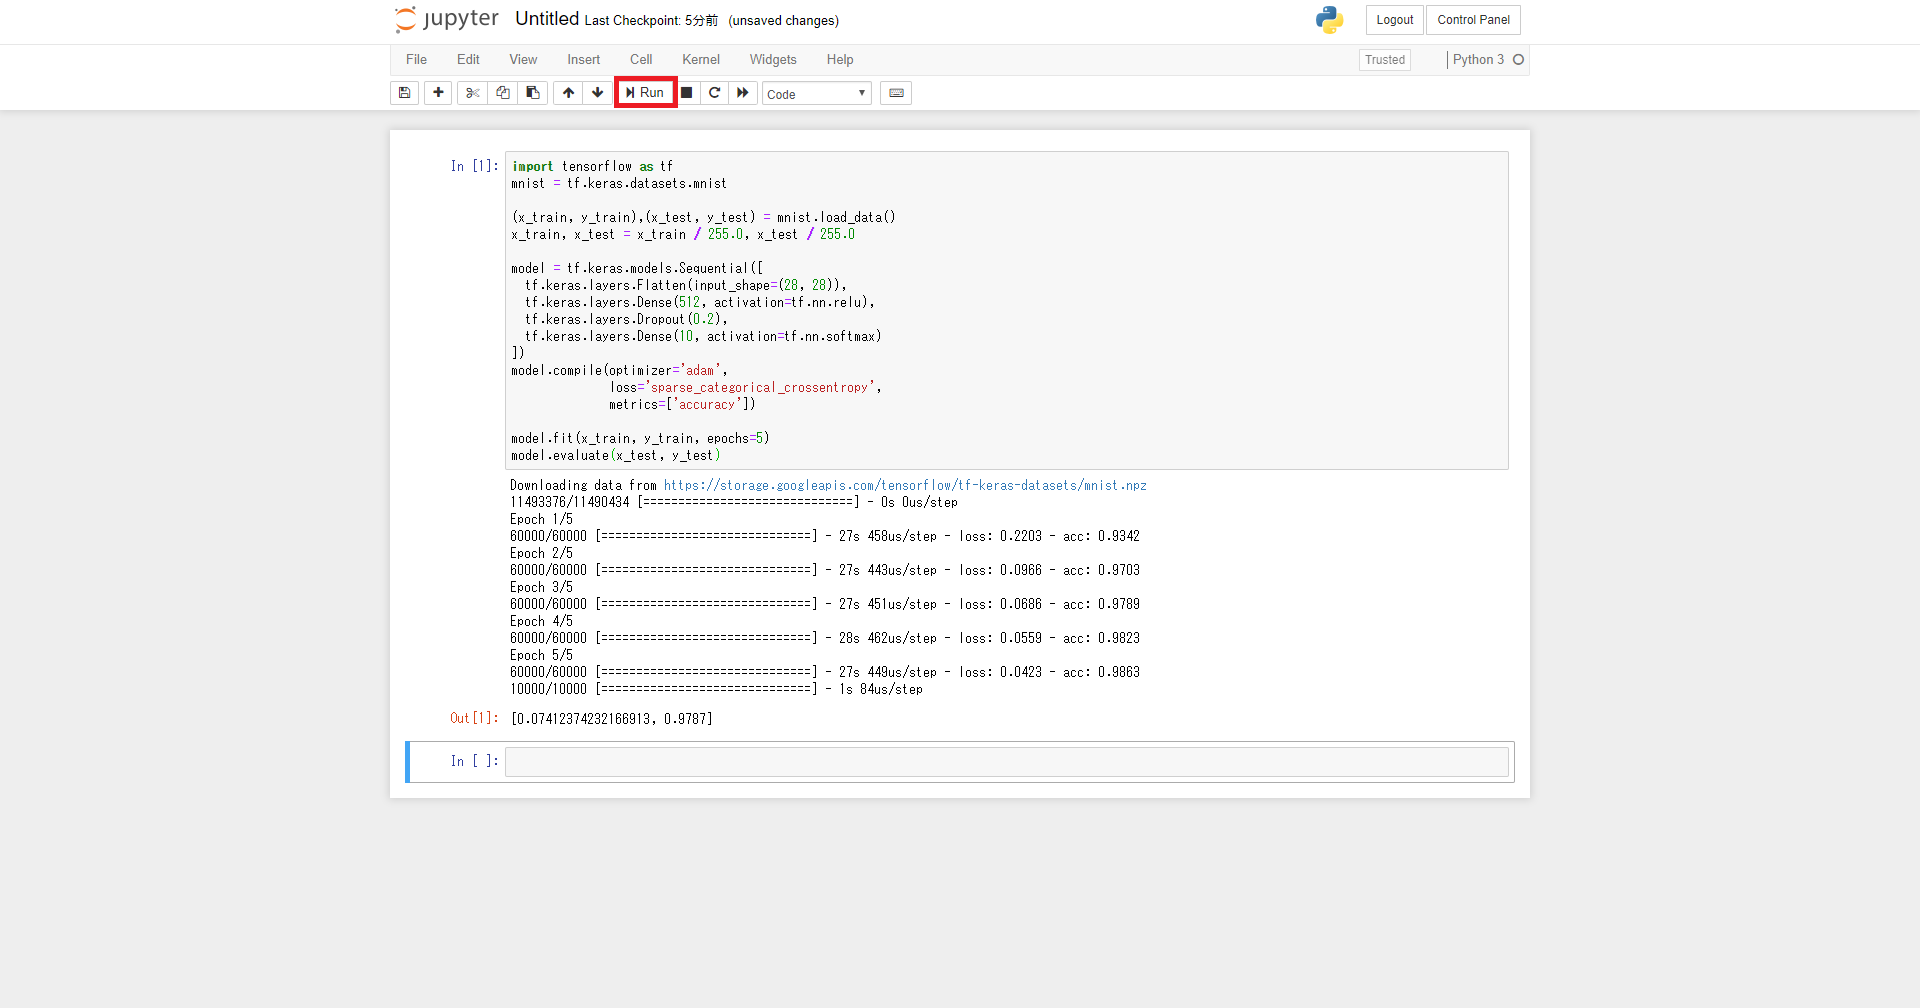
10.TensorFlowの公式チュートリアルを実行
code
import tensorflow as tf
mnist = tf.keras.datasets.mnist

(x_train, y_train),(x_test, y_test) = mnist.load_data()
x_train, x_test = x_train / 255.0, x_test / 255.0

model = tf.keras.models.Sequential([
  tf.keras.layers.Flatten(input_shape=(28, 28)),
  tf.keras.layers.Dense(512, activation=tf.nn.relu),
  tf.keras.layers.Dropout(0.2),
  tf.keras.layers.Dense(10, activation=tf.nn.softmax)
])
model.compile(optimizer='adam',
              loss='sparse_categorical_crossentropy',
              metrics=['accuracy'])

model.fit(x_train, y_train, epochs=5)
model.evaluate(x_test, y_test)
「Run」ボタンを押下
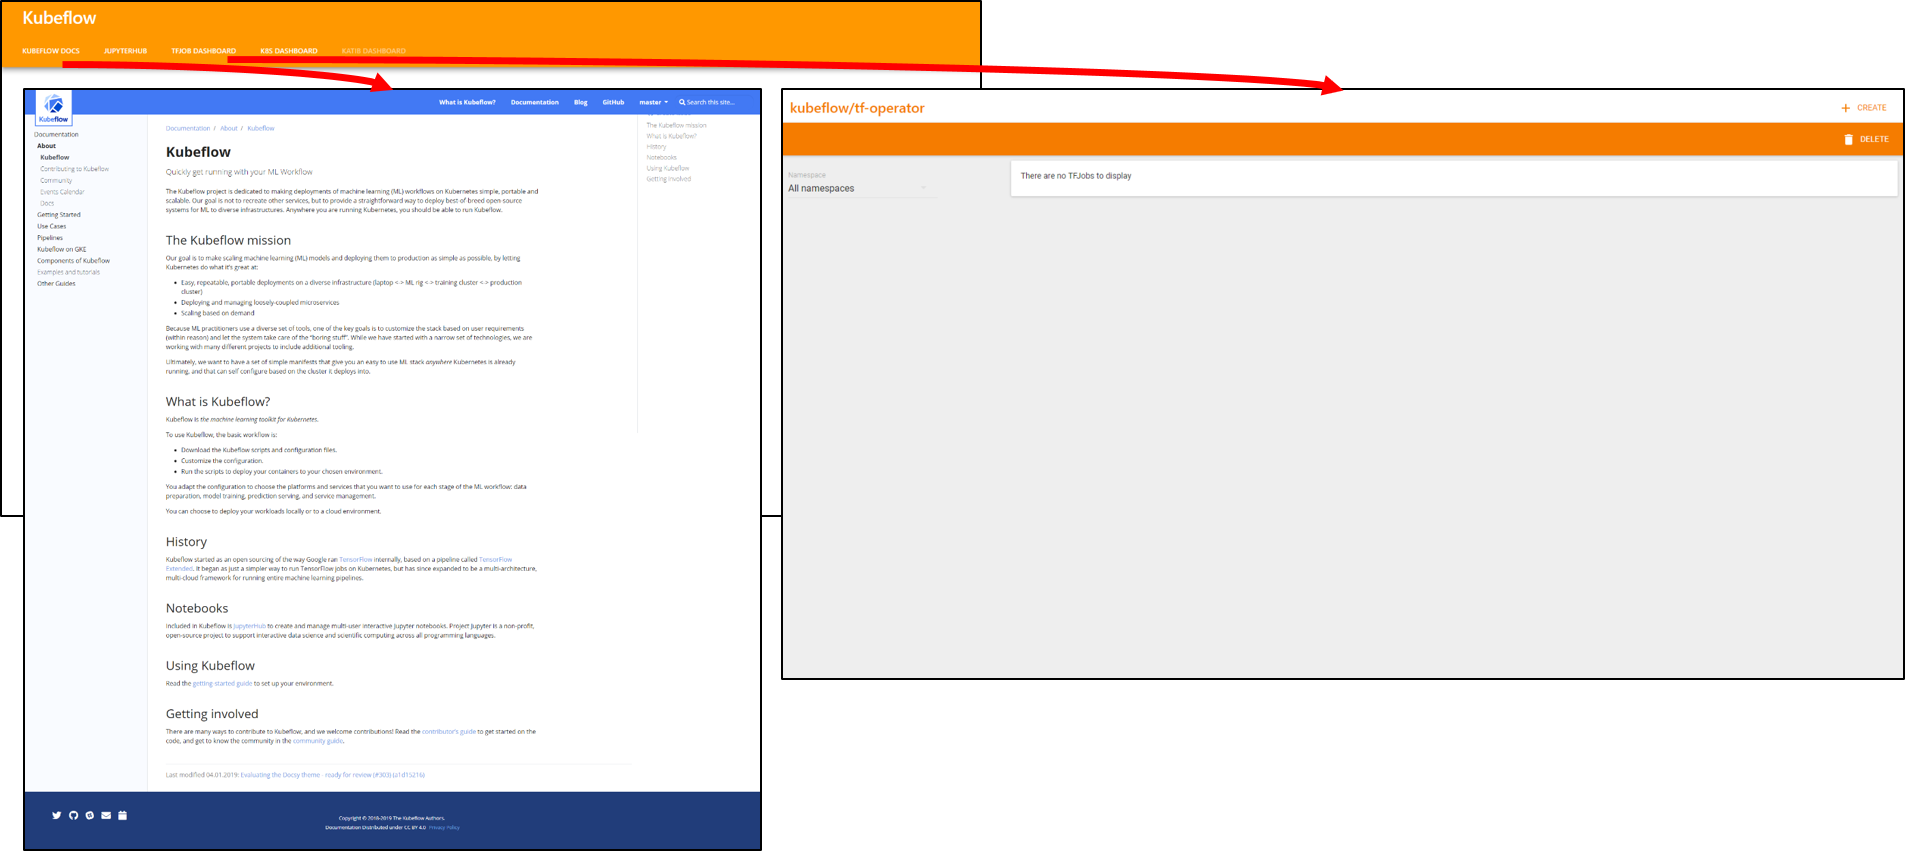
11.「KUBEFLOW DOCS」「TFJOB DASHBOARD」を確認
以上でRancherのカタログ機能を利用したKubeflowのデプロイからサンプルコードの実行までとなります。Kubeflowカタログは、まだEXPERIMENTALということでなのかはわかりませんが、GKEにGPUクラスタの設定はまだできないようなのでクラスタをインポートする形となりました。今後も色々と改善されるかもしれません。
ただ、公式のデプロイ手順は結構実行することが多いので、それに比べると非常に簡単であることは確かです。
正直、KubeflowやTensorflowは初心者なのでこの環境がどの程度のものかは不明です。有識者の方に試していただいてフィードバックなど頂けると幸いです。
参考資料