Rancher2.1から1系にもあったWindows Support機能が復活しました。現時点では、KubernetesのMasterになることはできませんが、Workerとしてノード追加できます。また、NetworkはFlannelのみ対応となっています。
以下の構成で検証してみました。
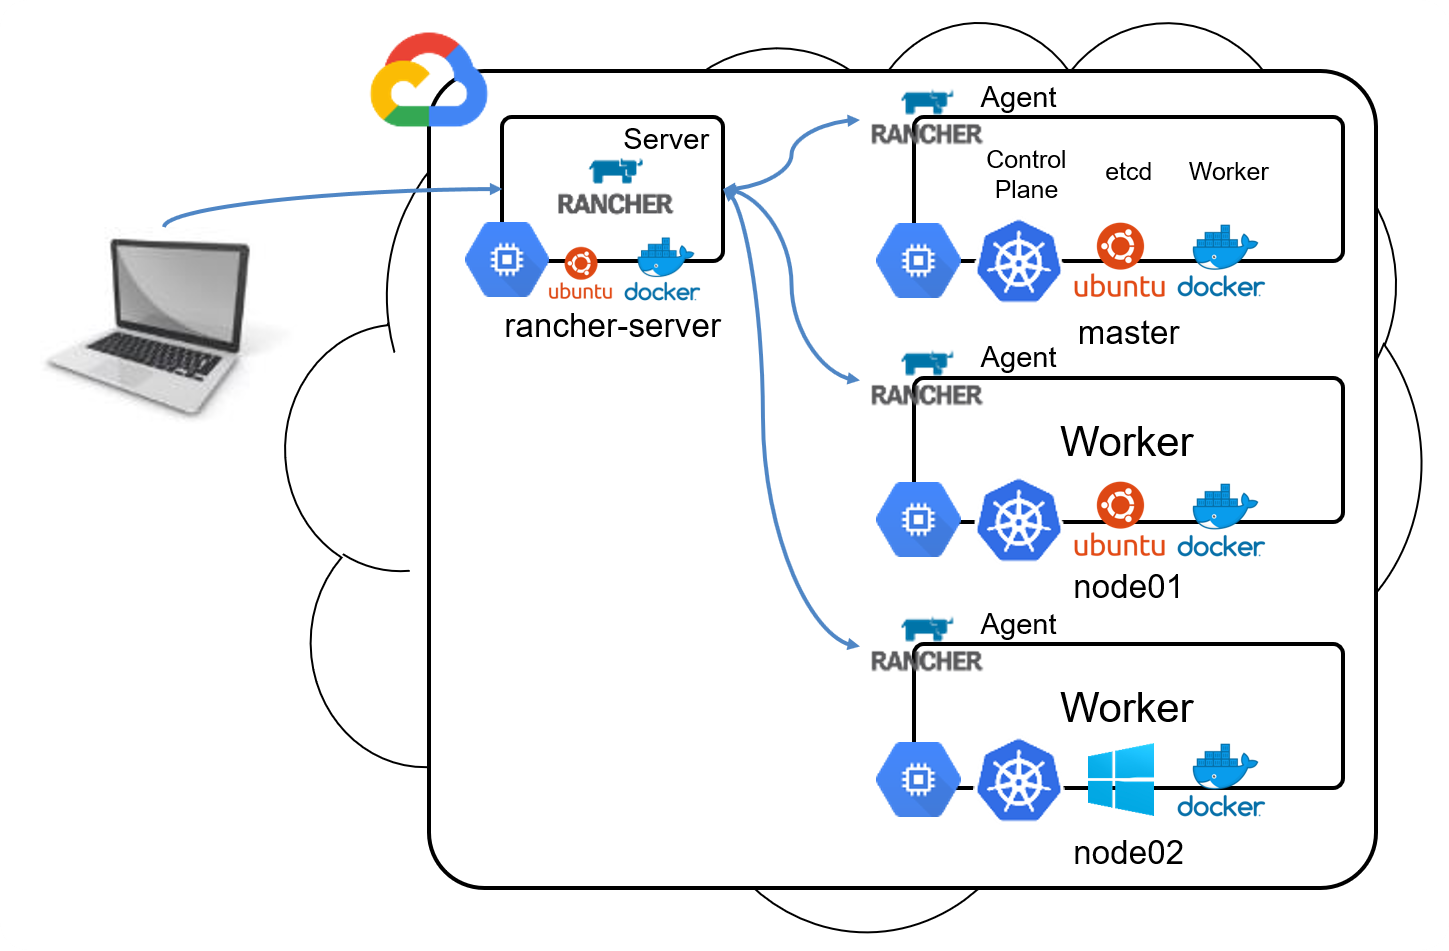
Rancher Server Version:2.1.3
1.Rancher Serverの構築
1.Instance準備
| 項目 | 入力概要 |
|---|---|
| 名前 | rancher-server |
| リージョン | asia-northeast1(東京) |
| ゾーン | asia-northeast1-b |
| マシンタイプ | vCPUx1 |
| ブートディスク | Ubuntu 16.04 LTS ディスクサイズ80GB |
| ファイアウォール | HTTP トラフィックを許可する、HTTPS トラフィックを許可するの両方をチェックします。 |
2.Dockerのインストール
コマンド
$ curl https://releases.rancher.com/install-docker/17.03.2.sh | sh
・
・(省略)
・
+ sudo -E sh -c docker version
Client:
 Version:      17.03.2-ce
 API version:  1.27
 Go version:   go1.7.5
 Git commit:   f5ec1e2
 Built:        Tue Jun 27 03:35:14 2017
 OS/Arch:      linux/amd64

Server:
 Version:      17.03.2-ce
 API version:  1.27 (minimum version 1.12)
 Go version:   go1.7.5
 Git commit:   f5ec1e2
 Built:        Tue Jun 27 03:35:14 2017
 OS/Arch:      linux/amd64
 Experimental: false

If you would like to use Docker as a non-root user, you should now consider
adding your user to the "docker" group with something like:

  sudo usermod -aG docker iyutaka2018

Remember that you will have to log out and back in for this to take effect!

WARNING: Adding a user to the "docker" group will grant the ability to run
         containers which can be used to obtain root privileges on the
         docker host.
         Refer to https://docs.docker.com/engine/security/security/#docker-daemon-attack-surface
         for more information.
3.Rancher2.1 Serverのインストール
コマンド
$ sudo docker run -d --restart=unless-stopped -p 80:80 -p 443:443 rancher/rancher
Unable to find image 'rancher/rancher:latest' locally
latest: Pulling from rancher/rancher
32802c0cfa4d: Pull complete
da1315cffa03: Pull complete
fa83472a3562: Pull complete
f85999a86bef: Pull complete
802918c3c5d1: Pull complete
941c9d7db7cb: Pull complete
a00bebfc6f0e: Pull complete
0a145b822324: Pull complete
1cd1020104e1: Pull complete
03f3b0fc5689: Pull complete
07054e1590fd: Pull complete
db38f96efb72: Pull complete
Digest: sha256:b5762180fdc05b5be8337453cc9bbadc33645d50cd8d2dac89c6676bf07460b7
Status: Downloaded newer image for rancher/rancher:latest
98fc7fb2332a8319af6608db4757014898c1ef50779b086c49b0f6e79f50da2f
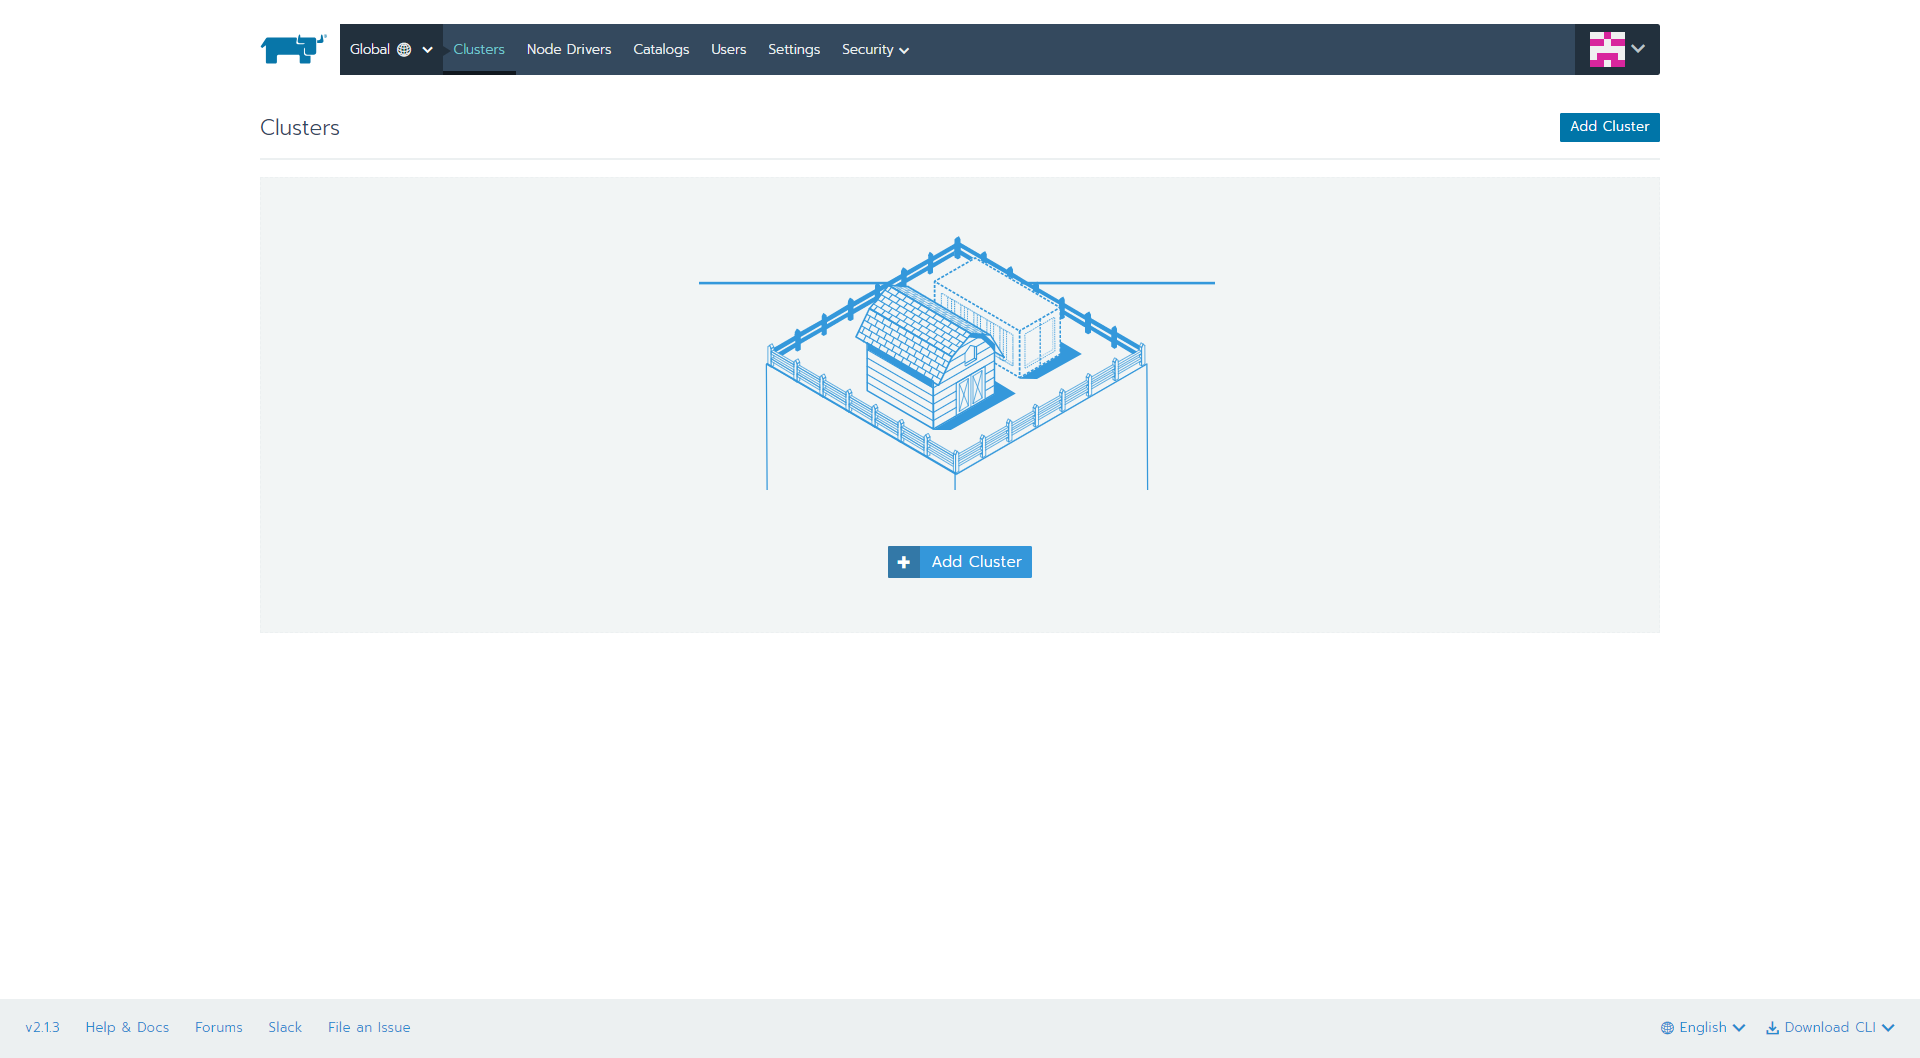
4.ブラウザを起動して、RancherUIにアクセス
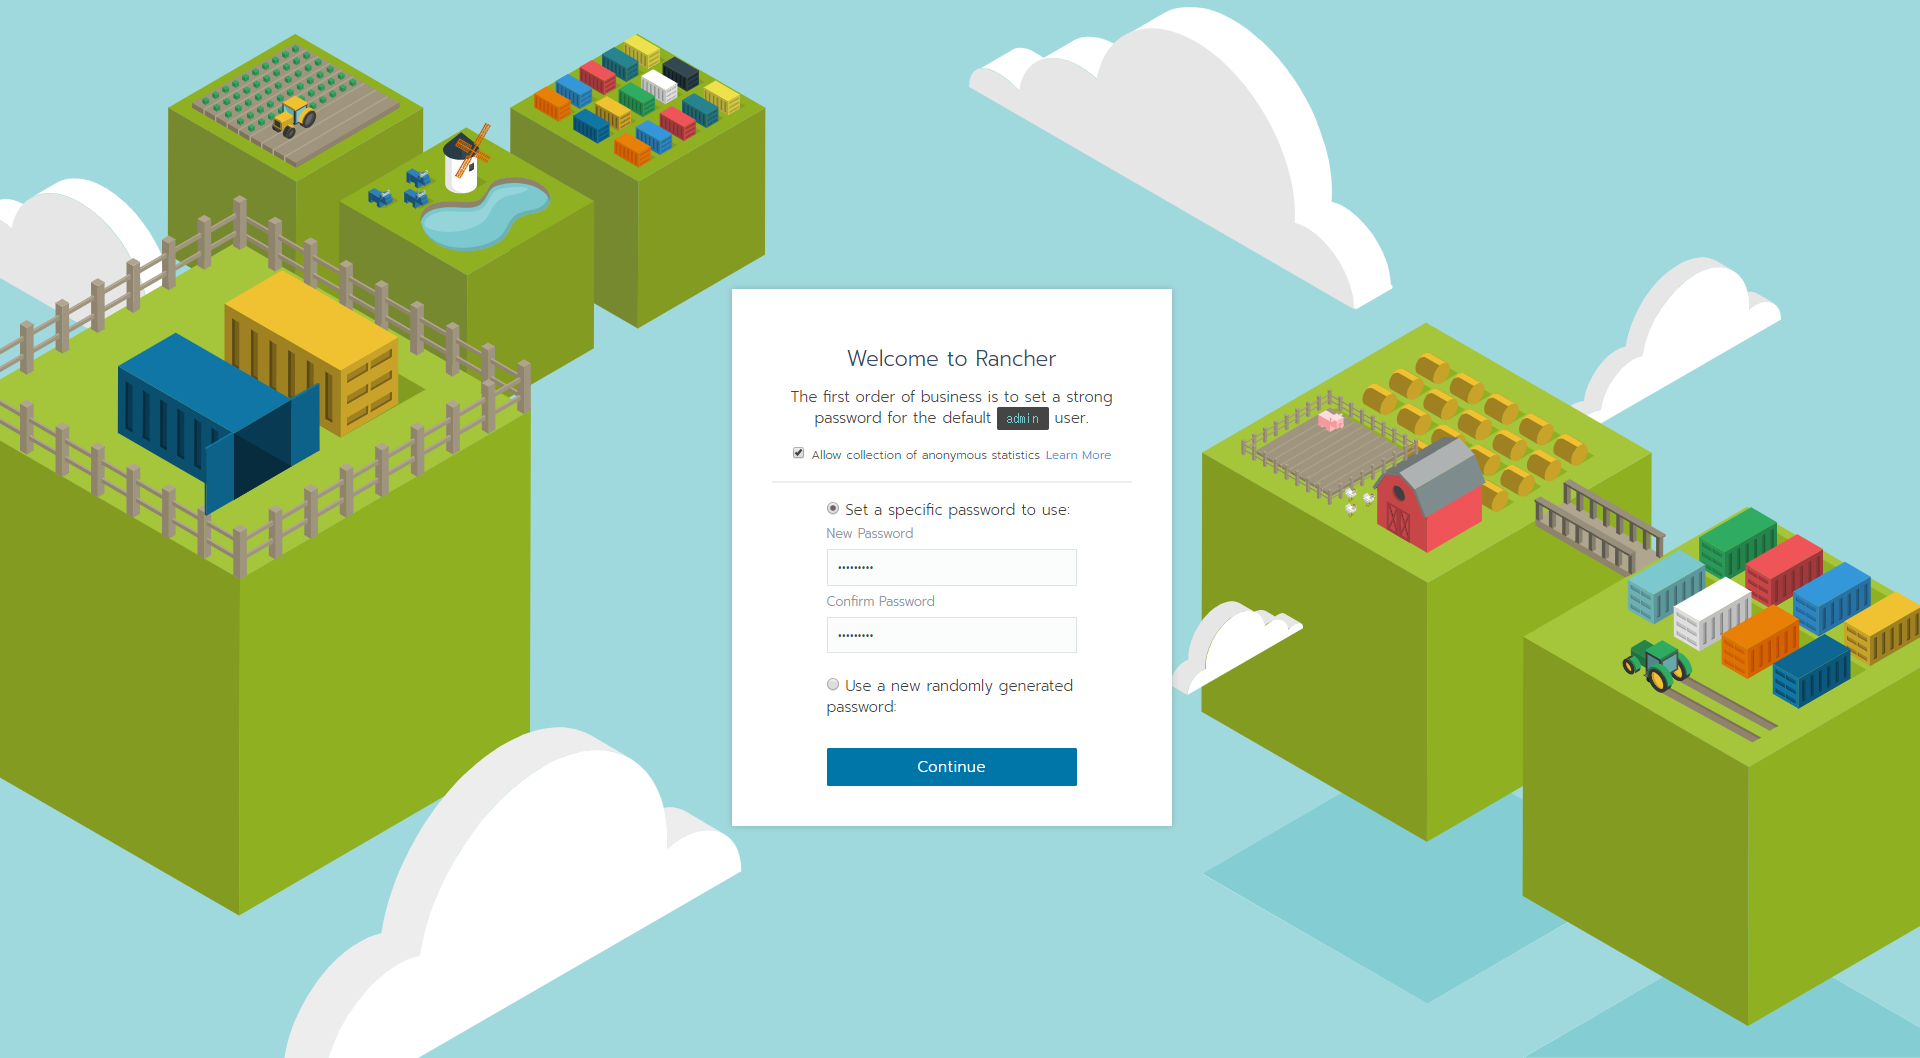
5.初回ログイン
a.adminユーザのパスワード作成
任意のパスワードを入力
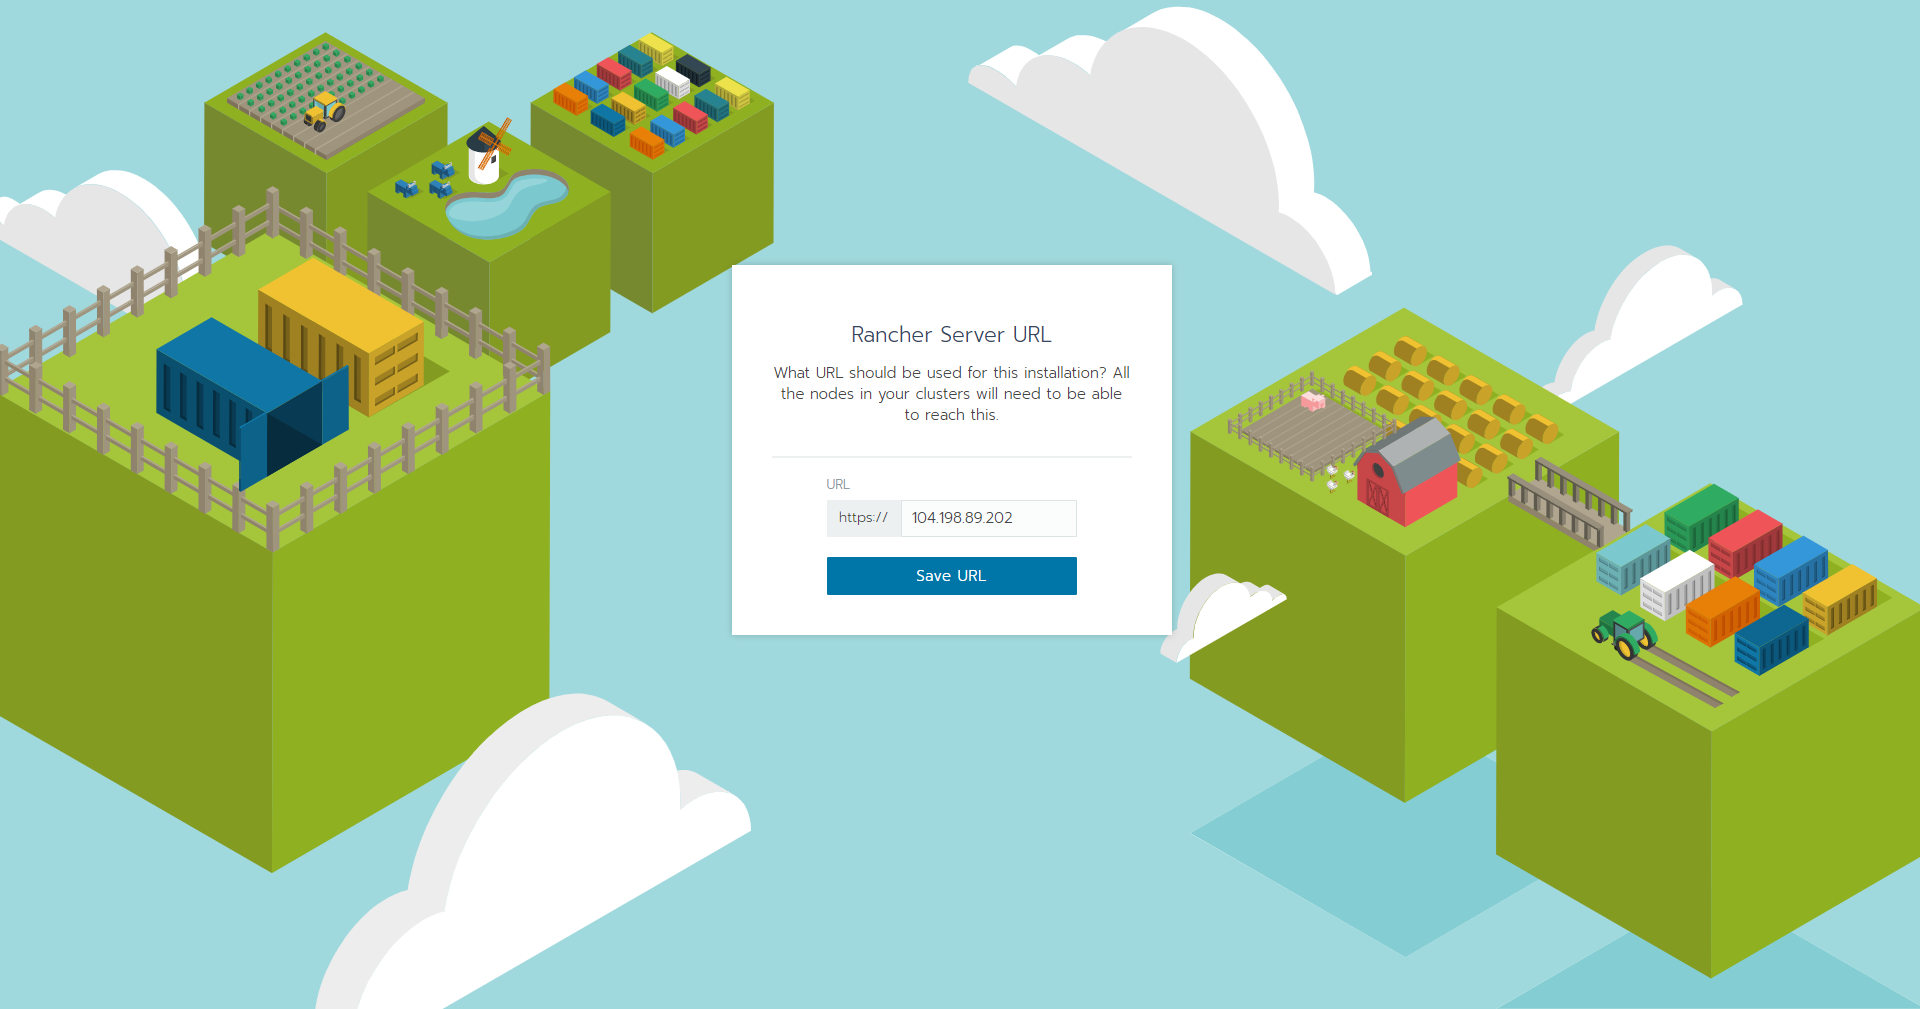
b.Rancher Server URLの登録
「Save URL」ボタンを押下
c.ログイン完了
2.MasterとNodeの構築
1.Instance準備
| 項目 | 入力概要 |
|---|---|
| 名前 | master |
| リージョン | asia-northeast1(東京) |
| ゾーン | asia-northeast1-b |
| マシンタイプ | vCPUx1 |
| ブートディスク | Ubuntu 16.04 LTS ディスクサイズ80GB |
| ファイアウォール | HTTP トラフィックを許可する、HTTPS トラフィックを許可するの両方をチェックします。 |
| 項目 | 入力概要 |
|---|---|
| 名前 | node01 |
| リージョン | asia-northeast1(東京) |
| ゾーン | asia-northeast1-b |
| マシンタイプ | vCPUx1 |
| ブートディスク | Ubuntu 16.04 LTS ディスクサイズ80GB |
| ファイアウォール | HTTP トラフィックを許可する、HTTPS トラフィックを許可するの両方をチェックします。 |
| 項目 | 入力概要 |
|---|---|
| 名前 | node02 |
| リージョン | asia-northeast1(東京) |
| ゾーン | asia-northeast1-b |
| マシンタイプ | vCPUx1 |
| ブートディスク | Windows Server version 1803 Datacenter Core for Containers ディスクサイズ80GB |
| ファイアウォール | HTTP トラフィックを許可する、HTTPS トラフィックを許可するの両方をチェックします。 |
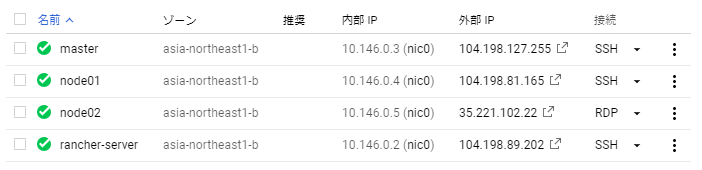
2.Instance作成完了の確認
3.master,node01にDockerをインストール
コマンド
$ curl https://releases.rancher.com/install-docker/17.03.2.sh | sh
・
・(省略)
・
+ sudo -E sh -c docker version
Client:
 Version:      17.03.2-ce
 API version:  1.27
 Go version:   go1.7.5
 Git commit:   f5ec1e2
 Built:        Tue Jun 27 03:35:14 2017
 OS/Arch:      linux/amd64

Server:
 Version:      17.03.2-ce
 API version:  1.27 (minimum version 1.12)
 Go version:   go1.7.5
 Git commit:   f5ec1e2
 Built:        Tue Jun 27 03:35:14 2017
 OS/Arch:      linux/amd64
 Experimental: false

If you would like to use Docker as a non-root user, you should now consider
adding your user to the "docker" group with something like:

  sudo usermod -aG docker iyutaka2018

Remember that you will have to log out and back in for this to take effect!

WARNING: Adding a user to the "docker" group will grant the ability to run
         containers which can be used to obtain root privileges on the
         docker host.
         Refer to https://docs.docker.com/engine/security/security/#docker-daemon-attack-surface
         for more information.
3.Kubernetesクラスタの構築
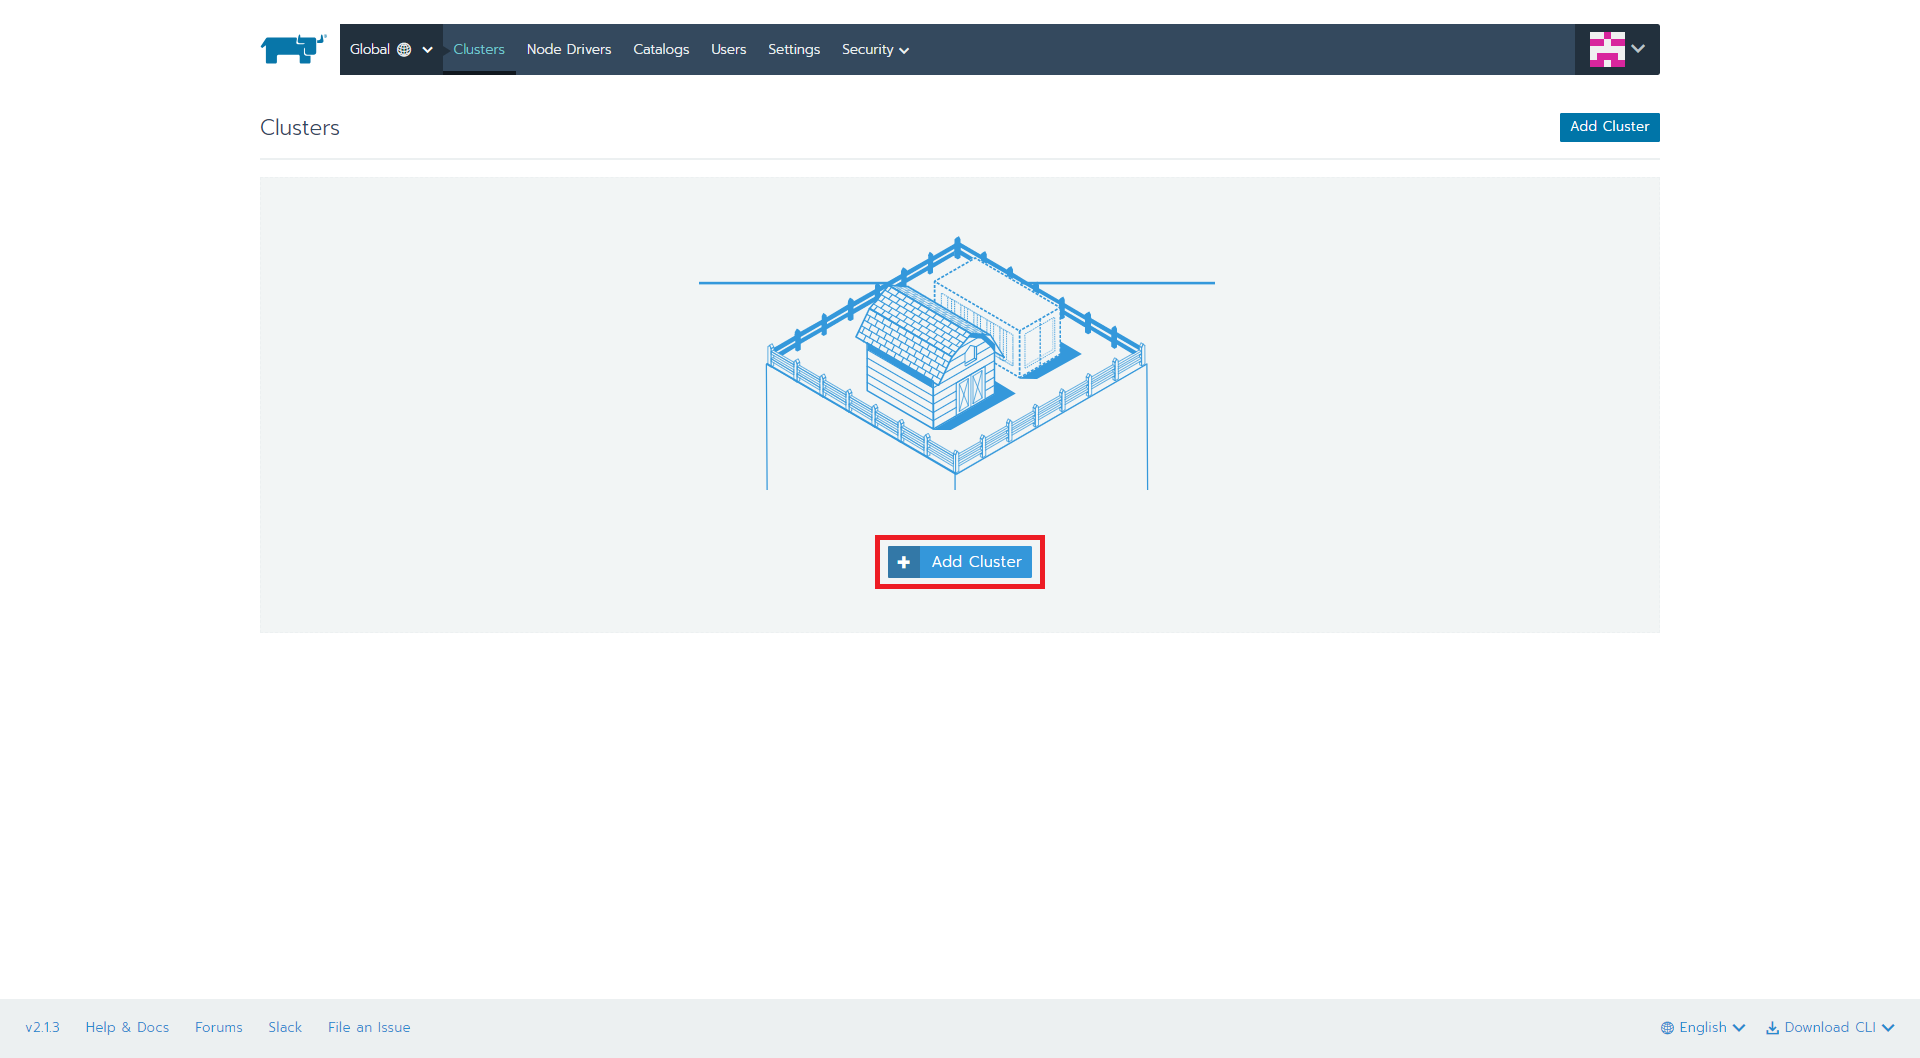
1.「Add Cluster」ボタンを押下
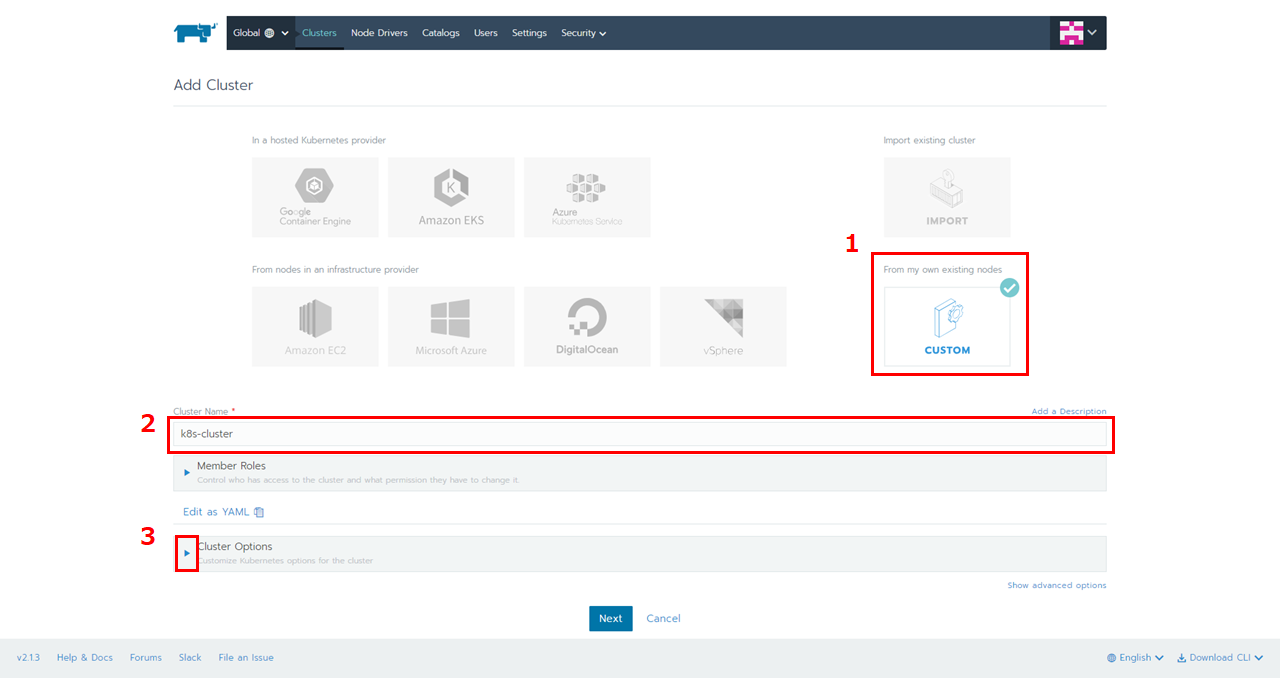
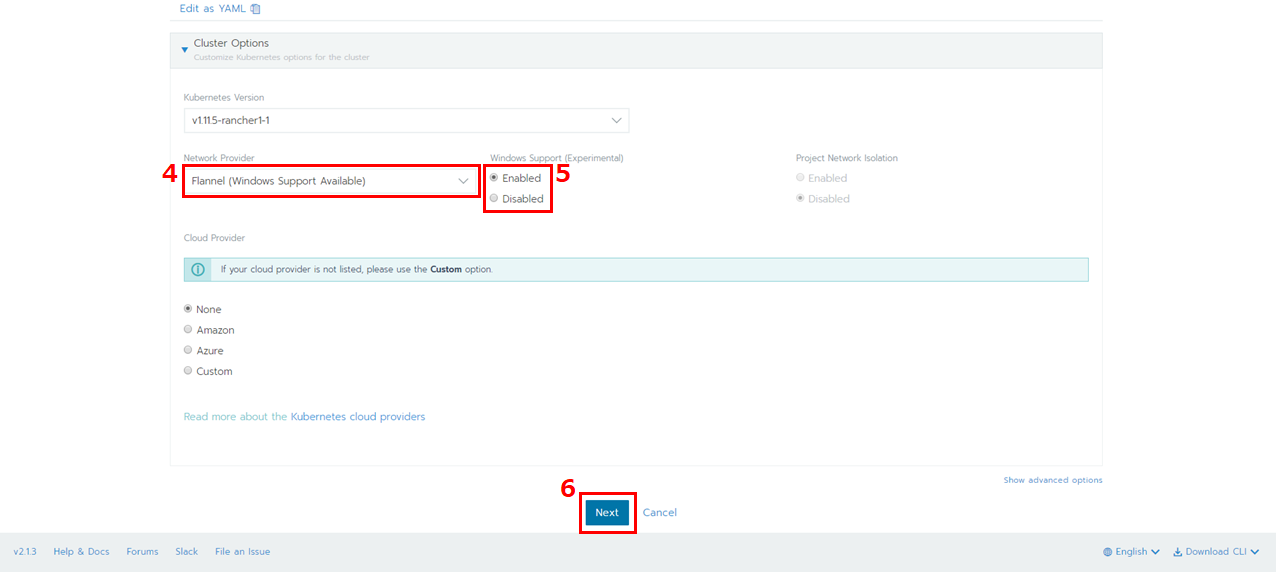
2.「Custom」を選択、「Cluster Name」に任意の名前を入力、「Cluster Options」をクリック、「Windows Support (Experimental)」を「Enabled」、「Next」ボタンを押下
3.「Node Role」の「etcd」と「Control Plane」にチェック、「Copy to Clipboard」ボタンを押下
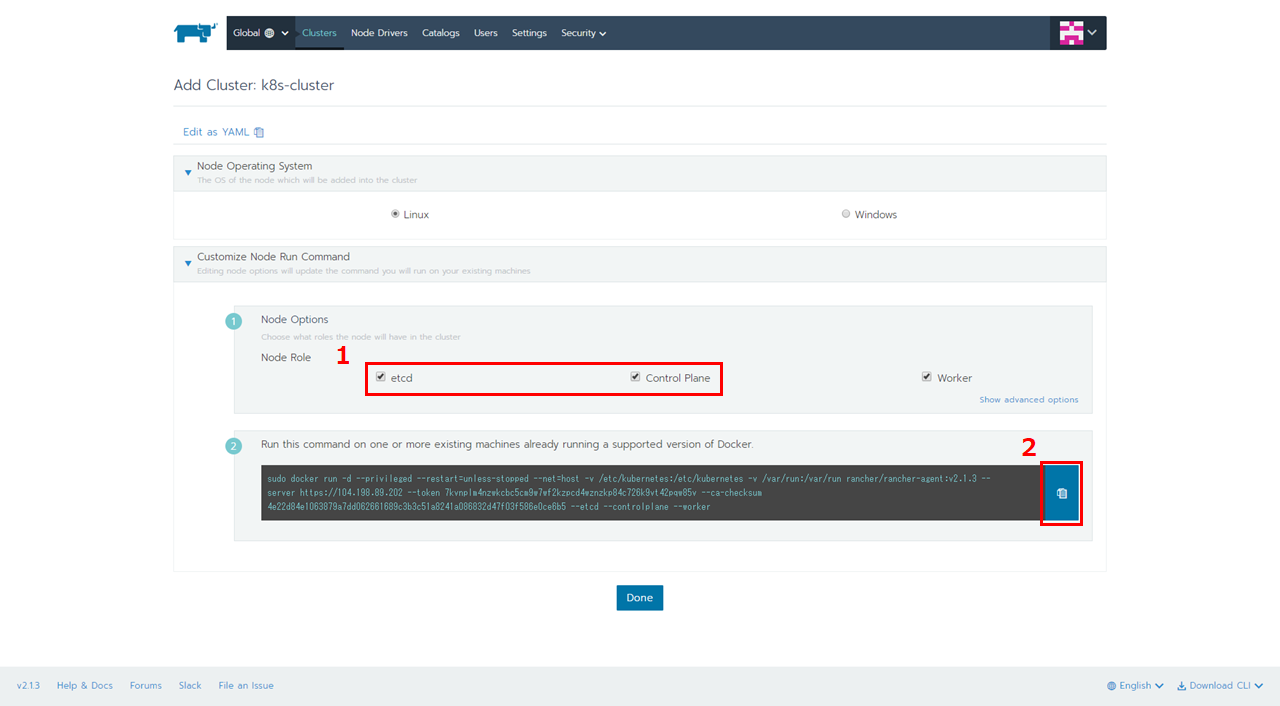
4.コピーしたコマンドをmasterのコンソールで実行
コマンド
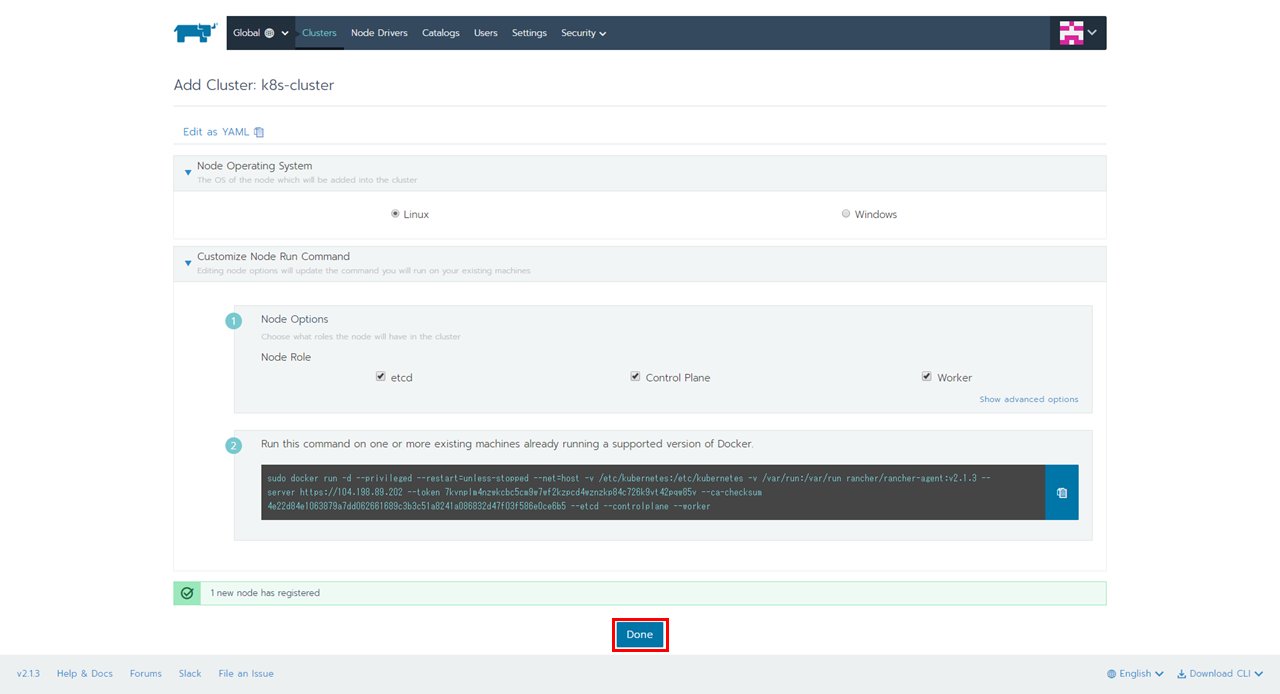
$ sudo docker run -d --privileged --restart=unless-stopped --net=host -v /etc/kubernetes:/etc/kubernetes -v /var/run:/var/run rancher/rancher-agent:v2.1.3 --server https://104.198.89.202 --token 7kvnplm4nzwkcbc5cm9w7wf2kzpcd4wznzkp84c726k9vt42pqw85v --ca-checksum 4e22d84e1063879a7dd062661689c3b3c51a8241a086832d47f03f586e0ce6b5 --etcd --controlplane --worker
5.「Done」ボタンを押下
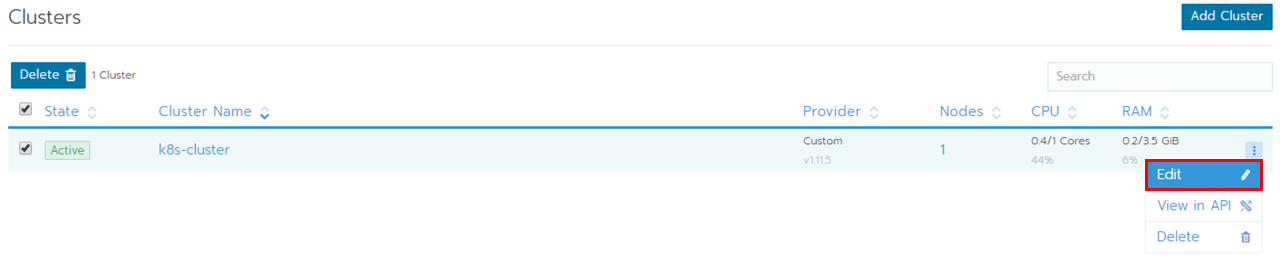
6.クラスタ作成後、赤枠部分をクリックして、「Edit」を選択
7.「Copy to Clipboard」ボタンを押下
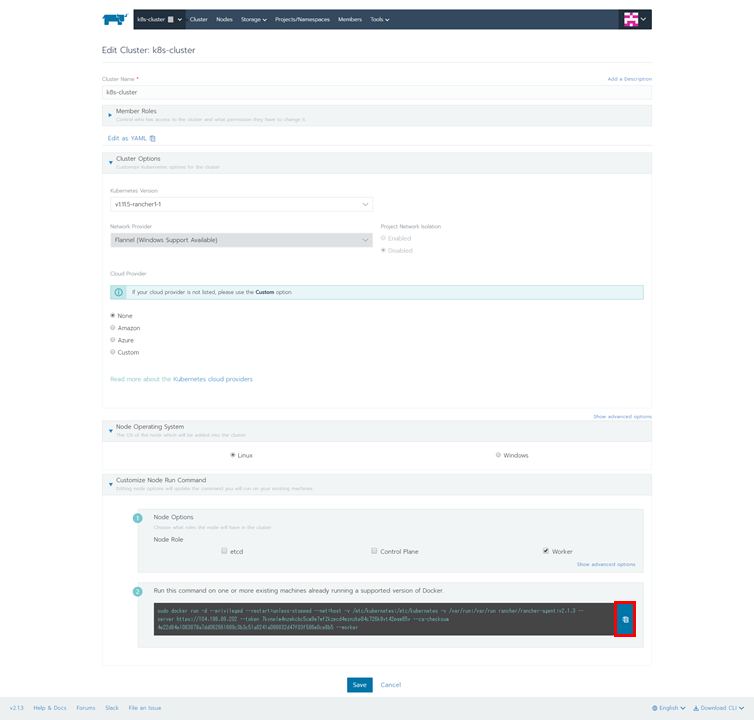
8.コピーしたコマンドをnode01のコンソールで実行
コマンド
sudo docker run -d --privileged --restart=unless-stopped --net=host -v /etc/kubernetes:/etc/kubernetes -v /var/run:/var/run rancher/rancher-agent:v2.1.3 --server https://104.198.89.202 --token 7kvnplm4nzwkcbc5cm9w7wf2kzpcd4wznzkp84c726k9vt42pqw85v --ca-checksum 4e22d84e1063879a7dd062661689c3b3c51a8241a086832d47f03f586e0ce6b5 --worker
9.「Save」ボタンを押下
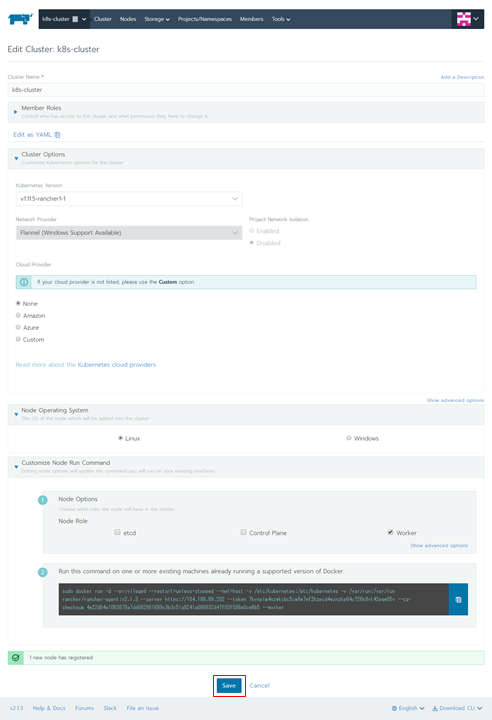
10.Nodeが追加されたことを確認
11.上部メニューから「Global」を選択
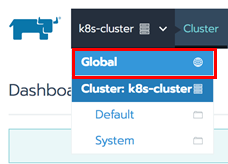
12.クラスタ作成後、赤枠部分をクリックして、「Edit」を選択
13.「Node Operating System」で「Windows」を選択、「Copy to Clipboard」ボタンを押下

14.Windowsの場合は、リモートデスクトップ、Macの場合はChromeの「Chrome RDP for Google Cloud Platform」をインストールします。
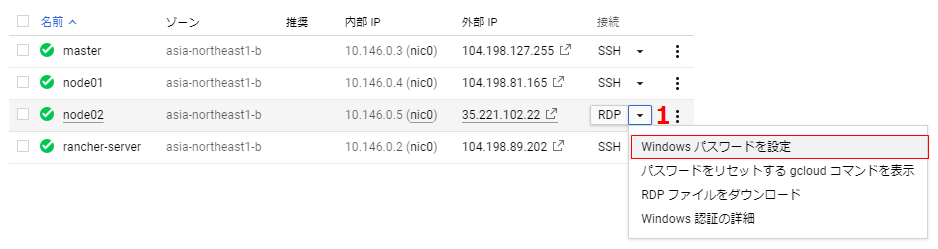
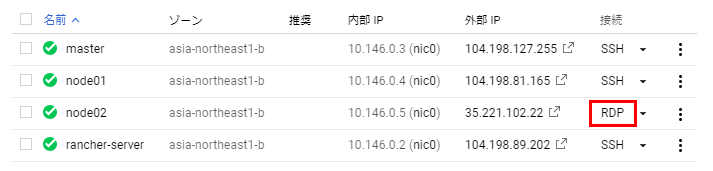
15.「RDP」ボタンを押下
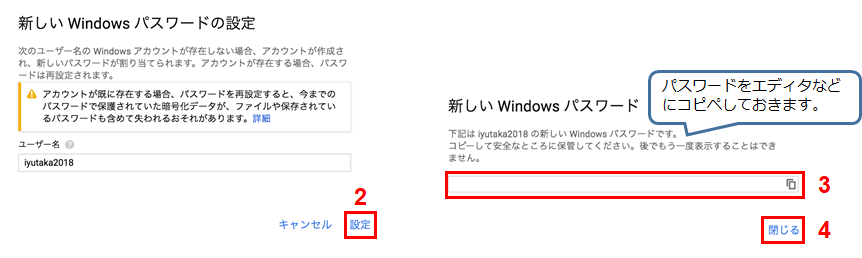
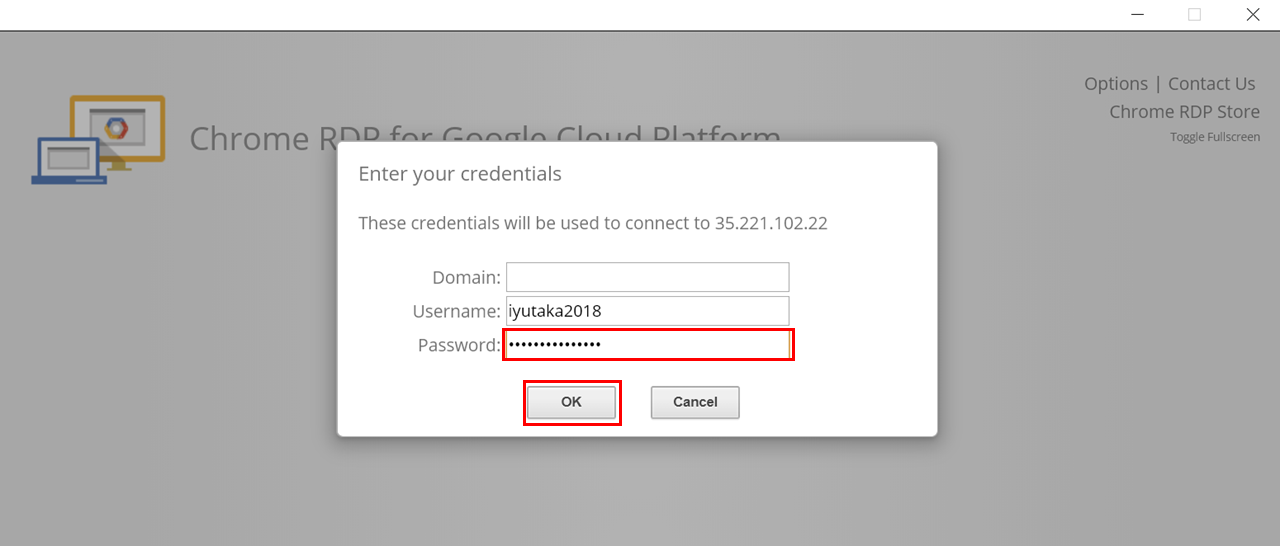
16.Chrome RDP for GCP起動後、パスワード入力して「OK」ボタンを押下
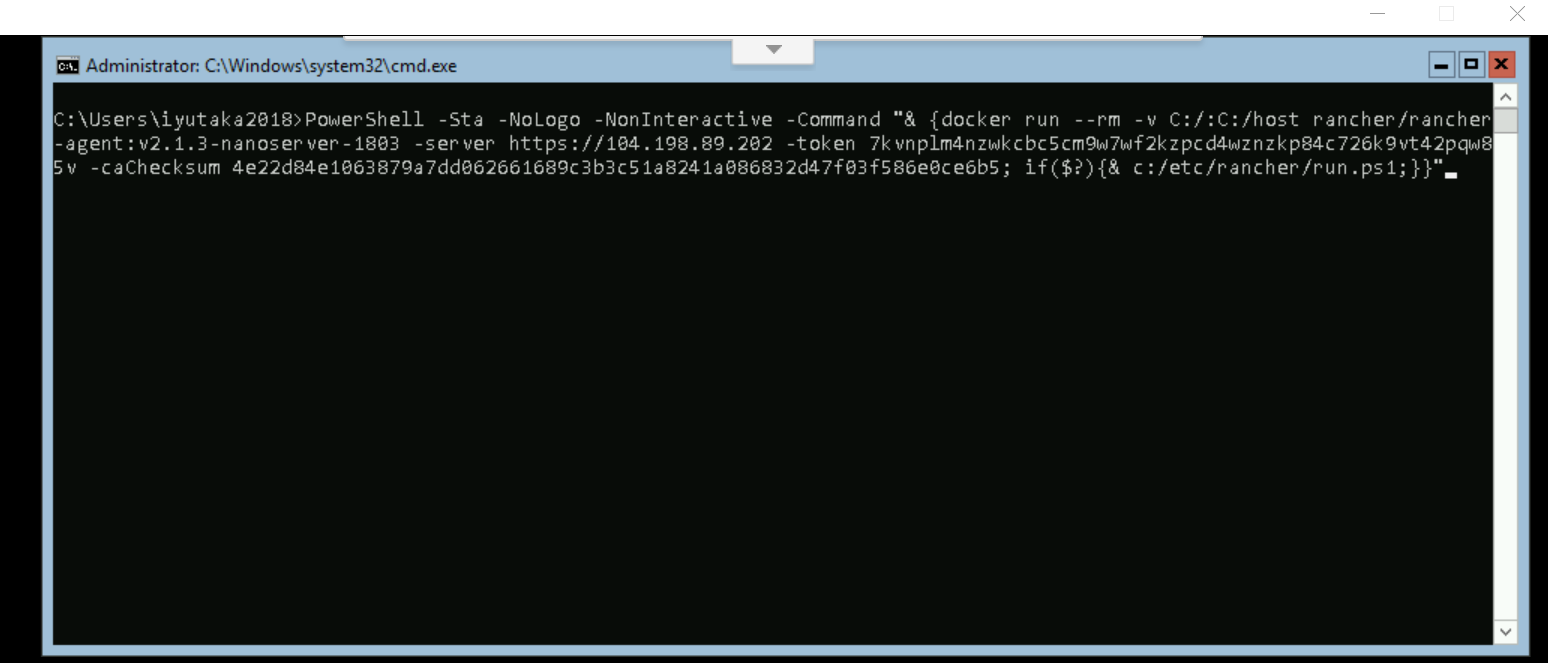
17.13の手順でコピーしたコマンドを実行
18.「Save」ボタンを押下

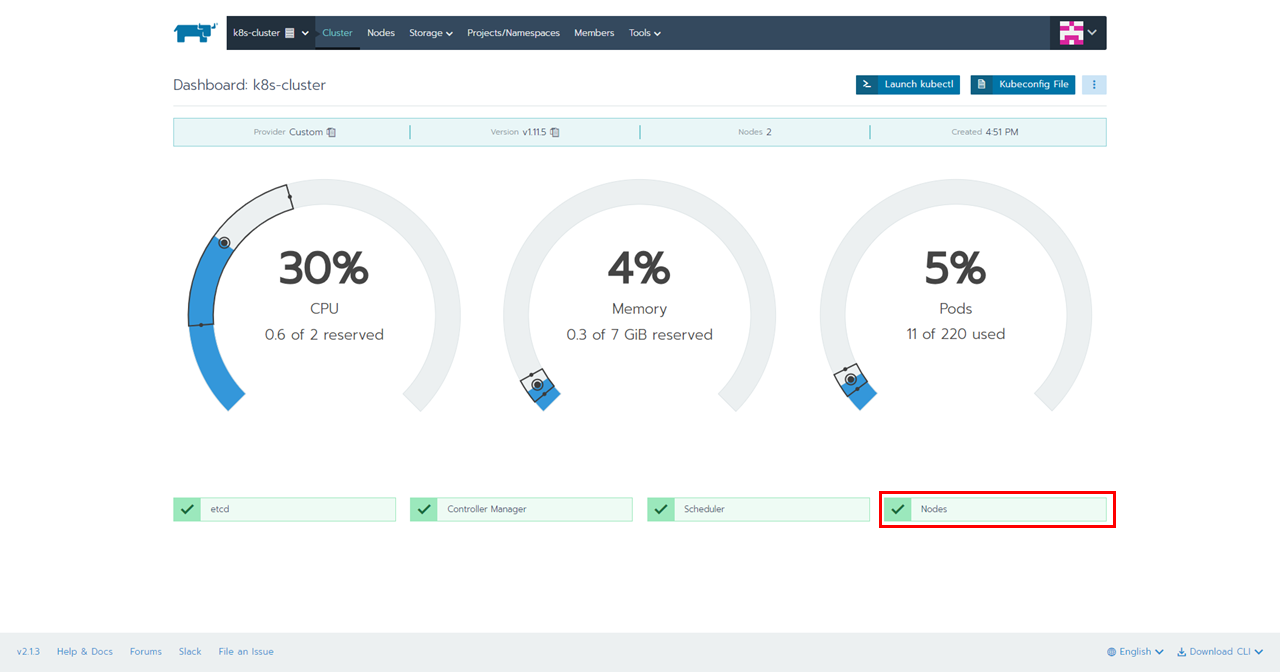
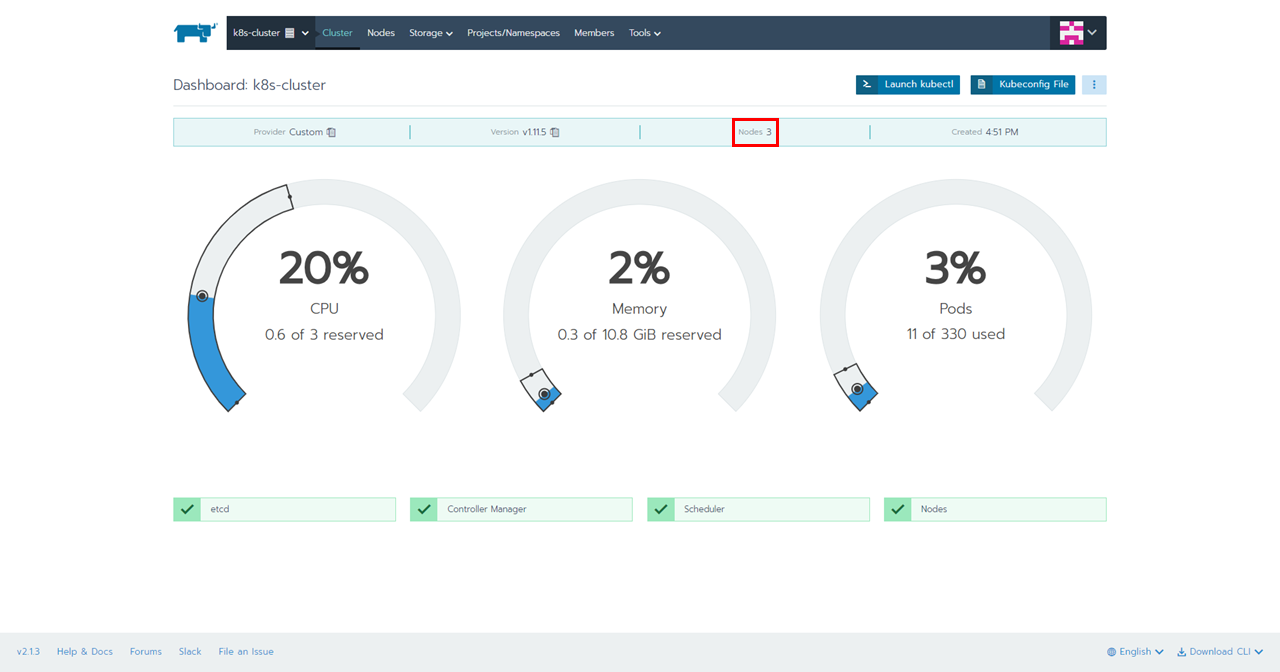
19.「Nodes」の数が、3になっていることを確認
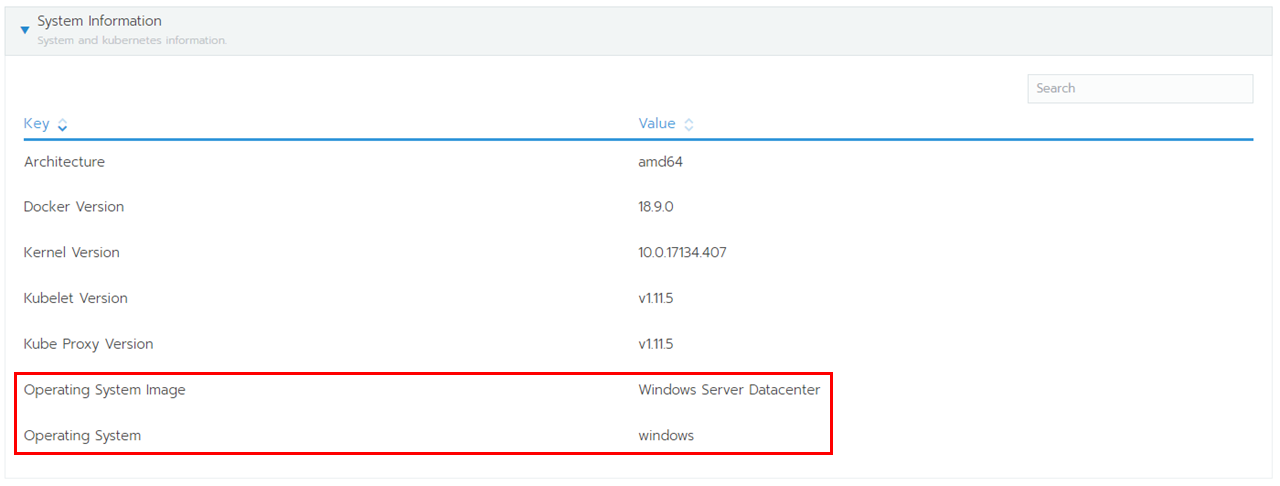
20.上部メニュー「Nodes」を選択、「node02」をクリック
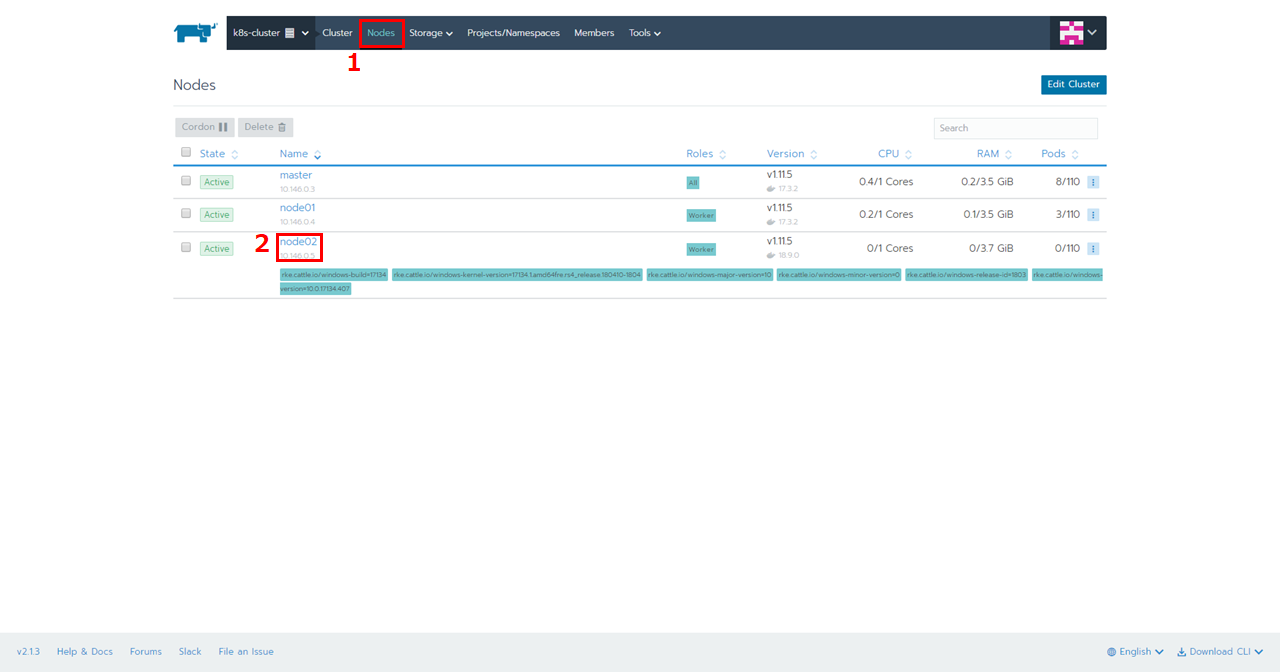
21.上部メニュー「Nodes」を選択、「node02」をクリック
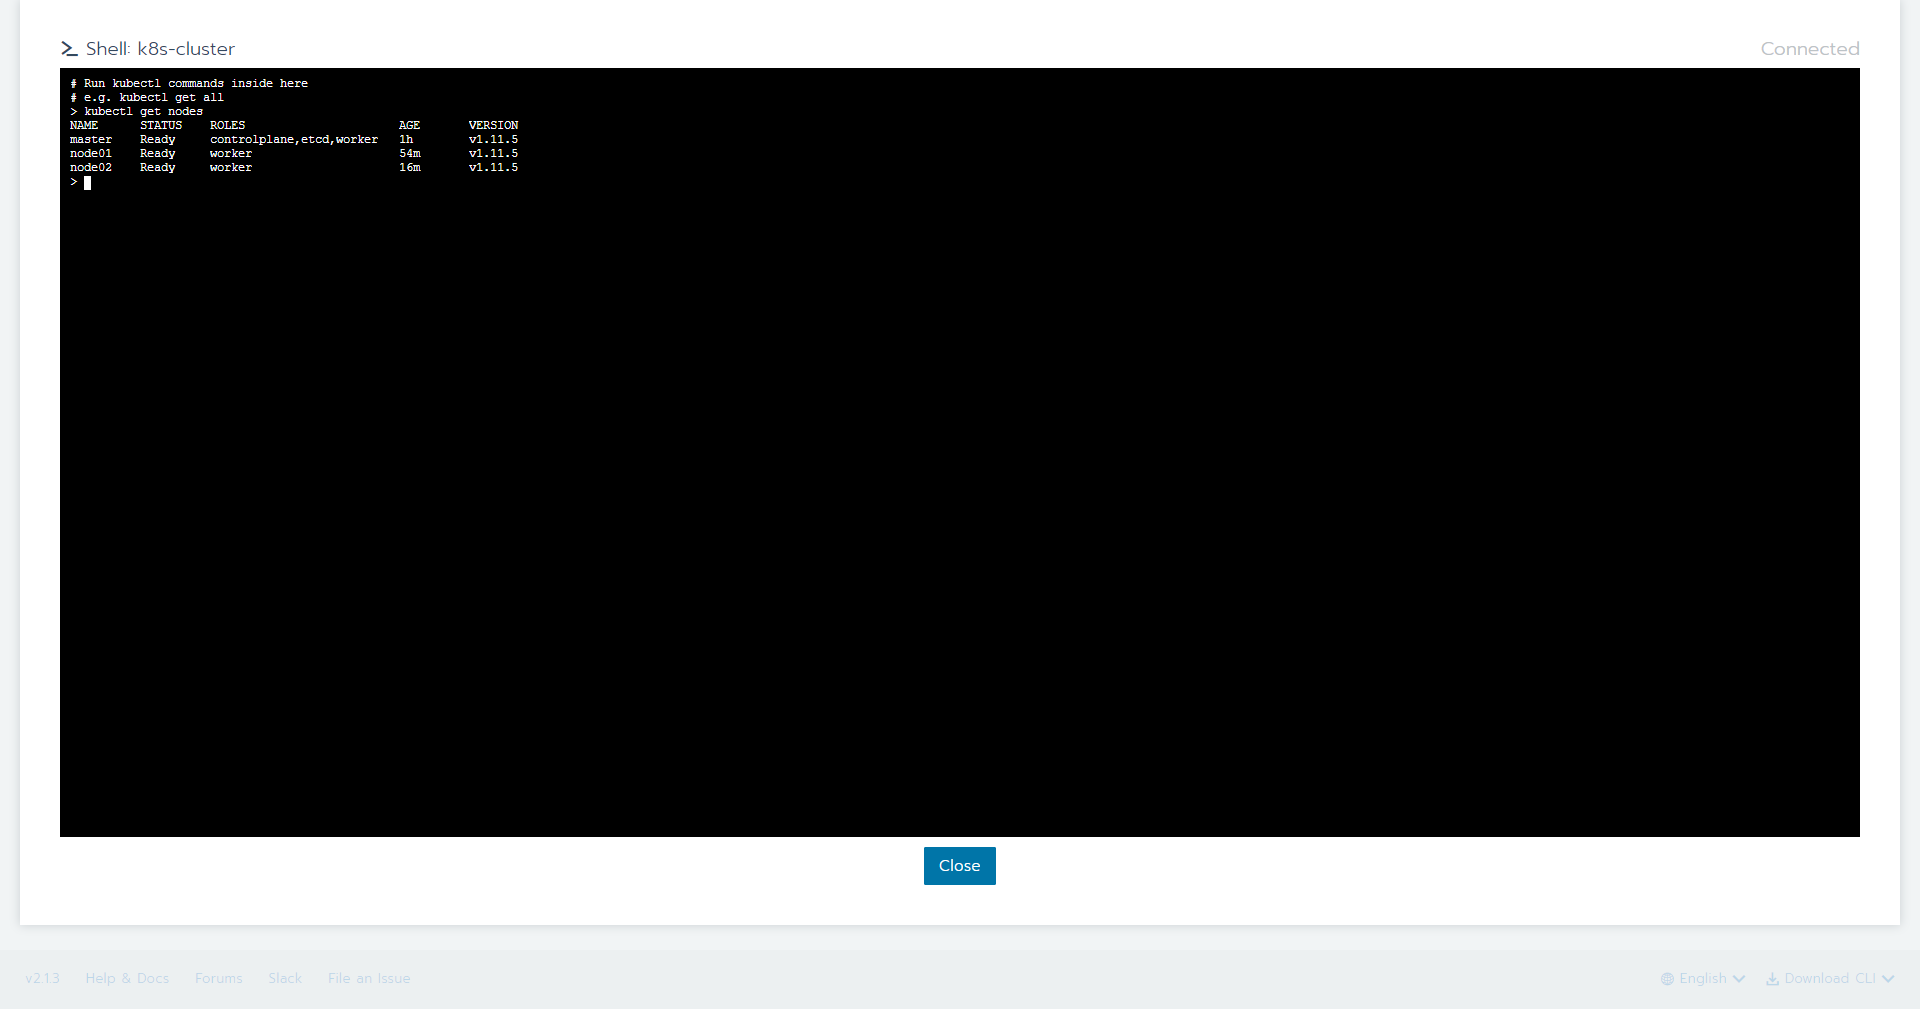
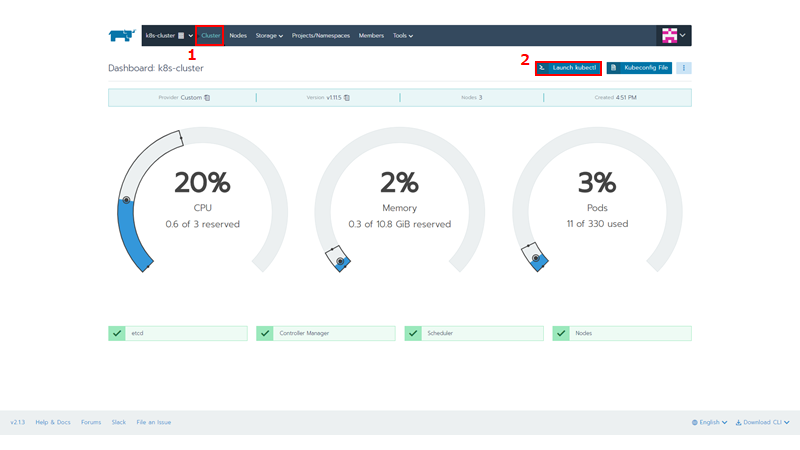
22.上部メニューから「Cluster」を選択し、「Launch kubectl」ボタンを押下
23.Node状況を確認
コマンド
# Run kubectl commands inside here
# e.g. kubectl get all
> kubectl get nodes
NAME      STATUS    ROLES                      AGE       VERSION
master    Ready     controlplane,etcd,worker   1h        v1.11.5
node01    Ready     worker                     54m       v1.11.5
node02    Ready     worker                     16m       v1.11.5
>