要旨
Poooli L3 プリンタをクロスプラットフォームで利用できるように、Python の socket を用いて Bluetooth を利用し画像ファイルを出力する。Windows/Linux で 2 階調 bitmap 出力と、6 階調のグレースケール bitmap 出力が出来た。Mac OS12 からは socket が利用できなかった。Mac/Windows から Bluetooth LE ライブラリ Bleak の利用を試み Phomemo M02S への出力ができた。
前置き
先日の記事で、Linux Ubuntu から Bluetooth を tty に結び付る方法で、Fortran から出力を行った。
しかしこの方法は Windows や Mac では利用することが出来ないので、クロスプラットフォームで動作するように、Python を利用することを試みた。
まず初めに Phomemo 社の感熱プリンタ(ESC/POS 2 階調 bitmap)に対して github 上に置かれているプログラム例を参考にして、最小限度の内容のプログラムを作成することにした。そうした後、それを書き換えて Poooli 社の感熱プリンタ用に作り替えることとした。
Phomemo M02S 用プログラム
Bluetooth 利用の参考にしたのは以下の二つのプログラムである。WiFi と Bluetooth を統一的に扱える Socket ライブラリを利用している。
https://github.com/theacodes/phomemo_m02s
https://github.com/hkeward/phomemo_printer
プログラムは内容的に一直線的なので、サブルーチンも用いず古典的命令型言語風に記述した。
プログラム
あらかじめ調べたプリンタの MAC address をべた書きするようにしている。
プリンタにデータ列を送る send 命令が non-blocking になっているようで、プリンタが画像を出力し終わる前にプログラムが最後まで到達し、プリンタとの接続を切ってしまうので、それを避けるためにプリンタへ電池残量問い合わせを行うことで出力の完遂を待つようにした。
import os, sys
import socket
from PIL import Image

M02S = ("00:15:83:54:A2:7F", 1) # (MAC address, channel 1)

ESC = b"\x1B"
GS  = b"\x1D"
US  = b"\x1F"

INIT = ESC + b"@"
BM   = GS  + b"v" + b"0" + b"\x00"
ENGY = US  + b"\x11" + b"\x08"

args = sys.argv
fn = args[1]
width = 576 # default

print("Connecting...")
s = socket.socket(socket.AF_BLUETOOTH, socket.SOCK_STREAM, socket.BTPROTO_RFCOMM)
if len(args) == 2:
    s.connect(M02S)
else:
    s.connect((args[2], 1))

# printer initialization
s.send(INIT)

# set concentration coefficiennt
s.send(US + b"\x11\x37" + b"\x96" ) # standard 64, M02S 96

# set concentration
s.send(US + b"\x11\x02" + b"\x01" ) # concenttration 01, 03, 04

# PIL
image = Image.open(fn)
if image.width > image.height:
    image = image.transpose(Image.ROTATE_90)

# width M02S 576 dots
IMAGE_WIDTH_BITS = width # must be multiple of 8
IMAGE_WIDTH_BYTES = IMAGE_WIDTH_BITS // 8
image = image.resize( size=(IMAGE_WIDTH_BITS, int(image.height * IMAGE_WIDTH_BITS / image.width)) )

# black&white printer: dithering
image = image.convert(mode="1")

# Header
s.send(BM)
s.send(IMAGE_WIDTH_BYTES.to_bytes(2, byteorder="little"))
s.send(image.height.to_bytes(2, byteorder="little"))

print("formatting data...")
image_bytes = b""
for iy in range(image.height):
    for ix in range(int(image.width / 8)):
        byte = 0
        for bit in range(8):
            if (image.getpixel( (ix * 8 + bit, iy) )  == 0 ):
                byte |= 1 << (7 - bit)
        image_bytes += byte.to_bytes(1, "little")


# send BMP data to printer
print("sending data...")
s.send(image_bytes) # non-blocking send
#
# wait till print ends
s.send(ENGY)  # get battery energy
a = s.recv(3)
print("Energy ", int(a[2]), "%")

# close bluetooth connection
s.close()
利用例
D:>python -m M02S fn.jpg

Poooli L3 プリンタ
Poooli L3 プリンタは 2 階調 bitmap に加え、6 階調程度のグレースケール bitmap を出力できる。ここではまず 2 階調 bitmap 用プログラムを作り、それを改変してグレースケール用のプログラムを作ることとした。
Poooli 2 階調 bitmap
Poooli の場合、画像データを miniLZO によって圧縮しているので、これを共有ライブラリとしてコンパイルしておく必要がある。Windows の場合 VC++対応にするのは煩雑なので MinGW の gcc に頼ることにした。
wget http://www.oberhumer.com/opensource/lzo/download/minilzo-2.10.tar.gz
tar xvf minilzo-2.10.tar.gz
cd minilzo-2.10
gcc -I. -shared -fPIC -O2 -o minilzo.so minilzo.c
出来た minilzo.so を以下の python スクリプトと同じディレクトリに置く。
miniLZO の利用に関しては、以下のサイトを参考にした。そのままでは Python3 で動かないことと、ワークエリアの取り方などに誤りが見受けられるので、直接の利用はしなかった。
プログラム
import os, sys
import socket
import ctypes
from PIL import Image

Poooli_L3 = ("00:15:82:93:3C:F9", 6) # MAC address, channel

INITIALIZE  = b"\x1b\x1cset mm\x05\x08"
PAPER_TYPE  = b"\x10\x7e\x68\x79\x7d\x0d"
PAPER_WIDTH = b"\x10\x7e\x68\x79\x7a" + b"\xed\x09" # width    ed09h 1248dots, 9d0eh 912dots, 850fh 648
DENSITY     = b"\x10\x7e\x68\x79\x6e" + b"\x46"     # thickness  3Ah 55, 46h 75, 52h 95

args = sys.argv
fn = args[1]
width = 1248 # default 107mm paper

print("Connecting...")
s = socket.socket(socket.AF_BLUETOOTH, socket.SOCK_STREAM, socket.BTPROTO_RFCOMM)
if len(args) == 2:
    s.connect(Poooli_L3)
else:
    width = int(args[2])
#    s.connect((args[3], 1))


# printer initialization
s.send(INITIALIZE)
s.recv(2)
s.send(PAPER_TYPE)
s.recv(2)
s.send(PAPER_WIDTH)
s.recv(2)
# set concentration
s.send(DENSITY)
s.recv(2)
# self test
#s.send(b"\x16\x16\x0D")


# PIL
image = Image.open(fn)
if image.width < image.height:
    image = image.transpose(Image.ROTATE_90)
#
# width 1248/912/576 dots
IMAGE_WIDTH_BITS = width # must be multiple of 8
IMAGE_WIDTH_BYTES = IMAGE_WIDTH_BITS // 8
image = image.resize( size=(IMAGE_WIDTH_BITS, int(image.height * IMAGE_WIDTH_BITS / image.width)) )
#
# black&white dithering
image = image.convert(mode="1")


## print ##
lzo = ctypes.cdll.LoadLibrary('./minilzo.so')
wk  = ctypes.create_string_buffer(16384 * 8) # 64bit pointer
#
mx = image.width // 8
my = 120
print("sending data...")
for ky in range(image.height // my + 1) :
    nmy = my
    if ky == image.height // my:
        nmy = image.height % my
        if nmy == 0:
            exit
    image_bytes = b""
    for iy in range(nmy):
        for ix in range(mx):
            byte = 0
            for bit in range(8):
                if image.getpixel( (ix * 8 + bit, iy + ky*my) )  == 0:
                    byte |= 1 << (7 - bit)
            image_bytes += byte.to_bytes(1, "little")
    #
    # miniLZO compress
    buff = ctypes.create_string_buffer(image_bytes)
    ni = ctypes.c_int(len(buff))
    no_max = len(buff) + len(buff) // 16 + 64 + 3
    out = ctypes.create_string_buffer(no_max)
    no = ctypes.c_int(len(out))
    iret = lzo.lzo1x_1_compress(ctypes.byref(buff), ni, ctypes.byref(out), ctypes.byref(no), ctypes.byref(wk))
    lzno = no.value
    image_lzo = out[:lzno]
    #
    ## send to printer;  all data must be XORed with 13 (\x0d)
    mxxor  = mx  ^ (256 * 13 + 13)
    nmyxor = nmy ^ (256 * 13 + 13)
    lzno_xor = lzno ^ (((13 * 256 + 13) * 256 + 13) * 256 + 13)
    s.send(b"\x10\x7b\x3d\x3d")                           # print 1bit BMP command
    s.send(   mxxor.to_bytes(2, byteorder="little"))      # width
    s.send(  nmyxor.to_bytes(2, byteorder="little"))      # height
    s.send(lzno_xor.to_bytes(4, byteorder="little"))      # compressed data length
    tmp = b""                                             # compressed data
    for ib in range(no.value):
        tmp += (image_lzo[ib] ^ 13).to_bytes(1, "little")
    s.send(tmp)


## wait till print ends
#s.send(b"\x16\x1f\x69") # get info
s.send(b"\x16\x1f\x7e") # get status
a = s.recv(16)
print("Energy ", int(a[3]), "%")

## close bluetooth connection
s.close()
実行例
python3 -m Poooli.py fn.jpg
Poooli Grayscale
Grayscale の場合 CRC32 が必要になるので binascii ライブラリ中の crc32 ルーチンを用いた。しかしながら以前 Fortran で書いたものと初期値の扱いに違いがあり、初期値のビットを反転させる必要があった。(-1 ^ 489490 = FFFFFFFFh ^ 489490)
プログラム
プログラムとしては階調を付けた画像の出力は出来たが、Poooli L3 プリンタは6~7階調しかないので、単純に PIL の処理で階調を落とすとグラデーションなどがガタガタになってしまった。何かもうひと工夫が必要と思われる。
import os, sys
import binascii
import socket
import ctypes
from PIL import Image, ImageOps

Poooli_L3 = ("00:15:82:93:3C:F9", 6) # MAC address, channel

INITIALIZE  = b"\x1b\x1cset mm\x05\x08"
PAPER_TYPE  = b"\x10\x7e\x68\x79\x7d\x0d"
PAPER_WIDTH = b"\x10\x7e\x68\x79\x7a" + b"\xed\x09" # width    ed09h 1248dots, 9d0eh 912dots, 850fh 648
DENSITY     = b"\x10\x7e\x68\x79\x6e" + b"\x46"      # thickness  3Ah 55, 46h 75, 52h 95

args = sys.argv
fn = args[1]
width = 1248 # default 107mm paper

print("Connecting...")
s = socket.socket(socket.AF_BLUETOOTH, socket.SOCK_STREAM, socket.BTPROTO_RFCOMM)
if len(args) == 2:
    s.connect(Poooli_L3)
else:
    width = int(args[2])
#    s.connect((args[3], 1))


# printer initialization
s.send(INITIALIZE)
s.recv(2)
s.send(PAPER_TYPE)
s.recv(2)
s.send(PAPER_WIDTH)
s.recv(2)
# set concentration
s.send(DENSITY)
s.recv(2)
# self test
#s.send(b"\x16\x16\x0D")


# PIL
image = Image.open(fn)
if image.width < image.height:
    image = image.transpose(Image.ROTATE_90)
#
# width 1248/912/576 dots
IMAGE_WIDTH_BITS = width # must be multiple of 8
IMAGE_WIDTH_BYTES = IMAGE_WIDTH_BITS // 8
image = image.resize( size=(IMAGE_WIDTH_BITS, int(image.height * IMAGE_WIDTH_BITS / image.width)) )
#
# black&white dithering
image = image.convert(mode="L") # 8bit grayscale
depth = 7
image = image.quantize(depth)
#ImageOps.posterize(image, 2)
#image.show()

## print ##
lzo = ctypes.cdll.LoadLibrary('./minilzo.so')
wk  = ctypes.create_string_buffer(16384 * 8) # 64bit pointer
#
mx = image.width // 8
ny = image.height
print("sending data...")
for iy in range(ny):
    if iy % 100 == 0:
        print(100 * iy // ny, "%" )
    image_bytes = b""
    for ik in range(depth - 2):
        for ix in range(mx):
            byte = 0
            for bit in range(8):
                if image.getpixel( (ix * 8 + bit, iy) ) > ik:
                    byte |= 1 << (7 - bit)
                  #  print(ik, image.getpixel( (ix * 8 + bit, iy) ))
            image_bytes += byte.to_bytes(1, "little")

    # miniLZO compress
    buff = ctypes.create_string_buffer(image_bytes)
    ni = ctypes.c_int(len(buff) - 1)
    no_max = len(buff) + len(buff) // 16 + 64 + 3
    out = ctypes.create_string_buffer(no_max)
    no = ctypes.c_int(len(out))
    iret = lzo.lzo1x_1_compress(ctypes.byref(buff), ni, ctypes.byref(out), ctypes.byref(no), ctypes.byref(wk))
    lzno = no.value
    image_lzo = b"\x12\x78\x07" + iy.to_bytes(2, byteorder="little") + lzno.to_bytes(4, byteorder="little")
    image_lzo += out[:lzno]
    #
    # crc32
    icrc32 = binascii.crc32(image_lzo, -1 ^ 489490)
    icrc32_xor = icrc32 ^ (((13 * 256 + 13) * 256 + 13) * 256 + 13)

    ## send to printer;  all data must be XORed with 13 (\x0d)
    tmp = b""                                             # compressed data
    for ib in range(no.value + 9):
        tmp += (image_lzo[ib] ^ 13).to_bytes(1, "little")
    s.send(tmp)
    s.send(icrc32_xor.to_bytes(4, byteorder="little"))
# end of grayscale data
print("sent...")
s.send(b"\x1F\x75\x04")
ny_xor = (ny - 1) ^ (((13 * 256 + 13) * 256 + 13) * 256 + 13)
#
s.send(ny_xor.to_bytes(4, byteorder="little"))
a = s.recv(10)
print(a[:4])
a = s.recv(12)
print(a[5:11])
## wait till print ends
#s.send(b"\x16\x1f\x69") # get info
s.send(b"\x16\x1f\x7e")  # get status
a = s.recv(16)
print("Energy ", int(a[3]), "%")

## close bluetooth connection
s.close()
出力例
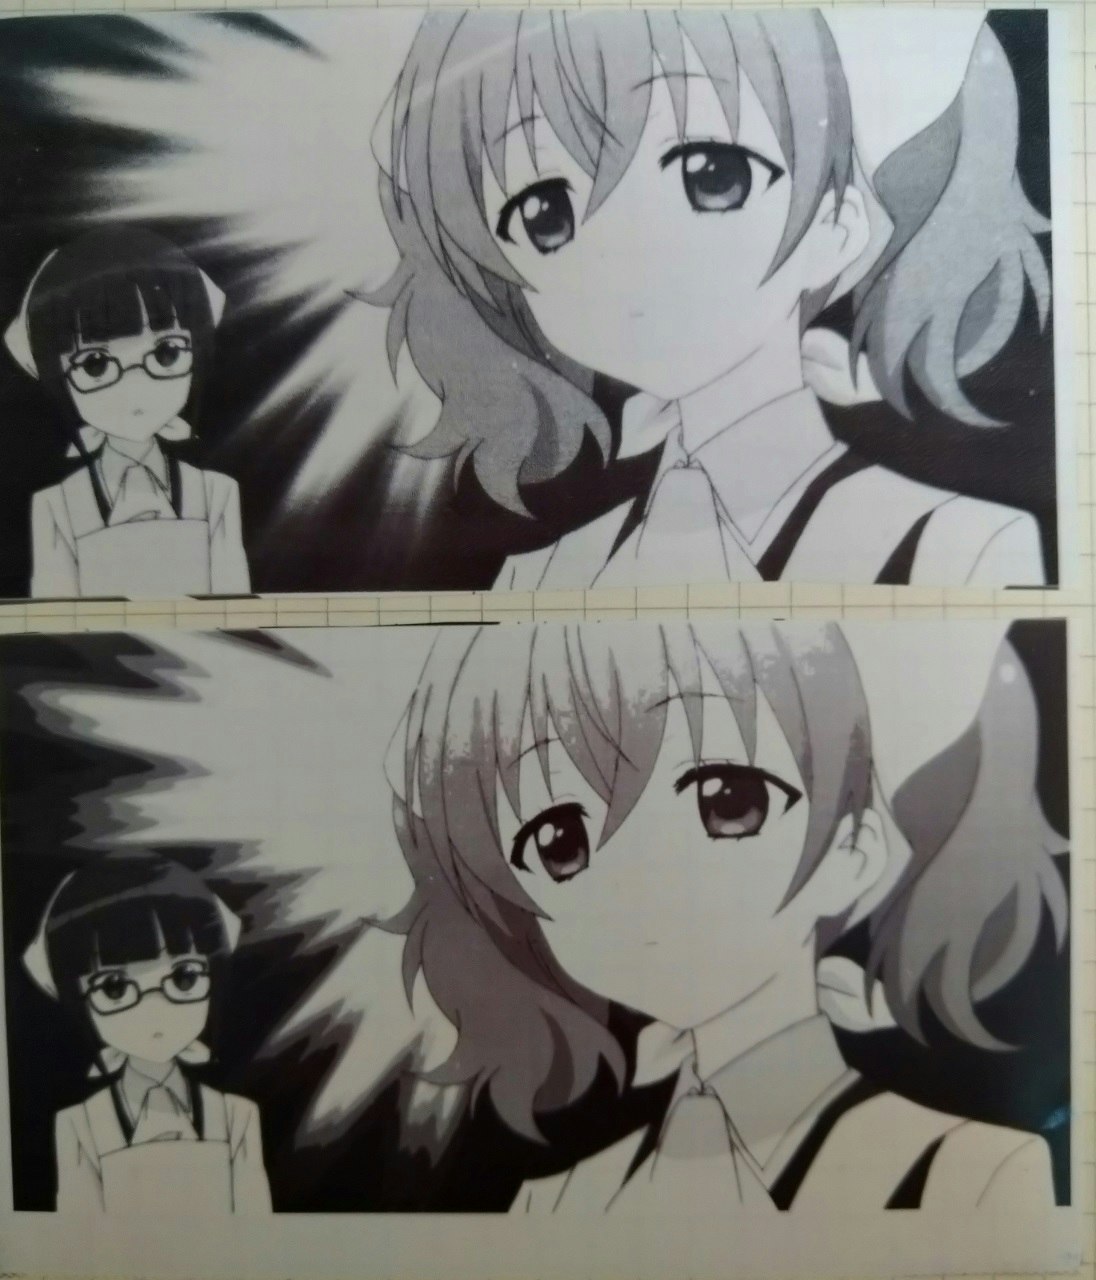
上図. 2 値 bitmap (Dithering 処理)
下図. 6 値 grayscale bitmap
Mac OS 12.3 (Bluetooth LE)
Mac OS 12 は Bluetooth 利用に問題があるらしく、少なくとも私の環境からは Python の socket が利用できなかった。ネット掲示板などを見ると OS12.3 あたりから python の Bluetooth LE ライブラリの bleak が使えるようだったので、以下の記事を参考に試してみた。
必要な UUID は LightBlue というスマホアプリで調べた。
プログラムは、簡単のためまず Phomemo M02S 用のプログラムを作った。Poooli 用はわずかな改造で済むはずである。
プログラム Phomemo M02S
非同期 I/O になっているため、プリンタの出力が終わる迄 bluetooth 接続が切れないように同期を取らなければならないが、よく分からないので write_gatt_char に response=True の optional 引数を与えてみた。
import asyncio
import platform
import os, sys
from PIL import Image
from bleak import BleakClient

async def run(address, loop):
    async with BleakClient(address, loop=loop) as client:
        x = await client.is_connected()
        print("Connected: {0}".format(x))

        ESC = b"\x1B"
        GS  = b"\x1D"
        US  = b"\x1F"

        INIT = ESC + b"@"
        BM   = GS  + b"v" + b"0" + b"\x00"
        ENGY = US  + b"\x11" + b"\x08"

        args = sys.argv
        fn = args[1]
        width = 576 # default
# printer initialization
        await client.write_gatt_char("0000ff02-0000-1000-8000-00805f9b34fb", INIT)

# set concentration coefficiennt # standard 64, M02S 96
        await client.write_gatt_char("0000ff02-0000-1000-8000-00805f9b34fb", US + b"\x11\x37" + b"\x96")

# set concentration # concenttration 01, 03, 04
        await client.write_gatt_char("0000ff02-0000-1000-8000-00805f9b34fb", US + b"\x11\x02" + b"\x03")

        # PIL
        image = Image.open(fn)
        if image.width > image.height:
              image = image.transpose(Image.ROTATE_90)

        # width M02S 576 dots
        IMAGE_WIDTH_BITS = width # must be multiple of 8
        IMAGE_WIDTH_BYTES = IMAGE_WIDTH_BITS // 8
        image = image.resize( size=(IMAGE_WIDTH_BITS, int(image.height * IMAGE_WIDTH_BITS / image.width)) )

        # black&white printer: dithering
        image = image.convert(mode="1")

        # Header
        await client.write_gatt_char("0000ff02-0000-1000-8000-00805f9b34fb", BM)
        await client.write_gatt_char("0000ff02-0000-1000-8000-00805f9b34fb", IMAGE_WIDTH_BYTES.to_bytes(2, byteorder="little"))
        await client.write_gatt_char("0000ff02-0000-1000-8000-00805f9b34fb", image.height.to_bytes(2, byteorder="little"))

        print("formatting data...")
        image_bytes = b""
        for iy in range(image.height):
            for ix in range(int(image.width / 8)):
                byte = 0
                for bit in range(8):
                    if (image.getpixel( (ix * 8 + bit, iy) )  == 0 ):
                        byte |= 1 << (7 - bit)
                image_bytes += byte.to_bytes(1, "little")


    # send BMP data to printer
        print("Data sending...")
        await client.write_gatt_char("0000ff02-0000-1000-8000-00805f9b34fb", image_bytes, response=True)

    #    await asyncio.sleep(15.0, loop=loop)

if __name__ == "__main__":
    address = "00:15:83:54:A2:7F" #"4C71A23D-6B52-777C-A288-51B98A0CA15F" # M02S

    loop = asyncio.get_event_loop()
    loop.run_until_complete(run(address, loop))
まとめ
Poooli L3 プリンタをクロスプラットフォームで利用することを目的として、Python からの Bluetooth 出力プログラムを作った。まず ESC/POS 規格に従っている Phomemo M02S プリンタに対して、socket 経由で bluetooth を利用するプログラムを作り、これを出発点とした。Poooli L3 プリンタは 2 階調 bitmap とグレイスケール bitmap と二通りの出力が可能なので、それぞれにプログラムを作った。Mac の場合 socket から bluetooth が利用できなかったので、別に bleak ライブラリを利用することを試み、Phomemo M02S プリンタからの出力に成功した。これを Poooli L3 用に改変するのは容易なはずである。