VonageコミュニケーションAPIを使ってみた、Vonageのことなら何でも共有しよう! by Vonage Advent Calendar 2022 の23日目です。
はじめに
今回はReactでの動作確認のみでNext.jsでは動作しませんのでご了承ください。
Vonageとは
VonageとはCPaaS(Communication Platform as a Service)という物の一種でビデオ通話や音声通話などをはじめとしたコミュニケーションにまつわる技術をサービスとしてを提供しています。
また、歴史的経緯からVideo APIとそれ以外でサービスが分かれています。
そのため、Video APIとその他のAPIで同じアカウントを使うことはできません。
提供機能一覧
- Video API デベロッパーセンター
- Vonage Video API:WebRTCプラットフォーム(APIとSDK)
- Vonage Video API Tools:Vonageが提供している開発・デバッグツール
- Vonage デベロッパーセンター
- Vonage Verify API:二要素認証API
- Vonage Voice API:PSTN・SIP・Websocket対応できるプログラマブルボイスAPI
- Vonage In-App SDK:アプリ上のメッセージ・音声(PSTN・SIP・Websocketも対応)SDK
- Vonage SMS API:SMSの送受信API
- Vonage Messaging API:Facebook Messenger、WhatsApp、Viber等の送受信API
- Vonage Management API:上記APIの利用レポート・アカウント管理・電話番号管理API
準備
Vonageアカウントの作成はこちらを参考にしてください(めんどかった)
プロジェクトの作成
アカウント登録が済んだらダッシュボードに行ってください。
そしたら画像のような画面が表示されると思います。
(表示されない場合は左側にある「Create Projectをクリックしてください。」) 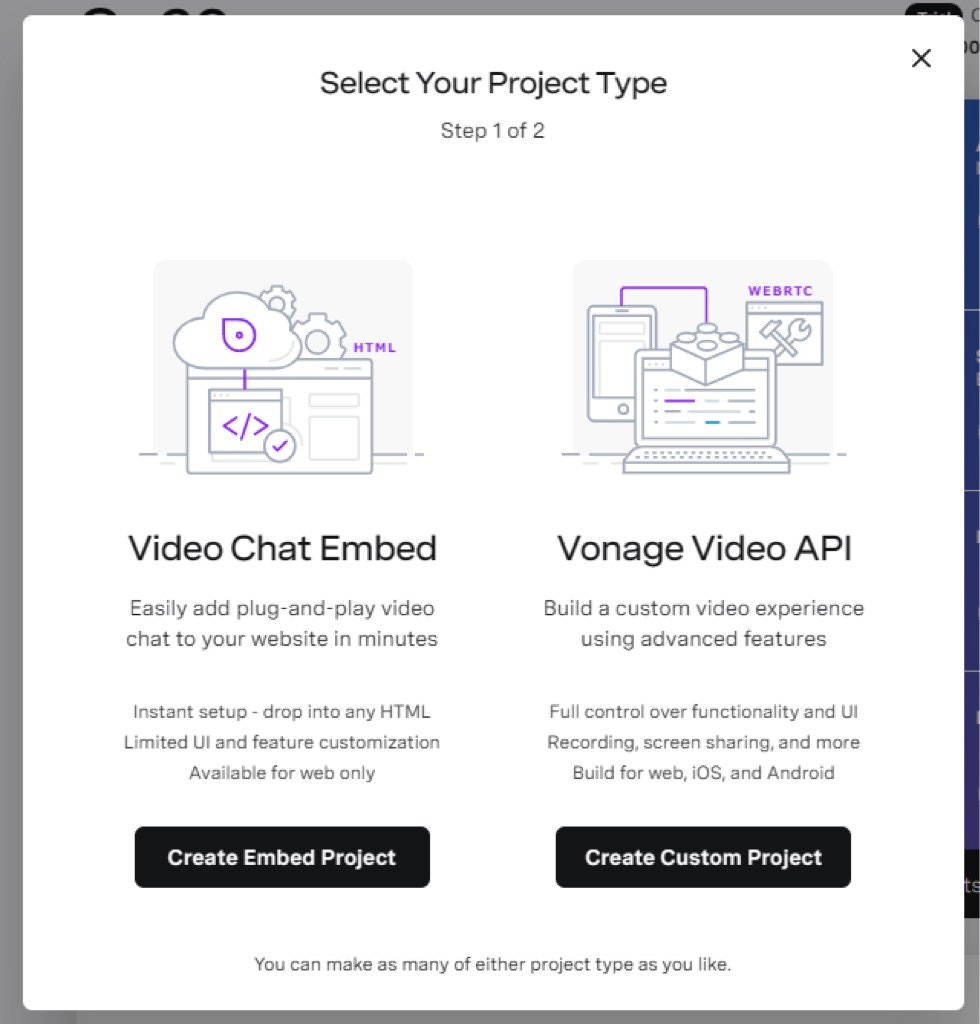 今回は自分でUIを作っていくので右側の「Vonage Video API」を選択。
続いて、適当なProject nameを指定してください。
ここではコーデックも指定できます。
今回はV8で進めていきます。
次に「Create」を選択。
これでプロジェクトを作成できました。
部屋の作成とAPIキーの取得
「View Project」を選択してダッシュボードに移動します。
表示されたプロジェクトのPROJECT API KEYをメモしておいてください。これをあとで使います。
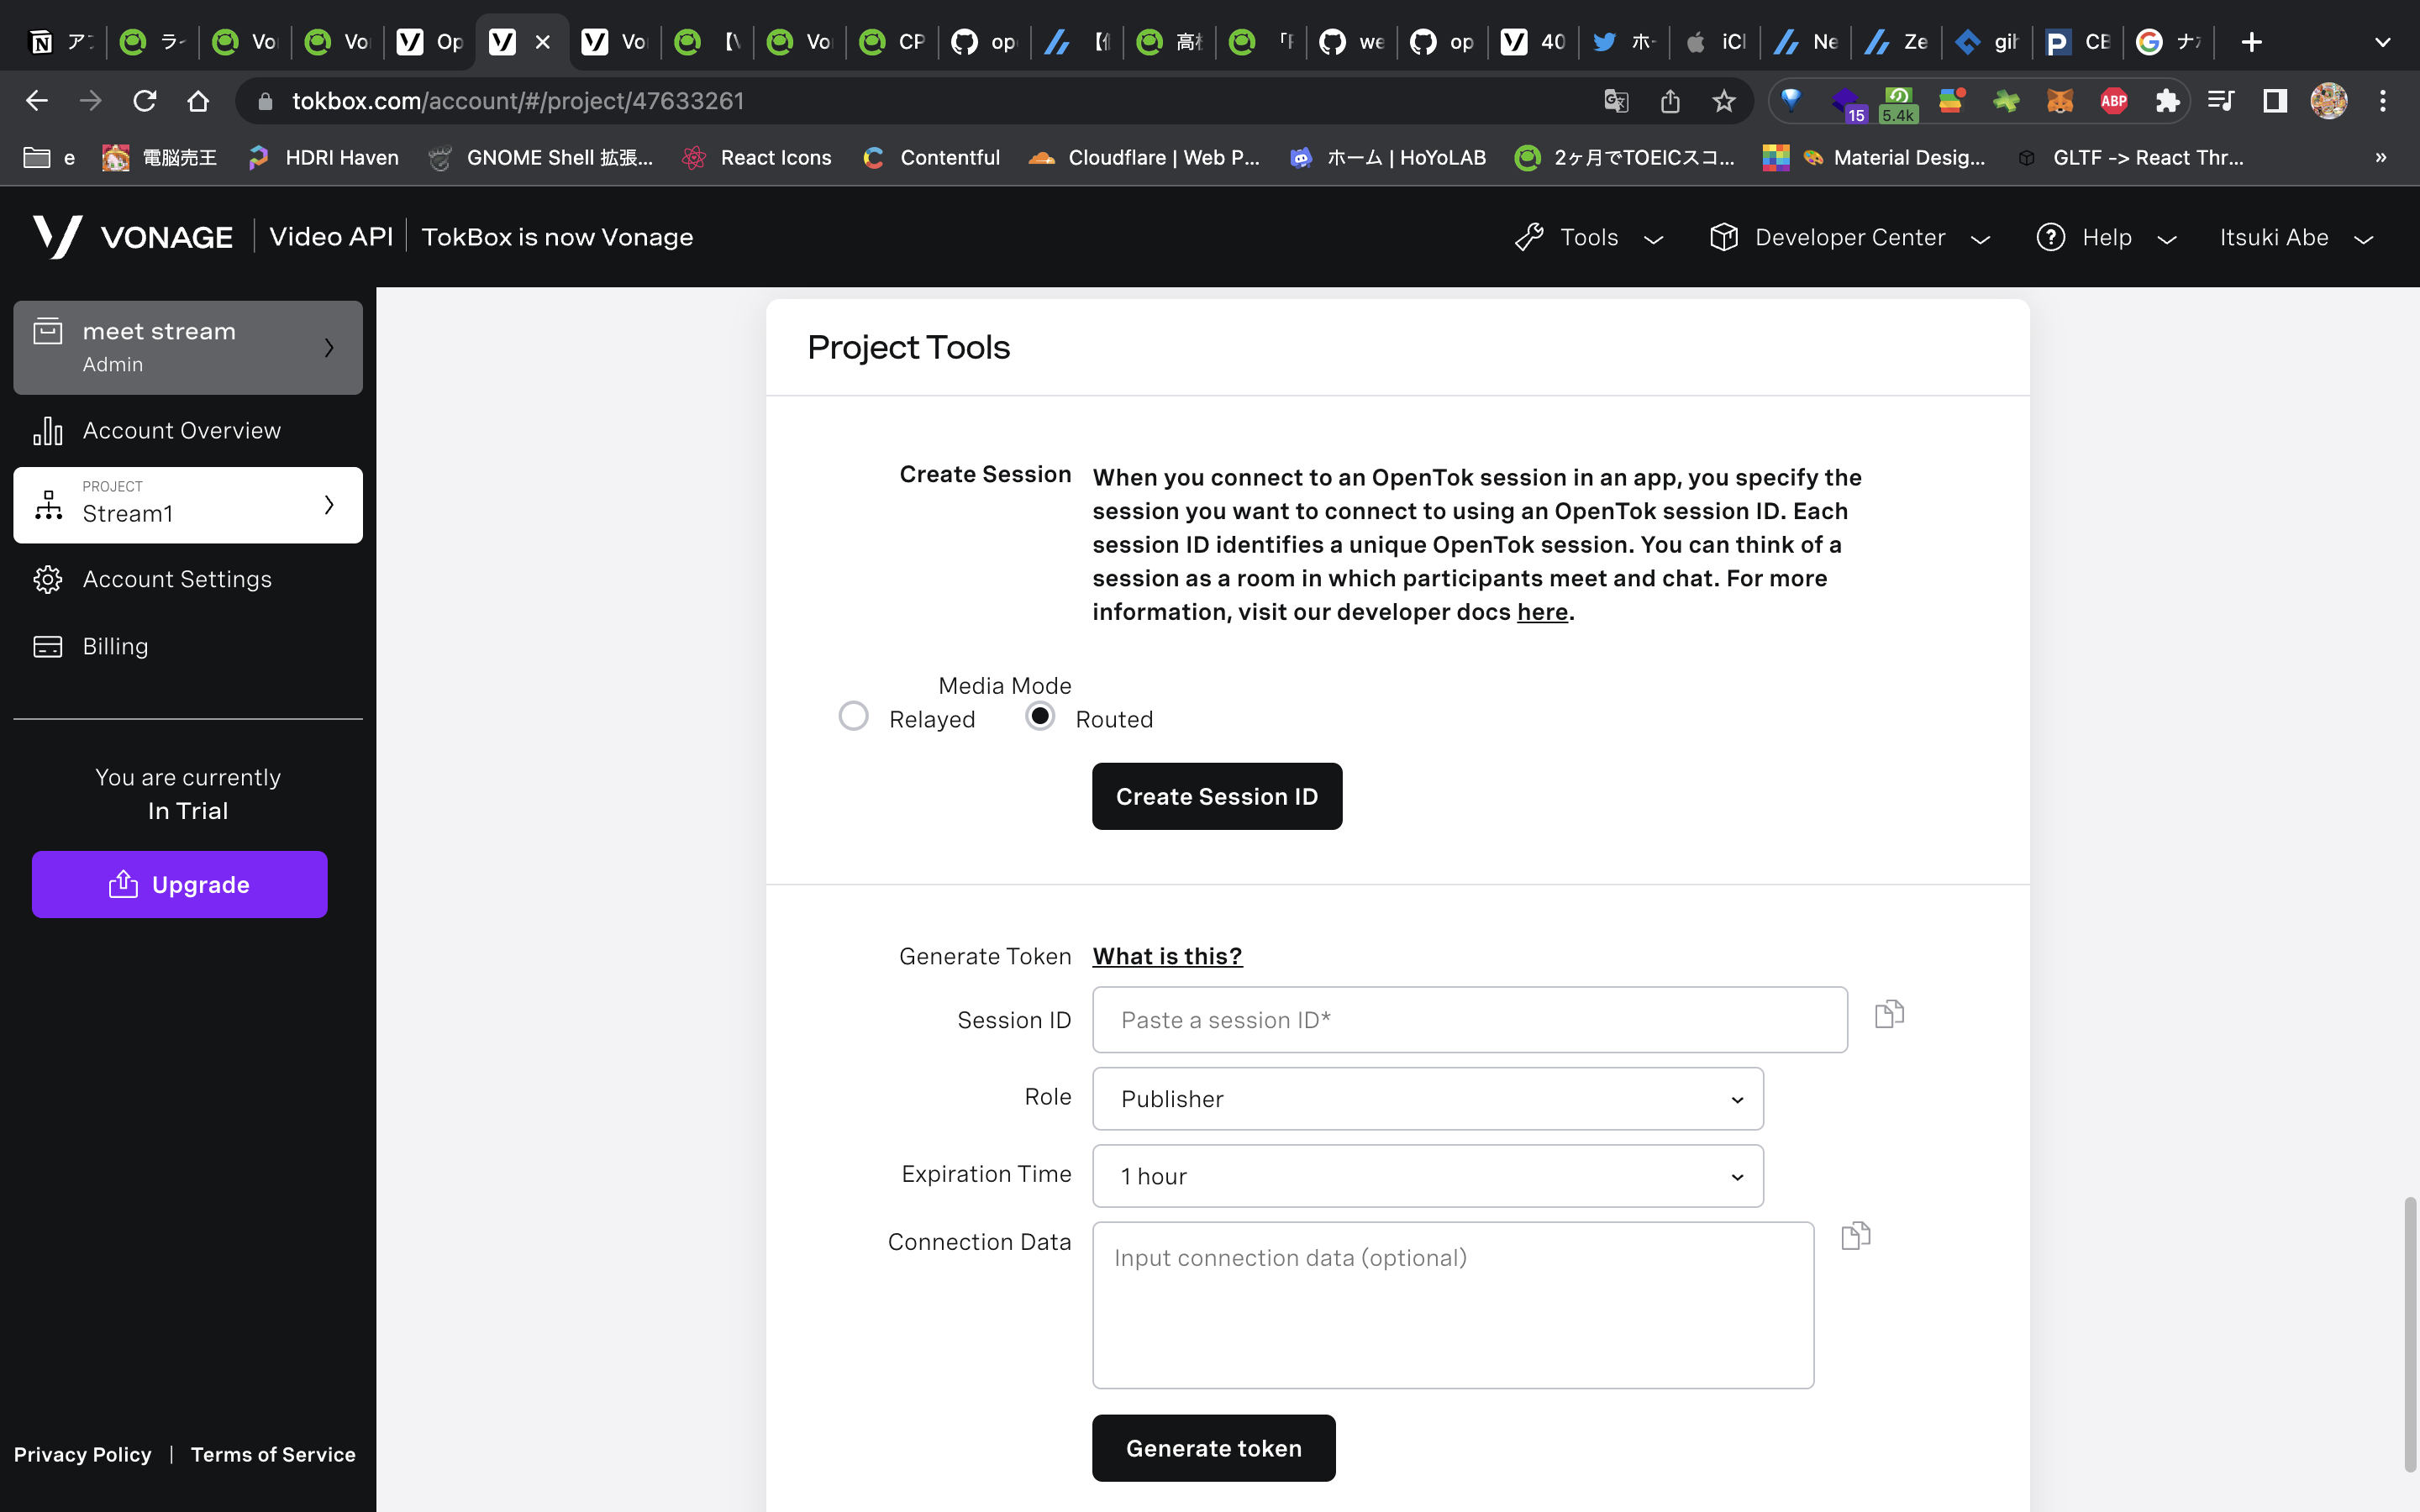
ページを下にスクロールしていくと「Project Tools」という項目があります。
ここで「Create Session ID」を選択してSession IDを作成します。
Sessionというのは、参加者が会話などをするための仮想的な部屋のような物です。
次に、Sessionに接続するためのトークンを生成します。先ほど生成したSession IDをその下にある入力フォームに貼り付けます。「Expiration Time」は、トークンの有効期間です。この有効期間を過ぎると、Sessionに接続できなくなります。
Session IDを貼り付けて、Expiration Timeを設定したら、「Generate token」を選択します。
生成したSession IDとトークンはあとで使うのでコピーしておいてください。
Reactアプリの作成
Reactアプリを作っていきます。ローカルの任意のディレクトリで、以下のコマンドを実行します。meet1 の部分は自由に変更してください。アプリを作成するディレクトリの名前ですね。
`
npx create-react-app meet1
cd meet1 && yarn add @vonage/video-publisher @vonage/video-subscribers react-icons
APIキーの読み込み
REACT_APP_TOKBOX_API_KEY=XXXX
REACT_APP_TOKBOX_SESSION_ID=XXXX
REACT_APP_TOKBOX_TOKEN='XXXX'
映像を表示
OpentokのコンポーネントをWeb Components経由で読み込みます。
ここでTypescriptを使う場合はWeb Componentsを読み込むのがちょっと面倒です。
また、Next.jsなどでSSRする場合もそのままではできません。(普通にReactコンポーネントにして欲しい)
import React, { useRef, useEffect } from 'react';
import './App.css';
import '@vonage/video-publisher/video-publisher.js';
import '@vonage/video-subscribers/video-subscribers.js';

// APIキーたちを.env.localから読み込み
const VONAGE_API_KEY = process.env.REACT_APP_VONAGE_API_KEY
const VONAGE_SESSION_ID = process.env.REACT_APP_VONAGE_SESSION_API
const VONAGE_TOKEN = process.env.REACT_APP_VONAGE_TOKEN

const App = () => {
  // Web Componentsを参照
  const publisher = useRef(null);
  const subscribers = useRef(null);

  useEffect(() => {
    const OT = window.OT;

    // Opentokセッションの初期化
    const session = OT.initSession(VONAGE_API_KEY, VONAGE_SESSION_ID);

    // Web Componentsのセッションとトークンの設定
    publisher.current.session = session;
    publisher.current.token = VONAGE_TOKEN;
    subscribers.current.session = session;
    subscribers.current.token = VONAGE_TOKEN;
  });

  return (
    <div className="App">
      {/* Web Componentsで読み込んでいます */}
      <video-subscribers width="35svh" height="35svh" ref={subscribers} />
      <video-publisher width="20vw" height="15svh" ref={publisher} />
    </div>
  );
}

export default App;
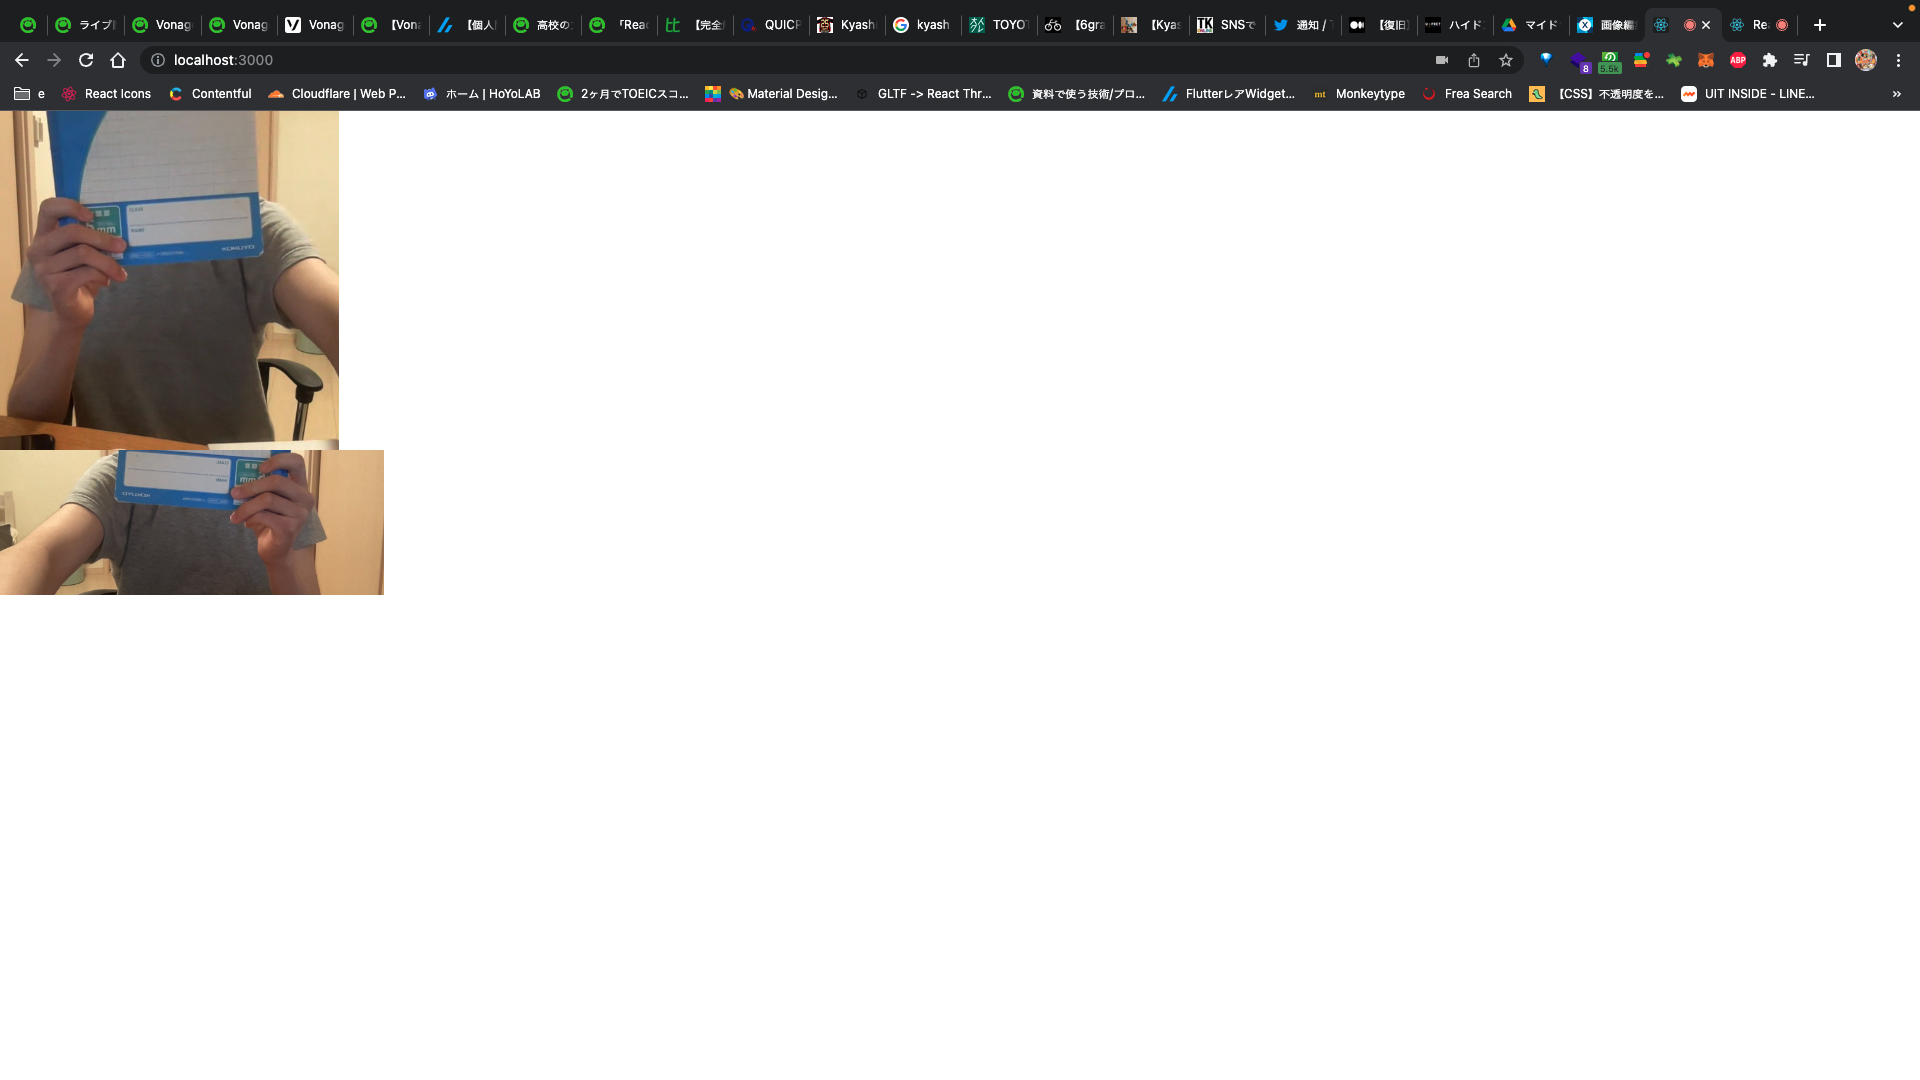
ここではVideo APIの要素を初期化してWeb Componentsでそれぞれ自分の映像とその他の参加者の映像を呼び出しています。
あと、同じカメラを使用しているため二つとも同じように見えるかもしれません。
UI作成
これだけではクッソ見づらいのでちょっとそれっぽくします。
ここは特に言う事もないのでコードだけ載せます。
import React, { useRef, useEffect } from 'react';
import './App.css';
import '@vonage/video-publisher/video-publisher.js';
import '@vonage/video-subscribers/video-subscribers.js';
// アイコンたち
import { HiVideoCamera, HiVideoCameraSlash } from "react-icons/hi2"
import { IoIosMicOff, IoIosMic } from "react-icons/io"

// APIキーたちを.env.localから読み込み
const VONAGE_API_KEY = process.env.REACT_APP_VONAGE_API_KEY
const VONAGE_SESSION_ID = process.env.REACT_APP_VONAGE_SESSION_API
const VONAGE_TOKEN = process.env.REACT_APP_VONAGE_TOKEN

const App = () => {
  // Web Componentsを参照
  const publisher = useRef(null);
  const subscribers = useRef(null);

  useEffect(() => {
    const OT = window.OT;

    // Opentokセッションの初期化
    const session = OT.initSession(VONAGE_API_KEY, VONAGE_SESSION_ID);

    // Web Componentsのセッションとトークンの設定
    publisher.current.session = session;
    publisher.current.token = VONAGE_TOKEN;
    subscribers.current.session = session;
    subscribers.current.token = VONAGE_TOKEN;
  });

  return (
    <div className="App">
      <section className="App-section-subscribers">
        <video-subscribers width="37.5vw" height="37.5svh" ref={subscribers} />
      </section>
      <section class="App-section-publisher">
        <video-publisher width="20vw" height="15svh" ref={publisher} />
      </section>
      <section className="App-section-tools">
        <button>
          <HiVideoCamera />
        </button>
        <button>
          <IoIosMic />
        </button>
      </section>
    </div>
  );
}

export default App;
.App-section-subscribers {
  height: 75svh;
  width: 100%;
  background: #000;
  display: flex;
  justify-content: center;
  padding-top: 12px;
  padding-bottom: 12px;
}

.App-section-publisher {
  height: 15svh;
  display: flex;
  justify-content: center;
  width: 100%;
  background: #000;
}

.App-section-tools {
  background: #000;
  width: 100%;
  position: absolute;
  bottom: 0;
  height: 10svh;
  display: flex;
  justify-content: center;
  align-items: center;
  gap: 12px;
}

.App-section-tools button {
  font-size: 32px;
  padding: 8px;
  display: flex;
  justify-content: center;
  align-items: center;
  background: none;
  border-radius: 9999px;
  border: none;
  color: #a1a1aa;
  transition: all 0.25s 0s ease;
}

.App-section-tools button:hover {
  background-color: #a1a1aa33;
}

video-subscribers {
  display: flex;
  justify-content: center;
  align-items: center;
  flex-wrap: wrap;
  gap: 6px;
  color: #FFF;
}

.OT_video-element {
  /* 映像をcontainにする */
  object-fit: contain !important;
}
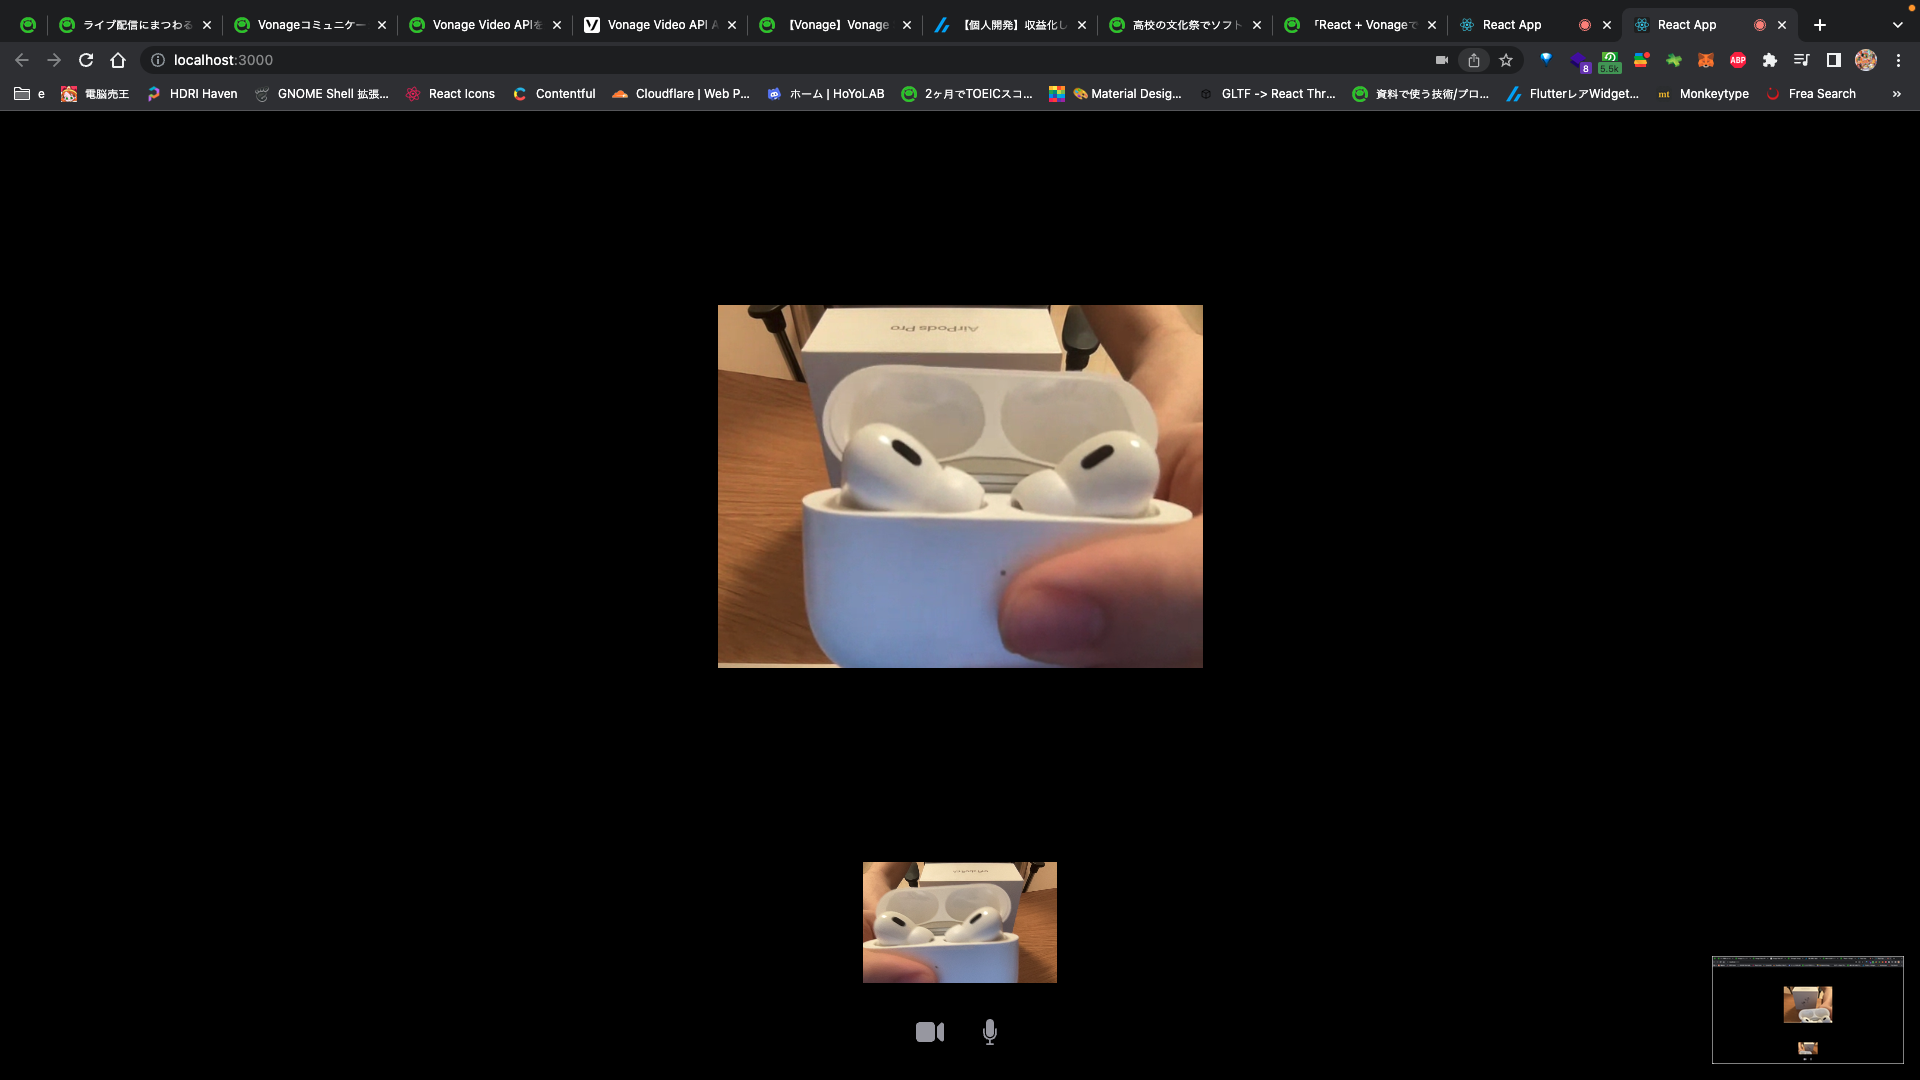
実際の画面
画面オフとかの実装
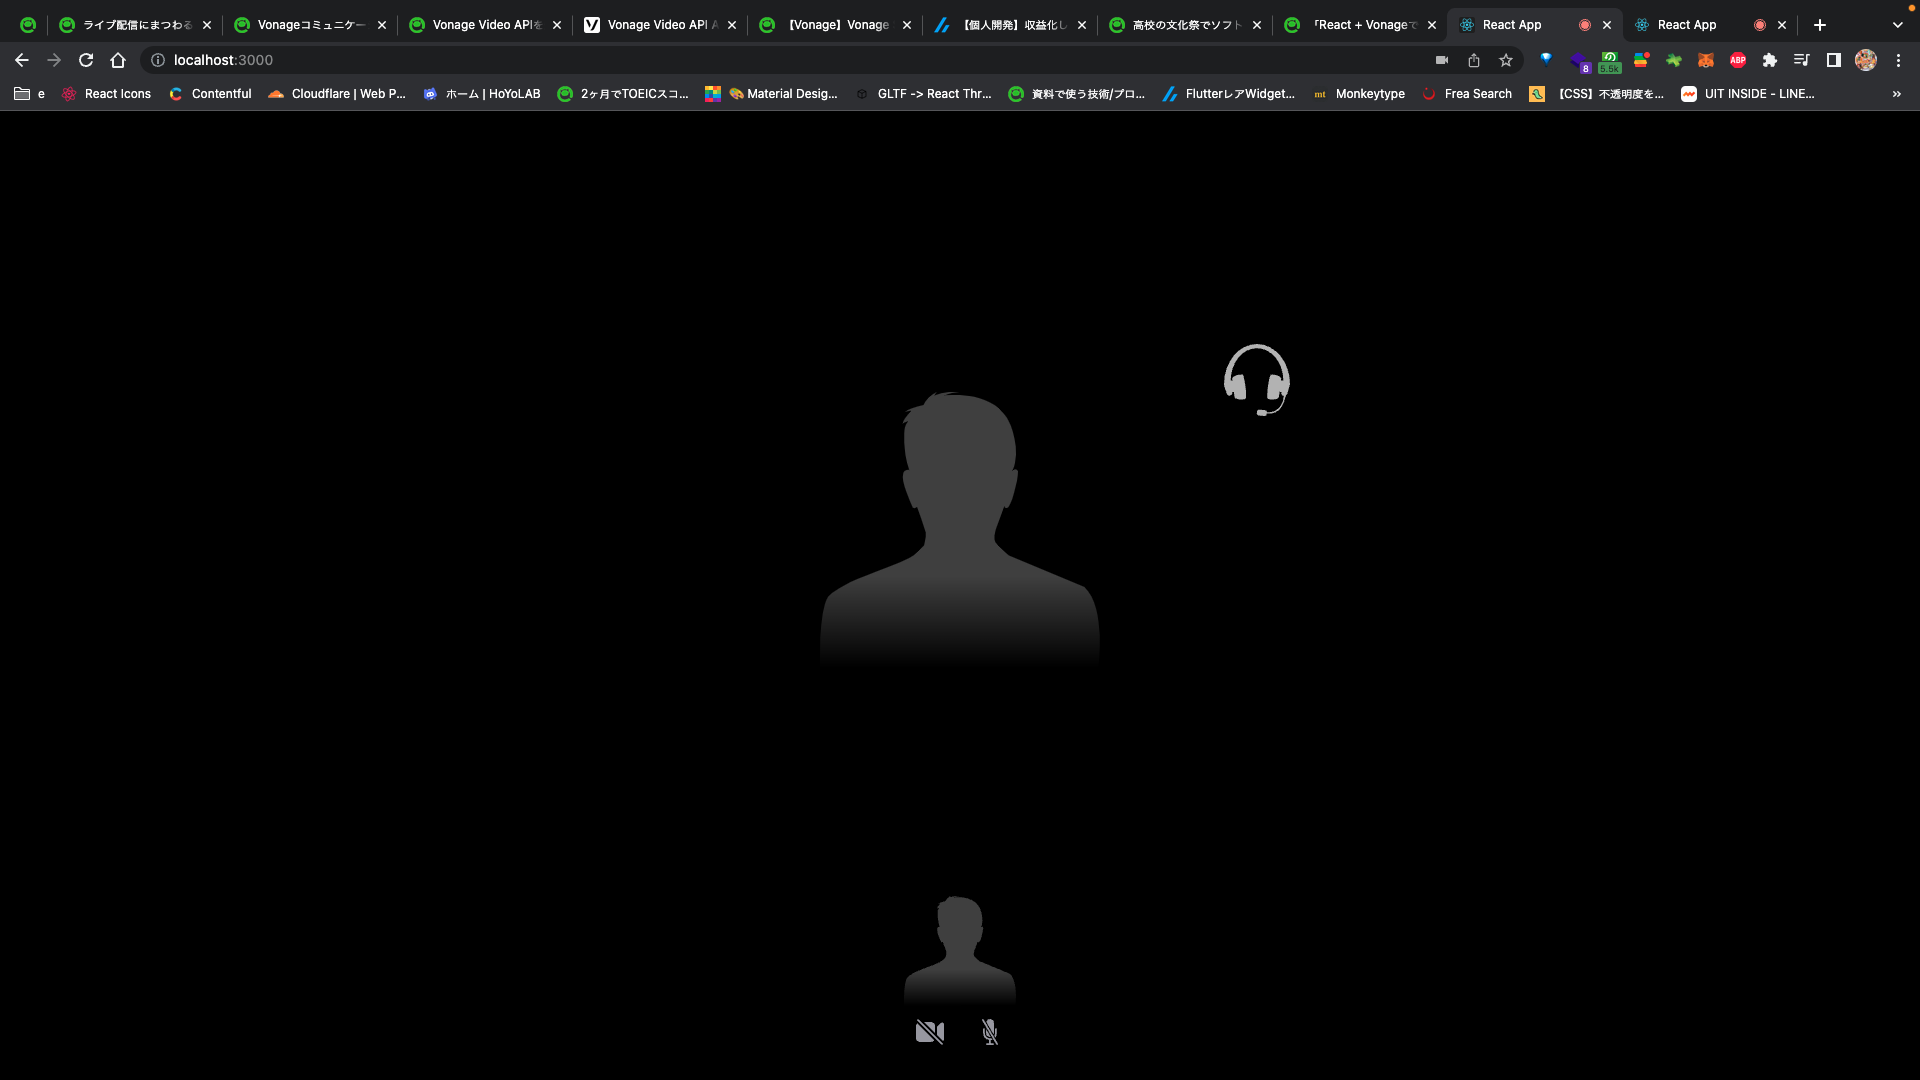
流石にこのままでは画面オフやミュートすらできないのでそういった機能を実装していきます。
めっちゃ簡単です。
import React, { useRef, useEffect, useState } from 'react';
import './App.css';
import '@vonage/video-publisher/video-publisher.js';
import '@vonage/video-subscribers/video-subscribers.js';
import { HiVideoCamera, HiVideoCameraSlash } from "react-icons/hi2"
import { IoIosMicOff, IoIosMic } from "react-icons/io"

// APIキーたちを.env.localから読み込み
const VONAGE_API_KEY = process.env.REACT_APP_VONAGE_API_KEY
const VONAGE_SESSION_ID = process.env.REACT_APP_VONAGE_SESSION_API
const VONAGE_TOKEN = process.env.REACT_APP_VONAGE_TOKEN

const App = () => {
  // 切り替えボタンの表示管理
  const [videoState, setVideoState] = useState(true)
  const [audioState, setAudioState] = useState(true)
  // Web Componentsを参照
  const publisher = useRef(null);
  const subscribers = useRef(null);

  const toggleVideo = () => {
    setVideoState(!videoState)
    // 画面オンオフ
    publisher.current.toggleVideo();
  };

  const toggleAudio = () => {
    setAudioState(!audioState)
    // ミュート
    publisher.current.toggleAudio();
  };

  useEffect(() => {
    const OT = window.OT;

    // Opentokセッションの初期化
    const session = OT.initSession(VONAGE_API_KEY, VONAGE_SESSION_ID);

    // Web Componentsのセッションとトークンの設定
    publisher.current.session = session;
    publisher.current.token = VONAGE_TOKEN;
    subscribers.current.session = session;
    subscribers.current.token = VONAGE_TOKEN;
  });

  return (
    <div className="App">
      <section className="App-section-subscribers">
        <video-subscribers width="37.5vw" height="37.5svh" ref={subscribers} />
      </section>
      <section class="App-section-publisher">
        <video-publisher width="20vw" height="15svh" ref={publisher} />
      </section>
      <section className="App-section-tools">
        <button onClick={toggleVideo}>
          {
            /* 切り替えステートによって変更される */
            videoState ? <HiVideoCamera /> : <HiVideoCameraSlash />
          }
        </button>
        <button onClick={toggleAudio}>
          {audioState ? <IoIosMic /> : <IoIosMicOff />}
        </button>
      </section>
    </div>
  );
}

export default App;
最後に
今回使ったライブラリはとても簡単に実装でき、簡単にビデオ通話アプリを作成できるので試しに使ってみる分にはいいライブラリかなと思いました。
ただ、UIのカスタマイズが難しかったり、情報が少なかったりしました。また、ReactコンポーネントではなくWeb Componentsなので対応がめんどくさかったりTypescriptに対応してませんでした。
そのためちゃんと実装する場合はopentok.jsというjavascript向けのSDKを使って実装してみるのがいいのかなと感じました。
今回作成したアプリのリポジトリ: https://github.com/cupmen4800/vnage-video1
