

概要
SiteGuard Server Editionについて
さくらのVPS、さくらのクラウド、さくらの専用サーバでは、EGセキュアソリューションズ株式会社が手掛けるWAF、SiteGuard Server Editionを無料で利用することができる。
通常ライセンスであれば25万円/年が発生するところを無料で使えるのだから、試さない手はない。
今回はさくらのクラウドのサーバーで、SiteGuard Server Editionを有効化してみた。
この記事は解説動画も公開している。
環境
構築した環境は以下の通り:
- OS:Ubuntu 26.04
- Webサーバ:nginx 1.30.4
- Site Guard Server Edition:Ver8.00 Update 3
なお、構築にあたってはパケットフィルタの適用およびKMSキーによるディスク暗号化も施している。
構築
サーバー構築
2コア4GB、ディスク20GBのサーバーに、Ubuntu26.04を入れて動かしていく。
上述の最低限の防御に加え、スタートアップスクリプトでSiteGuard Server Edition、nginxのビルド、Let's EncryptによるHTTPS対応に必要なパッケージをそれぞれインストールする。
画面操作では時間がかかるので、Terraformで構築した。
# サーバ公開鍵認証に用いるキーペアの作成
resource "tls_private_key" "temporary_ssh_key" {
  algorithm = "RSA"
  rsa_bits  = 4096
}

# サーバ公開鍵認証に用いるキーペアの作成
resource "local_sensitive_file" "private_key_file" {
  content  = tls_private_key.temporary_ssh_key.private_key_pem
  filename = ".ssh/id_rsa.pem"
}

resource "sakura_disk" "server_disk" {
  name        = "ディスク"
  description = "SiteGuard Server Editionを適用するサーバのディスク"

  connector            = "virtio"
  encryption_algorithm = "aes256_xts"
  icon_id              = var.ubuntu_icon
  kms_key_id           = sakura_kms.server_encryption_key.id
  plan                 = "ssd"
  size                 = 20
  source_archive_id    = 113801341908
  zone                 = var.zone

  tags = ["SiteGuard"]
}

resource "sakura_kms" "server_encryption_key" {
  name        = "サーバディスク暗号化鍵"
  description = "サーバのディスク暗号化に用いる鍵"
  key_origin  = "generated"

  tags = ["SiteGuard"]
}

resource "sakura_packet_filter" "minimum_filter" {
  name        = "仮運用パケットフィルタ"
  description = "仮運用向けに用いる最低限のパケットフィルタ"
  zone        = var.zone
}

resource "sakura_packet_filter_rules" "rules" {
  packet_filter_id = sakura_packet_filter.minimum_filter.id
  zone             = var.zone

  expression = [
    {
      description      = "SSHアクセスを許可する。必要に応じてIPアドレス制限を設定する。"
      destination_port = "22"
      protocol         = "tcp"
      source_network   = "0.0.0.0/0"
    },
    {
      description      = "SiteGuard Server Edition設定画面へのアクセスを許可する。"
      destination_port = "9443"
      protocol         = "tcp"
      source_network   = "0.0.0.0/0"
    },
    {
      destination_port = "80"
      protocol         = "tcp"
    },
    {
      destination_port = "443"
      protocol         = "tcp"
    },
    {
      protocol       = "udp"
      source_port    = "123"
      source_network = "0.0.0.0/0"
    },
    {
      protocol         = "udp"
      destination_port = "68"
    },
    {
      protocol = "icmp"
    },
    {
      protocol         = "tcp"
      destination_port = "32768-61000"
    },
    {
      protocol         = "udp"
      destination_port = "32768-61000"
    },
    {
      protocol = "fragment"
    },
    {
      protocol    = "ip"
      allow       = false
      description = "登録外の要求を拒否する。"
    }
  ]
}

resource "sakura_script" "sitegurad_requirement_script" {
  name    = "SiteGuard動作環境構築スクリプト"
  class   = "shell"
  content = file("scripts/install_docker.sh")
  icon_id = var.ubuntu_icon

  tags = ["SiteGuard"]
}

resource "sakura_server" "server" {
  name        = "サーバ"
  description = "SiteGuard Server Editionを適用するサーバ"

  commitment       = "standard"
  core             = 2
  disks            = [sakura_disk.server_disk.id]
  icon_id          = var.ubuntu_icon
  interface_driver = "virtio"
  memory           = 4
  tags             = ["@keyboard-us", "SiteGuard"]
  zone             = var.zone

  disk_edit_parameter = {
    hostname            = "test.t-shirotani.jp"
    password_wo         = var.os_password
    password_wo_version = 1
    disable_pw_auth     = true

    ssh_key_ids = [sakura_ssh_key.server_sshkey.id]
    script = [{
      id = sakura_script.sitegurad_requirement_script.id
    }]
  }

  network_interface = [{
    upstream         = "shared"
    packet_filter_id = sakura_packet_filter.minimum_filter.id
  }]
}

resource "sakura_ssh_key" "server_sshkey" {
  name        = "サーバ公開鍵認証用鍵"
  description = "サーバにSSHログインする際に用いる公開鍵"
  public_key  = tls_private_key.temporary_ssh_key.public_key_openssh
}
output "server_ip" {
  description = "サーバのIPアドレス"
  value       = sakura_server.server.ip_address
}
#!/bin/bash
#
# @sacloud-once
# @sacloud-name "SiteGuard Server Edition requirements"
# @sacloud-desc SiteGuard Server Editionの動作に必要なパッケージをインストールします。
#
# @sacloud-require-archive distro-ubuntu

_motd() {
  LOG=$(ls /root/.sacloud-api/notes/*log 2>/dev/null || echo "/var/log/sacloud-startup.log")
  case $1 in
    start)
    echo -e "\n#-- Startup-script is \\033[0;32mrunning\\033[0;39m. --#\n\nPlease check the log file: ${LOG}\n" > /etc/motd
    ;;
    fail)
    echo -e "\n#-- Startup-script \\033[0;31mfailed\\033[0;39m. --#\n\nPlease check the log file: ${LOG}\n" > /etc/motd
    exit 1
    ;;
    end)
    cp -f /dev/null /etc/motd
    ;;
  esac
}

_motd start
set -eux
trap '_motd fail' ERR

cd /root

# 1. パッケージの更新と必須パッケージのインストール
apt-get update && apt-get upgrade -y
# SiteGuard Server Editionの動作に必要
sudo apt -y install unzip make libapr1 libaprutil1 libapr1-dev libaprutil1-dev fontconfig
sudo apt -y install openjdk-21-jre
# nginxのビルドに必要
sudo apt -y install build-essential libssl-dev libpcre2-dev zlib1g-dev
# Let's EncryptによるHTTPS対応に必要
sudo apt -y install snapd
sudo snap install --classic certbot
sudo ln -s /snap/bin/certbot /usr/local/bin/certbot
# 証明書の自動更新に用いるWebroot
sudo mkdir -p /var/www/letsencrypt
# 完了
_motd end
terraform init
terraform apply
5分ほどで構築が完了し、サーバーのグローバルIPアドレスが出力される。
ドメインの紐づけ
任意のドメインを割り当てる。
ドメインの取得先やDNSサーバによって操作方法が異なるので詳述は避ける。
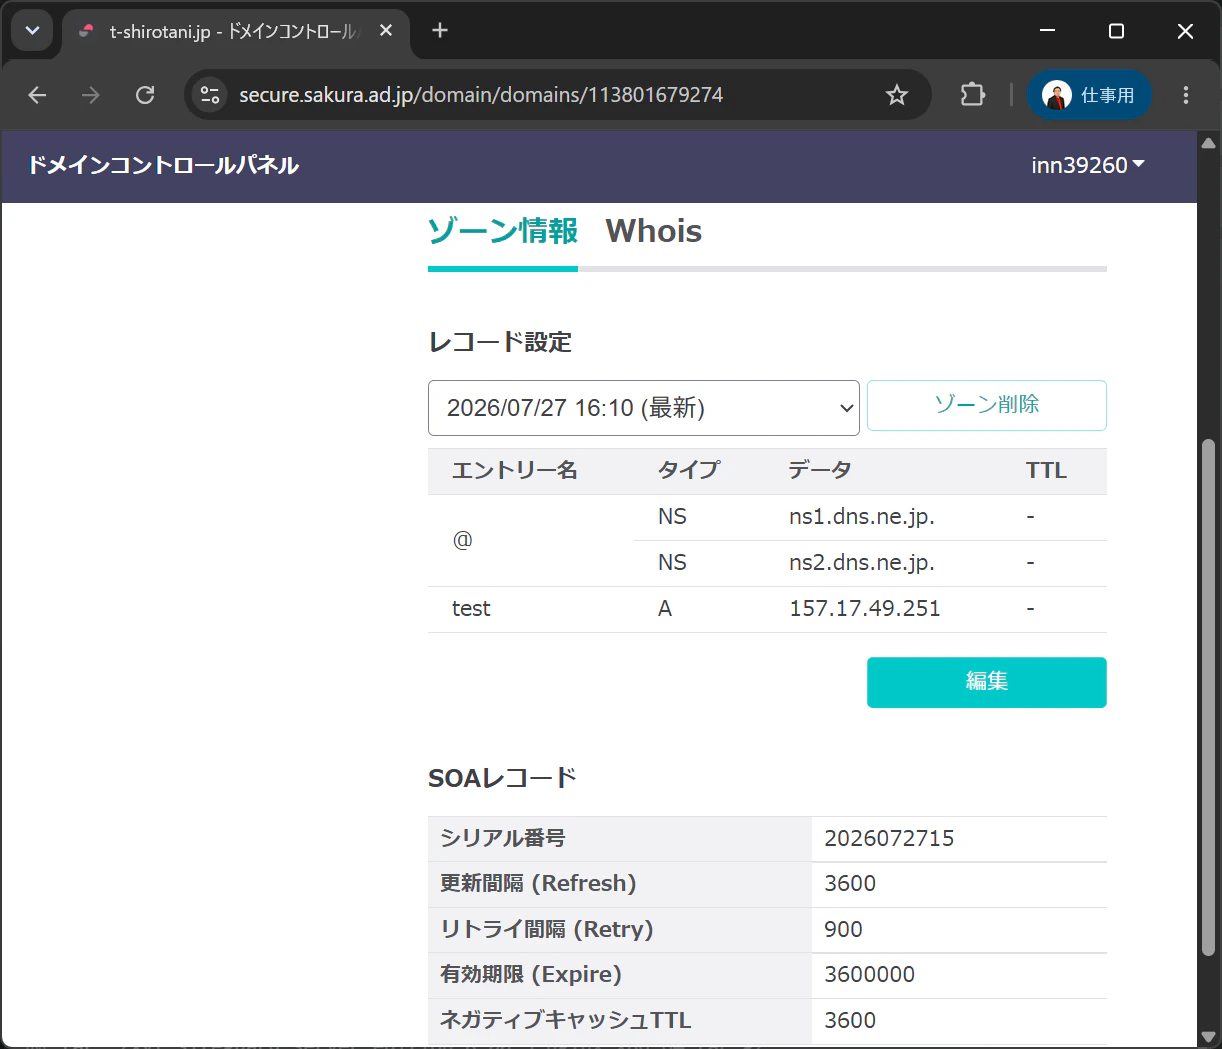
私はさくらのドメインでドメインを取得し、サブドメインのAレコードにサーバーのIPアドレスを設定した。
ビルド・インストール
nginxおよびSiteGuard Server Editionをビルド・インストールしていく。
公開鍵認証を用いて、構築したサーバーにログインする。
ssh -i ./.ssh/id_rsa.pem ubuntu@[サーバーのグローバルIPアドレス]
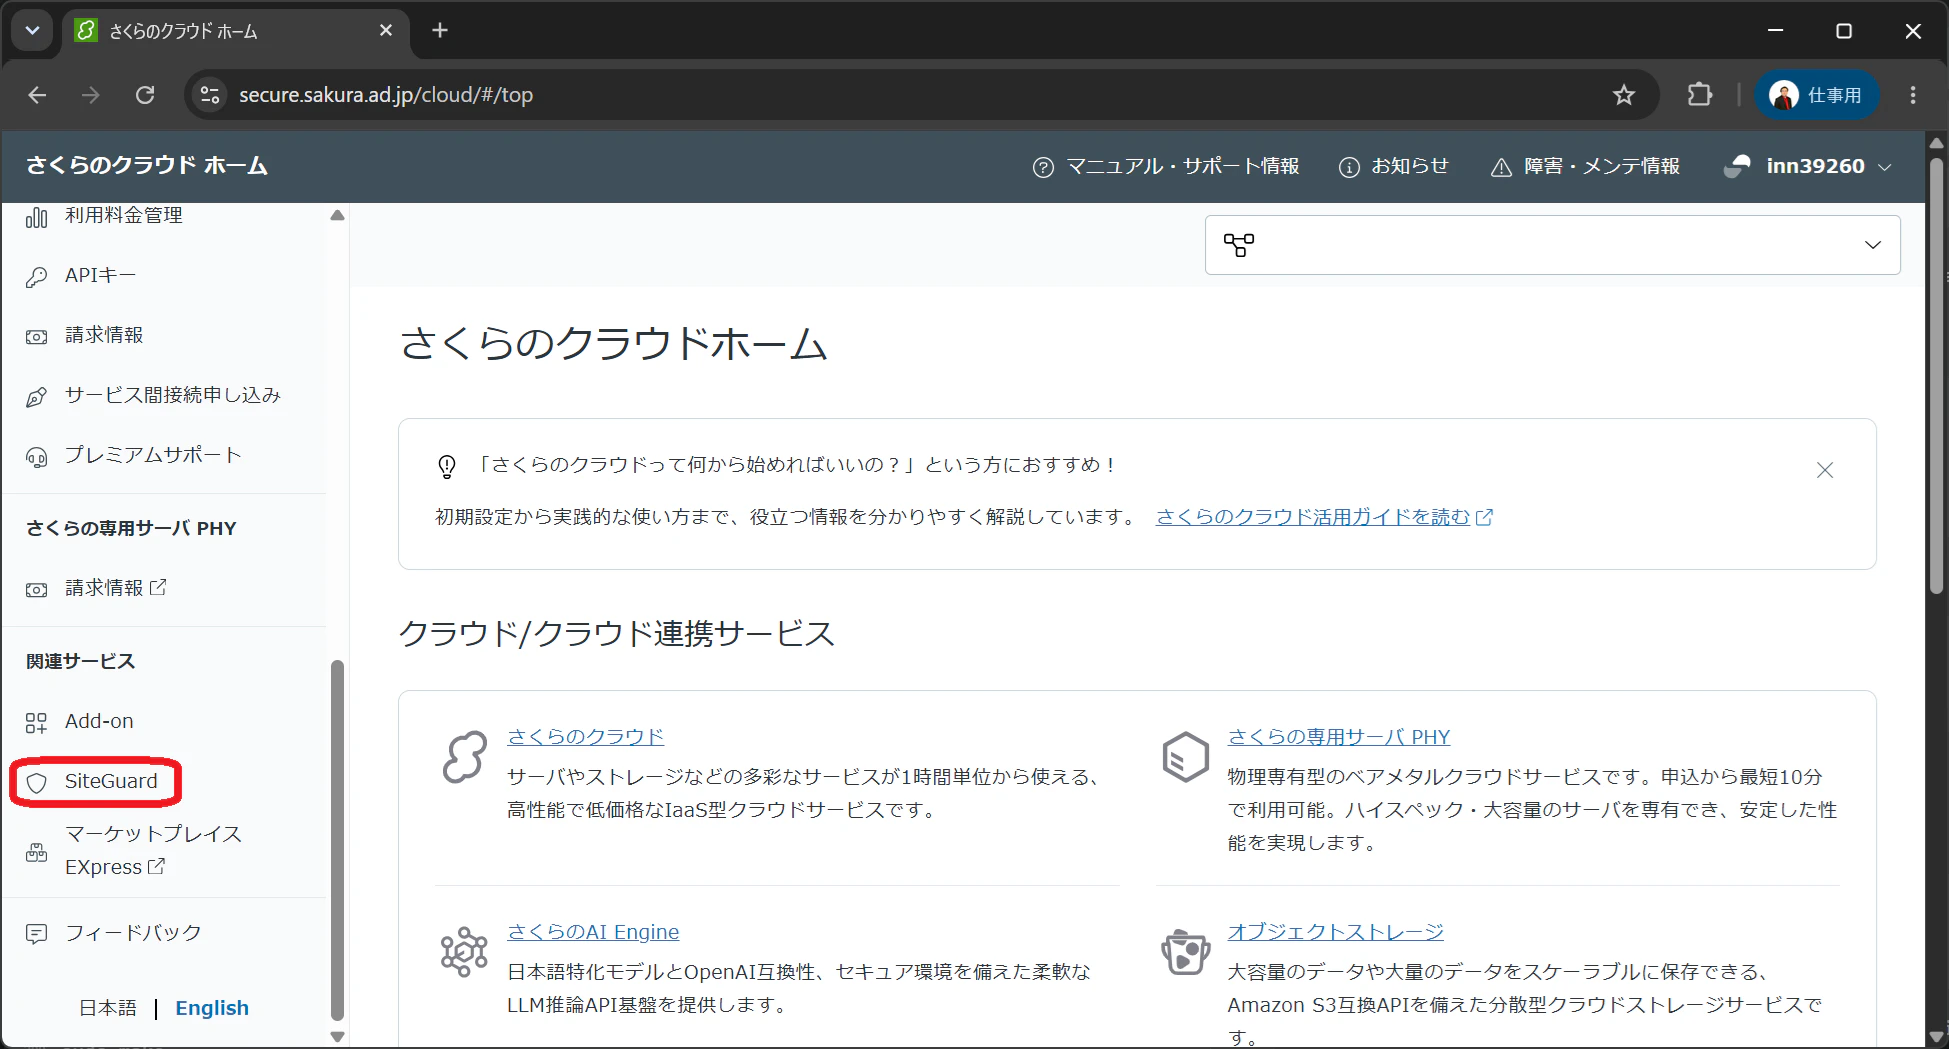
まずSiteGuard Server Editionをダウンロードし、インストールする。ダウンロード元URLは、さくらのクラウドホームから遷移できるご利用ガイドに記載がある。利用者限定情報なので、ここでの記載は控える。
wget [ダウンロード元URL]
tar -zxvf siteguard-server-edition-8.00-3.nginx.x86_64.tar.gz
cd siteguard-server-edition-8.00-3.nginx.x86_64
sudo make install
続けて、nginx。
先んじてnginx実行用ユーザを作成する。
sudo useradd -r -s /usr/sbin/nologin nginx
続けてnginxソースをダウンロードし、展開する。
wget https://nginx.org/download/nginx-1.30.4.tar.gz
tar -zxvf nginx-1.30.4.tar.gz
cd nginx-1.30.4
nginxの設定値を編集する。ここでSiteGuard Server Editionのモジュールを反映する。
sudo ./configure --prefix=/etc/nginx --sbin-path=/usr/sbin/nginx --conf-path=/etc/nginx/nginx.conf --pid-path=/run/nginx.pid --error-log-path=/var/log/nginx/error.log --http-log-path=/var/log/nginx/access.log --user=nginx --group=nginx --with-http_ssl_module --with-http_v2_module --add-module=/opt/jp-secure/siteguardlite/nginx
設定出来たら、ビルド・インストールする。
sudo make
sudo make install
HTTPS対応
nginxサービスファイル作成
certbotを用いてTLS証明書の取得および自動更新をできるようにする。
まずはnginxをサービス登録できるよう、サービスファイルを作成する。
sudo nano /lib/systemd/system/nginx.service
反映する内容は以下の通り:
[Unit]
Description=The NGINX HTTP and reverse proxy server
After=syslog.target network-online.target remote-fs.target nss-lookup.target

[Service]
Type=forking
PIDFile=/run/nginx.pid
ExecStartPre=/usr/sbin/nginx -t
ExecStart=/usr/sbin/nginx
ExecReload=/usr/sbin/nginx -s reload
ExecStop=/bin/kill -s QUIT $MAINPID
PrivateTmp=true

[Install]
WantedBy=multi-user.target
80番ポート開放
certbotによる証明書取得・反映ができるよう、設定ファイルを編集し、80番ポートを開放する。ACMEによる自動更新用のルーティングも追加する。
sudo nano /etc/nginx/nginx.conf
serverブロックを以下のように記述する。ドメインはこの記事用に作成したもの。
server {
	listen       80;
	listen       [::]:80;
	server_name  test.t-shirotani.jp;

	location /.well-known/acme-challenge/ {
		root /var/www/letsencrypt;
	}

	location / {
		return 301 https://$host$request_uri;
	}
}
これにて設定は完了。あとはサービスとして起動させるだけだ。
nginx起動
sudo nginx -t
sudo systemctl daemon-reload
sudo systemctl enable nginx
sudo systemctl start nginx
nginx -tコマンドを叩くとSiteGuardが無効であると警告が出るが、この段階では無視して問題ない。
certbot
以下のコマンドを実行し、対話プロンプトでメールアドレス入力と利用規約同意を済ませる。
sudo certbot certonly --webroot -w /var/www/letsencrypt -d test.t-shirotani.jp --deploy-hook "systemctl reload nginx"
無事完了すると、TLS証明書がインストールされる。
nginxの設定ファイルを再度編集し、HTTPSでホストできるようにする。ドメインについては80番ポートの時と同じ。
sudo nano /etc/nginx/nginx.conf
server {
    listen 443 ssl;
    listen [::]:443 ssl;
    server_name test.t-shirotani.jp;

    ssl_certificate     /etc/letsencrypt/live/test.t-shirotani.jp/fullchain.pem;
    ssl_certificate_key /etc/letsencrypt/live/test.t-shirotani.jp/privkey.pem;

    location / {
        root   html;
        index  index.html index.htm;
    }
}
最後の一押し、nginxを再起動する。
sudo nginx -t
sudo systemctl reload nginx
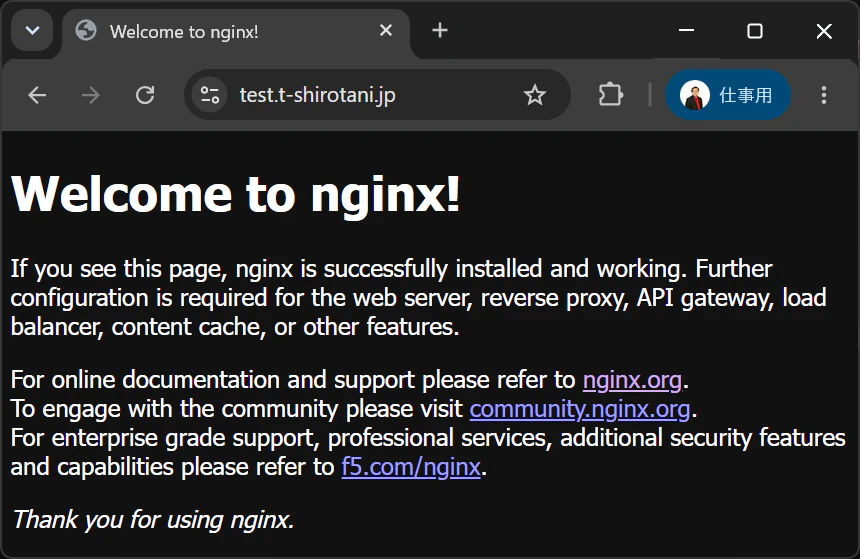
これでHTTPSに対応できた。ドメインを叩けば、nginxの画面が表示される。
SiteGuard Server Editionのセットアップ
いよいよ大詰め、以下のコマンドを実行する。
cd /opt/jp-secure/siteguardlite/
sudo ./setup.sh
対話形式でセットアップが進む。基本的には既定値通り。
Nginx Config Fileは自動検知されなかったため、手動で入力した(入力値は上記設定どおり、/etc/nginx/nginx.conf)。
管理画面のホストに用いる証明書についても、certbotで取得したTLS証明書に書き換える。
/etc/letsencrypt/live/ドメイン/fullchain.pem
/etc/letsencrypt/live/ドメイン/privkey.pem
完了すると、制御画面のURLと認証情報が表示される。構築はこれで完了だ。実際にアクセスしてみよう。
設定・検証
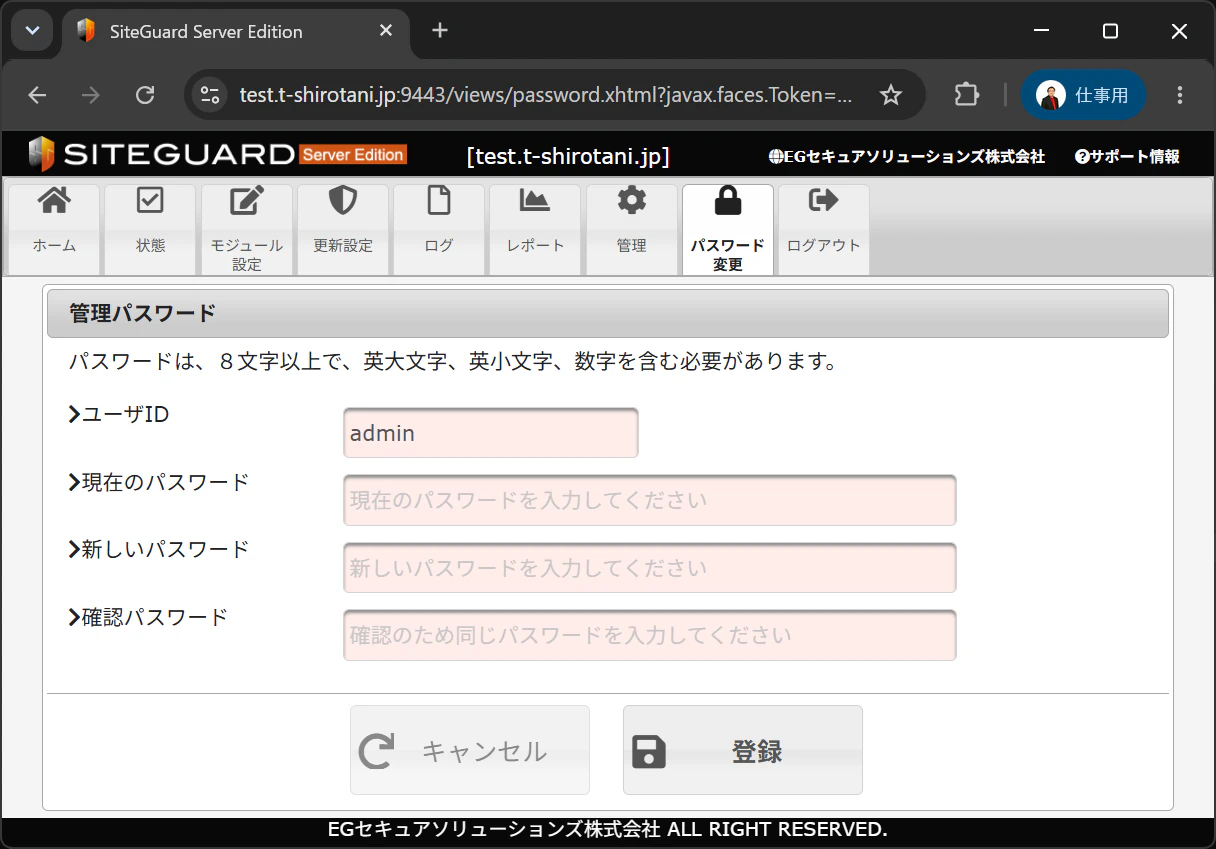
画面にアクセスしてログインすると、初期パスワードを変更するように要求される。
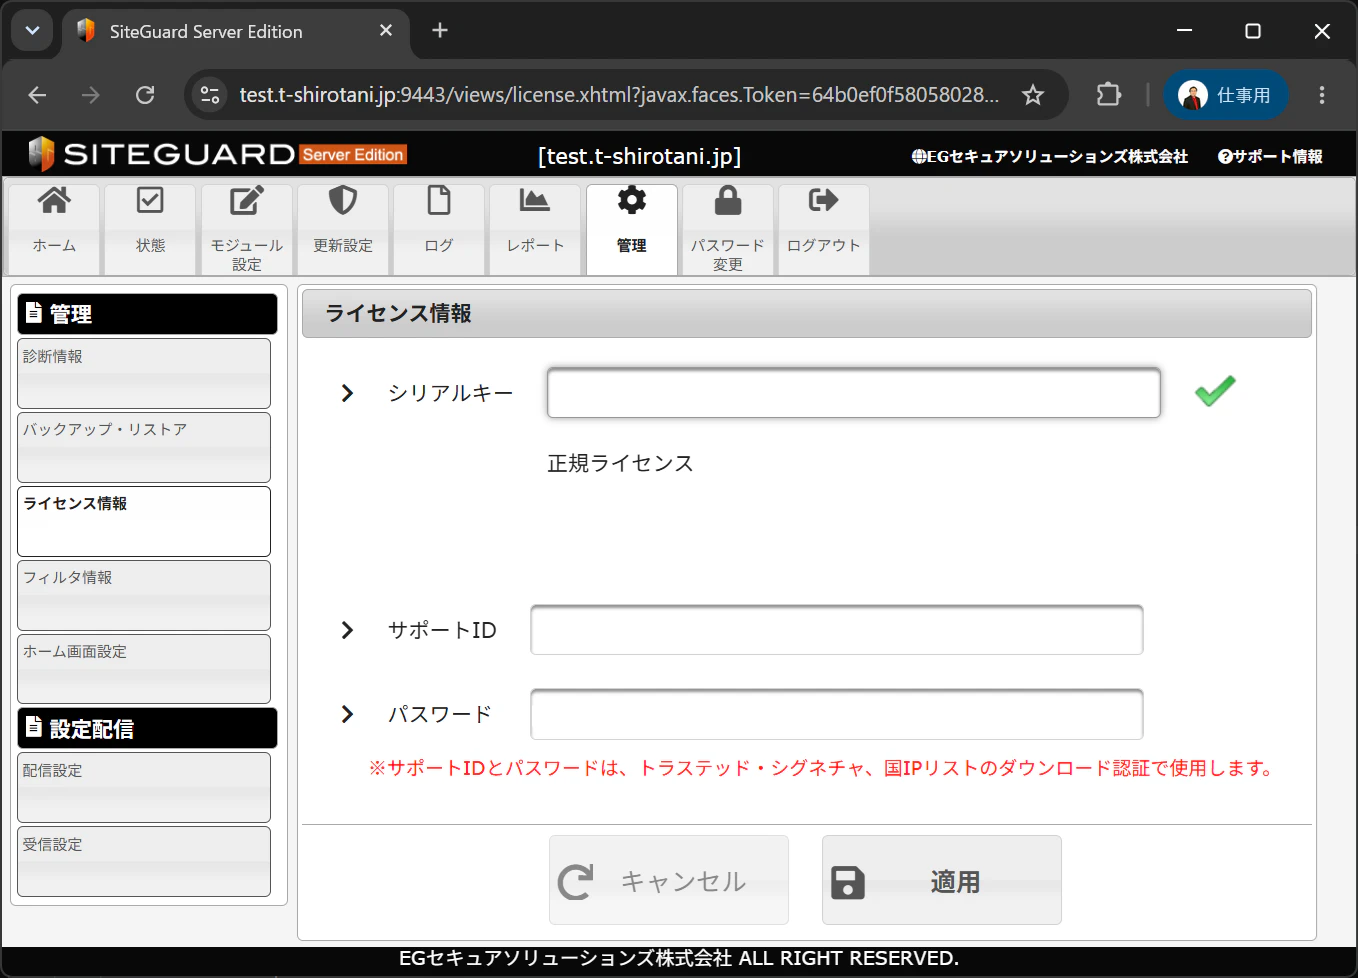
変更を済ませたら、今度はライセンスを有効化する。「管理」タブからライセンス情報に遷移し、シリアルキー、サポートID、パスワードを入力すればよい。これらの情報は、ご利用ガイドに記載がある。
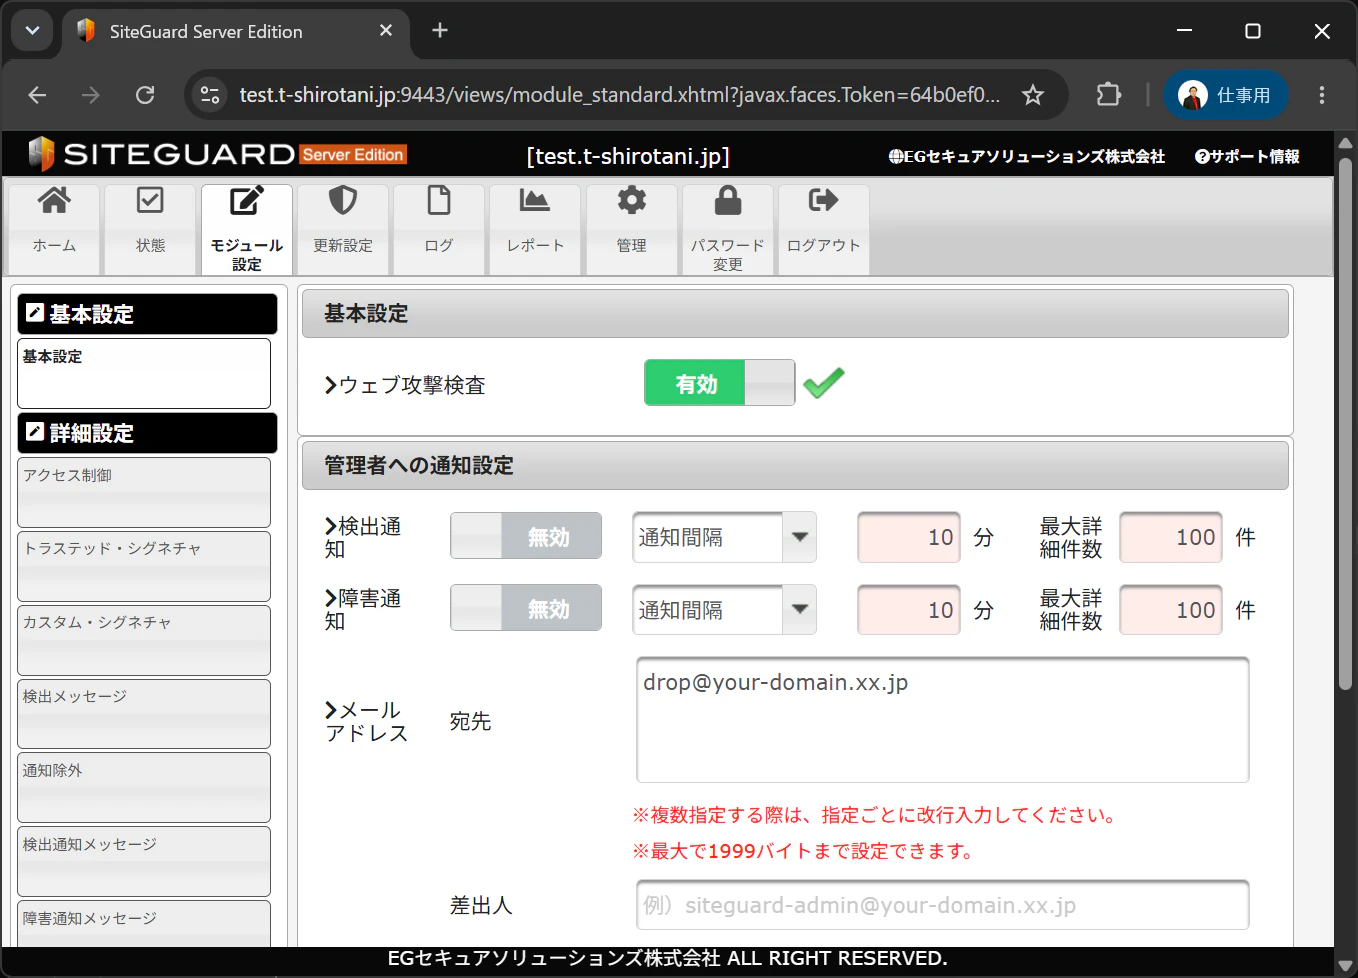
続けて「モジュール設定」タブでウェブ攻撃検査も有効化する。これで、完成だ。
試しに攻撃シミュレート用のURLを呼び出してみる。
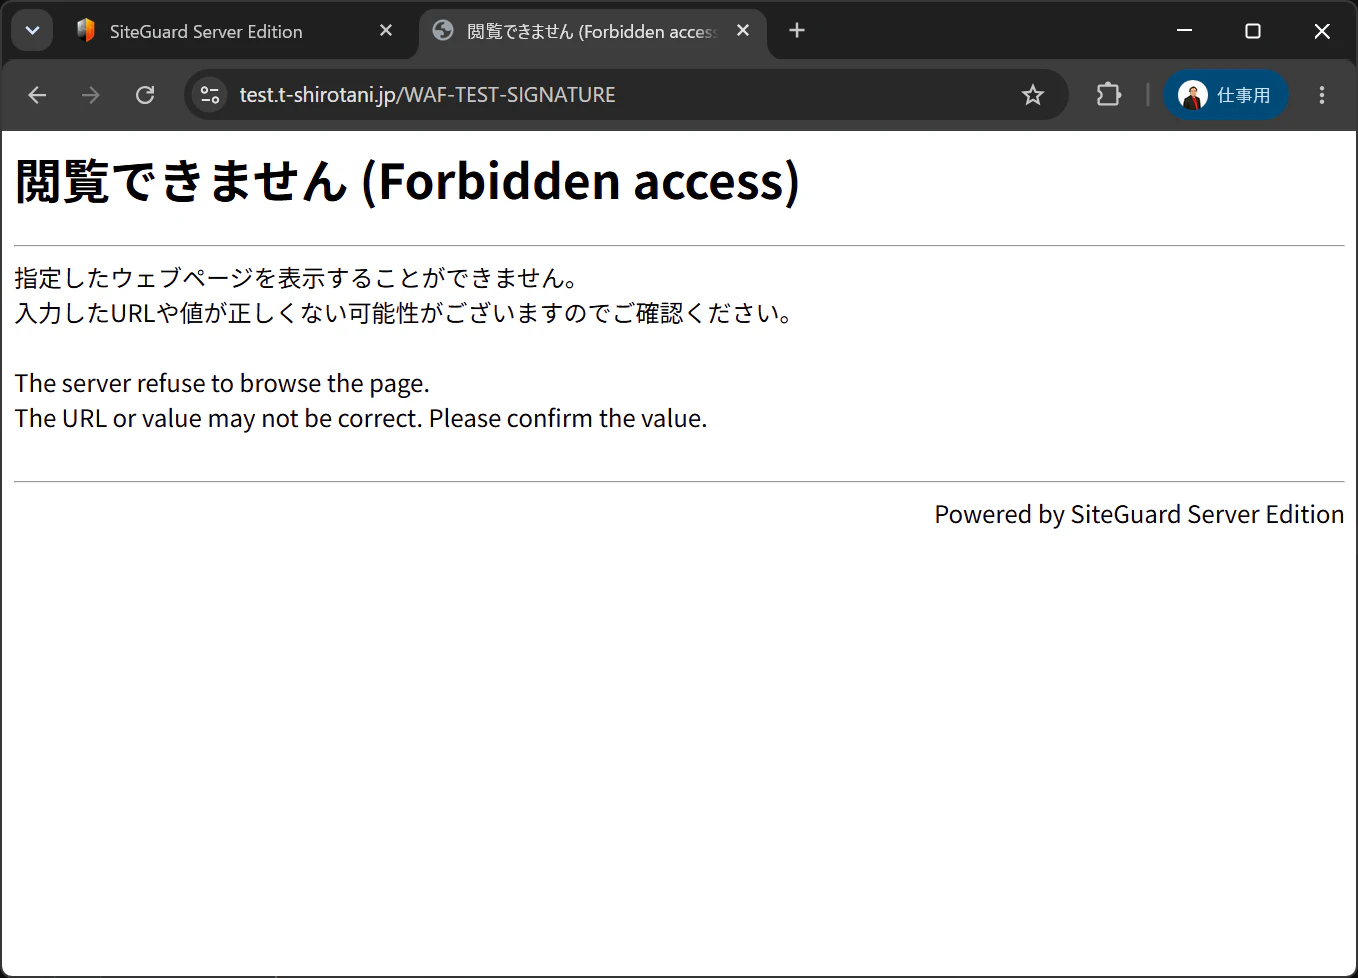
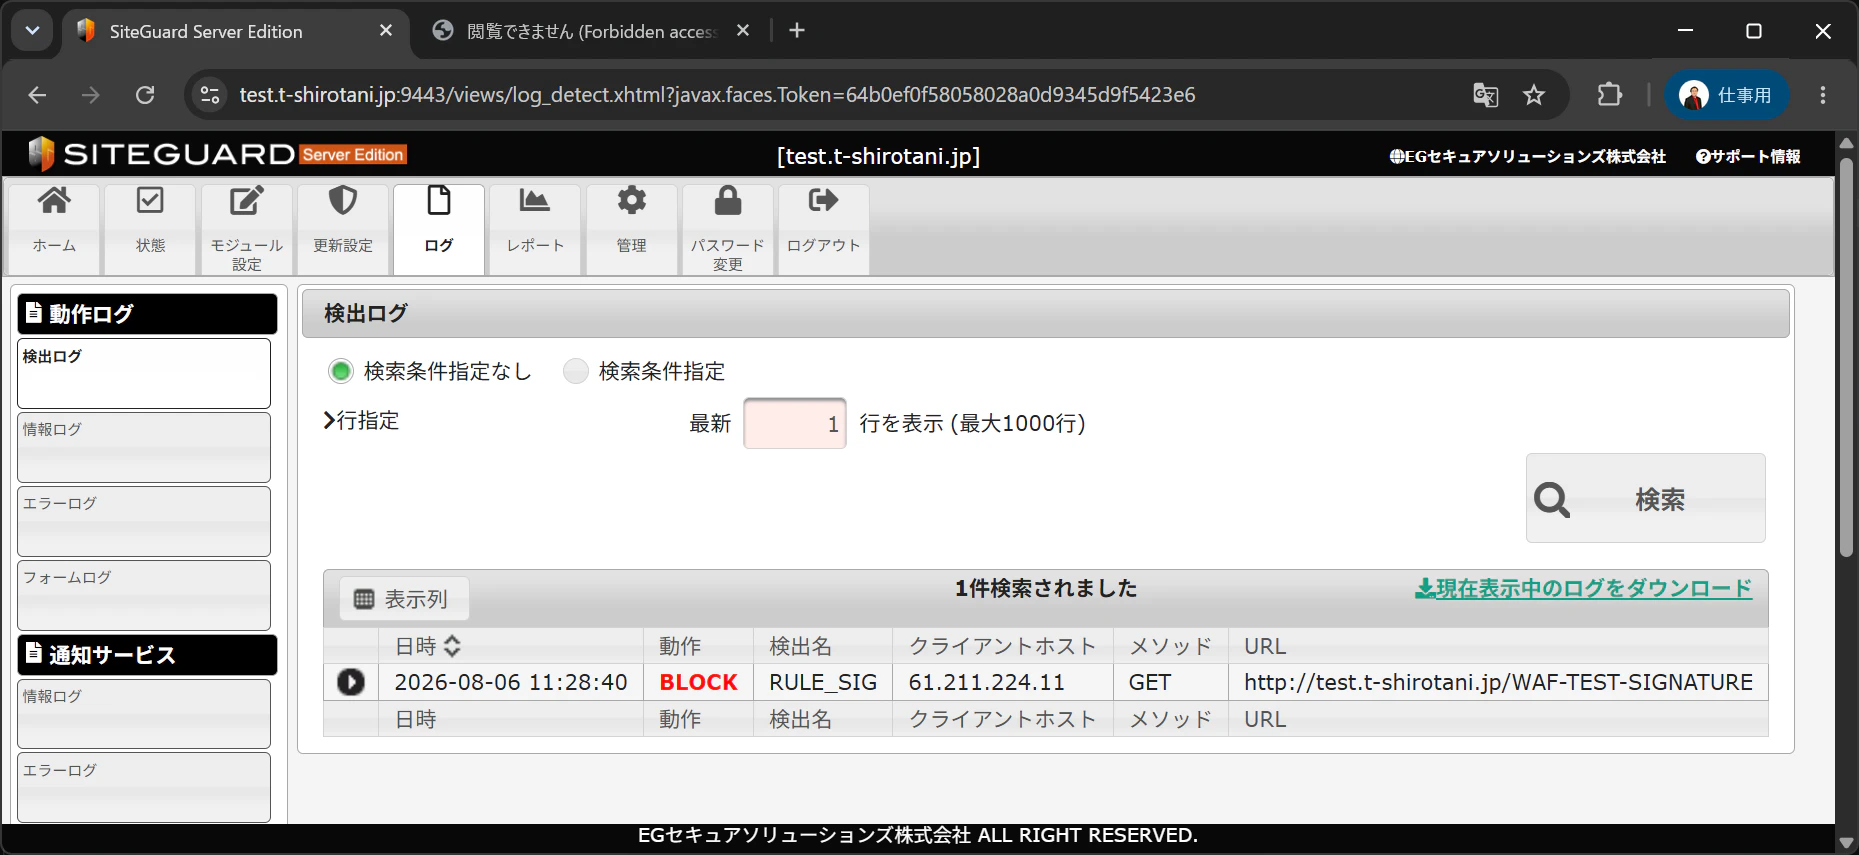
問題なく検知された。
運用保守に関する補記
シグネチャの更新
SiteGuard Server Editionは、シグネチャと呼ばれる攻撃のパターン情報をもとに防御を行う。このシグネチャは、定期的に更新される。
更新元URLはご利用ガイドに記載があるので、それをSiteGuard Server Editionの設定ファイルに記載する必要がある。
利用者限定情報なのでここでの記載は割愛するが、実運用では必須なのでお忘れなきよう。
なぜcertbotをwebrootプラグインにするか
certbotにはnginxの設定ファイルの自動反映を行ってくれる--nginxという方式も存在する。
しかし、今回はnginxを手動コンパイルしており、設定ファイルのパスが通常値から変動する可能性がある。
また、手動で入れたnginxの場合、python3-certbot-nginxでnginxとの依存関係を解決できない場合も存在する。
確実な保守性の観点から、webrootプラグインを選択する方がよい。
nginxの自動更新停止
nginxは手動コンパイルされているため、aptでの自動更新を有効にしている場合、そのタイミングで不整合を起こし、落ちてしまう。
sudo apt-mark hold nginx nginx-common nginx-core
などを叩いて自動更新を無効化しておくとよいだろう。