はじめに
Djangoの使い方~デプロイ編②~の続きです。
今回はデプロイで表示できたサイトの見た目を変えていきます
URLを作ろう
mysite/urls.py ファイルを下記に下記に書き換えて下さい。
from django.urls import path, includefrom django.contrib import admin

urlpatterns = [
    path('admin/', admin.site.urls),
    path('', include('blog.urls')),
]
これでDjangoは'http://127.0.0.1:8000/' に来たリクエストを blog.urls へリダイレクトするようになります。
blogのURL
blog ディレクトリの下に、新しく urls.py という空のファイルを作って、コードエディタで開いて下さい。そして最初の2行を以下のように書きます。
from django.urls import path
from . import views
これはDjangoの path メソッドと、blog アプリの全ての ビューをインポートするという意味です。
その後、最初のURLパターンを追加します。
urlpatterns = [
    path('', views.post_list, name='post_list'),
]
これは 'http://127.0.0.1:8000/' というアドレスにアクセスしてきたら views.post_list が正しい行き先だということをDjangoに伝えています。
ビューの作成
blog/views.py をコードエディタで開いて次のように記入して下さい。
from django.shortcuts import render

def post_list(request):
return render(request, 'blog/post_list.html', {})
テンプレートの作成
blogディレクトリの中にtemplatesという名前のディレクトリを作成してください。 次に、自分のtemplatesディレクトリの中にblogという名前のディレクトリを作ります。
blog
└───templates
└───blog
blog/templates/blogディレクトリの中に、post_list.htmlファイルを作成します。
post_list.htmlファイルをコードエディタで開いて、次の内容を加えます。
<html>
    <head>
        <title>Django Girls blog</title>
    </head>
    <body>
        <div>
            <h1><a href="/">Django Girls Blog</a></h1>
        </div>


        <div>
            <p>published: 14.06.2014, 12:14</p>
            <h2><a href="">My first post</a></h2>
            <p>Aenean eu leo quam. こんにちは! よろしくお願いします! </p>
        </div>


        <div>
            <p>公開日: 2014/06/14, 12:14</p>
            <h2><a href="">2番目の投稿</a></h2>
            <p> こんにちは! よろしくお願いします! </p>
        </div>
    </body></html>
ここを開いて確認してみましょう。
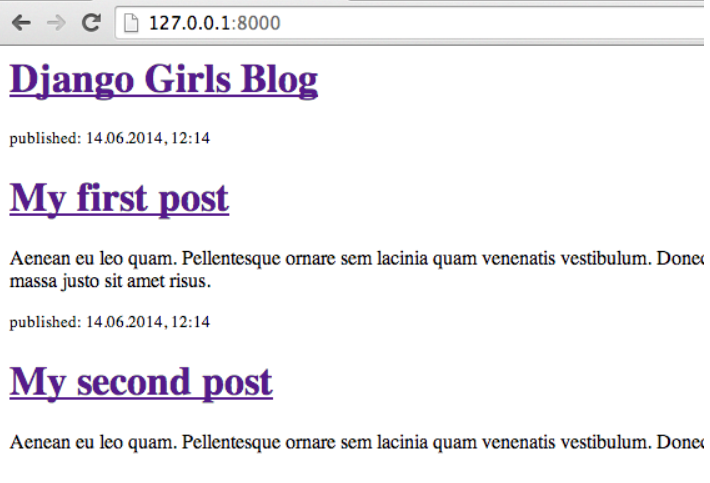
このように表示されるはずです。
デプロイしよう
djangogirls ディレクトリにいることを確認
$ git status
コミット
$ git add --all .
コミットメッセージをつける
$ git commit -m "Changed the HTML for the site."
GitHubに変更部分をプッシュ
$ git push
PythonAnywhereコンソールページを開き、Bashコンソールに移動してください。
ユーザー名を自分にして下記を実行
$ cd ~/<your-pythonanywhere-username>.pythonanywhere.com
$ git pull
[...]
Webページで自分のアプリをReloadするとWeb上で動くようになります!
おわりに
次はHTMLでデザインを変えていきます!