はじめに
Djangoの使い方~オブジェクト作成編~の続きです。
今回は前回作成したログイン画面からログインする方法と、
デプロイの準備までやります!
ログイン方法
ログインするにはユーザーを作る必要があります。
コマンドラインでpython manage.py createsuperuserを入力します。
(myvenv) C:\Users\Name\djangogirls> python manage.py createsuperuser
こんな感じで作ります。入力中はパスワードが見えませんが大丈夫です。
Username: admin Email address: admin@admin.com Password: Password (again): Superuser created successfully.
ブラウザに戻って作成したユーザーでログインします。
こんな画面が出ます。
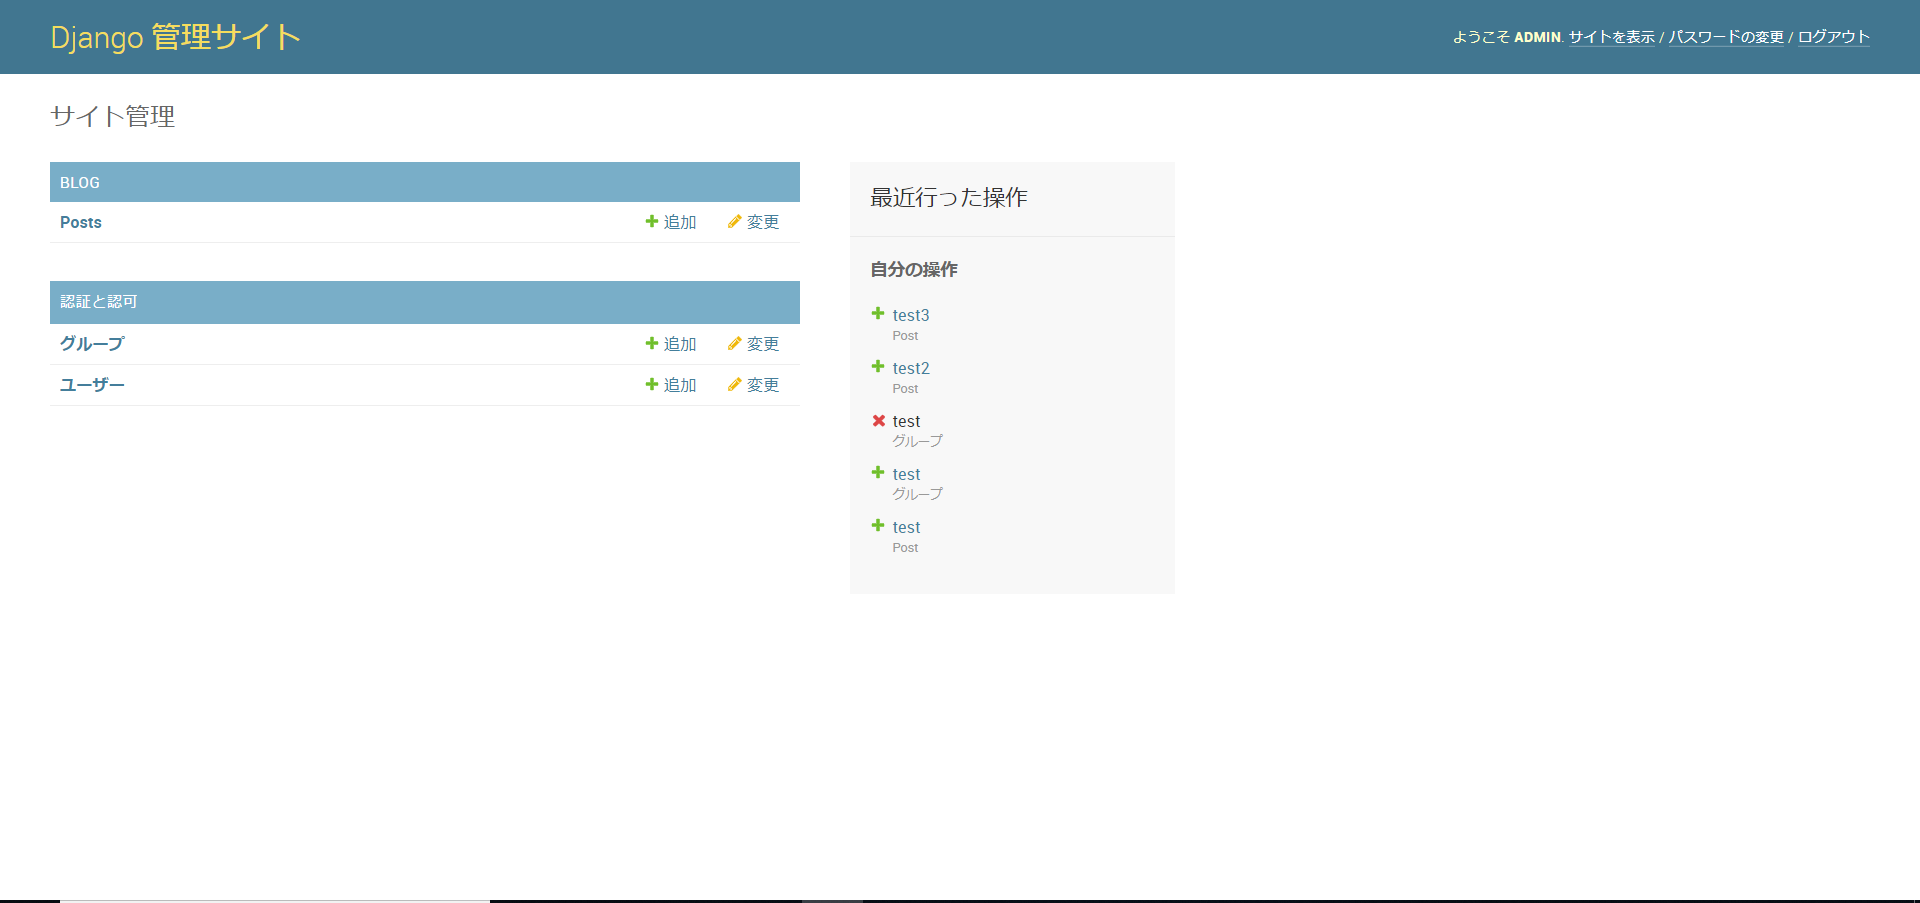
PostsのPOSTを追加から2~3個公開記事を作ってみましょう。
デプロイの準備
Gitリポジトリを始める
コンソールを開き、djangogirlsディレクトリで下のコマンドを実行します。
$ git init
Initialized empty Git repository in ~/djangogirls/.git/
$ git config --global user.name "Your Name"
$ git config --global user.email you@example.com
ベースディレクトリ内で .gitignore という名前のファイルを作成します。
次の内容で新しいファイルを作成して下さい。
*.pyc
*~
__pycache__
myvenv
db.sqlite3
/static
.DS_Store
"djangogirls" フォルダ内に .gitignore という名前で保存して下さい。
ドット「.」から始まるファイル名の作成方法が分からない方は下記参照して下さい。
Windowsエクスプローラーでドットファイルを作成する
変更を保存するためにコンソールで下のコマンドを実行します。
$ git add --all .
$ git commit -m "My Django Girls app, first commit"
 [...]
 13 files changed, 200 insertions(+)
 create mode 100644 .gitignore
 [...]
 create mode 100644 mysite/wsgi.py
GitHubにコードをプッシュする
Githubで "my-first-blog"というリポジトリを新規作成します。
左側にあるNewを押してください。
"READMEで初期化する"チェックボックスをオフのままにし、.gitignoreオプションを空白にして、ライセンスをNoneのままにしておきます。
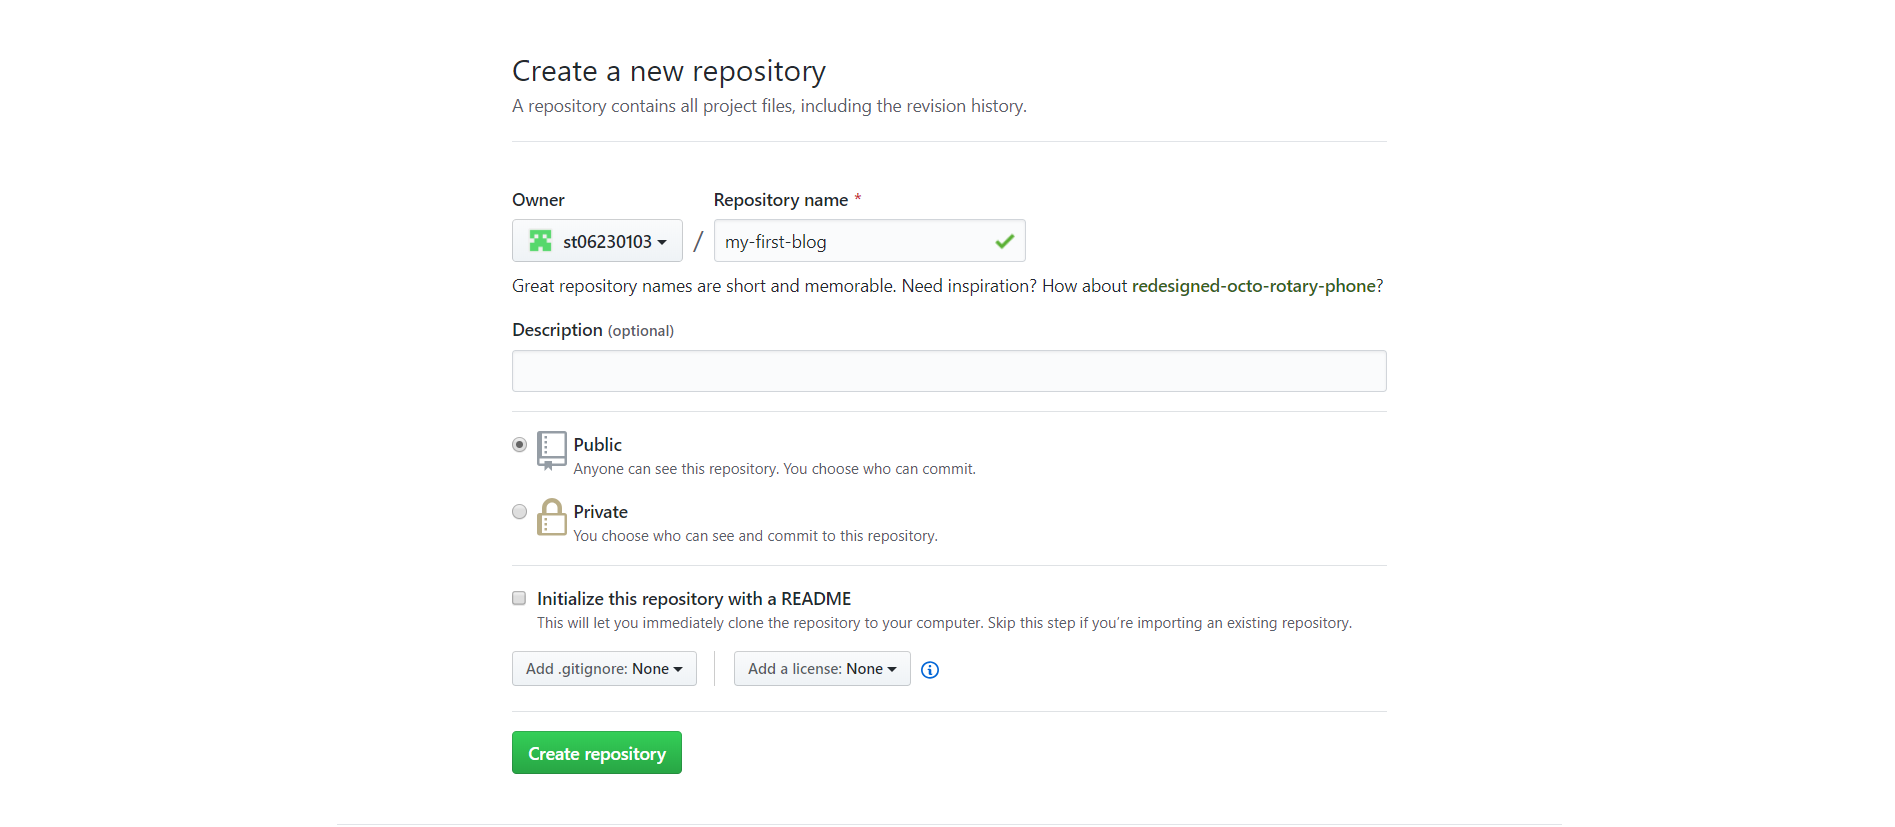
これでcreate repositoryしましょう。

リポジトリをクローンするためのURLがでてきます。これは次で使います。
自分のコンピューター上のGitリポジトリをGitHub上のGitリポジトリに結びつけます。
コンソールに次のように入力します。このURLは上の画像のURLと一緒にして下さい。
プロキシがある場合はコマンドラインで
```を行ってから下記を行ってください。

```ruby:command-line
$ git remote add origin https://github.com/<your-github-username>/my-first-blog.git
$ git push -u origin master
GitHubのユーザー名とパスワードを入力すると、次のように表示されます
Username for 'https://github.com': ola
Password for 'https://ola@github.com':
Counting objects: 6, done.
Writing objects: 100% (6/6), 200 bytes | 0 bytes/s, done.
Total 3 (delta 0), reused 0 (delta 0)

To https://github.com/ola/my-first-blog.git
 * [new branch]      master -> master
Branch master set up to track remote branch master from origin.
これでコードがGitHub上にプッシュされました。
おわりに
次はpythonanywhereを使ってデプロイします!
次回→Djangoの使い方~デプロイ編②~