前がき
この文章は主に未来の自分へのメモ書きである。
目標
手元のマシン(M1 Mac)に Docker を入れ、コンテナを構築し、Hello WorldレベルのWebサービスを構築する。将来は、AWSへデプロイするサービスを開発したいので、Amazon Linux を対象とし、やはりSwiftで展開したいので、Swiftで Hello Worldを構築するものとする。
指南役
今回の指南役には、Chat GPT 3.5と GPT 4にお願いしました。知り合いを先生にしたら絶対やりたくない教えてくんになっても、文句一つ言わず教えてくれるので、大変ありがたいですが、たまにサラッと間違った道を教えてくれるので、時々難儀しました。
Install Docker
Dockerは以下より入手します。今回はM1 Macなので、Apple Chipを選びます。
Docker.dmg! を開き、アプリをインストールします。

質問があったりしますが、こんな画面が出てきます。また。メニューの右側にも鯨のアイコンが表示されるようになります。

この状態でターミナルを開けば、dockerコマンドが使えるようになっています。
$ docker --version
Docker version 23.0.5, build bc4487a
Working Directory
どんなディレクトリの構成にすれば良くわかっていないですが、とりあえず、Home Directory の下に Dockers と言うフォルダを作ってその中を作業場所としたいと思います。
$ cd ~
$ mkdir Dockers
$ cd Dockers
$ ls
$ mkdir myapp
$ cd myapp
ベースとなるコンテナイメージを探す
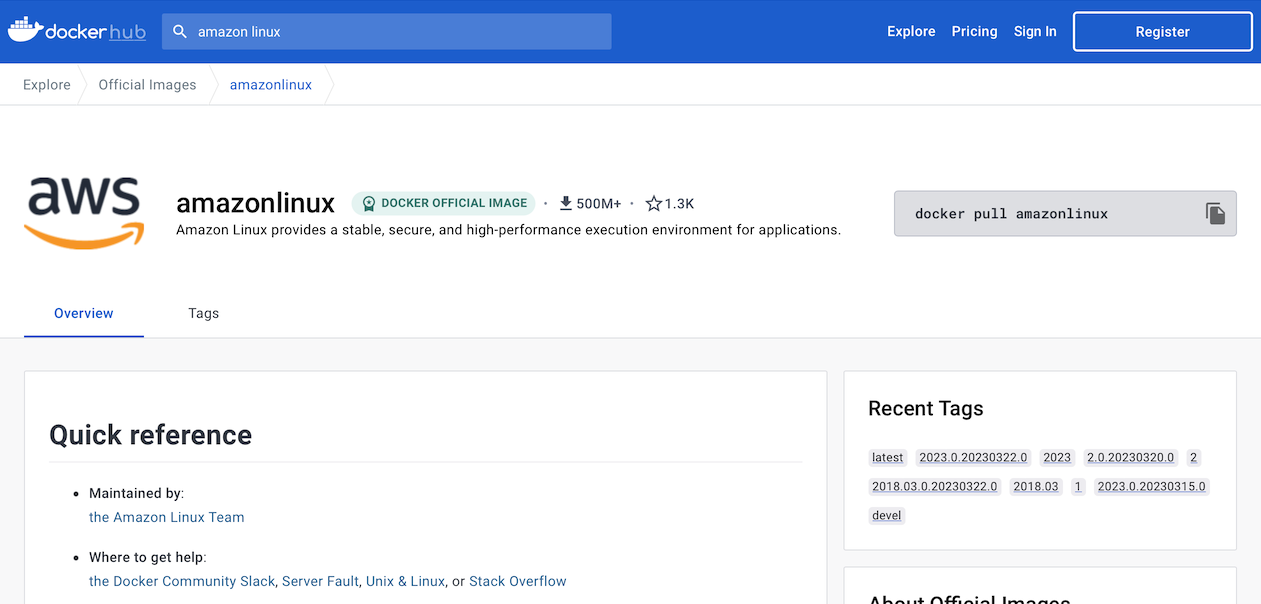
https://hub.docker.com より自分の用途に合ったイメージを選びます。今回は、amazon linux を選びます。

$ docker pull amazonlinux
Using default tag: latest
latest: Pulling from library/amazonlinux
3a410071be52: Pull complete
Digest: sha256:1293fb4fa103ea81a8769d7b0aa000072884b0750c0a28563fd9838fea784245
Status: Downloaded newer image for amazonlinux:latest
docker.io/library/amazonlinux:latest
Dockerfile はどこから拾ってきたか、わからなくなってしましたが、これを使いました。
FROM amazonlinux:2
LABEL maintainer="Swift Infrastructure <swift-infrastructure@forums.swift.org>"
LABEL description="Docker Container for the Swift programming language"

RUN yum -y install \
  binutils \
  gcc \
  git \
  unzip \
  glibc-static \
  gzip \
  libbsd \
  libcurl-devel \
  libedit \
  libicu \
  libsqlite \
  libstdc++-static \
  libuuid \
  libxml2-devel \
  tar \
  tzdata \
  zlib-devel

# Everything up to here should cache nicely between Swift versions, assuming dev dependencies change little

# pub   4096R/ED3D1561 2019-03-22 [SC] [expires: 2023-03-23]
#       Key fingerprint = A62A E125 BBBF BB96 A6E0  42EC 925C C1CC ED3D 1561
# uid                  Swift 5.x Release Signing Key <swift-infrastructure@swift.org
ARG SWIFT_SIGNING_KEY=A62AE125BBBFBB96A6E042EC925CC1CCED3D1561
ARG SWIFT_PLATFORM=amazonlinux2
ARG SWIFT_BRANCH=swift-5.8-release
ARG SWIFT_VERSION=swift-5.8-RELEASE
ARG SWIFT_WEBROOT=https://download.swift.org

ENV SWIFT_SIGNING_KEY=$SWIFT_SIGNING_KEY \
    SWIFT_PLATFORM=$SWIFT_PLATFORM \
    SWIFT_BRANCH=$SWIFT_BRANCH \
    SWIFT_VERSION=$SWIFT_VERSION \
    SWIFT_WEBROOT=$SWIFT_WEBROOT

RUN set -e; \
    ARCH_NAME="$(rpm --eval '%{_arch}')"; \
    url=; \
    case "${ARCH_NAME##*-}" in \
        'x86_64') \
            OS_ARCH_SUFFIX=''; \
            ;; \
        'aarch64') \
            OS_ARCH_SUFFIX='-aarch64'; \
            ;; \
        *) echo >&2 "error: unsupported architecture: '$ARCH_NAME'"; exit 1 ;; \
    esac; \
    SWIFT_WEBDIR="$SWIFT_WEBROOT/$SWIFT_BRANCH/$(echo $SWIFT_PLATFORM | tr -d .)$OS_ARCH_SUFFIX" \
    && SWIFT_BIN_URL="$SWIFT_WEBDIR/$SWIFT_VERSION/$SWIFT_VERSION-$SWIFT_PLATFORM$OS_ARCH_SUFFIX.tar.gz" \
    && SWIFT_SIG_URL="$SWIFT_BIN_URL.sig" \
    && echo $SWIFT_BIN_URL \
    # - Download the GPG keys, Swift toolchain, and toolchain signature, and verify.
    && export GNUPGHOME="$(mktemp -d)" \
    && curl -fsSL "$SWIFT_BIN_URL" -o swift.tar.gz "$SWIFT_SIG_URL" -o swift.tar.gz.sig \
    && gpg --batch --quiet --keyserver keyserver.ubuntu.com --recv-keys "$SWIFT_SIGNING_KEY" \
    && gpg --batch --verify swift.tar.gz.sig swift.tar.gz \
    # - Unpack the toolchain, set libs permissions, and clean up.
    && tar -xzf swift.tar.gz --directory / --strip-components=1 \
    && chmod -R o+r /usr/lib/swift \
    && rm -rf "$GNUPGHOME" swift.tar.gz.sig swift.tar.gz

# Print Installed Swift Version
RUN swift --version
試しにこれだけでエラーの有無を確認するため、コンテナイメージをビルドします。tagはmyappとしました。
$ docker build -t myapp .
Vaptor
これで下拵えは一区切りつきました。次は Hello World Swift アプリです。WebServiceをスクラッチから書くのは大変なので、今回はVaporを使います。GPT4は執拗にKituraを推してきたので、大きなまわり道になってしまいましたが、いかが Vapor のURLです。

Directory Structure
アプリ自体のディレクトリの構成はこのようにしました。
$ tree
.
├── Dockerfile
├── Package.swift
└── Sources
    └── myapp
        └── main.swift
Dockerfileに追加
Dockerfileに以下を追加します。Hello Worldアプリ実装分です。
# Copy your Swift application code into the container
COPY . /app

# Build your Swift application
RUN swift build --configuration release

# Expose port 8080 for your Vapor application
EXPOSE 8080

# Start your Swift application
CMD [".build/release/myapp"]
// swift-tools-version: 5.8
import PackageDescription

let package = Package(
    name: "myapp",
    platforms: [
        .macOS(.v12)
    ],
    products: [
        .executable(name: "myapp", targets: ["myapp"]),
    ],
    dependencies: [
        // Add your package dependencies here
        .package(url: "https://github.com/vapor/vapor.git", from: "4.76.0"),
    ],
    targets: [
        // Targets are the basic building blocks of a package, defining a module or a test suite.
        // Targets can depend on other targets in this package and products from dependencies.
		.executableTarget(name: "myapp", dependencies: [
			.product(name: "Vapor", package: "vapor")
		])
    ]
)
Requestに適当にResponseするのはこのコードです。
import Vapor

let app = Application()
app.http.server.configuration.hostname = "0.0.0.0"

app.get { req -> String in
    return "Hello, world!"
}

try app.run()
ファイルがその内容が一通り揃っている事を確認すると、再度ビルドします。タグをmyappとします。
$ docker build -t myapp .
..snip...
 => => writing image sha256:40f4404945bf8efca9640b39b7bce76e98ad6a4557d8d36284c7d488e72ce55a                                                                  0.0s
 => => naming to docker.io/library/myapp                                                                                                                      0.0s
$
エラーのない事を確認すると、コンテナを走らせます。
$ docker run -p 8080:8080 myapp
2023-04-27T19:59:48+0000 notice codes.vapor.application : [Vapor] Server starting on http://0.0.0.0:8080
実行中のコンテナはdocker psで確認できます。
$ docker ps
CONTAINER ID   IMAGE     COMMAND                  CREATED          STATUS          PORTS                    NAMES
4da5883a3b12   myapp     ".build/release/myapp"   10 minutes ago   Up 10 minutes   0.0.0.0:8080->8080/tcp   eager_bohr
もしくは、Dockerアプリでも確認できます。

ブラウザで「http:127.0.0.1:8080」を叩くと、Hello world!!が表示されました。

すったもんだ
なんか、スラスラと実装の過程を記録しているように見えますが、GPT先輩と結構すったもんだしています。ようやくここまで辿り着いたので、三ヶ月後の自分に向けてメモを残しておく事が目的です。
環境
執筆時点での環境は以下の通りでした。普段使っていないmacだったのでアップデートされていない事に今気がつきました。
macOS: 13.0.1 (22A400)
Version 14.1 (14B47b)
Docker 4.19.0 (106363)
Swift 5.7.1
vapor 4.76.0