以前の記事でMonacaとkintoneとの連携方法について解説しました。
今回はkintoneに添付ファイル(画像)をアップロードする方法を紹介します。
添付ファイルの登録は単純なテキストデータの登録とは異なり、クライアント側のロジックに一手間加える必要があります。
ポイントは以下の2点です。
- Cameraプラグインで取得した画像をBlob形式に変換する
- 一度kintoneに画像をアップロードしてから、レコードと画像を関連付ける
サンプルアプリ
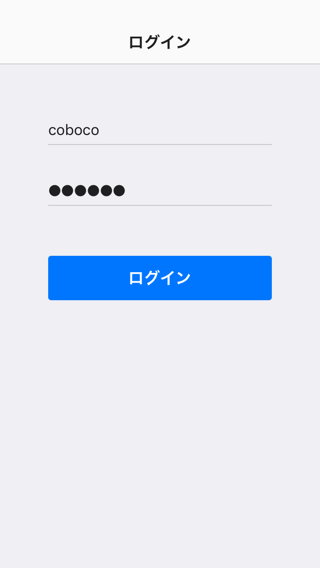
ログイン画面
kintoneのアカウントを入力してログインを実行します。
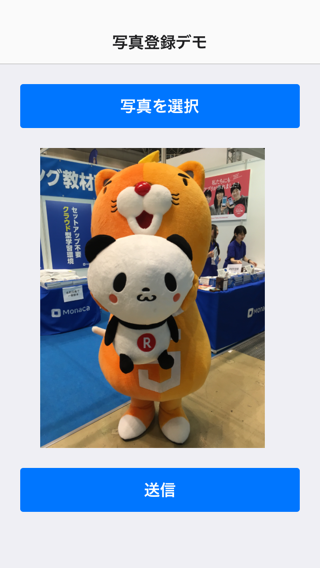
登録画面
「写真を選択」ボタンで端末内の写真を選択した後に、「送信」ボタンでkintoneへの登録を実行します。
実行結果
kintoneアプリの添付ファイルフィールドに、画像が登録されます。

ソースコード
<!DOCTYPE HTML>
<html>
<head>
  <meta charset="utf-8">
  <meta name="viewport" content="width=device-width, initial-scale=1, maximum-scale=1, user-scalable=no">
  <meta http-equiv="Content-Security-Policy" content="default-src * data: gap: https://ssl.gstatic.com; style-src * 'unsafe-inline'; script-src * 'unsafe-inline' 'unsafe-eval'">
  <script src="components/loader.js"></script>
  <link rel="stylesheet" href="components/loader.css">
  <link rel="stylesheet" href="css/style.css">
  <!-- kintone Utility Libraryの読込 -->
  <script src="js/kintoneUtility.js"></script>

  <script>
    // kintoneのアプリ情報
    let appInfo = {
      id: 1,  // 自分のアプリIDに変更してください
      domain: 'サブドメイン.cybozu.com'  // 自分のサブドメインに変更してください
    };

    // ログイン処理
    function login() {
      let name = document.querySelector('#name').value;
      let pass = document.querySelector('#pass').value;

      // ドメイン情報の設定
      kintoneUtility.rest.setDomain(appInfo.domain);
      // 認証情報の設定
      kintoneUtility.rest.setUserAuth(name, pass);
      // 登録画面に遷移
      document.querySelector('#navi').pushPage('entry.html');

    }

    // 写真を選択ボタン押下時の処理
    function choosePic() {
      // 写真を読み込み
      navigator.camera.getPicture(onSuccess, onError, {
        sourceType : Camera.PictureSourceType.PHOTOLIBRARY,
        destinationType: Camera.DestinationType.FILE_URI
      });

      // 写真のパスが取得される
      function onSuccess(imageURI) {
        document.querySelector('#photo').src = imageURI;
      }
    }

    // 送信ボタン押下時の処理
    function onSendBtnClick() {
      // 写真のパスを取得
      let imageURI = document.querySelector('#photo').src;

      // 写真が選択されている場合
      if (imageURI.length > 0) {
          // URIからFileEntryに変換する
          window.resolveLocalFileSystemURL(imageURI, resolveOnSuccess, onError);
      }
    }

    // FileEntry取得完了時の処理
    function resolveOnSuccess(fileEntry) {
      // Fileオブジェクトを取得
      fileEntry.file((file) => {
        // FileReaderを生成
        let reader = new FileReader();
        // ArrayBuffer形式への変換完了時の処理
        reader.onloadend = uploadPic;
        // ArrayBuffer形式に変換
        reader.readAsArrayBuffer(file);
      }, onError);
    }

    // kintoneに画像をアップロード
    function uploadPic(event) {
      // ArrayBufferからBlobに変換する
      let file = new Blob([event.target.result]);
      // まず、kintoneに画像ファイル単体をアップロード
      kintoneUtility.rest.uploadFile({
        fileName: 'sample.jpg',
        blob: file
      })
      .then(function(response) {
        // 画像に割り当てられたファイルキーが返却される
        postToKintoneApp(response.fileKey);
      })
      .catch(onError);
    }

    // kintoneアプリにレコード登録
    function postToKintoneApp(key) {
      kintoneUtility.rest.postRecord({
        app: appInfo.id,
        record: {
          "添付ファイル": {
            // 画像のファイルキーを指定して、レコードに関連付ける
            value: [{fileKey: key}]
          }
        }
      })
      .then(function(response) {
        console.log(response);
        alert("登録しました");
      })
      .catch(onError);
    }

    // エラー時の処理
    function onError(error) {
      console.log(error);
    }

  </script>
</head>
<body>
  <ons-navigator id="navi" page="login.html"></ons-navigator>

  <!-- ログイン画面 -->
  <template id="login.html">
    <ons-page>
      <ons-toolbar>
        <div class="center">ログイン</div>
      </ons-toolbar>

      <div class="login-form">
        <ons-input type="text" modifier="large underbar" placeholder="アカウント名" value="" id="name"></ons-input>
        <ons-input type="password" modifier="large underbar" placeholder="パスワード" value="" id="pass"></ons-input>
        <ons-button id="loginButton" modifier="large" onclick="login()">ログイン</ons-button>
      </div>
    </ons-page>
  </template>

  <!-- 登録画面 -->
  <template id="entry.html">
    <ons-page>
      <ons-toolbar>
        <div class="center">写真登録デモ</div>
      </ons-toolbar>

      <div class="entry-form">
        <ons-button onclick="choosePic()" modifier="large">写真を選択</ons-button>
        <img id="photo" src="">

        <ons-button onclick="onSendBtnClick()" modifier="large">送信</ons-button>
      </div>
    </ons-page>
  </template>
</body>
</html>
添付ファイルアップロード処理について
kintone Utility Library for JavaScript を使用して画像ファイルをアップロードするには、以下の手順で処理を実行します。
画像ファイルのアップロード
kintoneUtility.rest.uploadFile({
  fileName: 'ファイル名',
  blob: Blob形式の画像データ
})
引数にオブジェクト形式でファイルの情報を指定します。blobプロパティには、Blob形式に変換した画像データを指定します。画像データをBlobに変換する処理についてはこちらの記事で解説しています。
このメソッドの戻り値はPromiseです。アップロード成功時には画像ファイルに割り当てられた「ファイルキー」が返されます。
この時点ではまだ、kintoneアプリのレコードには登録されていません。
kintoneアプリのレコードに画像ファイルを関連付ける
kintoneUtility.rest.postRecord({
  app: アプリID,
  record: {
    "フィールドコード": {
      value: [{fileKey: ファイルキー}]
    }
  }
})
このメソッドは、kintoneアプリにレコードを登録する命令です。
添付ファイルフィールドへの登録値として、画像の「ファイルキー」を指定することでレコードと画像ファイルの関連付けが行われます。
おわりに
Monacaとkintoneの連携は比較的容易に行うことができるのですが、画像ファイルを登録しようと思うと一気に面倒になりますね…。
画像アップロード&レコードへの関連付けが1つのメソッドで同時に行えて、Blob以外のデータ形式にも対応されると、もっと楽になるのですが…。
kintone Utility Libraryのバージョンアップに期待しましょう。

