はじめに
「Rubyによるクローラー開発技法」を読み終わって、クローラーを作ってみたくなりました。(まだ作ってません)
好きなジャンルの画像を集めてくれるものを作ろうと思ったものの、ローカルに画像がたまると嫌なのでよく使うGoogle Driveに上げといて欲しいと思って調べてみたらAPIがあるみたいなので使ってみました。
環境
- MacBook Air(Yosemite)
- Ruby(2.1.2)
手順
1. Google Developers Consoleでプロジェクト作成とクライアントIDなどの取得
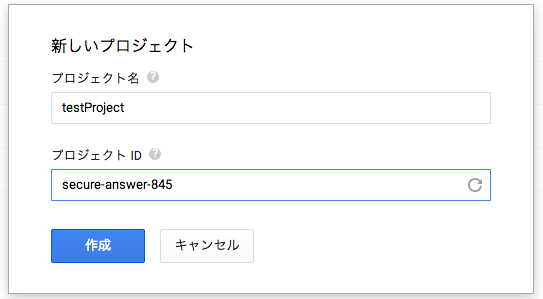
Google Developers Consoleにアクセスし、「プロジェクトを作成」を押下します。

「プロジェクト名」に好きな名前を付けます。
「プロジェクトID」はそのままでも大丈夫です。
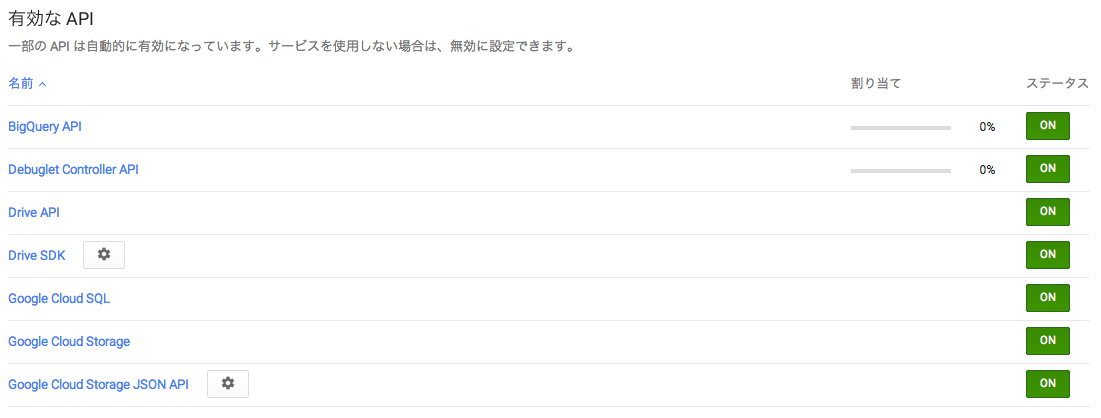
APIと認証 > API を選択し、有効なAPIが以下のようになるようにします。
デフォルトでは「Drive API」と「Drive SDK」がOFFになっているのでONにします。
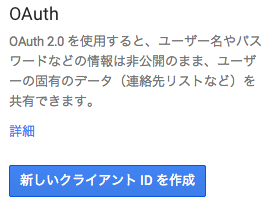
APIと認証 > 認証情報 を選択し、「新しいクライアントIDを作成」を押下します。
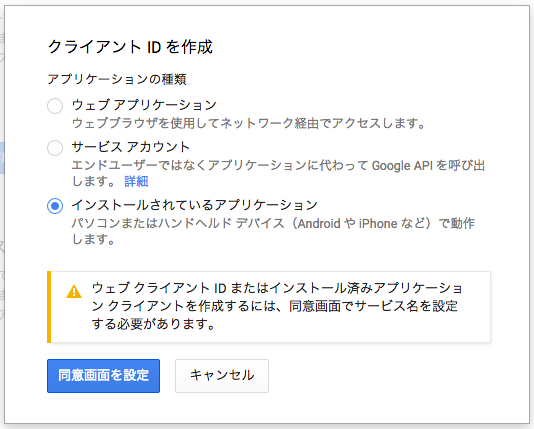
「インストールされているアプリケーション」を選択し、「同意画面を設定」をクリックします。
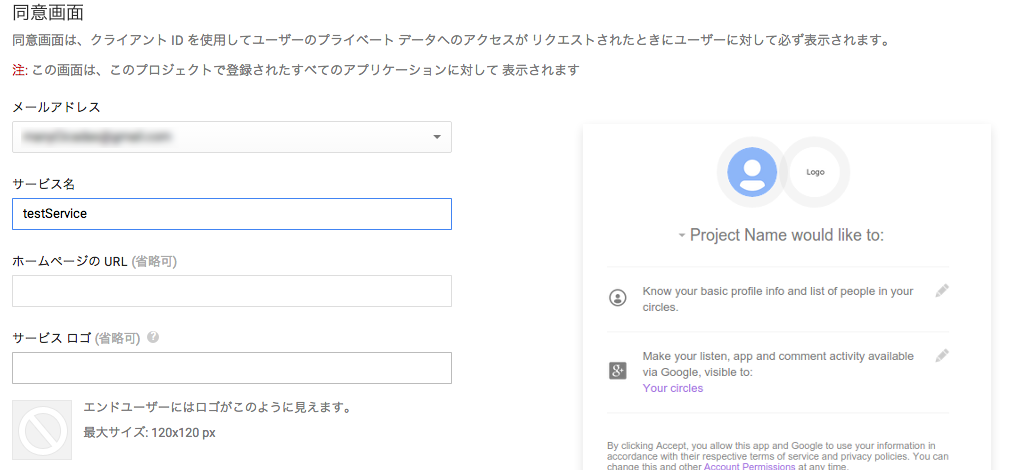
「メールアドレス」を選択し、「サービス名」を入力して「保存」を押します。
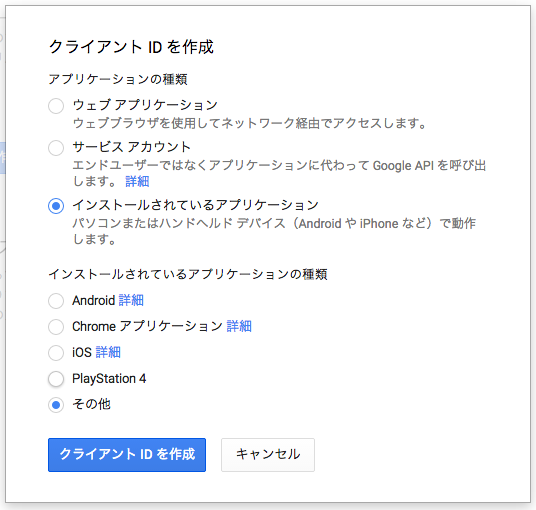
「インストールされているアプリケーション」を選択し、「その他」を選択して「クライアントIDを作成」をクリックします。
以下の手順ではこの値を使用していきます。
[クライアントID]
127036428910-2cihomq21p413jtu4ebmf4kvefi8v9p1.apps.googleusercontent.com

[クライアントシークレット]
2KR6kOI2hOs0QSKqqltrkyfi

[リダイレクトURI]
http://localhost
2. Authorization Codeの取得
以下のURLの「クライアントID」と「リダイレクトURI」にさっきGoogle Developers Consoleで取得した情報と置き換えます。
https://accounts.google.com/o/oauth2/auth
?client_id=クライアントID
&redirect_uri=リダイレクトURI
&scope=https://www.googleapis.com/auth/drive
&response_type=code
私の場合だと以下のような感じになります。
https://accounts.google.com/o/oauth2/auth
?client_id=127036428910-2cihomq21p413jtu4ebmf4kvefi8v9p1.apps.googleusercontent.com
&redirect_uri=http://localhost
&scope=https://www.googleapis.com/auth/drive
&response_type=code
ブラウザを立ち上げて、上記のURLを貼り付けてエンターを押します。

するとアカウントのログインを求められるので、アクセスしたいGoogle Driveのアカウントでログインします。
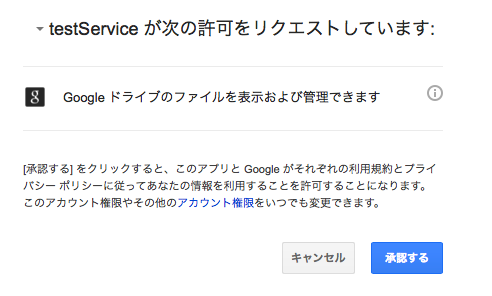
下のような画面になるので「承認する」をクリックします。
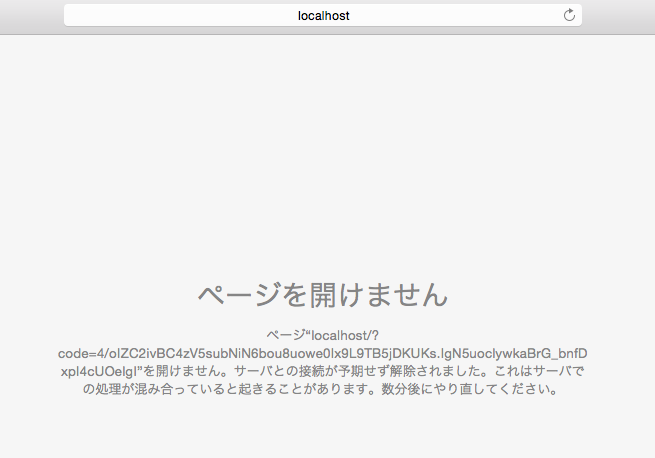
コピーしたURLはこんな感じです。
このURLの「4/oIZC2ivBC4zV5subNiN6bou8uowe0Ix9L9TB5jDKUKs.IgN5uoclywkaBrG_bnfDxpI4cUOelgI」の部分をこの先で使います。
http://localhost/?code=4/oIZC2ivBC4zV5subNiN6bou8uowe0Ix9L9TB5jDKUKs.IgN5uoclywkaBrG_bnfDxpI4cUOelgI
3. アクセストークンの取得
以下の[]で囲んだ部分を自分の情報に書き換えます。
curl -d client_id=[クライアントID] -d client_secret=[クライアントシークレット] -d redirect_uri=[リダイレクトURI] -d grant_type=authorization_code -d code=[Authorization Code] https://accounts.google.com/o/oauth2/token
私の場合だと以下のような感じになります。
curl -d client_id=127036428910-2cihomq21p413jtu4ebmf4kvefi8v9p1.apps.googleusercontent.com -d client_secret=2KR6kOI2hOs0QSKqqltrkyfi -d redirect_uri=http://localhost -d grant_type=authorization_code -d code=4/oIZC2ivBC4zV5subNiN6bou8uowe0Ix9L9TB5jDKUKs.IgN5uoclywkaBrG_bnfDxpI4cUOelgI https://accounts.google.com/o/oauth2/token
上記をターミナルで実行すると、以下の様なものが返ってきます。
一番下のがリフレッシュトークンです。
{
  "access_token" : "ya29.DwGisAjZTMSJH6biEjydYXIp6JaXRmYnh21CrW09XpSZzbyRtlg9xmONE1TD7tDDawQgpTjHgZD0kA",
  "token_type" : "Bearer",
  "expires_in" : 3600,
  "refresh_token" : "1/djoROZFMLKPHygvCqtREUAnF7ddeG-3mtXagaXwXAUg"
}
以下のようなのが出た場合はなにか指定が間違ってます。
{
  "error" : "invalid_grant"
}
以下のようなのが出た場合は2.のAuthorization Codeの取得のURLをもう一回ブラウザに貼り付けて認証してください。値が変わっているはずです。新しい値を取得してからcurlコマンドを書き換えてもう一回ターミナルで実行してください。
{
  "error" : "invalid_grant",
  "error_description" : "Code was already redeemed."
}
4. リフレッシュトークンからアクセストークンの再取得
アクセストークンには有効期限があるらしく、期限が切れた場合はリフレッシュトークンからアクセストークンの再取得が必要らしいです。
以下の[]の部分を自分の情報に書き換えます。
curl -d client_id=[クライアントID] -d client_secret=[クライアントシークレット] -d refresh_token=[リフレッシュトークン] -d grant_type=refresh_token https://accounts.google.com/o/oauth2/token
私の場合以下の様な感じになります。
これをまたターミナルで実行します。
curl -d client_id=127036428910-2cihomq21p413jtu4ebmf4kvefi8v9p1.apps.googleusercontent.com -d client_secret=2KR6kOI2hOs0QSKqqltrkyfi -d refresh_token=1/djoROZFMLKPHygvCqtREUAnF7ddeG-3mtXagaXwXAUg -d grant_type=refresh_token https://accounts.google.com/o/oauth2/token
するとこんなのが返ってきます。
これでやっとRuby側からGoogleDriveにアクセスできます。
{
  "access_token" : "ya29.DwHCrzGUsuzSUnFUKCHUugHXh3lTbYuBkn0fHk4lA33zxdGiFxT8palk5rvmR4PYlGqhlfFsRWzTBA",
  "token_type" : "Bearer",
  "expires_in" : 3600
}
5. RubyでGoogle Driveにアクセス
まず以下を実行してgemをインストールします。
$ gem install google_drive
以下の様なコードを書きます。
require 'google/api_client'
require 'google_drive'

CLIENT_ID = "127036428910-2cihomq21p413jtu4ebmf4kvefi8v9p1.apps.googleusercontent.com"
CLIENT_SECRET = "2KR6kOI2hOs0QSKqqltrkyfi"
REFRESH_TOKEN = "ya29.DwHCrzGUsuzSUnFUKCHUugHXh3lTbYuBkn0fHk4lA33zxdGiFxT8palk5rvmR4PYlGqhlfFsRWzTBA"

client = OAuth2::Client.new(
	CLIENT_ID, CLIENT_SECRET,
	:site => "https://accounts.google.com",
	:token_url => "/o/oauth2/token",
	:authorize_url => "/o/oauth2/auth"
)

auth_token = OAuth2::AccessToken.from_hash(client, { :refresh_token => REFRESH_TOKEN, :expires_at => 3600 })
auth_token = auth_token.refresh!

session = GoogleDrive.login_with_oauth(auth_token.token)

for file in session.files
	puts file.title
end
ターミナルで実行してみると、こんなかんじにGoogle Driveにあるファイルのリストが出ます。
$ ruby google-api-get-list.rb
IMG_0456.JPG
IMG_0454.JPG
IMG_0455.JPG
IMG_0451.JPG
(省略)
以下の部分を
for file in session.files
	puts file.title
end
こんな風に書き換えて実行すると、Google Driveに作ったファイルがアップロードされます。
file_name = "Test" + Time.now.strftime('%Y-%m-%d_%H:%M:%S') + ".txt"
file = File.open(file_name, 'w')
file.puts("Test Upload!!")
file.close

session.upload_from_file(file_name, file_name, :convert => false)
まとめ
このような感じで、RubyでGoogle Driveにアクセスできるようになりました。
現状「やったー動いたー!」な状態なため、細かい部分は調べれてないです。
これから調べます。
*説明で使っているクライアントIDなどは削除済みです。

