はじめに
POV-Ray3.6のWindows版にはGUIが提供されているのですが、コードの編集には非常に苦労します。また、MacやLinuxでは環境が提供されていません。そこで、以前にSublimeText2用のパッケージを作成しましたので、こちらでも案内します。
本記事の詳細は以下のページをご覧ください。
[POV-Ray][SublimeText2]SublimeText用POV-Rayパッケージを作成しました
特徴
- そこそこのシンタックスハイライト
- ほぼ全てのキーワードに対応したスニペット(ここ重要)
- レンダリング(Windows非対応)
インストール&利用方法
リポジトリを登録
SublimeText2の Preference > Package Controlをクリックし「Add Repository」を選択し
https://github.com/cho-design-lab/POV-Ray-sublime
を入力してください。
インストール
tools > Command Pallete...をクリックし、「Install Package」を選択し、POV-Ray-sublimeを選びEnterすればインストール完了です。
利用する
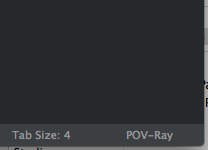
エディタの右下のファイル形式をPOV-Rayに変更するか、ファイルの拡張子を.povにすればパッケージが適用されます。

レンダリングする(Macのみ)
MacではPOV-Rayのエンジンにパスが通っていれば、tools > build もしくはCommand+Bでシーンファイルと同じ階層に画像が保存されます。また、解像度やその他設定を変更する場合は、povray.iniをシーンファイルと同じ階層にコピーし、編集することで可能です。
おわりに
ずいぶん昔に作成したパッケージだったのですが、最近POV-Rayを利用する機会があり、あらためて便利でしたので紹介しました。
