Docker for Mac でのWebSphere環境構築(インストール編)
はじめに
初めての投稿なので、少々バックグラウンドを。
当方、所謂インフラ屋ですが、昨今のパブリッククラウドの隆盛で危機感を覚え(現在AWS使用案件従事中)、これはいろいろとチャンレンジしないといかん、ということでとりあえず「Java Gold」(Javaは新人研修時に習った程度)と情報処理「システムアーキテクト」取得を目指しています。あと、AI分野も勉強していく予定です。
というわけで、今回はDockerにIBM WebSphere Application Server(以降WAS)と、連携するIBM HTTP Server(以降IHS)環境を構築していきます。実は、マークダウンも初めてなので(HTMLはW3Cのサイトを通読した程度の知識あり)、とりあえず
Markdown記法 チートシートを見ながら、Eclipse+Markdown Editorで書いていきます。
前提環境
使用する環境は以下の通りです。
- ホストマシン:iMac (Retina 5K, 27-inch, Late 2014) 4 GHz Intel Core i7 / 32GB 1600 MHz DDR3
- ホストOS:Mac OS High Sierra 10.13.2
- ホストカーネル:Darwin alto.local 17.3.0 Darwin Kernel Version 17.3.0: Thu Nov 9 18:09:22 PST 2017; root:xnu-4570.31.3~1/RELEASE_X86_64 x86_64
- Docker: Docker Community Edition Version 17.12.0-ce-mac49(21995)
- Dockerサブネット:
10.1.1.0/24(mognetwork) - IHSコンテナ、ホスト名、IPアドレス:
ihs www.docker.mognet.net 10.1.1.10 - WASコンテナ、ホスト名、IPアドレス:
was was.docker.mognet.net 10.1.1.11
Dockerには既にmognetworkという名前のブリッジネットワークを構築済みで、サブネットは10.1.1.0/24です。念のため、作り方を補足的に記載します。
$ docker network create -d bridge --subnet 10.1.1.0/24 mognetwork
これだけですが、周知の通りDockerのサブネットに直接ホストOSからアクセスはできませんので、以下のようなスクリプトで起動時にホストのループバックアドレスにエイリアスを追加しています。
# !/bin/sh
for i in $(seq 1 1 254); do
	sudo /sbin/ifconfig lo0 alias 10.1.1.${i}/24
done
で、このスクリプトをログオン時に自動実行させるため、以下のファイルを作成しています。
<!DOCTYPE plist PUBLIC "-//Apple//DTD PLIST 1.0//EN" "http://www.apple.com/DTDs/PropertyList-1.0.dtd">
<plist version="1.0">
<dict>
	<key>Label</key>
	<string>net.mognet.ipalias</string>
	<key>Program</key>
	<string>/usr/local/bin/ipalias</string>
	<key>RunAtLoad</key>
	<true/>
</dict>
</plist>
一般ユーザなのでsudo visudoでpiro ALL=NOPASSWD: /sbin/ifconfigを追加しています。
**ちなみに、エイリアスを254個作りますので、例えばListen *:80みたいなことをしているサービスがあると、相当起動時間が遅くなる可能性があります。**この辺のさじ加減はあるかと思いますが念のため。
これで、docker run時のポートフォワーディング設定でエイリアスIPを明示しつつ指定すれば、あたかもそのコンテナのアドレスに直接アクセスしているような感じになります。hostsにホスト名を切っておけば当然ホスト名でもアクセスできます。あくまでも体感上ですが。。。
環境構築
前置きが長くなりましたが、ここから本題です。実はIBM社オフィシャルのWAS Dockerイメージが公開されています(IHSもあります)。これらを使えばさくっとWAS導入できますが、日本語化されていないので今回はCentOSのイメージを落としてきて、ゼロベースでIHS+WAS環境を構築していきます(UbuntuでもOracleLinuxでもいいです)。**Docker的にはアンチパターンかもしれませんがお勉強も兼ねてということで。。。**あと、インストールにはIBMアカウント(無料)が必要ですので、未作成の場合はIBM ID登録ページで作成します。
以降、コマンド実行がホスト上、コンテナ上(root/非root)とややこしくなるので、プロンプト表記を以下のようにします。
| コマンド実行環境 | プロンプト表記 |
|---|---|
| ホスト上(Mac) | mac:$ |
| コンテナ上(root) | root:# |
| コンテナ上(一般ユーザ) | $ |
1. IBM Installation Manager(IIM)のダウンロード
まずはこれがないとどうしようもないので、IBM ダウンロードサイトからIIMを落としてきます。コンテナ上にwgetとか入れたくないのでホスト上でやりました。
なお、実際にWASやIHSをインストールする際に指定するリポジトリURLはIBM WebSphere Liberty Repository WASDevを参照してください。
2. 初期OS構築
コンテナイメージを作る上でベースとなるOSコンテナを作ります。WASとIHS両方で使えるように適当なタイミングでcommitします。
mac:$ docker run -it --name tmp centos # ベースのOSをrun
mac:$ docker cp ~/Downloads/agent.installer.linux.gtk.x86_64_1.8.8000.20171130_1105 tmp:/tmp # ホストでダウンロードしたIIMをコンテナの"/tmp"にコピー
ここからコンテナ上での作業です。早速IIMをインストールします。非GUI環境なので、installcコマンドを使います。
root:# /tmp/agent.installer.linux.gtk.x86_64_1.8.8000.20171130_1105/installc -acceptLicense
Installed com.ibm.cic.agent_1.8.8000.20171130_1105 to the /opt/IBM/InstallationManager/eclipse directory.
続いて一般ユーザを作成します。Mac側と合わせたいので、uid=501(piro) gid=20(staff) gid=10(wheel)で作ります。
root:# vi /etc/group
root:# grep staff /etc/group
staff:x:20
root:# useradd -g 20 -G 10 -u 501 piro
root:# id piro
uid=501(piro) gid=20(staff) groups=20(staff),10(wheel)
root:# passwd	                 # パスワードも初期化しておきます
root:# passwd piro               # 同上
root:# yum install -y sudo       # ないと不便かもしれないので一応
root:# yum install -y sysstat    # チューニング時にないとお話にならないので
root:# rm -f /etc/localtime      # ここから日本時間化対応
root:# ln -s /usr/share/zoneinfo/Asia/Tokyo /etc/localtime
root:# echo 'export TZ=JST-9' >>/etc/profile
ダミーのエントリーポイントスクリプトを作ります。とりあえず明示的にコンテナを落とすまで10秒ずつ眠ってもらいます。
root:# cat << END_OF_CAT > /opt/IBM/entry.sh
# !/bin/bash
while true; do
    sleep 10
done
END_OF_CAT
root:# chmod 755 /opt/IBM/entry.sh
root:# exit
ここからWASとIHSを作っていきますので、この時点でイメージをコミットして、いらなくなったコンテナとイメージは削除します。
mac:$ docker commit tmp ibmbase
mac:$ docker rm tmp
mac:$ docker image rm centos
3. WASコンテナ作成
WASを導入していきます。ちょっと面倒ですが、WASのログやらをホストOSから直接見たいので、一旦コンテナ上でWASを構築し、ホストOS上にファイルをコピーした上で、再度ホスト上のディレクトリをマウントする形でコンテナを起動します。
3.1. WASインストール(仮)
一時的なコンテナを作成します。
mac:$ docker run -it --name wastmp ibmbase
コンテナにてWASのインストーラ(IIM)を起動します。
root:# /opt/IBM/InstallationManager/eclipse/tools/imcl -c
対話型のCUIインストーラが起動しますので適当に答えるだけです(インストール対象パッケージはWAS本体とIBM JDK、追加は日本語サポートと動作確認用のサンプルアプリケーションのみ)。ログを書き出すと非常に長いので(既に初投稿ならではの冗長さ)、初めにキーストロークだけ記載しておきます。p → 1 → d → https://www.ibm.com/software/repositorymanager/V9WASILAN → p → _username_ → _passowrd_ → 1 → o → a → r → 1 → 1 → 1 → 3 → 1 → n → 1 → n → a → n → n → n → 8 → n → 4 → n → i → f → x
注:適宜空行がありますが、マークダウンインタープリタで段落と解釈されるので削除しています。`pre`も効かない。。。
=====> IBM Installation Manager
Select:
     1. Install - Install software packages
     2. Update - Find and install updates and fixes to installed software packages
     3. Modify - Change installed software packages
     4. Roll Back - Revert to an earlier version of installed software packages
     5. Uninstall - Remove installed software packages
Other Options:
     L. View Logs
     S. View Installation History
     V. View Installed Packages
        ------------------------
     P. Preferences
        ------------------------
     A. About IBM Installation Manager
        ------------------------
     X. Exit Installation Manager
-----> P
=====> IBM Installation Manager> Preferences
Select:
     1. Repositories
     2. Appearance
     3. Files for Rollback
     4. SSL/TLS
     5. HTTP/FTP Proxy
     6. Passport Advantage
     7. Secure Storage
     8. Updates
     R. Return to Main Menu
-----> [1] 1
=====> IBM Installation Manager> Preferences> Repositories
Repositories:
Other Options:
     D. Add Repository
     S. [X] Search service repositories during installation and updates
     R. Restore Defaults
     A. Apply Changes and Return to Preferences Menu
     P. Temporarily Keep Changes and Return to Preferences Menu
-----> D
=====> IBM Installation Manager> Preferences> Repositories> Add repository
Enter a new repository location. To skip, press Enter:
-----> https://www.ibm.com/software/repositorymanager/V9WASILAN
Checking repositories...
=====> IBM Installation Manager> Password required
Credentials are required to connect to the IBM download site. Enter IBM ID and password.
Select:
     P. Provide credentials and connect
     C. Cancel
Select 'P' to enter credentials and connect, or 'C' to cancel.
  Forgot your IBM ID?
    https://www.ibm.com/account/profile?page=forgotuid
  Forgot your password?
    https://www.ibm.com/account/profile?page=forgot
  IBM ID help and FAQ
    https://www.ibm.com/account/profile/us/en?page=regfaqhelp
-----> P
Enter user name:
-----> yourIBMId
Enter password:
To skip entering password, press Enter. In most cases, you must enter a password to access a repository.
----->
     1. [ ] Save password if valid
     O. OK,      C. Cancel
-----> 1
     1. [X] Save password if valid
     O. OK,      C. Cancel
-----> o
Enter the master password to setup credentials storage:
Confirm the master password to setup credentials storage:
=====> IBM Installation Manager> Preferences> Repositories
Repositories:
     1. [X] https://www.ibm.com/software/repositorymanager/V9WASILAN
Other Options:
     D. Add Repository
     C. Clear Credentials
     S. [X] Search service repositories during installation and updates
     R. Restore Defaults
     A. Apply Changes and Return to Preferences Menu
     P. Temporarily Keep Changes and Return to Preferences Menu
-----> A
=====> IBM Installation Manager> Preferences
Select:
     1. Repositories
     2. Appearance
     3. Files for Rollback
     4. SSL/TLS
     5. HTTP/FTP Proxy
     6. Passport Advantage
     7. Secure Storage
     8. Updates
     R. Return to Main Menu
-----> [1] R
=====> IBM Installation Manager
Select:
     1. Install - Install software packages
     2. Update - Find and install updates and fixes to installed software packages
     3. Modify - Change installed software packages
     4. Roll Back - Revert to an earlier version of installed software packages
     5. Uninstall - Remove installed software packages
Other Options:
     L. View Logs
     S. View Installation History
     V. View Installed Packages
        ------------------------
     P. Preferences
        ------------------------
     A. About IBM Installation Manager
        ------------------------
     X. Exit Installation Manager
-----> 1
Checking repositories...
Loading repositories...
Checking availability of packages...
Validating package prerequisites...
=====> IBM Installation Manager> Install
Select packages to install:
     1. [ ] IBM WebSphere Application Server (ILAN) 9.0.0.6
     2. [ ] IBM WebSphere Application Server Liberty (ILAN) 17.0.0.4
     3. [ ] IBM SDK, Java Technology Edition, Version 8 8.0.5.7
     C. Cancel
-----> [C] 1
=====> IBM Installation Manager> Install> Select
IBM WebSphere Application Server (ILAN) 9.0.0.6
Options:
     1. Choose version 9.0.0.6 for installation.
     2. Show all available versions of the package.
     C. Cancel
-----> [1] 1
Preparing and resolving the selected packages...
=====> IBM Installation Manager> Install
Select packages to install:
     1. [X] IBM WebSphere Application Server (ILAN) 9.0.0.6
     2. [ ] IBM WebSphere Application Server Liberty (ILAN) 17.0.0.4
     3. [ ] IBM SDK, Java Technology Edition, Version 8 8.0.5.7
     O. Check for Other Versions, Fixes, and Extensions
     N. Next,      C. Cancel
-----> [N] 3
=====> IBM Installation Manager> Install> Select
IBM SDK, Java Technology Edition, Version 8 8.0.5.7
Options:
     1. Choose version 8.0.5.7 for installation.
     2. Show all available versions of the package.
     C. Cancel
-----> [1] 1
Preparing and resolving the selected packages...
=====> IBM Installation Manager> Install
Select packages to install:
     1. [X] IBM WebSphere Application Server (ILAN) 9.0.0.6
     2. [ ] IBM WebSphere Application Server Liberty (ILAN) 17.0.0.4
     3. [X] IBM SDK, Java Technology Edition, Version 8 8.0.5.7
     O. Check for Other Versions, Fixes, and Extensions
     N. Next,      C. Cancel
-----> [N] n
Loading fixes...
Loading fixes...
=====> IBM Installation Manager> Install> Fixes
Select Fixes:
     1-. [ ] Fixes for IBM WebSphere Application Server (ILAN) 9.0.0.6
       2. [ ] 9.0.0.6-WS-WAS-IFPI90804 9.0.6.20180111_1502
Other Options:
     S. Show Recommended Only
     O. Check for Other Fixes
     B. Back,      N. Next,      C. Cancel
-----> [N] 1
Preparing and resolving the selected packages....
=====> IBM Installation Manager> Install> Fixes
Select Fixes:
     1-. [X] Fixes for IBM WebSphere Application Server (ILAN) 9.0.0.6
       2. [X] 9.0.0.6-WS-WAS-IFPI90804 9.0.6.20180111_1502
Other Options:
     S. Show Recommended Only
     O. Check for Other Fixes
     B. Back,      N. Next,      C. Cancel
-----> [N] n
Validating package prerequisites...
=====> IBM Installation Manager> Install> Fixes> Licenses
Read the following license agreements carefully.
View a license agreement by entering the number:
     1. IBM WebSphere Application Server (ILAN) - Software License Agreement
Options:
     A. [ ] I accept the terms in the license agreement
     D. [ ] I do not accept the terms in the license agreement
     B. Back,      C. Cancel
-----> [C] a
=====> IBM Installation Manager> Install> Fixes> Licenses
Read the following license agreements carefully.
View a license agreement by entering the number:
     1. IBM WebSphere Application Server (ILAN) - Software License Agreement
Options:
     A. [X] I accept the terms in the license agreement
     D. [ ] I do not accept the terms in the license agreement
     B. Back,      N. Next,      C. Cancel
-----> [N] n
=====> IBM Installation Manager> Install> Fixes> Licenses> Shared Directory
Shared Resources Directory:
        /opt/IBM/IMShared
Options:
     M. Change Shared Resources Directory
     B. Back,      N. Next,      C. Cancel
-----> [N] n
Finding compatible package groups...
=====> IBM Installation Manager> Install> Fixes> Licenses> Shared Directory>
  Location
New package group:
     1. [X] IBM WebSphere Application Server V9.0
Selected group id: "IBM WebSphere Application Server V9.0"
Selected location: "/opt/IBM/WebSphere/AppServer"
Selected architecture: 64-bit
Options:
     M. Change Location
     T. Change to 32-bit architecture
     B. Back,      N. Next,      C. Cancel
-----> [N] n
=====> IBM Installation Manager> Install> Fixes> Licenses> Shared Directory>
  Location> Translations
Select the translations to install.
Translations Supported by All Packages
     1. [X] English
     2. [ ] Brazilian Portuguese
     3. [ ] Czech
     4. [ ] French
     5. [ ] German
     6. [ ] Hungarian
     7. [ ] Italian
     8. [ ] Japanese
     9. [ ] Korean
    10. [ ] Polish
    11. [ ] Romanian
    12. [ ] Russian
    13. [ ] Simplified Chinese
    14. [ ] Spanish
    15. [ ] Traditional Chinese
Other Options:
     S. Select All Translations
     U. Unselect All Translations
     B. Back,      N. Next,      C. Cancel
-----> [N] 8
=====> IBM Installation Manager> Install> Fixes> Licenses> Shared Directory>
  Location> Translations
Select the translations to install.
Translations Supported by All Packages
     1. [X] English
     2. [ ] Brazilian Portuguese
     3. [ ] Czech
     4. [ ] French
     5. [ ] German
     6. [ ] Hungarian
     7. [ ] Italian
     8. [X] Japanese
     9. [ ] Korean
    10. [ ] Polish
    11. [ ] Romanian
    12. [ ] Russian
    13. [ ] Simplified Chinese
    14. [ ] Spanish
    15. [ ] Traditional Chinese
Other Options:
     S. Select All Translations
     U. Unselect All Translations
     B. Back,      N. Next,      C. Cancel
-----> [N] n
=====> IBM Installation Manager> Install> Fixes> Licenses> Shared Directory>
  Location> Translations> Features
IBM WebSphere Application Server (ILAN)
     1. [X] EJBDeploy tool for pre-EJB 3.0 modules
     2. [X] Stand-alone thin clients and resource adapters
     3. [X] Embeddable EJB container
     4. [ ] Sample applications
IBM SDK, Java Technology Edition, Version 8
     B. Back,      N. Next,      C. Cancel
-----> [N] 4
=====> IBM Installation Manager> Install> Fixes> Licenses> Shared Directory>
  Location> Translations> Features
IBM WebSphere Application Server (ILAN)
     1. [X] EJBDeploy tool for pre-EJB 3.0 modules
     2. [X] Stand-alone thin clients and resource adapters
     3. [X] Embeddable EJB container
     4. [X] Sample applications
IBM SDK, Java Technology Edition, Version 8
     B. Back,      N. Next,      C. Cancel
-----> [N] n
=====> IBM Installation Manager> Install> Fixes> Licenses> Shared Directory>
  Location> Translations> Features> Summary
Target Location:
  Package Group Name         :  IBM WebSphere Application Server V9.0
  Installation Directory     :  /opt/IBM/WebSphere/AppServer
  Shared Resources Directory :  /opt/IBM/IMShared
Translations:
        English, Japanese
Packages to be installed:
     1. IBM WebSphere Application Server (ILAN) 9.0.0.6
       2. 9.0.0.6-WS-WAS-IFPI90804 9.0.6.20180111_1502
     3. IBM SDK, Java Technology Edition, Version 8 8.0.5.7
Options:
     G. Generate an Installation Response File
     B. Back,      I. Install,      C. Cancel
-----> [I] i
                 25%                50%                75%                100%
------------------|------------------|------------------|------------------|
............................................................................
=====> IBM Installation Manager> Install> Fixes> Licenses> Shared Directory>
  Location> Translations> Features> Summary> Completion
The install completed successfully.
Options:
     F. Finish
-----> [F] F
=====> IBM Installation Manager
Select:
     1. Install - Install software packages
     2. Update - Find and install updates and fixes to installed software packages
     3. Modify - Change installed software packages
     4. Roll Back - Revert to an earlier version of installed software packages
     5. Uninstall - Remove installed software packages
Other Options:
     L. View Logs
     S. View Installation History
     V. View Installed Packages
        ------------------------
     P. Preferences
        ------------------------
     A. About IBM Installation Manager
        ------------------------
     X. Exit Installation Manager
-----> x
3.2. イメージ作成とディレクトリコピー
インストールが完了したので、ここでイメージを取りつつ、ホストOSにWASのインストールディレクトリをコピーします。
mac:$ docker commit wastmp websphere
mac:$ sudo mkdir /opt/IBM
mac:$ sudo chown piro:staff /opt/IBM
mac:$ docker cp -a wastmp:/opt/IBM/WebSphere /opt/IBM
mac:$ docker rm -f wastmp  # 用済みなので削除
3.3. WASコンテナ作成(永続)
作成したイメージから永続コンテナを走らせます。ここでentrypointも上書きします。
mac:$ docker run --name was -h was.docker.mognet.net --entrypoint /opt/IBM/entry.sh \
-p 10.1.1.11:9043:9043 -p 10.1.1.11:9080:9080 -p 10.1.1.11:9443:9443 \
-p 10.1.1.11:2809:2809 -p 10.1.1.11:8880:8880 \
--net=mognetwork --ip=10.1.1.11 \
-v /opt/IBM/WebSphere/AppServer:/opt/IBM/WebSphere/AppServer \
websphere
ホスト上のファイルシステムをコンテナにマウントする場合、dockerのPreferencesで、File Sharingに/opt/IBMが入っていないとエラーになります。
docker上で管理コンソール用プロファイルを作成します。
mac:$ docker exec -it was bash
root:# chown -R piro:staff /opt/IBM
root:# su - piro
$ /opt/IBM/WebSphere/AppServer/bin/manageprofiles.sh -create \
  -templatePath /opt/IBM/WebSphere/AppServer/profileTemplates/management \
  -profileName AdminAgent -nodeName adminserver -cellName AdminCell -hostName was.docker.mognet.net -serverName adminagent \
  -adminUserName wsadmin -adminPassword p@ssw0rd -enableAdminSecurity true -keyStorePassword p@ssw0rd \
  -personalCertDN cn=was.mognet.net,ou=dev,ou=docker,o=mognet.net,L=Koutou-Ku,ST=Tokyo,c=JP \
  -personalCertValidityPeriod 15 \
  -signingCertDN cn=websphereCA,ou=dev,ou=docker,o=mognet.net,L=Koutou-Ku,ST=Tokyo,c=JP \
  -signingCertValidityPeriod 25 \
  -serverType ADMIN_AGENT
INSTCONFPARTIALSUCCESS: The profile now exists, but errors occurred. For more information, consult /opt/IBM/WebSphere/AppServer/logs/manageprofiles/AdminAgent_create.log.
# なんか警告あるけど気にしないで起動
$ /opt/IBM/WebSphere/AppServer/profiles/AdminAgent/bin/startServer.sh adminagent
ここで何度かdockerデーモンごと落ちましたが、何度かdockerとコンテナを再起動したらうまくいきました。続けてデフォルトプロファイルの作成です。
$ /opt/IBM/WebSphere/AppServer/bin/manageprofiles.sh -create \
  -templatePath /opt/IBM/WebSphere/AppServer/profileTemplates/default \
  -profileName AppSrv01 -nodeName apserver -cellName devAppcell -hostName was.docker.mognet.net -serverName apserver \
  -adminUserName wsadmin -adminPassword p@ssw0rd -enableAdminSecurity true -keyStorePassword p@ssw0rd \
  -isDefault \
  -applyPerfTuningSetting standard \
  -personalCertDN cn=was.docker.mognet.net,ou=dev,ou=docker,o=mognet.net,L=Koutou-Ku,ST=Tokyo,c=JP \
  -personalCertValidityPeriod 15 \
  -signingCertDN cn=websphereCA,ou=dev,ou=docker,o=mognet.net,L=Koutou-Ku,ST=Tokyo,c=JP \
  -signingCertValidityPeriod 25
デフォルトプロファイルを管理エージェントに登録します。途中で認証を求められるので、管理ユーザ名とパスワードを入力します。
$ /opt/IBM/WebSphere/AppServer/profiles/AdminAgent/bin/registerNode.sh -profilePath /opt/IBM/WebSphere/AppServer/profiles/AppSrv01
最後にentry.shからインスタンス起動するよう修正して一旦終了です。
$ sudo cat << END_OF_CAT > /opt/IBM/entry.sh
# !/bin/bash
su - piro
WAS_HOME=/opt/IBM/WebSphere/AppServer
ADM_PROF=${WAS_HOME}/profiles/AdminAgent
APP_PROF=${WAS_HOME}/profiles/AppSrv01

${ADM_PROF}/bin/startServer.sh adminagent &
${APP_PROF}/bin/startServer.sh apserver &

while true; do
    sleep 10
done
END_OF_CAT
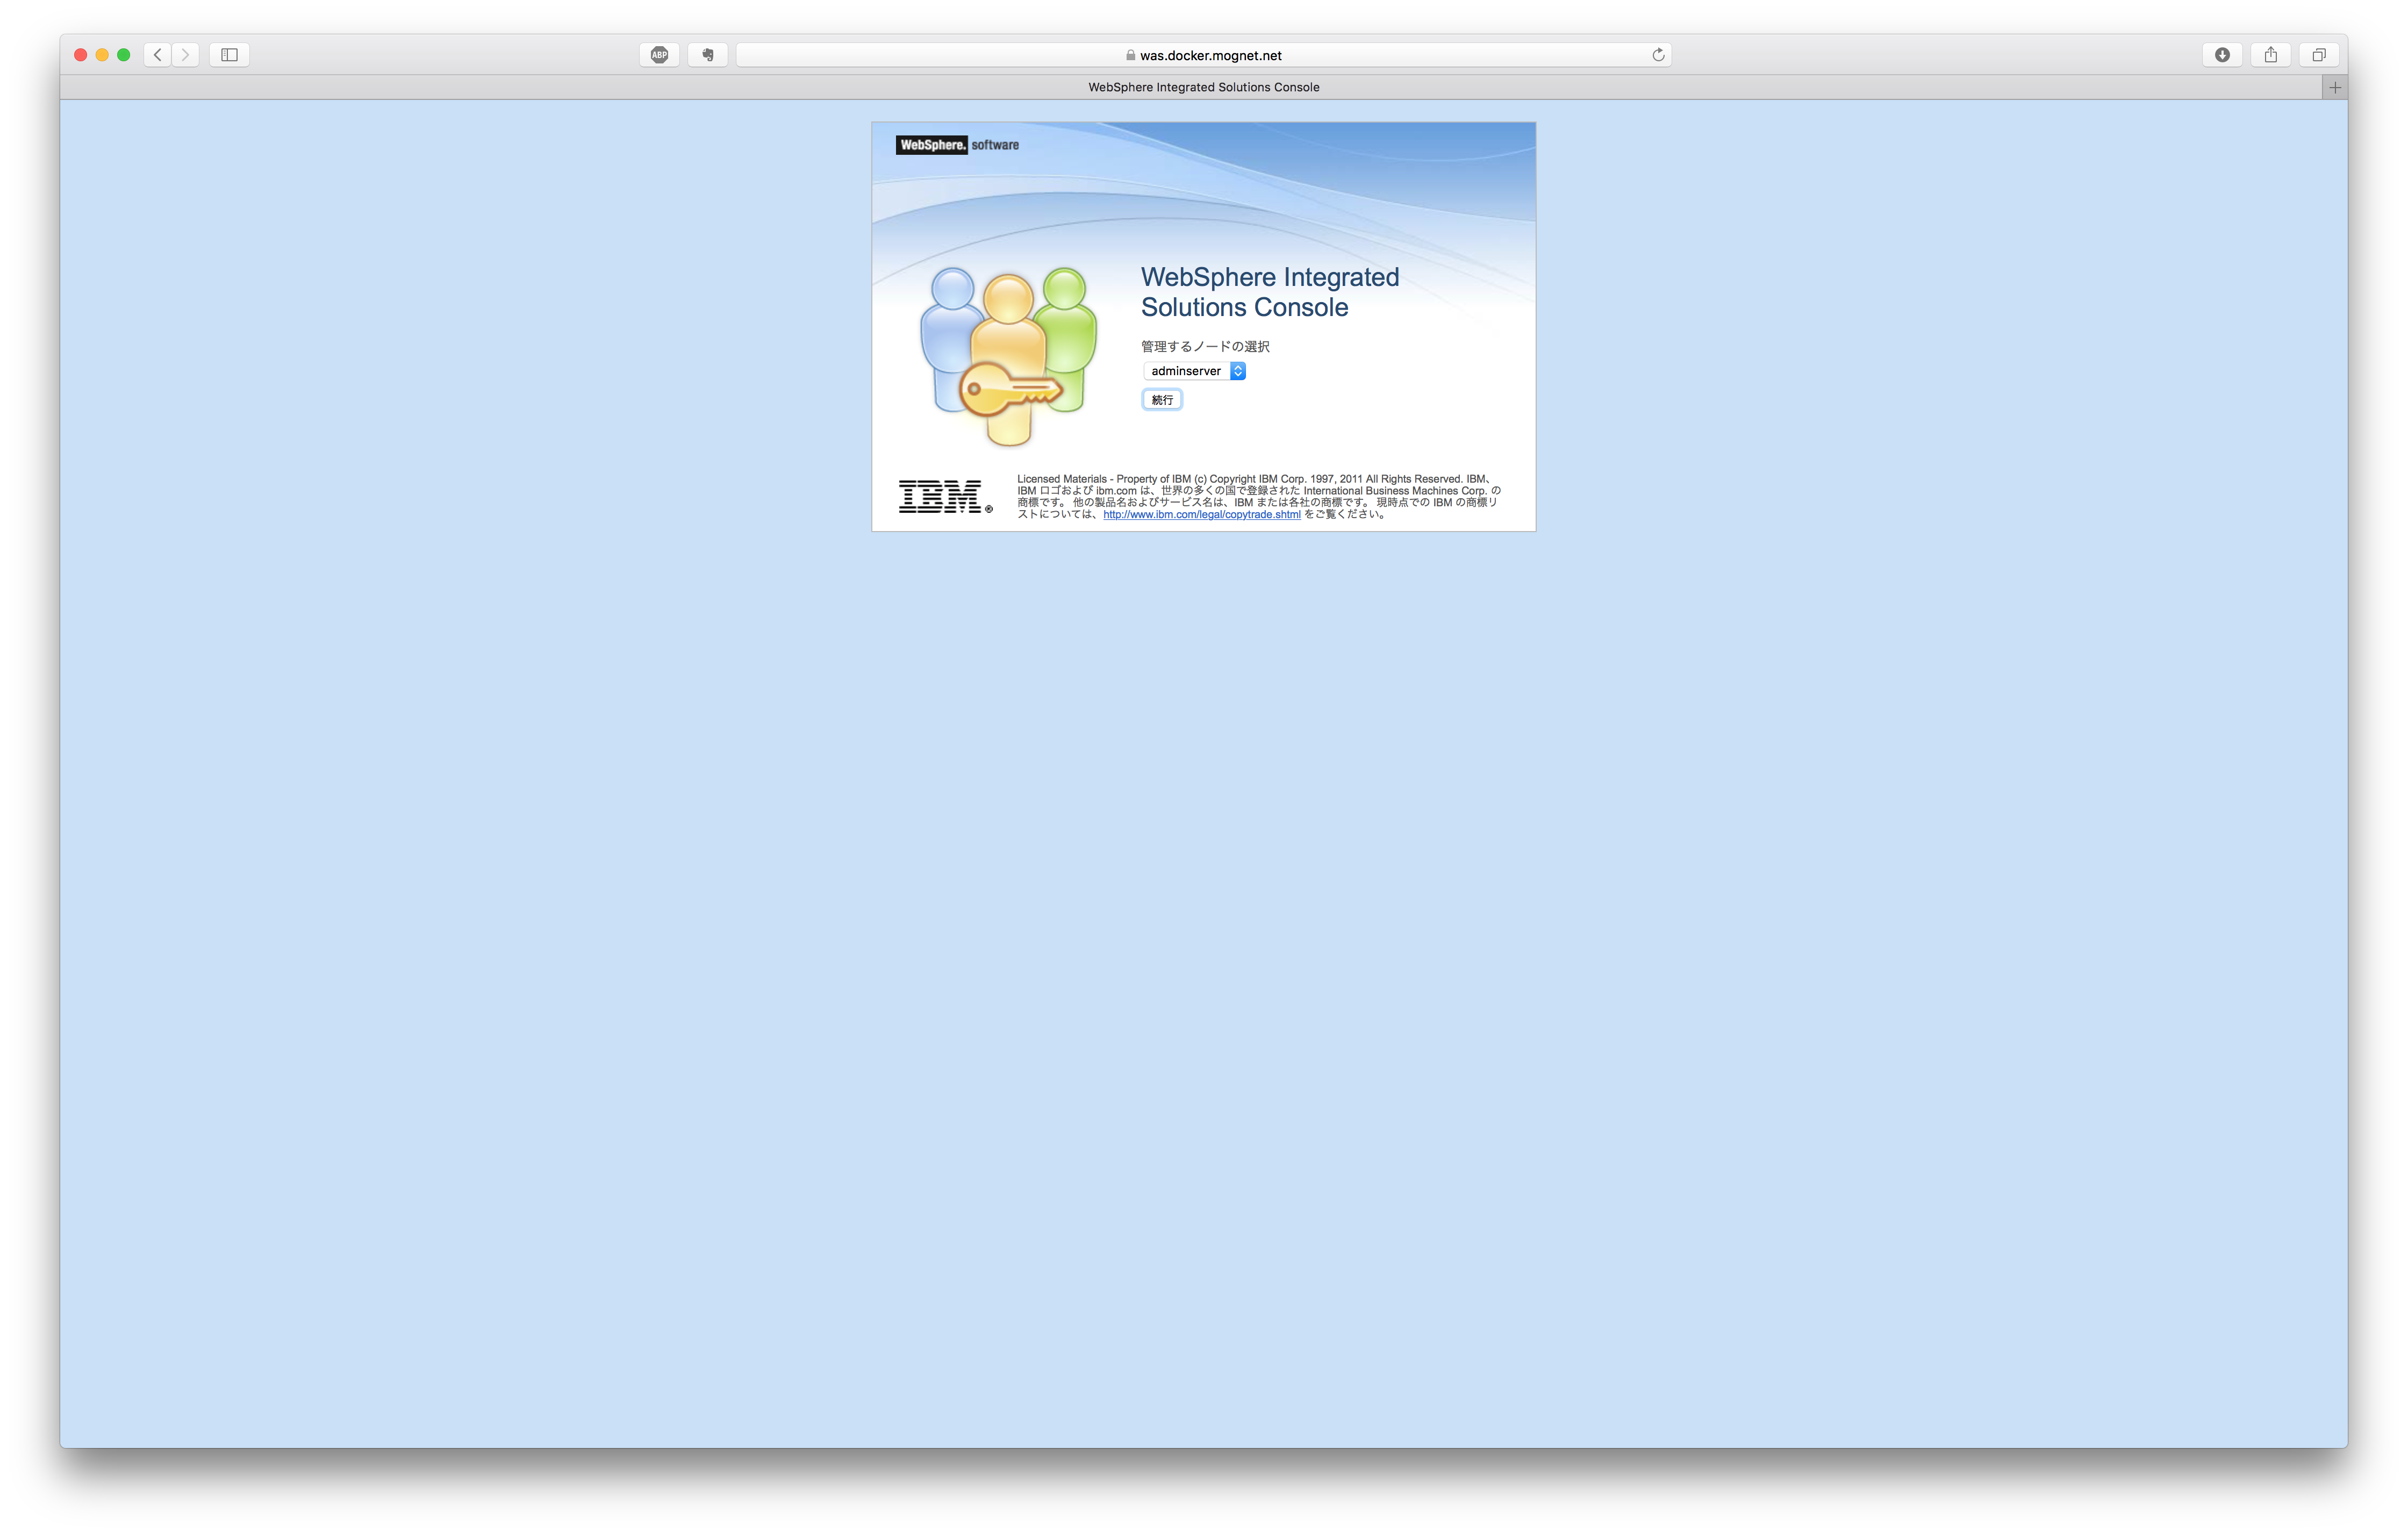
コンテナを再起動してWebコンソールにアクセスできることを確認します。コンソールURLは https://10.1.1.11:9043/ibm/console/logon.jsp です。ホストOSのhostsにエントリを加えることで、 https://was.docker.mognet.net:9043/ibm/console/logon.jsp でアクセスできるようにします。
# docker env
10.1.1.10	www.docker.mognet.net	ihs
10.1.1.11	was.docker.mognet.net	was
4. IHSコンテナ作成
さらにIHSを導入していきます。WAS同様にログやらをホストOSから直接見たいので、一旦コンテナ上でIHSを構築し、ホストOS上にファイルをコピーした上で、再度ホスト上のディレクトリをマウントする形でコンテナを起動します。
4.1. IHSインストール(仮)
一時的なコンテナを作成します。
mac:$ docker run -it --name ihstmp ibmbase
コンテナにてIHSのインストーラ(IIM)を起動します。
root:# /opt/IBM/InstallationManager/eclipse/tools/imcl -c
WAS同様、対話型のCUIインストーラが起動しますので適当に答えるだけです。レスポンスファイルを生成しておいたので、これを載せます。リポジトリがWASとは異なるのと、インストールパッケージが異なります(IHS、IHS Plugin、IBM JDK)。なぜか3つ一気にインストールしようとすると、フィックスの競合がおきてNGだったので、2回(IHS+JDK、Plugin+JDK)インストールしています。
<?xml version='1.0' encoding='UTF-8'?>
<agent-input>
  <variables>
    <variable name='sharedLocation' value='/opt/IBM/IMShared'/>
  </variables>
  <server>
    <repository location='https://www.ibm.com/software/repositorymanager/V9WASSupplements'/>
  </server>
  <profile id='IBM HTTP Server V9.0' installLocation='/opt/IBM/HTTPServer'>
    <data key='cic.selector.arch' value='x86_64'/>
    <data key='user.ihs.http.server.service.name.key' value='IBMHTTPServerV9.0'/>
    <data key='user.ihs.http.server.service.name' value='IBM HTTP Server V9.0'/>
    <data key='user.ihs.win.serverServicePassword' value='XjTveChg5ba6olBVMK/Reg=='/>
    <data key='user.ihs.allowNonRootSilentInstall' value='true'/>
    <data key='user.ihs.win.serverServiceLogOnAsLocalSystem' value='true'/>
    <data key='user.ihs.win.serverServiceUser' value='root'/>
    <data key='user.ihs.httpPort' value='80'/>
    <data key='cic.selector.nl' value='en,ja'/>
  </profile>
  <install>
    <!-- IBM HTTP Server for WebSphere Application Server 9.0.0.6 -->
    <offering profile='IBM HTTP Server V9.0' id='com.ibm.websphere.IHS.v90' version='9.0.6.20171205_1311' features='core.feature'/>
    <!-- IBM SDK, Java Technology Edition, Version 8 8.0.5.7 -->
    <offering profile='IBM HTTP Server V9.0' id='com.ibm.java.jdk.v8' version='8.0.5007.20171218_1035' features='com.ibm.sdk.8'/>
  </install>
  <preference name='com.ibm.cic.common.core.preferences.eclipseCache' value='${sharedLocation}'/>
</agent-input>
<?xml version='1.0' encoding='UTF-8'?>
<agent-input>
  <variables>
    <variable name='sharedLocation' value='/opt/IBM/IMShared'/>
  </variables>
  <server>
    <repository location='https://www.ibm.com/software/repositorymanager/V9WASSupplements'/>
  </server>
  <profile id='Web Server Plug-ins for IBM WebSphere Application Server V9.0' installLocation='/opt/IBM/WebSphere/Plugins'>
    <data key='cic.selector.arch' value='x86_64'/>
    <data key='cic.selector.nl' value='en,ja'/>
  </profile>
  <install>
    <!-- Web Server Plug-ins for IBM WebSphere Application Server 9.0.0.6 -->
    <offering profile='Web Server Plug-ins for IBM WebSphere Application Server V9.0' id='com.ibm.websphere.PLG.v90' version='9.0.6.20171205_1311' features='core.feature'/>
    <!-- IBM SDK, Java Technology Edition, Version 8 8.0.5.7 -->
    <offering profile='Web Server Plug-ins for IBM WebSphere Application Server V9.0' id='com.ibm.java.jdk.v8' version='8.0.5007.20171218_1035' features='com.ibm.sdk.8'/>
  </install>
  <preference name='com.ibm.cic.common.core.preferences.eclipseCache' value='${sharedLocation}'/>
</agent-input>
4.2. イメージ作成とディレクトリコピー
インストールが完了したので、ここでイメージを取りつつ、ホストOSにIHSのインストールディレクトリをコピーします。
mac:$ docker commit ihstmp ibmhttpserver
mac:$ docker cp -a wastmp:/opt/IBM/HTTPServer /opt/IBM
mac:$ docker cp -a ihstmp:/opt/IBM/WebSphere/Plugins /opt/IBM/WebSphere
mac:$ docker rm -f ihstmp # 用済みなので削除
4.3. IHSコンテナ作成(永続)
作成したイメージから永続コンテナを走らせます。ここでentrypointも上書きします。
mac:$ docker run --name ihs -h www.docker.mognet.net --entrypoint /opt/IBM/entry.sh \
-p 10.1.1.10:80:80 -p 10.1.1.10:443:443 \
--net=mognetwork --ip=10.1.1.10 \
-v /opt/IBM/WebSphere/Plugins:/opt/IBM/WebSphere/Plugins \
-v /opt/IBM/HTTPServer:/opt/IBM/HTTPServer \
ibmhttpserver
docker上で起動確認します。
mac:$ docker exec -it was bash
root:# /opt/IBM/HTTPServer/bin/apachectl -k start
root:# ps -ef | grep httpd
root        34     0  0 11:50 ?        00:00:00 /opt/IBM/HTTPServer/bin/httpd -d /opt/IBM/HTTPServer -k start
nobody      35    34  0 11:50 ?        00:00:00 /opt/IBM/HTTPServer/bin/httpd -d /opt/IBM/HTTPServer -k start
nobody      36    34  0 11:50 ?        00:00:00 /opt/IBM/HTTPServer/bin/httpd -d /opt/IBM/HTTPServer -k start
nobody      37    34  0 11:50 ?        00:00:00 /opt/IBM/HTTPServer/bin/httpd -d /opt/IBM/HTTPServer -k start
最後にentry.shから起動するよう修正して一旦終了です。
root:# cat << END_OF_CAT > /opt/IBM/entry.sh
# !/bin/bash
IHS_HOME=/opt/IBM/HTTPServer

${IHS_HOME}/bin/apachctl -k start

while true; do
    sleep 10
done
END_OF_CAT
コンテナを再起動してデフォルトサイトにアクセスできることを確認します。URLは http://10.1.1.10/ です。

さて、長くなってしまったので今回はこれくらいにします。次回はプラグインの設定(IHSーWASの連携)です。