この記事で書くこと
cri-tools(crictl)でContainer Runtimeを操作してContainerを起動してみる.
- High level Runtime: containerd
- Low level Runtime: runc
環境構築
利用環境
以下の仮想マシンを用います:
- OS: Ubuntu18.04
- Infra: AWS EC2 t3a.nano
パッケージインストール
Runtimeをインストールしていきます.
containerd/runcはDockerをインストールする手順をなぞって containerd.io のみインストールするようにします.
コマンド
sudo apt purge -y docker docker-engine docker.io containerd runc
sudo apt update -y
sudo apt install -y \
    apt-transport-https \
    ca-certificates \
    curl \
    gnupg-agent \
    software-properties-common
curl -fsSL https://download.docker.com/linux/ubuntu/gpg \
    | sudo apt-key add -
sudo add-apt-repository \
    "deb [arch=amd64] https://download.docker.com/linux/ubuntu \
    $(lsb_release -cs) \
    stable"
sudo apt update -y
sudo apt install containerd.io
参考:
- Dockerインストール手順
-
kubernetes.ioのContainer runtimes
- network周りは後の設定にまとめて書きますがやっておいてもOK
関連ツールとしてCLIであるcrictlとcniプラグインをインストールします.
CRI-OやpodmanのパッケージをホストしているKubicリポジトリからインストールします. 具体的にはCRI-Oのインストール手順で cri-tools と containernetworking-plugins パッケージのみインストールします.
コマンド
export OS=xUbuntu_18.04
echo "deb https://download.opensuse.org/repositories/devel:/kubic:/libcontainers:/stable/$OS/ /" \
    | sudo tee /etc/apt/sources.list.d/devel:kubic:libcontainers:stable.list
curl -L https://download.opensuse.org/repositories/devel:/kubic:/libcontainers:/stable/$OS/Release.key \
    | sudo apt-key add -
sudo apt update -y
sudo apt install -y \
    cri-tools \
    containernetworking-plugins
参考:
設定
kubernetes.ioのContainer runtimesの手順に従ってOSのネットワーク設定を行います.
コマンド
cat << __EOT__ | sudo tee /etc/modules-load.d/containerd.conf
overlay
br_netfilter
__EOT__

sudo modprobe overlay
sudo modprobe br_netfilter

cat << __EOT__ | sudo tee /etc/sysctl.d/99-kubernetes-cri.conf
net.bridge.bridge-nf-call-iptables  = 1
net.ipv4.ip_forward                 = 1
net.bridge.bridge-nf-call-ip6tables = 1
__EOT__

sudo sysctl --system
また, containerd自体の設定を作ってcontainerdサービスを再起動しておきます.
sudo mkdir -p /etc/containerd
sudo containerd config default | sudo tee /etc/containerd/config.toml
sudo systemctl restart containerd
さらにcniの設定として /etc/cni/net.d/50-bridge.conflist を以下の内容1で作成します.
{
  "cniVersion": "0.4.0",
  "name": "cni-bridge",
  "plugins": [
    {
      "type": "bridge",
      "bridge": "cni-bridge0",
      "isGateway": true,
      "isMasq": true,
      "hairpinMode": true,
      "ipam": {
        "type": "host-local",
        "routes": [
          {
            "dst": "0.0.0.0/0"
          }
        ],
        "ranges": [
          [
            {
              "subnet": "10.66.0.0/16",
              "gateway": "10.66.0.1"
            }
          ]
        ]
      }
    },
    {
      "type": "portmap",
      "capabilities": {
        "portMappings": true
      }
    },
    {
      "type": "firewall"
    },
    {
      "type": "tuning"
    }
  ]
}
crictl の設定を以下の内容で /etc/crictl.yaml に作っておきます.
runtime-endpoint: unix:///run/containerd/containerd.sock
Container実行 (シンプル版)
pod定義とcontainer定義の2つのjsonファイルを作っておきます.
{
  "metadata": {
    "name": "busybox",
    "namespace": "default",
    "attempt": 1,
    "uid": "hdishd83djaidwnduwk28bcsb"
  },
  "log_directory": "/tmp",
  "linux": {
  }
}
{
  "metadata": {
    "name": "busybox"
  },
  "image":{
    "image": "busybox"
  },
  "command": [
    "top"
  ],
  "log_path":"busybox.0.log",
  "linux": {
  }
}
使用するContainer imageをpullしておきます.
sudo crictl pull busybox
runp コマンドでpodを作ります:
sudo crictl runp busybox-pod.json
作成されたpod idが以下のように出力されます.
454c57297c0f385fbbf6c4557179e399f8ebd8b17d4cc6e6632e11e745d0f59b
pods コマンドで作成されたpodを確認することができます.
sudo crictl pods --namespace default
出力されたpod idを使って create コマンドでpod内にContainerを作成します.
sudo crictl create <pod id> busybox-container.json busybox-pod.json
作成されたcontainer idが以下のように出力されます.
b67493102c7a10ac29c23f8bfdbf001cbf2ba0c368f818d85e0ab4189ef853cc
start コマンドで作成されたContainerを起動します.
sudo crictl start <container id>
ps コマンドで起動しているContainer(-a オプションで起動しないものも含める)を一覧できます.
sudo crictl ps
起動した状態では exec や logs といったおなじみのコマンドでContainer操作ができます. また, 今回のContainerは top コマンドを実行しているだけなので面白くありませんが, port-forward コマンドも使えます.
ContainerとPodの削除は以下の通りです. (Pod IDを ${podid}, Container IDを ${containerid} で参照します)
sudo crictl stop "${containerid}"
sudo crictl rm "${containerid}"
sudo crictl stopp "${podid}"
sudo crictl rmp "${podid}"
Container実行 (nginx版)
前の例ではContainer内でコマンドを実行するだけだったので, 今度はnginxを起動してhostPortへのbindとhostPathをbindして静的HTMLファイルを返してみましょう.
以下のファイルを作成します.
{
  "metadata": {
    "name": "nginx",
    "namespace": "default",
    "attempt": 1,
    "uid": "hdishd83djaidwnduwk28bcsc"
  },
  "log_directory": "/tmp",
  "port_mappings": [
    {
      "protocol": 0,
      "container_port": 80,
      "host_port": 80
    }
  ],
  "linux": {
    "security_context": {
      "privileged": true
    }
  }
}
{
  "metadata": {
    "name": "nginx"
  },
  "image":{
    "image": "nginx:1.19"
  },
  "mounts": [
    {
      "container_path": "/usr/share/nginx/html/",
      "host_path": "/home/ubuntu/html/"
    }
  ],
  "log_path":"nginx.0.log",
  "linux": {
    "security_context": {
      "privileged": true
    }
  }
}
レスポンスとする以下のhtmlファイルは, Mountの都合で html/ ディレクトリを(上記 nginx-container.json で指定した host_path と一致するように)作成した中に作成してください.
<!DOCTYPE html>
<html>
  <head>
    <title>Hello Container!</title>
  </head>
  <body>
    <h1>Hello, Container world!</h1>
    <img style="width: 100px;" src="https://raw.githubusercontent.com/opencontainers/artwork/master/oci/icon/color/oci-icon-color.svg">
  </body>
</html>
さて上記configを使ってnginxを起動し, hostの80番ポートにbindしましょう.
起動コマンドはシンプル版とほぼ変わらないので特に説明しませんが, 以下のようになります. (bashを想定しています)
podid="$(sudo crictl runp nginx-pod.json)"
containerid="$(sudo crictl create "${podid}" nginx-container.json nginx-pod.json)"
sudo crictl start "${containerid}"
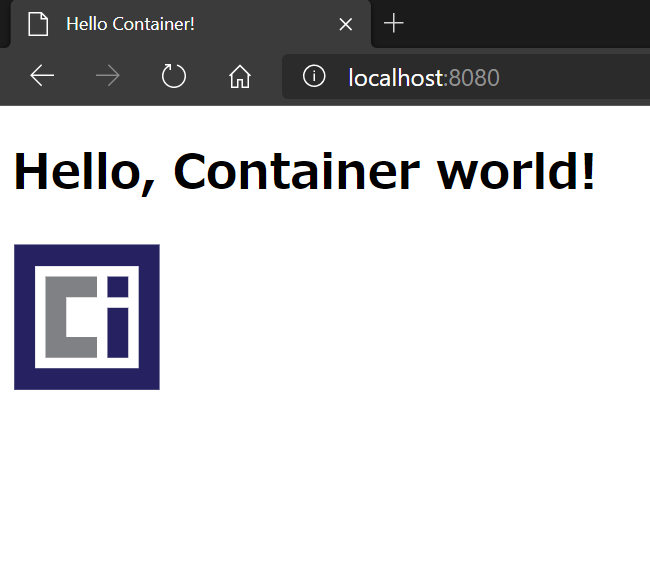
curlコマンドでホストから http://127.0.0.1 にアクセスすると先ほど作成したHTMLファイルの内容が返ってきていることがわかります.
以下はSSHポートフォワードで8080番ポートをVMの80番ポートにフォワードしてブラウザから閲覧した様子です.
また, 以下のコマンドでContainer内のportにport-forwardすることもできます. (今回はhostPortにbindしているので不要ですが, crictl の機能として紹介しています)
sudo crictl port-forward "${podid}" 8080:80
シンプル版と同様にPod/Containerを削除できます.
まとめ
今回はcontainerdとruncに対して crictl コマンドを使って, つまりCRIを使ってContainer操作を行ってみました.
おおよそdockerコマンドでよく行うことはできたと思っています.
今後はcontainerdをcri-oに, runcをcrunやrunscに変えて動かしてみたいと思っています.
-
このcni設定はpodmanをインストールするとpodmanが使うために用意する設定を
ほぼ丸パクリ参考にしてIP rangeや名前だけ変えたものになります. カスタムする際は cni.devのplugins などを参考にするとよいでしょう. ↩