この記事は、カサレアル Advent Calender 2022の15日目のエントリです。
seleniumをコンテナ化して動かしたいですよね?
- はい👈
- はい
さて、前回の記事の反響を確認したところ
「コマンドの数多すぎじゃね?😠」
とか
「仮想環境構築する際Cloud9の環境に左右されるじゃねえか😡😡」
とか
たくさんのご批判の声を頂きました。。。😭😭😭
(大嘘)
まあ、コマンドコピペするのめんどくさいですよね、わかります。。。
というわけで、seleniumをコンテナ化をすることにしました。
コマンド類をDockerfileに全部書けるし、Cloud9の環境に左右されることもありません😁
なるべくシンプルに、コピペでおkというスタンスでを書きました。
とりあえず動かして気持ちよくなりたいって方にオススメかもしれません、たぶん🥺
まあ、49番煎じくらいのネタかもですが😩😩😩
環境準備
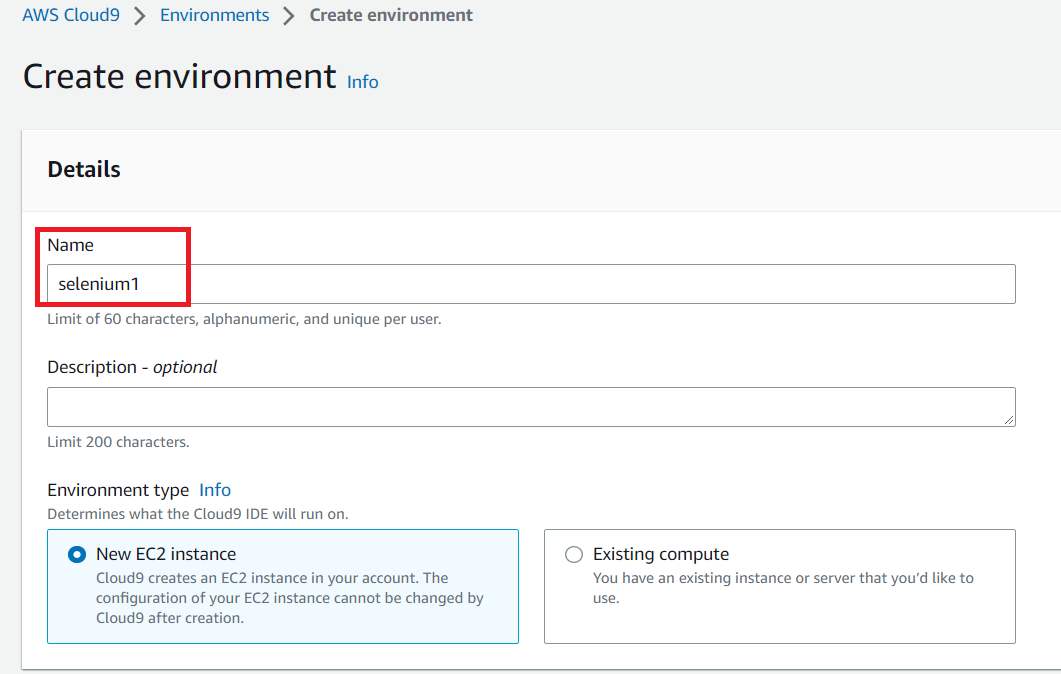
1. デフォルト設定でCloud9を作成

適当な名前を付けてCloud9を作成します。
お好みで設定してもいいですが、今回はデフォルトで作成しました。
作成したらCloud9を立ち上げます。
2. c9コマンドインストール
c9コマンドは便利なのでインストールします。
Cloud9のターミナルからファイルを開くコマンドです。
(なくてもいいですが、この記事では使ってます。)
以下コマンドをCloud9のターミナルで実行してください。
npm install -g c9
以上😎
手順
以下、 4手順 でseleniumが動かせます。
それぞれコマンドをCloud9のターミナルにペタペタしてみてください。
とりあえず動きます。
1. 実行ファイル作成
mkdir ~/environment/selenium_container
cd ~/environment/selenium_container
touch google.py
c9 google.py
- 以下を👆のファイルにコピペ
from selenium import webdriver
from selenium.webdriver.chrome.options import Options
from selenium.webdriver.chrome import service

# chromedriverのパス
CHROMEDRIVER = './chromedriver'

# ヘッドレスオプションとエラー回避オプション
options = Options()
options.add_argument('--headless')
options.add_argument('--no-sandbox')

# ドライバー指定でChromeブラウザを開く
chrome_service = service.Service(executable_path=CHROMEDRIVER)
driver = webdriver.Chrome(options=options, service=chrome_service)
driver.get('https://www.google.co.jp/')

# 現在のページのURLを取得
cur_url = driver.current_url

# 取得したURLを表示
print("現在のページ:" + cur_url)

driver.quit()
chrome を開いて google にアクセスするスクリプトです。
アクセスしたらその時点での URL を取得してターミナルに表示します。
つまり google の URL が表示されたら成功です。
コピペしたら保存を忘れずに😢
2. Dockerfile作成
touch Dockerfile
c9 Dockerfile
- 以下を👆のファイルにコピペ
# python3.7のDockerイメージ
FROM python:3.7

# seleniumインストール
RUN pip install --upgrade pip
RUN pip install selenium

# chromeインストール
RUN wget -q -O - https://dl-ssl.google.com/linux/linux_signing_key.pub | apt-key add && \
    echo 'deb [arch=amd64] http://dl.google.com/linux/chrome/deb/ stable main' | tee /etc/apt/sources.list.d/google-chrome.list && \
    apt-get update && \
    apt-get install -y google-chrome-stable=108.* && \
    apt-get -y clean && \
    rm -rf /var/lib/apt/lists/*

# chromedriverダウンロード
ADD https://chromedriver.storage.googleapis.com/108.0.5359.71/chromedriver_linux64.zip .
RUN unzip chromedriver_linux64.zip

# 実行ファイル配置
WORKDIR /app
COPY google.py .

# パスを通す
ENV PATH /usr/local/sbin:/usr/local/bin:/usr/sbin:/usr/bin:/sbin:/bin:/opt/chrome

# コンテナ起動時に実行
ENTRYPOINT [ "python", "google.py" ]
python の image を落としてきて、それぞれツールを突っ込みます。
今回はコンテナ起動時に selenium が動くようにしています。
各バージョンは前回の記事になるべく合わせてあります。
3. ビルド
docker build -t selenium .
ec2-user:~/environment/selenium_container $ docker build -t selenium .
~~~~~~~~~~~~~~~~~~~~~~~~
ログがぶぁー出てきます。
~~~~~~~~~~~~~~~~~~~~~~~~
Successfully tagged selenium:latest
4. 実行(動け🙏🙏🙏)
docker run selenium
ec2-user:~/environment/selenium_container $ docker run selenium
現在のページ:https://www.google.co.jp/
以上😎
バージョンまとめ
今回使用したのバージョンを書いておきます👀
python       : 3.7.16
pip          : 22.3.1
selenium     : 4.7.2
chrome       : 108.0.5359.124
chromedriver : 108.0.5359.71
参考
先駆者様に感謝❗️🙌✨感謝❗️🙌✨です🤟😁👍