この記事は、カサレアル Advent Calender 2022 の14日目のエントリです。
Cloud9でseleniumを動かしたいですよね?
- はい👈
- はい
というわけで、なるべくシンプルに、コピペでおkというスタンスでを書きました。
とりあえず動かして気持ちよくなりたいって方にオススメかもしれません、たぶん🥺
まあ、50番煎じくらいのネタかもですが😩😩😩
環境準備
1. デフォルト設定でCloud9を作成
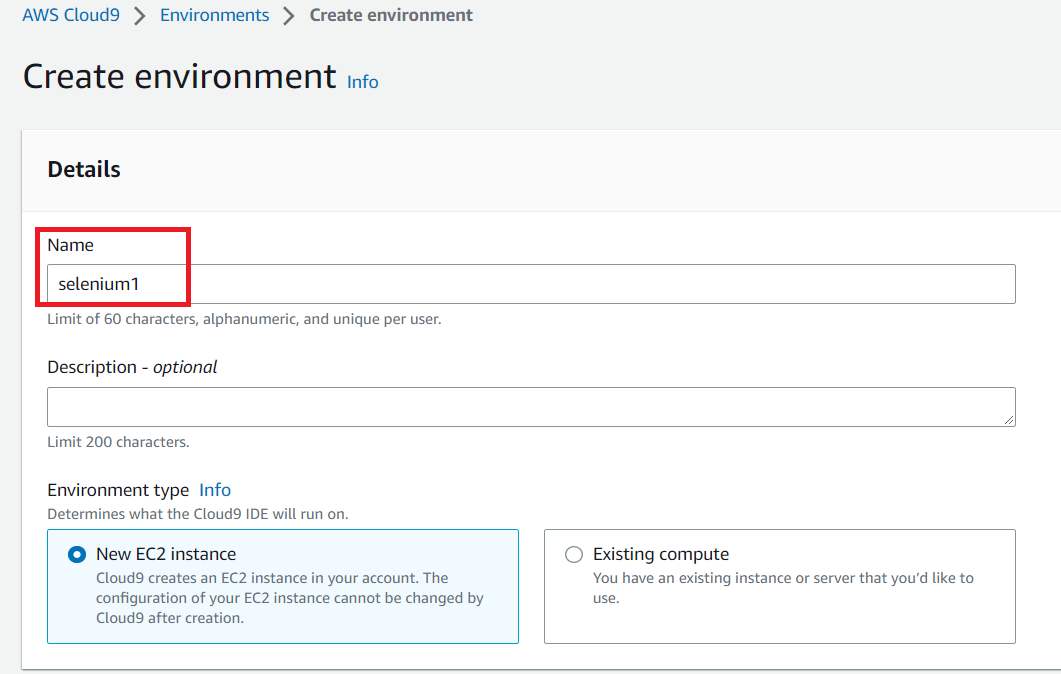
適当な名前を付けてCloud9を作成します。
お好みで設定してもいいですが、今回はデフォルトで作成しました。
作成したらCloud9を立ち上げます。
2. c9コマンドインストール
c9コマンドは便利なのでインストールします。
Cloud9のターミナルからファイルを開くコマンドです。
(なくてもいいですが、この記事では使ってます。)
以下コマンドをCloud9のターミナルで実行してください。
npm install -g c9
以上😎
手順
以下、 10手順 でseleniumが動かせます。
それぞれコマンドをCloud9のターミナルにペタペタしてみてください。
とりあえず動きます。
1. バージョン確認
python -V
pip -V
ec2-user:~/environment $ python -V
Python 3.7.15
ec2-user:~/environment $ pip -V
pip 20.2.2 from /usr/lib/python3.7/site-packages/pip (python 3.7)
現時点(2022/12/13)のCloud9では上記のバージョンがデフォルトでインストールされているようです。
2. 仮想環境作成
mkdir ~/environment/selenium_project
cd selenium_project
python -m venv py37
selenium_project 配下に py37 っていうディレクトリができます。
3. 仮想環境有効化
source py37/bin/activate
ec2-user:~/environment/selenium_project $ source py37/bin/activate
(py37) crhp:~/environment/selenium_project $
ターミナルの左に (py37) が付きましたね。
これで仮想環境の有効化ができました。
4. pipのupgrade
pip install --upgrade pip
pip list
(py37) ec2-user:~/environment/selenium_project $ pip list
Package    Version
---------- -------
pip        22.3.1
setuptools 47.1.0
仮想環境の pip を upgrade します。
仮想環境内の pip のバージョンが 22.3.1 になりましたね。
5. seleniumのインストール
pip install selenium
pip list
(py37) ec2-user:~/environment/selenium_project $ pip list
Package           Version
----------------- ---------
async-generator   1.10
attrs             22.1.0
certifi           2022.12.7
exceptiongroup    1.0.4
h11               0.14.0
idna              3.4
outcome           1.2.0
pip               22.3.1
PySocks           1.7.1
selenium          4.7.2
setuptools        47.1.0
sniffio           1.3.0
sortedcontainers  2.4.0
trio              0.22.0
trio-websocket    0.9.2
typing_extensions 4.4.0
urllib3           1.26.13
wsproto           1.2.0
なんかいっぱいインストールされましたね。
今回使用する selenium のバージョンは 4.7.2 のようです。
6. chromeのインストール
curl https://intoli.com/install-google-chrome.sh | bash
(py37) ec2-user:~/environment/selenium_project $ curl https://intoli.com/install-google-chrome.sh | bash
~~~~~~~~~~~~~~~~~~~~~~~~
ログがぶぁー出てきます。
~~~~~~~~~~~~~~~~~~~~~~~~
Complete!
Successfully installed Google Chrome!
7. chromeのバージョン確認
このバージョンはメモしといてください。
chromedriverのダウンロードはこちらのバージョンに合わせます。
yum info google-chrome-stable
(py37) ec2-user:~/environment/selenium_project $ yum info google-chrome-stable
Loaded plugins: extras_suggestions, langpacks, priorities, update-motd
google-chrome                                                                                                                                                                         3/3
hashicorp                                                                                                                                                                         865/865
254 packages excluded due to repository priority protections
Installed Packages
Name        : google-chrome-stable
Arch        : x86_64
Version     : 108.0.5359.98
Release     : 1
Size        : 300 M
Repo        : installed
From repo   : google-chrome
Summary     : Google Chrome
URL         : https://chrome.google.com/
License     : Multiple, see https://chrome.google.com/
Description : The web browser from Google
            :
            : Google Chrome is a browser that combines a minimal design with sophisticated technology to make the web faster, safer, and easier.
上記で Version を見といてくださいね。
今回インストールした chrome のバージョンは 108.0.5359.98 のようです。
8. chromedriverのダウンロード
chromedriver は先ほどインストールした chrome のバージョンと合わせます。
今回はバージョン 108 を使用してますが、手順6で確認した chrome のバージョンが 108 でなければ、コマンドのバージョンを変更して実行してくださいね😠
公開されている chromedriver は以下のページで確認できます👇
- 今回使用するchromedriver(赤枠)
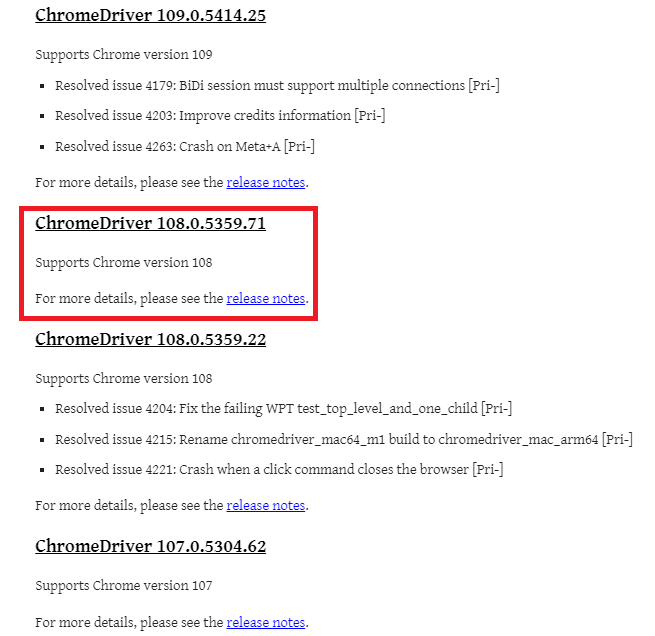
wget https://chromedriver.storage.googleapis.com/108.0.5359.71/chromedriver_linux64.zip
unzip chromedriver_linux64.zip
zipをダウンロードして解凍。
chromedriverってファイルが展開されます。
9. 実行ファイル作成
touch google.py
c9 google.py
- 以下を👆のファイルにコピペ
from selenium import webdriver
from selenium.webdriver.chrome.options import Options
from selenium.webdriver.chrome import service

# chromedriverのパス
CHROMEDRIVER = './chromedriver'

# ヘッドレスオプションとエラー回避オプション
options = Options()
options.add_argument('--headless')
options.add_argument('--no-sandbox')

# ドライバー指定でChromeブラウザを開く
chrome_service = service.Service(executable_path=CHROMEDRIVER)
driver = webdriver.Chrome(options=options, service=chrome_service)
driver.get('https://www.google.co.jp/')

# 現在のページのURLを取得
cur_url = driver.current_url

# 取得したURLを表示
print("現在のページ:" + cur_url)

driver.quit()
chrome を開いて google にアクセスするスクリプトです。
アクセスしたらその時点での URL を取得してターミナルに表示します。
つまり google の URL が表示されたら成功です。
コピペしたら保存を忘れずに😢
10. 実行(動け🙏🙏🙏)
python google.py
(py37) ec2-user:~/environment/selenium_project $ python google.py
現在のページ:https://www.google.co.jp/
以上😎
バージョンまとめ
今回使用したのバージョンを書いておきます👀
python       : 3.7.15
pip          : 22.3.1
selenium     : 4.7.2
chrome       : 108.0.5359.98
chromedriver : 108.0.5359.71
参考
先駆者様に感謝❗️🙌✨感謝❗️🙌✨です🤟😁👍