この記事でやること
この記事では、PDFファイルを読んで中身のテキスト情報からAzure Purviewに登録されている語彙にマッチするものを適用していきます。
PDFファイルはADLS Gen2上にあります。

準備
PDFファイルは事前にスキャンしておきます。
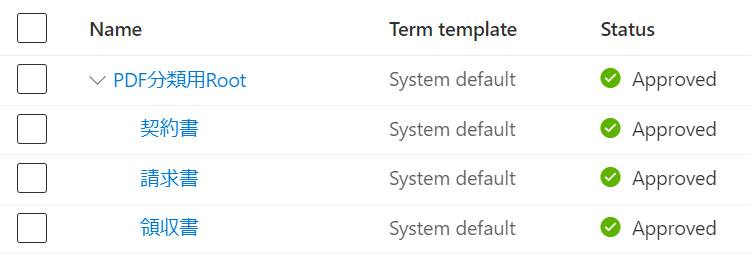
またPurviewには予め適用する語彙を登録しておきます。
今回は、PDF分類用Rootの下に登録しています。
実装
PyApacheAtlasの利用
PurviewへのアクセスにPyApacheAtlasを使います。
APIの利用開始はこの辺を参考に。
from pyapacheatlas.core import PurviewClient
from pyapacheatlas.auth import ServicePrincipalAuthentication

auth = ServicePrincipalAuthentication(
    tenant_id = "テナントID",
    client_id = "クライアントID",
    client_secret = "シークレット"
)

client = PurviewClient(
    account_name = "Purviewアカウント名",
    authentication = auth
)
語彙の取得
語彙のdisplayTextとtermGuidを取得します。
今回利用する語彙のルートとしてPDF分類用Rootを登録してあるので配下の語彙だけを取得します。
terms = []
glossary = client.get_glossary()
for term in glossary["terms"]:
    if(term["displayText"].startswith("PDF分類用Root_")):
        terms.append([term["displayText"], term["termGuid"]])
ADLS Gen2上のPDFへのアクセス
ADLS上のファイルへのアクセスはここを参照。
PDFからのテキスト抽出はpdfminer.sixを利用。(日本語に対応ということで。)
import json
from azure.storage.filedatalake import DataLakeServiceClient
from pdfminer.high_level import extract_text
from io import BytesIO

storage_account_name = "ストレージ アカウント名"
storage_account_key = "ストレージ アカウント キー"

service_client = DataLakeServiceClient(account_url="{}://{}.dfs.core.windows.net".format(
    "https", storage_account_name), credential=storage_account_key)

file_system="ADLSコンテナ名"
directory="ディレクトリパス"

file_system_client = service_client.get_file_system_client(file_system)
directory_client = file_system_client.get_directory_client(directory)
paths = file_system_client.get_paths(directory)
エンティティと語彙の紐付け
エンティティに語彙を紐付けるには、AtlasGlossarySemanticAssignmentタイプのリレーションを作成します。
relationships = []
for path in paths:
    qualifiedName=f"https://{storage_account_name}.dfs.core.windows.net/{file_system}/{path.name}"
    file_client = directory_client.get_file_client(path)
    download = file_client.download_file()
    downloaded_bytes = download.readall()
    pdf_file = BytesIO(downloaded_bytes)
    text = extract_text(pdf_file, maxpages=1) #サンプルなので1ページだけ

    for term in terms:
        if(term[0].rsplit("_")[1] in text):
            relationship = {
                "typeName": "AtlasGlossarySemanticAssignment",
                "attributes": {},
                "guid": -100,
                "end1": {
                    "guid": term[1]
                },
                "end2": {
                        "typeName": "azure_datalake_gen2_path",
                        "uniqueAttributes": {
                            "qualifiedName": qualifiedName
                        }
                },
            }
            relationships.append(relationship)
登録
リレーションシップを登録します。
for relationship in relationships:
    entity = relationship["end2"]["uniqueAttributes"]["qualifiedName"]
    print(f"Working on {entity}")

    try:
        results = client.upload_relationship(relationship)
        print("\tSuccess")
    except Exception as e:
        print(f"Exception for {entity} and was not uploaded: {e}")
応用
今回はテキストに一致する語彙を登録しましたが、機械学習などで分類した結果で関連付けなども可能かと思います。