初めに
今回初めて記事を書きますので拙いものになるかもしれませんがよろしくお願いします。
サークルでOpenVINOの学習済みモデルを使った推論をたくさんしており、せっかくなので記事に起こしたいと思います。
この記事はOpenVINO Toolkitがダウンロード済みのことを想定していますので、「OpenVINOって何?」や「どうやってダウンロードするの?」という方はQiitaで探してみてください!
初めはそこから書こうと思いましたが素敵な記事がたくさんあって敢えて書かなくてもいいと思いましたので、モデルのインストール、推論をメイン記事として進めていこうと思います。
最後に全コードを書いておりますので煩わしくなった方はそれだけでも実装してみてください。
環境
windows10
OpenVINO toolkit 2021.4.752
OpenVINO 2021.4.2
python 3.6
opencv 3.4.2
モデルのダウンロード方法
OpenVINO toolkitのフォルダに移動します。ダウンロードフォルダはデフォルトでC:\Program Files (x86)\Intel\にあると思います。
コマンドプロンプトを開いて以下のコードを入力します。
cd "C:\Program Files (x86)\Intel\openvino_2021.4.752\deployment_tools\tools\model_downloader"

python ./downloader.py --all --output_dir "C:¥Users¥<ユーザ名>¥Desktop¥OpenVINO¥models"
--output_dir以下のダブルクォーテーションで囲んだ部分はモデルをダウンロードしたいフォルダを入力してください。
モデルが大量にあり、時間がかかりますがこれでモデルのダウンロードが完了しました。
さて、モデルのダウンロードを待っている間にどんなモデルがあるのか確認してみましょう。
こちらでモデルが一覧できます。
記念すべき第一回はface-detection-0200をやっていこうと思います。
face-detection-0200
モデルの詳細
実装を進める前にgithubを見てインプット、アウトプットやどんなモデルなのかを確認していきましょう。
Use Case and High-Level Description
ユースケースと概要になります。ここは基本的にどのようなモデルで学習しているのかが書かれています。今回のモデルはMobileNetV2で、顔検出にSSDが使われています。MobileNetV2はこちらの方の記事が大変わかりやすかったので載せておきます。
簡単に言えば軽量で高性能なCNNです。
SSDについては私はこちらを参考にしました。
正直のところいまいちわかっていないです、、、
今度一からSSDを実装してみて理解を深めるしかないですね。一旦これを用いて顔検出を行っているんだというくらいの認識で行きます。
Specification
これには学習済みモデルの仕様が書かれています。
| Metric | Value |
|---|---|
| AP (WIDER) | 86.74% |
| GFlops | 0.786 |
| MParams | 1.828 |
| Source framework | PyTorch* |
APについてはこちらの記事がわかりやすいです!
簡単に言うとモデルの精度みたいなものですね(簡単すぎかも??)
GFlopsはコンピュータの処理性能を表す単位のことで、浮動小数点演算を単位時間当たり10憶回行うことを表しています。ここではモデルの重さを表していると思ってください。今回は0.786ですので、そこまで重くはないですね!
MParamsはそのままモデルのパラメータの数です。
frameworkはPyTorchを使っているとも書いてありますね。
っと、ここが仕様の部分になります。
Inputs
Image, name:
input, shape:1, 3, 256, 256in the formatB, C, H, W, where:
B- batch sizeC- number of channelsH- image heightW- image width
Expected color order:
BGR.
そのままですが、インプットは画像で、1,3,256,256ですね。これは画像を入れるときに変形して渡せば大丈夫ですね。
outputs
The net outputs blob with shape:
1, 1, 200, 7in the format1, 1, N, 7, whereNis the number of detected
bounding boxes. Each detection has the format [image_id,label,conf,x_min,y_min,x_max,y_max], where:
image_id- ID of the image in the batchlabel- predicted class ID (0 - face)conf- confidence for the predicted class- (
x_min,y_min) - coordinates of the top left bounding box corner- (
x_max,y_max) - coordinates of the bottom right bounding box corner
こちらも書いてある通りで、200のバウンディボックスが検出されており、それぞれに7つのパラメータが出力されております。
この辺は実装の時に詳しく見ようかなと思います。
それでは実装していきましょう!!
実装
ファイル構造
先ほどダウンロードしたface-detection-0200のモデルを持ってきています。
openvino/
├─ models/
├─ face-detection-0200/
   ├─ intel/
      ├─ face-detection-0200/
         ├─ FP16/
         ├─ FP16-INT8/
         ├─ FP32/
            ├─ face-detection-0200.bin
            ├─ face-detection-0200.xml
   ├─ face-detection-0200.py
   ├─ input_image.jpg
face-detection-0200.py
モデルの読み込み
モジュールのインポートをします。
import cv2
import numpy as np
from openvino.inference_engine import IECore
今回使用するのは上の三つです。
下のエラーが出る方は一つ下のコードを実行してみてください。
from .ie_api import *
ImportError: DLL load failed: 指定されたモジュールが見つかりません。

"C:\Program Files (x86)\Intel\openvino_2021.4.752\bin\setupvars.bat"
次にOpenVINOのオブジェクトを生成します。APIドキュメントはこちらです。
モデルを読み込むために、Inference Engineコアオブジェクトのread_network()を利用します。
Parameters
model – A .xml, .onnxor.prototxt model file or string with IR.
weights – A .bin file of the IR. Depending on init_from_buffer value, can be a string path or bytes with file content.
init_from_buffer – Defines the way of how model and weights attributes are interpreted.
usage example
ie = IECore()
net = ie.read_network(model=path_to_xml_file, weights=path_to_bin_file)
公式ドキュメント通りに下のように書いてモデルを読み込みます。ここで、.xmlファイルと.binファイルはそれぞれモデルの定義ファイルとモデルの重みのファイルになります。
# read module
ie = IECore()

# read IR model
model_name = "face-detection-0200"
model = './intel/{}/FP32/{}'.format(model_name, model_name)
net = ie.read_network(model=model+'.xml', weights=model+'.bin')
次に推論用のインスタンスを生成するためにload_netを呼び出します。
Parameters
network – A valid IENetwork instance. Model file name .xml, .onnx can also be passed as argument
device_name – A device name of a target plugin
config – A dictionary of plugin configuration keys and their values
num_requests – A positive integer value of infer requests to be created.
usage example
ie = IECore()
net = ie.read_network(model=path_to_xml_file, weights=path_to_bin_file)
exec_net = ie.load_network(network=net, device_name="CPU", num_requests=2)
これも公式のusageのように書けばok!
exec_net = ie.load_network(network=net, device_name='CPU', num_requests=1)
Inputs
モデルの準備ができたので画像をモデルにインプットしていきます。
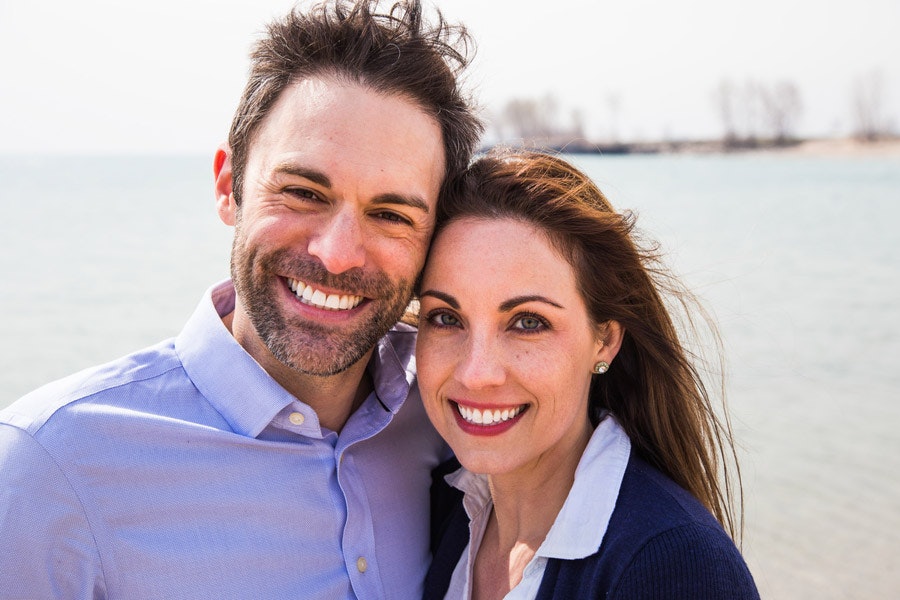
まずは適当な人の画像を用意します。今回私はこちらを使用しようと思います。用意が面倒な方は同じものを使っていきましょう。
opencvを使って画像を読み込みます。先ほど見たInputsに合わせるために画像サイズを整えて、width, height, channelの順番になっている画像をchannel, height, widthに直します。
frame = cv2.imread("input_image.jpg")
img = cv2.resize(frame, (256, 256))
img = img.transpose((2, 0, 1))
img = img.reshape((1, 3, 256, 256))
これでやっとモデルに入力する準備が整いました。この画像をモデルに入力して推論を行っていきます。
推論はinfer関数を用いて行います。このinfer関数を使用する際にinput nameが必要で、githubにはinputと書いてありますが、以下のコードで調べてみるとimageと出力されるのでimageとしておきます。
# print model data
input_blob_name = list(net.inputs.keys())
print("input_blob_name: {}".format(input_blob_name))
>>input_blob_name: {data}
これらより、モデルへの入力は以下のように記述します。
out = exec_net.infer(inputs={'image': img})
Outputs
このoutがoutputsになります。試しに以下のコードを実行してみます。
print(out)

>>{'detection_out': array([[[[...]]]], dtype=float32)}
と、このような出力になっているので、
out = out["detection_out"]
とします。ここで、もう一度outを確認してみましょう。
print(out.shape)
>>(1, 1, 200, 7)
この出力を見ればgithubのOutputsのようになっていることがわかります。
今から使うのは200,7の部分なので次元を削除します。
out = np.squeeze(out)
ここからは各バウンディボックスについての出力値を使っていきます。
for detection in out:
    print(detection)
>>[0., 0., 0.9989833, 0.458686, 0.37184125, 0.6566284, 0.77973706]
>>.
>>.
>>.
この7つの値は先ほど確認したOutputsの値に対応しています。
Each detection has the format [
image_id,label,conf,x_min,y_min,x_max,y_max], where:
image_id- ID of the image in the batchlabel- predicted class ID (0 - face)conf- confidence for the predicted class- (
x_min,y_min) - coordinates of the top left bounding box corner- (
x_max,y_max) - coordinates of the bottom right bounding box corner
confはlabel(今回はface)の確率なのでこれに閾値を設定します。今回は0.6くらいにしようと思います。
x_min, y_min, x_max, y_maxはここに書いてある通り顔矩形の隅の座標を取得できます。ただ、この出力は0-1の値をとる、widgh, heightに対する比率になっているのでこれをかけてあげます。
conf = float(detection[2])
if conf > 0.6:
    xmin = int(detection[3] * frame.shape[1])
    ymin = int(detection[4] * frame.shape[0])
    xmax = int(detection[5] * frame.shape[1])
    ymax = int(detection[6] * frame.shape[0])

    # adjustment
    if xmin < 0:
        xmin = 0
    if ymin < 0:
        ymin = 0
    if xmax > frame.shape[1]:
        xmax = frame.shape[1]
    if ymax > frame.shape[0]:
        ymax = frame.shape[0]
下の8行は例外の処理になります。
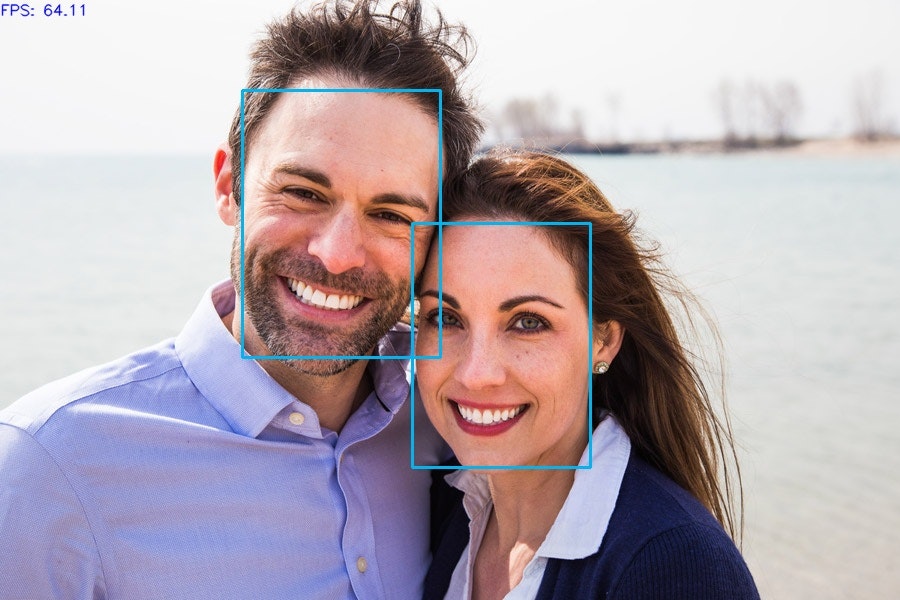
あとはこの座標から矩形をとって出力すれば推論の完成です。
全コード
import cv2
from openvino.inference_engine import IECore
import numpy as np
import time

# read module
ie = IECore()

# read IR model
model_name = "face-detection-0200"
model = './intel/{}/FP32/{}'.format(model_name, model_name)
net = ie.read_network(model=model+'.xml', weights=model+'.bin')

# print model data
input_blob_name = list(net.inputs.keys())
output_blob_name = list(net.outputs.keys())

print("input_blob_name: {}".format(input_blob_name))
print("output_blob_name: {}".format(output_blob_name))

batch, channel, height, width = net.inputs[input_blob_name[0]].shape

print("input shape: {} x {}".format(height, width))
print("input channnel: {}".format(channel))

# select target device
exec_net = ie.load_network(network=net, device_name='CPU', num_requests=1)

"""コメントアウト部分
cap = cv2.VideoCapture(0)
cap.set(cv2.CAP_PROP_BUFFERSIZE, 1)
# ここから下がwhile分の中。インデントをつけてください。
while True:
"""
frame = cv2.imread('test.jpg')
img = cv2.resize(frame, (width, height))
img = img.transpose((2, 0, 1))
img = img.reshape((1, channel, height, width))

# inference (face)
out = exec_net.infer(inputs={'image': img})
out = out['detection_out']
out = np.squeeze(out)
# detection process
for detection in out:
    # conf value
    confidence = float(detection[2])

    # outputs rect
    if confidence > 0.6:
        # translate box into image
        xmin = int(detection[3] * frame.shape[1])
        ymin = int(detection[4] * frame.shape[0])
        xmax = int(detection[5] * frame.shape[1])
        ymax = int(detection[6] * frame.shape[0])

        # adjustment
        if xmin < 0:
            xmin = 0
        if ymin < 0:
            ymin = 0
        if xmax > frame.shape[1]:
            xmax = frame.shape[1]
        if ymax > frame.shape[0]:
            ymax = frame.shape[0]

        cv2.rectangle(frame, (xmin, ymin), (xmax, ymax),
                    color=(240, 180, 0), thickness=2)

cv2.putText(frame, "FPS: {}".format(fps), (0, 15),
            cv2.FONT_HERSHEY_SIMPLEX, 0.5, (255, 0, 0), 1, cv2.LINE_AA)
cv2.imwrite('output.jpg', frame)

"""コメントアウト部分
    cv2.imshow("frame", frame)

    if cv2.waitKey(1) & 0xFF == ord("q"):
        break
# ここまでがwhile分の中。上のcv2.imwrite('output.jpg', frame)は消してもいいと思います。

cap.release()
cv2.destroyAllWindows()
"""
終わりに
今回はface-detection-0200の推論を行いました。思ったより長くなってしまったので次回からは理論編と実装編分けるなどしたいと思います。
またこのコードでエラーが出る、もしくはSSDの理論をわかりやすく説明できるよって方いらっしゃいましたらご連絡ください。
よろしくお願いします。
動画でリアルタイム表示したい!という方は二か所コメントアウトしているコード部分があるのでそこのコメントアウトを外してください。
while文内にインデントをつければインカメならそのまま動くと思います。ほかのカメラの方はcap = cv2.VideoCapture(0)の部分をそれぞれ変更して使ってください。
次回は今回使ったものをもとにface-recognitionをやろうと思います。ほかにopenvinoのモデルでリクエストがあれば書いてください。できればやろうと思います。
それではよい機械学習ライフを!!
お疲れさまでした!!
第二回はこちらです。
参考