x 原因は、わからないが液晶がちらつく場合は、ウェートを調整してね!!
目的
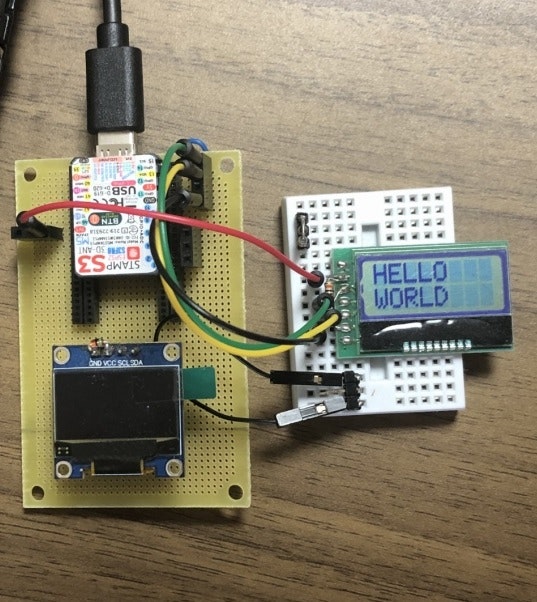
I2C液晶のテスト
arduinoのプログラムと完全に同じ
//AQM0802A_DEMO1

#include <Wire.h> //I2C library

//i2cバッファー
char data_read[4];

//初期レジスター
char INIT_com[] = {
  0x0, 0x38, //1
  0x0, 0x39, //2
  0x0, 0x4,  //3
  0x0, 0x14, //4
  0x0, 0x70, //5
  0x0, 0x56, //6
  0x0, 0x6C, //7
  0x0, 0x38, //8
  0x0, 0xC   //9
};

//画面のクリアレジスター
char INIT_cls[] = {0x0, 0x1};


//i2c書き込みルーチン
void i2c_lcd_w(char *buff1) {
  Wire.beginTransmission(0x3E);
  Wire.write(buff1[0]);
  Wire.write(buff1[1]);
  Wire.endTransmission();
  delay(2);
}//i2c_lcd_w


void ns_putc(char ch)
{

  data_read[0] = '@';
  data_read[1] = ch;

  //I2Cに送信
  i2c_lcd_w(data_read);

}//ns_putc


void ns_puts(const char *str1)
{

  //文字の中身がゼロか
  while (*str1) {

    //一文字出力
    ns_putc(*str1 ++);

  }//while

}//ns_puts


//カーソルの移動
void setCursor(int col, int rows)
{

  data_read[0] = 0x0;
  data_read[1] = 0x80 +  (rows * 0x40) + col ; //カーソルを移動

  //I2Cに送信
  i2c_lcd_w(data_read);

}//setCursor


//初期化関数
void setup()
{

  //I2Cの初期化
  Wire.begin();

  //液晶の初期化
  for (int ii = 0; ii < 9; ii++) {
    i2c_lcd_w(&INIT_com[ii << 1]);  // ii << 1 = ii * 2
  }//for

  //画面のクリア
  i2c_lcd_w(INIT_cls);

  //表示
  setCursor(0, 0); ns_puts("HELLO");
  setCursor(0, 1); ns_puts("WORLD");

}//setup


//メインループ
void loop()
{}//loop