何を作ったのか
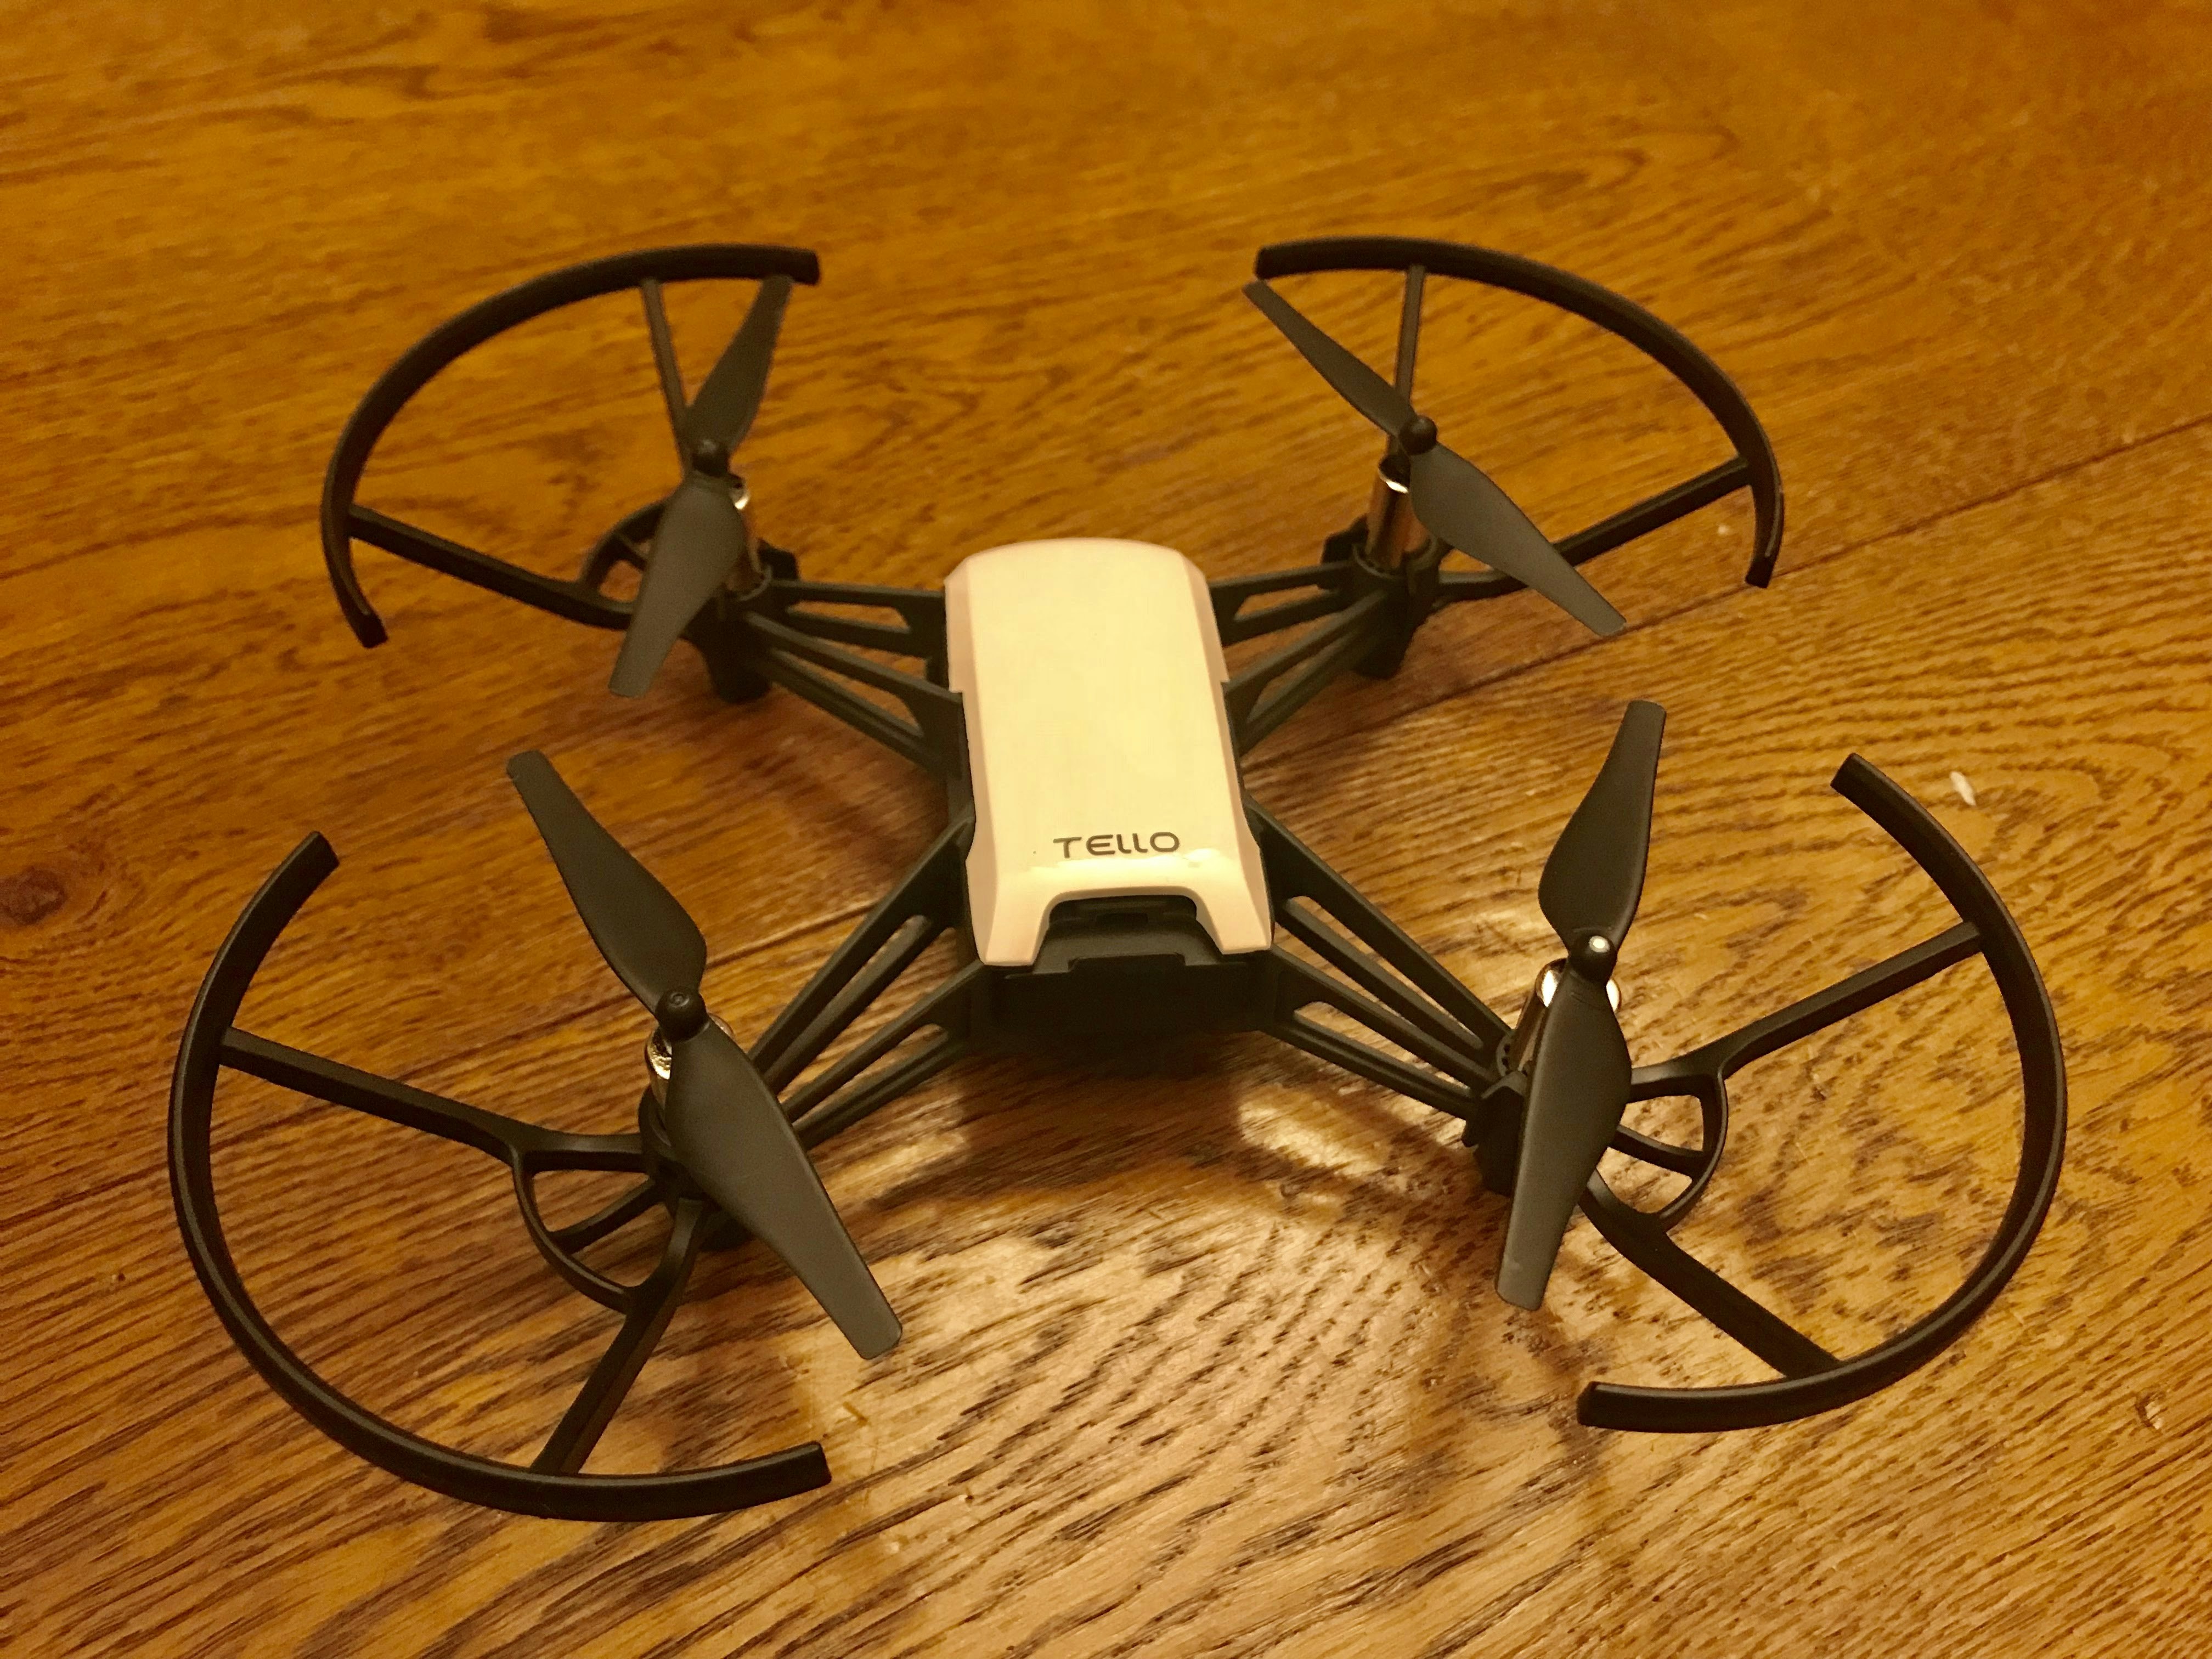
RyzeTech社がこの3月に発売したトイドローンTello。
通常、iPhone/AndroidをTello本体にWi-Fi接続して、専用アプリかBluetoothコントローラーで操作しますが、Scratchなどからプログラミングもできます。またTello SDKが提供されており、UDPプロトコルで接続することで規定の動作をさせることもできます。
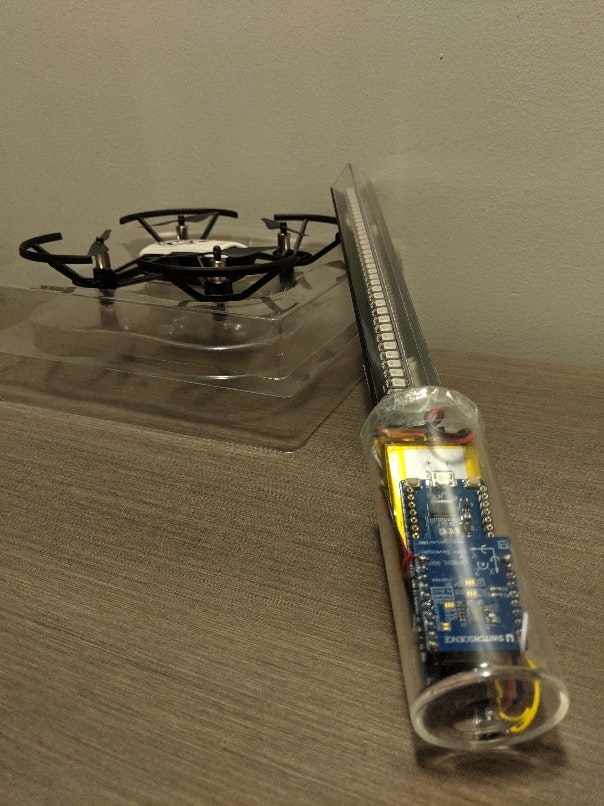
@bishiさんがすでにESP32を複数台使った編隊飛行をされていらっしゃいますが、今回はESP32と9軸センサーを使ってTelloを制御する杖をつくってみました。
用意するもの
- トイドローン [Tello] (https://www.ryzerobotics.com/jp/tello) (RyzeTech)
-
ESPr Developer 32 (スイッチサイエンス)
- ESPr® Developer用9軸慣性計測ユニットシールド (スイッチサイエンス)
- ピンヘッダ
- リチウムイオンポリマー電池 (3.7Vの適当なもの)
- WS2812B RGB LED Strap (NeoPixelなど。私は深センで購入。)
- 杖っぽくするもの
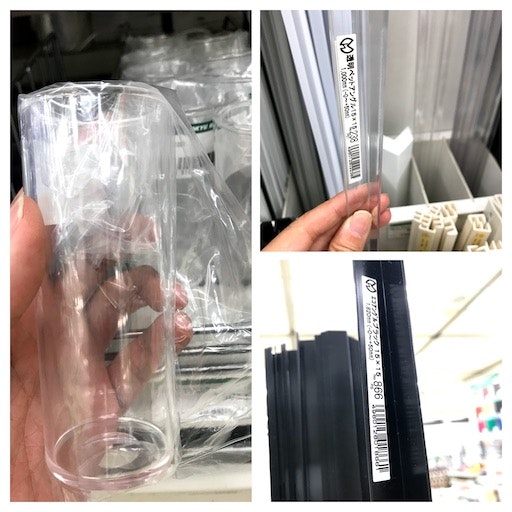
- アクリルビーカー(37mmx100mm)
- エコアングル(黒か白)
- 透明ペットアングル
- アクリル丸棒(3mmx300mm)
- アクリル用両面テープ
ハードウェア
ESPr Developer 32と9軸慣性計測ユニットシールドはピンヘッダで接続。従来のESPr Developerとピン配置が違うため、I2CはIO19とIO21になります。
今回は時間がなかったのでリチウムイオン電池をESP32につなぎ、ESP32のVOUTとGND、IO5をLEDストラップにつなぎました。ESP32の場合、Wi-Fi接続時に電圧が大きく変動してしまうため、LEDストラップの長さによっては慣性計測かLEDのいずれかがうまく動かないことがあり、試行錯誤する間に一部LEDを壊してしまったかもしれません。
本来はWS2812は5V駆動でESP32側は3.3Vなので、レベルシフタなどで5Vに変換してあげる必要があります。
ソースコード
Arduio IDEを使ったESP32向けコーディングする環境構築についてはここでは割愛します。参考にさせていただいたサンプルコード群は下記の通りです。
-
[SparkFun_LSM9DS1_Arduino_Library]
(https://github.com/sparkfun/SparkFun_LSM9DS1_Arduino_Library) -
編隊飛行のソースコード by @bishiさん
LSM9DS1の加速度センサーの値から計算して得られたRollとPitchから、棒がどの方向に傾いたかを判断して、それに合わせてTelloにUDPコマンドを投げているという感じです。
- Pitchが一定以上になると離陸、一定以下になったら着陸。
- PitchとRollの組み合わせで左右にフリップアクション。
- アクショントリガー時にLEDストラップを光らせる
///////////////////////
// Tello Control with LSM9DS1 and NeoPixel
// Written by Hitoshi Kikuchi, 2018/05
///////////////////////

// The SFE_LSM9DS1 library requires both Wire and SPI be
// included BEFORE including the 9DS1 library.
# include <Wire.h>
# include <WiFi.h>
# include <WiFiUdp.h>
# include <SPI.h>
# include <SparkFunLSM9DS1.h>
# include <Adafruit_NeoPixel.h>

///////////////////////
// NeoPixels Setup
///////////////////////
# define PIXEL_PIN 5    // Digital IO pin connected to the NeoPixels.
# define PIXEL_COUNT 36
Adafruit_NeoPixel strip = Adafruit_NeoPixel(PIXEL_COUNT, PIXEL_PIN, NEO_GRB + NEO_KHZ800);

///////////////////////
// I2C Setup
///////////////////////
// SDO_XM and SDO_G are both pulled high, so our addresses are:
# define LSM9DS1_M 0x1E // Would be 0x1C if SDO_M is LOW
# define LSM9DS1_AG  0x6B // Would be 0x6A if SDO_AG is LOW
bool I2C_ready = false;

////////////////////////////
// LEM9DS1 Output Settings
////////////////////////////
// Use the LSM9DS1 class to create an object. [imu] can be
// named anything, we'll refer to that throught the sketch.

LSM9DS1 imu;
# define PRINT_CALCULATED
# define PRINT_SPEED 500 // 250 ms between prints
int moveType = 0;
static unsigned long lastPrint = 0; // Keep track of print time

// Earth's magnetic field varies by location. Add or subtract
// a declination to get a more accurate heading. Calculate
// your's here:
// http://www.ngdc.noaa.gov/geomag-web/#declination
//#define DECLINATION -8.58 // Declination (degrees) in Boulder, CO.
# define DECLINATION 7.29 // Declination (degrees) in Tokyo, JAPAN.

//////////////////////////
// WiFi - Setup as Client
//////////////////////////
String ssidTello = ""; // Your Tello's SSID
String passwordTello = ""; // Your Tello's PW
String ipTello = "192.168.10.1";
const int udpPortTello = 8889;

String cmdTello = "command";
String takeoffTello = "takeoff";
String landTello = "land";
String cwTello = "flip l";
String ccwTello = "flip r";

WiFiUDP udp;
bool connectedTello = false;

//////////////////////////
// Setup
//////////////////////////

void setup()
{
  strip.begin();
  strip.show(); // Initialize all pixels to 'off'

  // Assign SDA and SCL pins at Wire.begin
  int SDA = 19;
  int SCL = 21;
  Wire.begin(SDA, SCL);
  Serial.begin(115200);

  connectTello();

  // Before initializing the IMU, there are a few settings
  // we may need to adjust. Use the settings struct to set
  // the device's communication mode and addresses:
  imu.settings.device.commInterface = IMU_MODE_I2C;
  imu.settings.device.mAddress = LSM9DS1_M;
  imu.settings.device.agAddress = LSM9DS1_AG;
  // The above lines will only take effect AFTER calling
  // imu.begin(), which verifies communication with the IMU
  // and turns it on.

  if (!imu.begin())
  {
    Serial.println("Failed to communicate with LSM9DS1.");
    Serial.println("Double-check wiring.");
    Serial.println("Default settings in this sketch will " \
                  "work for an out of the box LSM9DS1 " \
                  "Breakout, but may need to be modified " \
                  "if the board jumpers are.");
    while (1)
      ;
  }
  else {I2C_ready = true;}
}

//////////////////////////
// Main Loop
//////////////////////////

void loop()
{
  // Update the sensor values whenever new data is available
  if ( imu.accelAvailable() )
  {
    // To read from the accelerometer, first call the
    // readAccel() function. When it exits, it'll update the
    // ax, ay, and az variables with the most current data.
    imu.readAccel();
  }
  if ( imu.magAvailable() )
  {
    // To read from the magnetometer, first call the
    // readMag() function. When it exits, it'll update the
    // mx, my, and mz variables with the most current data.
    imu.readMag();
  }

  if ((lastPrint + PRINT_SPEED) < millis())
  {
    printAccel(); // Print "A: ax, ay, az"
    printAttitude(imu.ax, imu.ay, imu.az,
                 -imu.my, -imu.mx, imu.mz);
    Serial.println();

    lastPrint = millis(); // Update lastPrint time
  }
}


void printAccel()
{
  // Now we can use the ax, ay, and az variables as we please.
  // Either print them as raw ADC values, or calculated in g's.
  Serial.print("A: ");
# ifdef PRINT_CALCULATED
  // If you want to print calculated values, you can use the
  // calcAccel helper function to convert a raw ADC value to
  // g's. Give the function the value that you want to convert.
  Serial.print(imu.calcAccel(imu.ax), 1);
  Serial.print(", ");
  Serial.print(imu.calcAccel(imu.ay), 1);
  Serial.print(", ");
  Serial.print(imu.calcAccel(imu.az), 1);
  Serial.print(" g ");

# elif defined PRINT_RAW
  Serial.print(imu.ax);
  Serial.print(", ");
  Serial.print(imu.ay);
  Serial.print(", ");
  Serial.println(imu.az);
# endif

}


// Calculate pitch, roll, and heading.
// Pitch/roll calculations take from this app note:
// http://cache.freescale.com/files/sensors/doc/app_note/AN3461.pdf?fpsp=1
// Heading calculations taken from this app note:
// http://www51.honeywell.com/aero/common/documents/myaerospacecatalog-documents/Defense_Brochures-documents/Magnetic__Literature_Application_notes-documents/AN203_Compass_Heading_Using_Magnetometers.pdf

void printAttitude(float ax, float ay, float az, float mx, float my, float mz)
{
  float roll = atan2(ay, az);
  float pitch = atan2(-ax, sqrt(ay * ay + az * az));
  float movement = sqrt (ax * ax + ay * ay + az * az);
  float heading;
  if (my == 0)
    heading = (mx < 0) ? PI : 0;
  else
    heading = atan2(mx, my);

  heading -= DECLINATION * PI / 180;

  if (heading > PI) heading -= (2 * PI);
  else if (heading < -PI) heading += (2 * PI);
  else if (heading < 0) heading += 2 * PI;

  // Convert everything from radians to degrees:
  heading *= 180.0 / PI;
  pitch *= 180.0 / PI;
  roll  *= 180.0 / PI;

  Serial.print("Pitch: ");
  Serial.print(pitch, 1);
  Serial.print(", Roll: ");
  Serial.print(roll, 1);
  Serial.print(", Heading: "); Serial.print(heading, 0);

  if (pitch > 70) {
    Serial.print(" @@UP@@");
    if (moveType != 1) {
      udp.beginPacket(ipTello.c_str(), udpPortTello);
      udp.printf(takeoffTello.c_str());
      Serial.println(takeoffTello.c_str());
      udp.endPacket();
      colorWipe(strip.Color(4, 4, 4), 10);  // White
      delay(100); // required delay
      }
    moveType = 1;
    }
  else if (pitch < -35) {
    Serial.print(" @DOWN@");
    if (moveType != 2) {
      udp.beginPacket(ipTello.c_str(), udpPortTello);
      udp.printf(landTello.c_str());
      Serial.println(landTello.c_str());
      udp.endPacket();
      colorWipe(strip.Color(6, 6, 0), 10);  // Yellow
      delay(100); // required delay
      }
    moveType = 2;
    }
  else if ((pitch > 5) && (roll < -90)) {
    Serial.print(" @@CW@@");
    if (moveType != 3) {
      udp.beginPacket(ipTello.c_str(), udpPortTello);
      udp.printf(cwTello.c_str());
      Serial.println(cwTello.c_str());
      udp.endPacket();
      colorWipe(strip.Color(16, 0, 0), 1);
      colorWipe(strip.Color(0, 0, 0), 2);
      colorWipe(strip.Color(16, 0, 0), 1);
      colorWipe(strip.Color(0, 0, 0), 2);
      colorWipe(strip.Color(16, 0, 0), 1);
      delay(100); // required delay
      }  // Red
    moveType = 3;
    }
  else if ((pitch > 5) && (roll > 90)) {
    Serial.print(" @CCW@");
    if (moveType != 4) {
      udp.beginPacket(ipTello.c_str(), udpPortTello);
      udp.printf(ccwTello.c_str());
      Serial.println(ccwTello.c_str());
      udp.endPacket();
      colorWipe(strip.Color(0, 16, 0), 3);
      colorWipe(strip.Color(0, 0, 0), 2);
      colorWipe(strip.Color(0, 16, 0), 1);
      colorWipe(strip.Color(0, 0, 0), 2);
      colorWipe(strip.Color(0, 16, 0), 1);
      }  // Green
    moveType = 4;
    }
  else {
    if (moveType != 0) {colorRevWipe(strip.Color(0, 0, 0), 2);}  // Black
    moveType = 0;
    }

}

// Fill the dots one after the other with a color
void colorWipe(uint32_t c, uint8_t wait) {
  for(uint16_t i=0; i<strip.numPixels(); i++) {
    strip.setPixelColor(i, c);
    strip.show();
    delay(wait);
  }
}

void colorRevWipe(uint32_t c, uint8_t wait) {
  for(uint16_t i=0; i<strip.numPixels(); i++) {
    strip.setPixelColor((strip.numPixels()-i), c);
    strip.show();
    delay(wait);
  }
}

void connectTello() {
      // -- client mode
    // WiFi connect to Tello
    Serial.print("SSID Tello : ");
    Serial.println(ssidTello);
    Serial.print("Password Tello : ");
    Serial.println(passwordTello);
    connectToWiFi(ssidTello.c_str(), passwordTello.c_str());
}

// start connect to WiFi AP(Tello)
void connectToWiFi(const char *ssid, const char *password){
  Serial.print("Connecting : ");
  Serial.println(ssid);

  // delete old config
  WiFi.disconnect(true);

  //register event handler
  WiFi.onEvent(wifiEvent);

  WiFi.begin(ssid, password);
  Serial.println("Waiting for WiFi connection...");
}

//wifi event handler
void wifiEvent(WiFiEvent_t event){

  switch(event) {
    case SYSTEM_EVENT_STA_GOT_IP:
        // connected
        Serial.println("WiFi connected!");
        Serial.print("IP address : ");
        Serial.println(WiFi.localIP());
        delay(100); // required delay

        //initialize UDP
        udp.begin(WiFi.localIP(), udpPortTello);
        connectedTello = true;
        delay(100); // required delay
        udp.beginPacket(ipTello.c_str(), udpPortTello);
        udp.printf(cmdTello.c_str());
        Serial.println(cmdTello.c_str());
        udp.endPacket();
        delay(100); // required delay
        colorWipe(strip.Color(0, 0, 16), 3); //Blue
        break;


    case SYSTEM_EVENT_STA_DISCONNECTED:
        // disconnected
        Serial.println("WiFi lost connection");
        connectedTello = false;
        break;
  }
}
使い方
まず、ソースコード内のTelloのSSIDとPasswordを変更します。
最初はTelloの電源をいれないで、USBシリアルでPCに接続し、コンソールに表示される加速度センサーの値とPitch、Roll、アクションを杖を動かしながら観察してください。これを見ながらソースコード内のPitchとRollのしきい値を変更してください。
A: -0.9, 0.2, -0.4 g Pitch: 64.3, Roll: 149.7, Heading: 200 @CCW@flip r
A: -1.0, 0.1, -0.2 g Pitch: 77.2, Roll: 154.6, Heading: 200 @@UP@@takeoff
調整を終えたら、Telloの電源を入れESP32を再起動します。LEDが青く光ったらWi−Fi接続完了です。あとは杖を任意の方向に傾けて操作してください。
注意事項
Telloは重量80gで航空法のドローン規制の対象外ですが、地方自治体によっては公園や公共の場所での飛行を禁止していることがあります。屋内や私有地ではオーナーの許可が必要です。
屋外では強風に煽られることがありますので注意を。また明度が不足していると正常に操作できないかもしれません。では楽しいTelloハックを!