GitHub への push イベントを SNS で受け取って、「<リポジトリ名>:<ブランチ名>:<実行スクリプト>」というタグが付いている EC2 インスタンスを探して指定スクリプトを実行する、という話です。
で、スクリプト内で "git pull" するもヨシ、追加でごにょごにょするもヨシ。
前置き
CircleCI とかそんなんでなく、GitHub に push したら pull してくれればそれでいいんですよ、というケースは地味に多いわけです。
これは GitHub > SNS > Lambda > Run Command でスクリプト実行すれば良いのですが、「じゃぁリポジトリ毎に Lambda ファンクション作るの?」って話で。
そこで EC2 タグに関連するリポジトリ名とブランチ名、実行スクリプトを書いておけば 1つの lambda が全て面倒みてくれるようにします。
リポジトリが増えた時、サーバが増えた時も EC2 インスタンスにタグ付けるだけなので簡単です。
仕組み
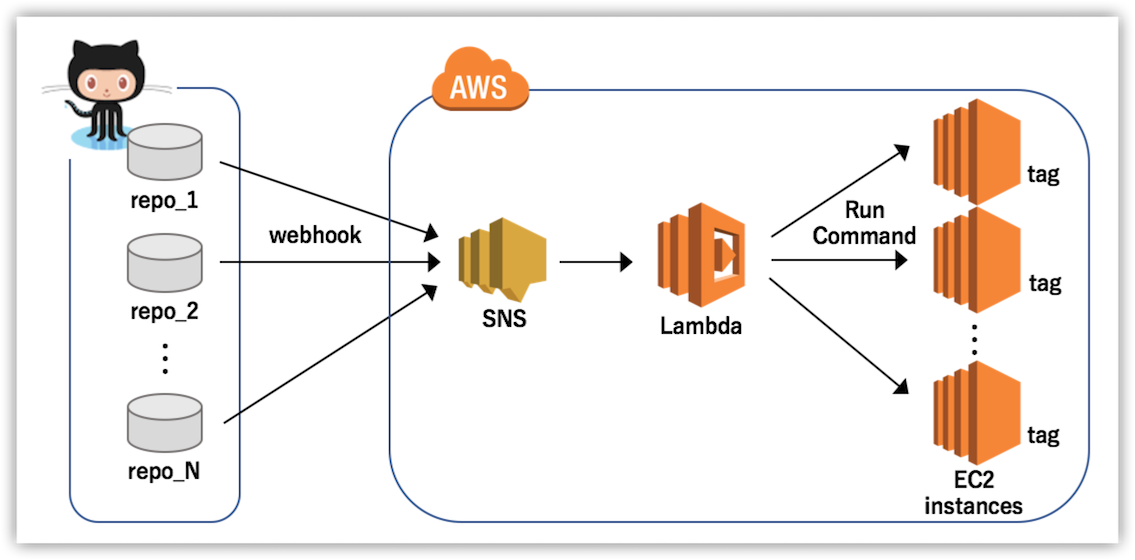
GitHub > SNS > Lambda はいろいろな方がやられている通り。
あとは EC2 インスタンスに
- key = GitHub-Webhook
- val = <リポジトリ名>:<ブランチ名>:<実行スクリプト>
というタグをつけておいて、lambda で対象 EC2 インスタンスを探して Rum Command でスクリプトを実行する。
で、スクリプトの中で git pull とか好きにせい、という構成。
例えば repo_1 というリポジトリの master に push したら、「key=GitHub-Webhook、val=repo_1:master:/hoge/hoge.sh」というタグが付いている EC2 インスタンスの /hoge/hoge.sh を実行します。
作る
SSM エージェントをインストールする
Run Command を実行するには対象インスタンスに SSM エージェントを入れておく必要があります。
40秒で支度しましょう。
$ cd /tmp
$ curl https://s3.amazonaws.com/ec2-downloads-windows/SSMAgent/latest/linux_amd64/amazon-ssm-agent.rpm -o amazon-ssm-agent.rpm
$ sudo yum install -y amazon-ssm-agent.rpm
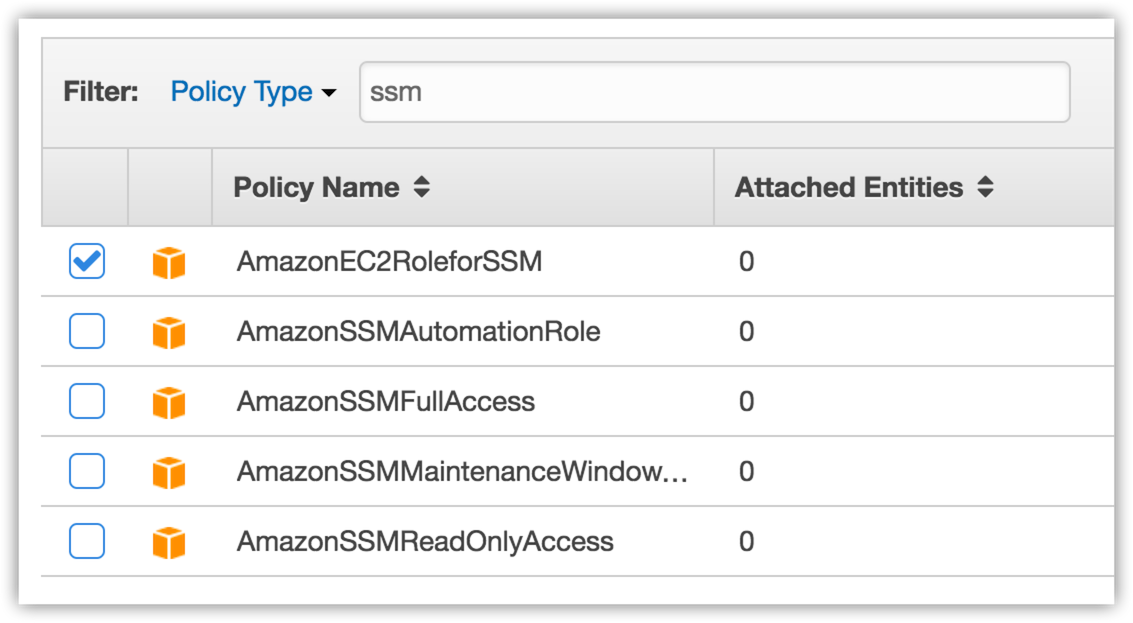
EC2ロール割り当て
で、EC2 インスタンスに AmazonEC2RoleforSSM ポリシーをアタッチしておく。
SNS topic、GitHub webhook 専用 IAM ユーザの作成、GitHub の設定
「github-webhook」という SNS topic を作ります。
CLI でシュッと。
$ aws sns create-topic --name github-webhook
GitHub webhook 用に「github-webhook」という名前の IAM ユーザを作って、以下のようなインラインポリシーを付ける。
つまり github-webhook topic にパブリッシュする事しかできないユーザ。
{
    "Version": "2012-10-17",
    "Statement": [
        {
            "Action": [
                "sns:Publish"
            ],
            "Sid": "Stmt0000000000000",
            "Resource": [
                "[さっき作った SNS の ARN]"
            ],
            "Effect": "Allow"
        }
    ]
}
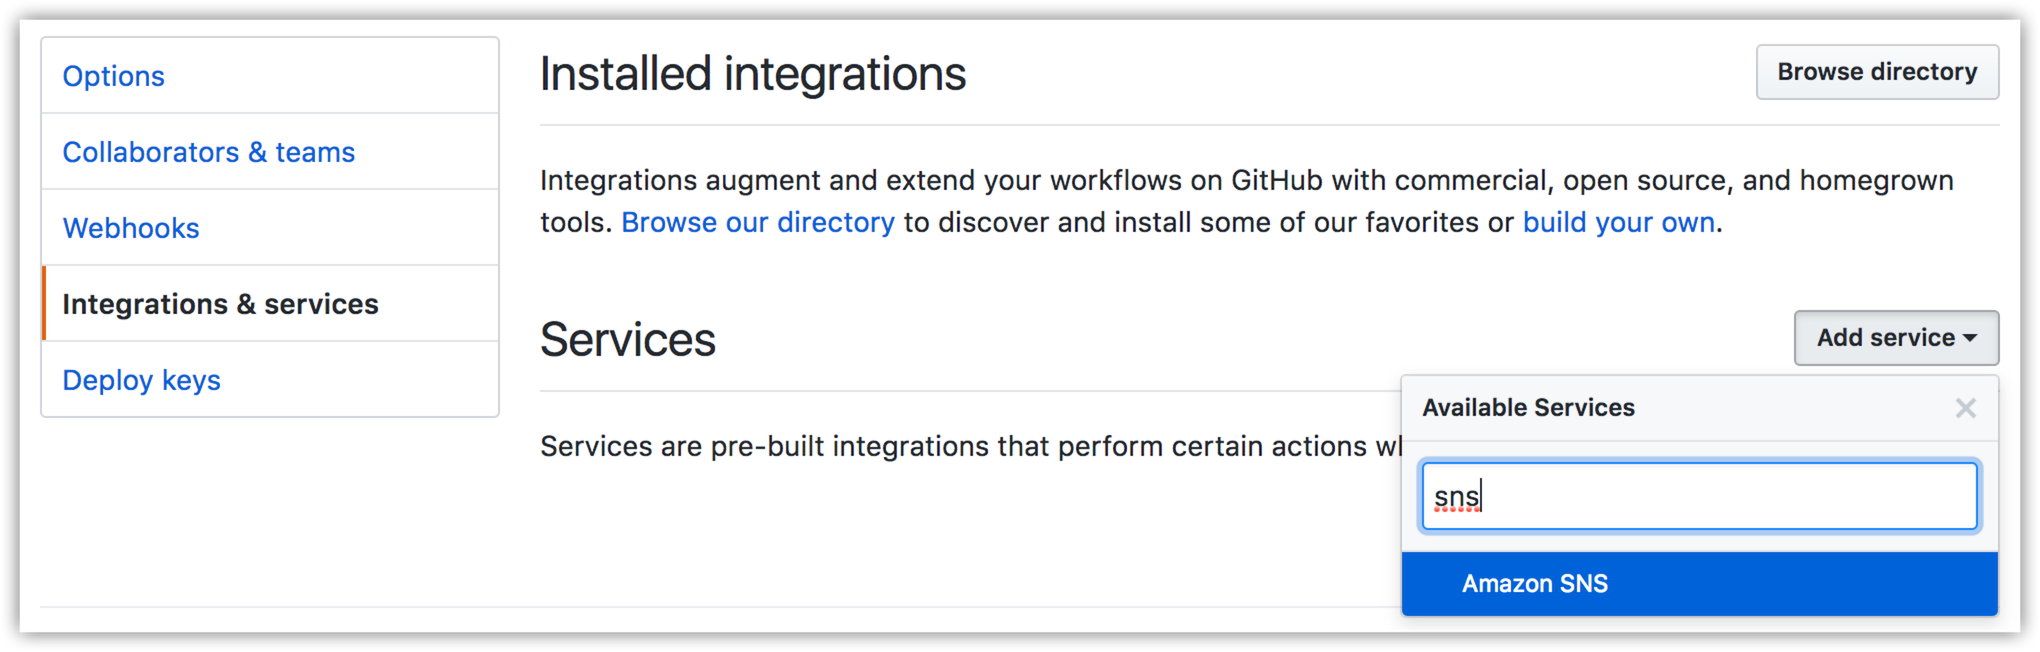
で、GitHub 側もぱぱっと。
Lambda 準備
特になんもしてない。
エラー処理もないのでやさしく使う。
# -*- coding: utf-8 -*-

import json
import boto3

# key="GitHub-Webhook", val=<repoName>:<branchName>:<command>
# というタグを持つインスタンスを列挙する。
def search_target_instance(repoName, branchName):
    # 実行中の EC2 インスタンスを取得
    ec2 = boto3.client('ec2')
    response = ec2.describe_instances(
        Filters=[
            {
                'Name': 'instance-state-name',
                'Values': ['running']
            }
        ]
    )

    targetInstances = []

    for resv in response['Reservations']:
        for instance in resv['Instances']:
            for tag in instance['Tags']:
                if tag['Key'] == 'GitHub-Webhook':
                    tagValue = tag['Value']

                    if tagValue.startswith(repoName + ":" + branchName + ":"):
                        target = instance['InstanceId'], tagValue.split(':')[-1]
                        targetInstances.append(target)

    return targetInstances

# Run Command で指定スクリプトを実行する。
def execute_command(instanceId, command):
    print instanceId + " : " + command
    ssm = boto3.client('ssm')

    ssmRes = ssm.send_command(
        InstanceIds = [instanceId],
        DocumentName = "AWS-RunShellScript",
        Parameters = {
            "commands": [ command ]
        })

    commandId = ssmRes['Command']['CommandId']
    return commandId

# Lambda エントリポイント
def lambda_handler(event, context):
    message = event['Records'][0]['Sns']['Message']
    gitHubJson = json.loads(message)

    # SNS からリポジトリ名とブランチ名を取得する。
    repoName = gitHubJson["repository"]["name"]
    branchName = gitHubJson["ref"].replace('refs/heads/', '')

    # デプロイ対象 EC2 インスタンスを取得
    targetInstances = search_target_instance(repoName, branchName)

    # EC2 タグで指定されているコマンドを実行する
    for instance in targetInstances:
        instanceId, command = instance
        print execute_command(instanceId, command)

    return {'status': 'ok'}
EC2 タグつけて push
ココまで来たら、タグ付けて GitHub に push すればよい。
Run Command の結果は AWS コンソールの EC2 / Run Command から確認できます。
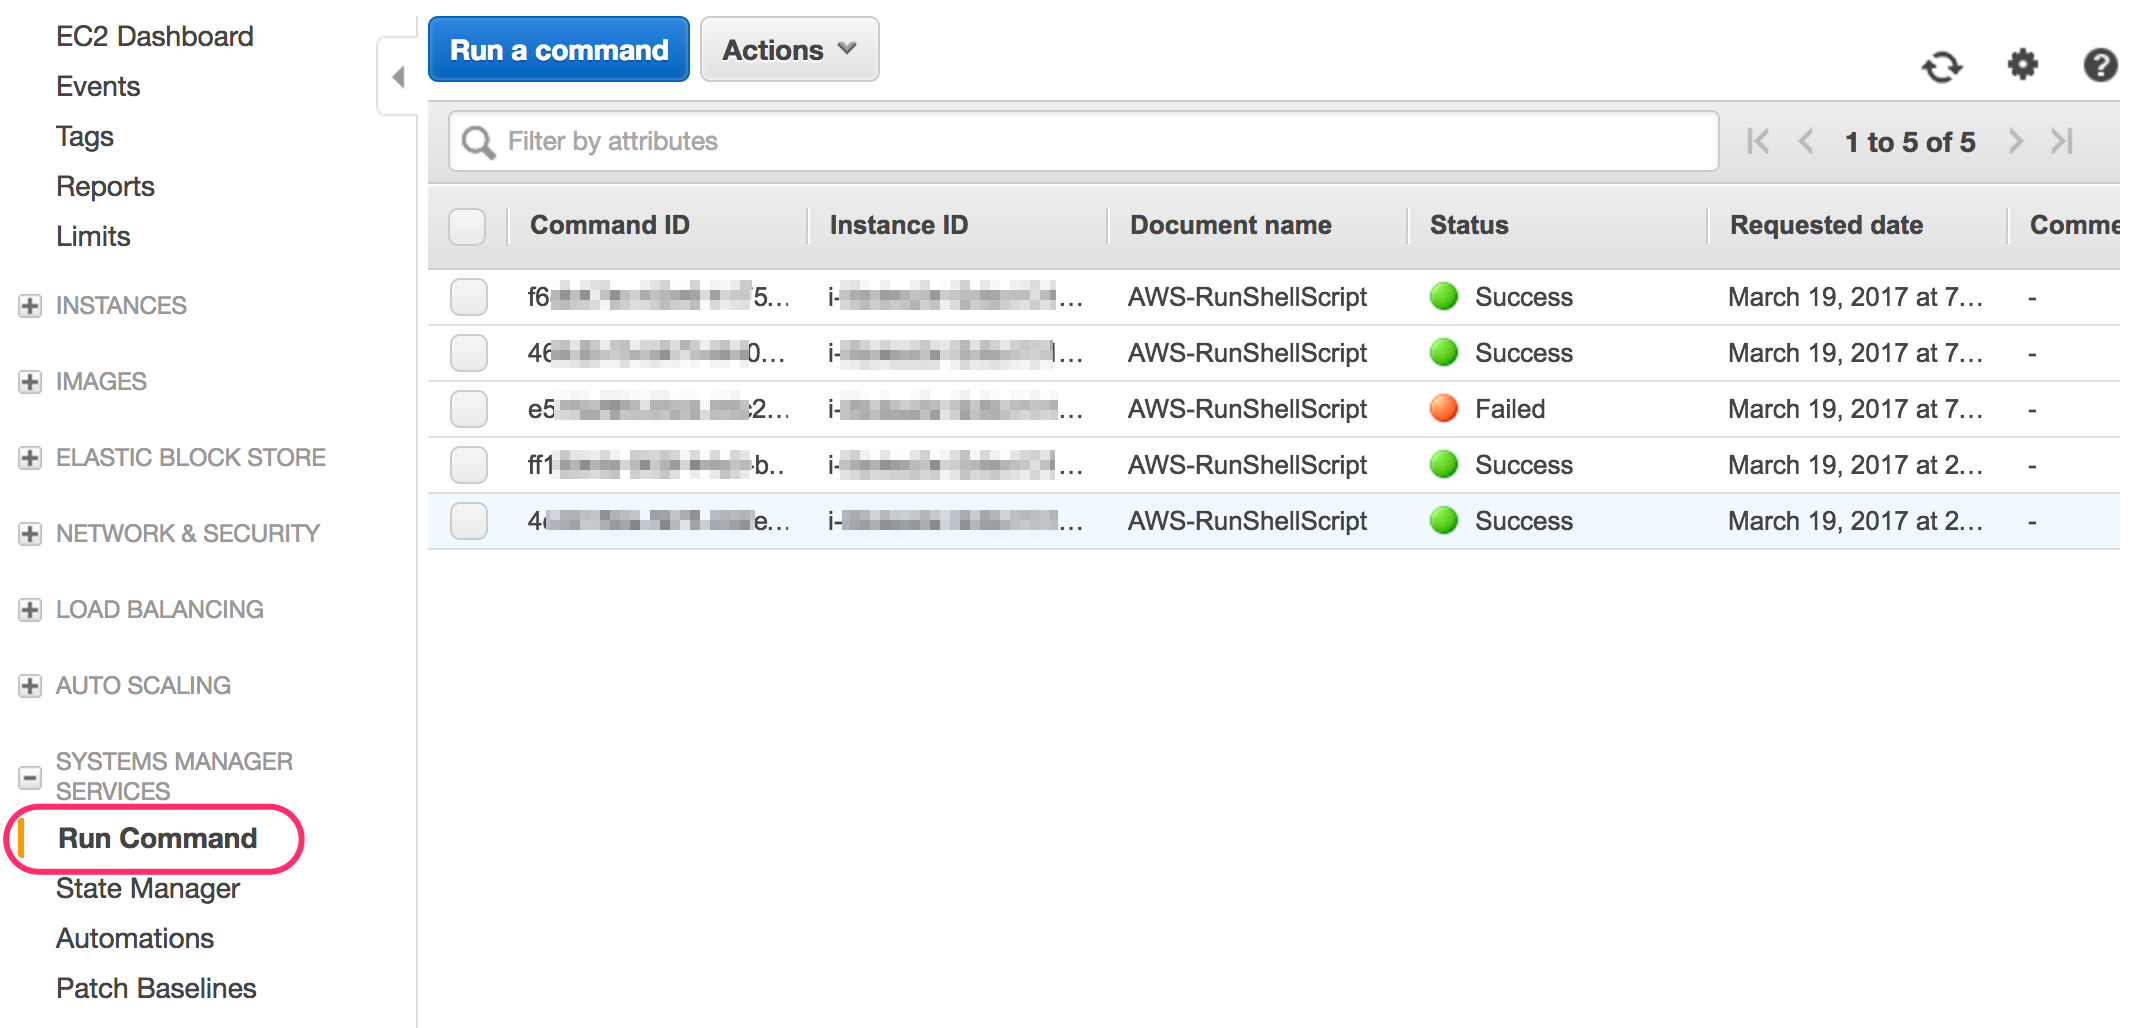
※ スクリプトは root で実行されるので注意。
結果はどうやって知るのよ?
本当は list_command_invocations() で Run Command の結果をみて Slack に通知とかすべきですが長くなるので割愛。
とりあえずスクリプト内から curl で slack に post しても良いかもしれないですね。
結論
大切なこと:「ssh ログインなんか絶対にしないぞ!」という強い意思。