会社のPCでVirtualBox使おうとしたときにプロキシ関係の設定で嵌ったのでメモ。
VirtualBoxへOSをインストールする手順は省いています。そこは適当にググってください。
便宜上、CentOS6.5で説明します。
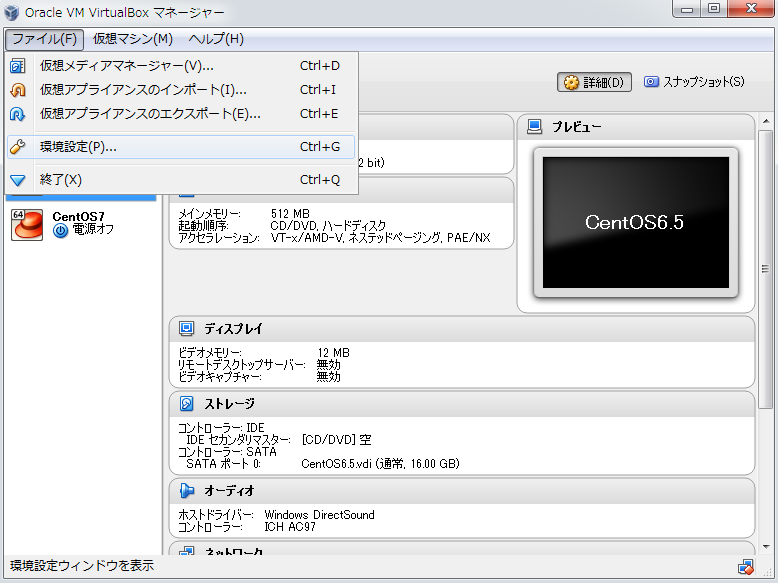
・VirtualBox起動後、[ファイル(F)]->[環境設定(P)]とクリックします。

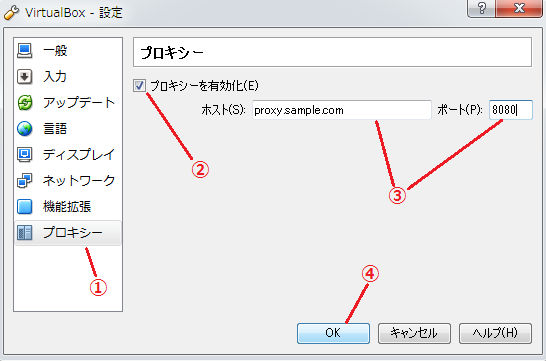
・[VirtualBox - 設定]で (1)プロキシーの項目をクリック (2)[プロキシーを有効化(E)]にチェックを入れる (3)ホスト名、ポート番号を指定する (4)OKをクリックする
OSを立ち上げ、以下のようにコマンドを実行する。
# echo "export HTTP_PROXY=http://proxy.sample.com:8080" >> /etc/profile.d/proxy.sh
# echo "export FTP_PROXY=http://proxy.sample.com:8080" >> /etc/profile.d/proxy.sh
# chmod +x /etc/profile.d/proxy.sh
# source /etc/profile.d/proxy.sh
あるいは単に~/.bashrcに追記する。
$ echo "export HTTP_PROXY=http://proxy.sample.com:8080" >> ~/.bashrc
$ echo "export FTP_PROXY=http://proxy.sample.com:8080" >> ~/.bashrc
$ source ~/.bashrc
以上。
