はじめに
NEM-Symbolは非常に簡単に扱うことができるブロックチェーンです。
本来はNODE.JSを使いますが今回はブラウザーで実行させる方法です。
ここではWEB初心者向けにSDKを使ったアカウントの作成方法を簡単に分かりやすく解説していきます。
公式はこちら
※testnet版になります。
準備するもの
WEBサーバー
XAMPPなどローカルWEBサーバー環境を用意しておいてください。
Symbol-sdk のブラウザー版(browserify)
https://github.com/xembook/nem2-browserify
symbol-sdk-0.21.0.js をgithubからダウンロードします。
ダウンロードしたら
作業ディレクトリにindex.htmlを作成してsymbol-sdk-0.21.0.jsを置いてください。
symbol-sdk-0.21.0.jsは名前をsymbol_sdk.jsにリネームしておきます。
作業ディレクトリ
|-index.html
|-symbol_sdk.js(symbol-sdk-0.21.0.js)
SDKの読み込み
symbol_sdk.jsを読み込みます。
<script src="symbol_sdk.js"></script>
次にSymbol-SDKをモジュールとしてインポートします。
<script>
var symbol_sdk_1 = require("/node_modules/symbol-sdk");
</script>
全体としてはこんな感じ。。。
<!DOCTYPE html>
<html lang="en">
<head>
    <meta charset="UTF-8">
    <meta name="viewport" content="width=device-width, initial-scale=1.0">
    <title>Symbol-sdk_test</title>
    <script src="/symbol_sdk.js"></script>
</head>
<body>
<script>

const symbol_sdk_1 = require("/node_modules/symbol-sdk");

</script>
アカウントを作成する
次に公式からアカウント作成させるスクリプトをコピペします。
const account = symbol_sdk_1.Account.generateNewAccount(symbol_sdk_1.NetworkType.TEST_NET);
console.log('Your new account address is:', account.address.pretty(), 'and its private key', account.privateKey);
全体はこんな感じ
<html lang="en">
<head>
    <meta charset="UTF-8">
    <meta name="viewport" content="width=device-width, initial-scale=1.0">
    <title>Symbol-sdk_test</title>
    <script src="/symbol_sdk.js"></script>
</head>
<body>
<script>

var symbol_sdk_1 = require("/node_modules/symbol-sdk");

const account = symbol_sdk_1.Account.generateNewAccount(symbol_sdk_1.NetworkType.TEST_NET);
console.log('Your new account address is:', account.address.pretty(), 'and its private key', account.privateKey);

</script>

</body>
</html>
以上でブラウザーからindex.htmlにアクセスするとアカウントが作成されます。
しかし、これではアクセスする毎にアカウントが作られるので、アカウントの作成ボタンをつけましょう。
アカウント作成ボタンを作る
先ほどのindex.htmlにボタンを作るコードを追加します。
まずコピペしたアカウント作成コードをfunction()に入れます。
関数名はget_accountにします。
function get_account(){
    const account = symbol_sdk_1.Account.generateNewAccount(symbol_sdk_1.NetworkType.TEST_NET);
    console.log('Your new account address is:', account.address.pretty(), 'and its private key', account.privateKey);
}
つぎにアカウント作成ボタンを作ります。
onclickに先ほど作成したget_account関数を指定します。
<button onclick="get_account()">アカウント作成</button>
全体ではこんな感じです。
<html lang="en">
<head>
    <meta charset="UTF-8">
    <meta name="viewport" content="width=device-width, initial-scale=1.0">
    <title>Symbol-sdk_test</title>
    <script src="/symbol_sdk.js"></script>
</head>
<body>
<script>

var symbol_sdk_1 = require("/node_modules/symbol-sdk");

function get_account(){
const account = symbol_sdk_1.Account.generateNewAccount(symbol_sdk_1.NetworkType.TEST_NET);
console.log('Your new account address is:', account.address.pretty(), 'and its private key', account.privateKey);
}
</script>

<button onclick="get_account()">アカウント作成</button>

</body>
</html>
以上で完成しました。
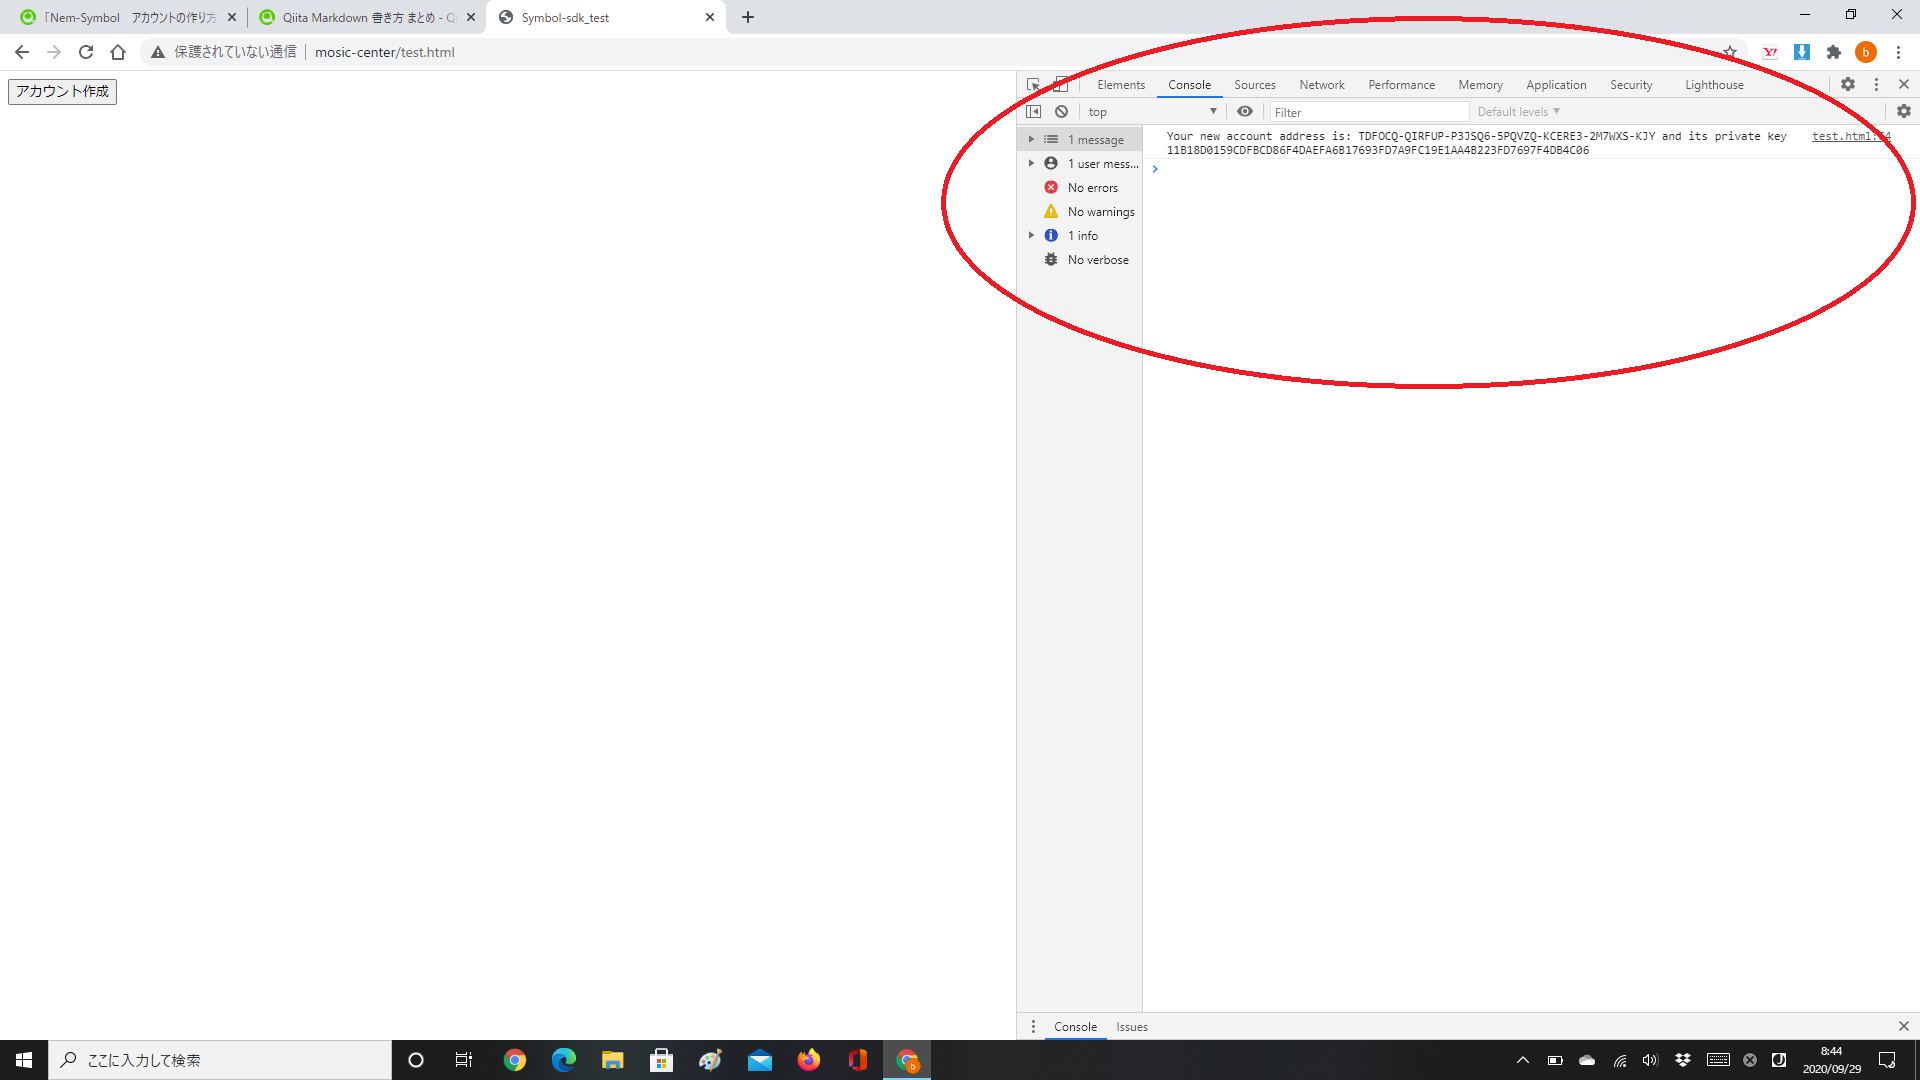
あとはブラウザーからアクセスしてアカウント作成ボタンを押します。
コンソールログ(F12押すもしくはメニューからその他のツール-デベロッパーツールを押す。)
にアドレスと秘密鍵が表示されていれば成功です!
秘密鍵をコンソールログからコピペしてSymbolWalletにインポートしましょう。
SymbolWalletのアカウントの作成から秘密鍵を使って作成でインポートすることができます。
以上Symbol-sdkを使ってブラウザーからアカウントを作る方法でした。
