はじめに
centos9 streamにpostgresqlのver11をインストールしたので、手順と初期設定を備忘として残す。
手順
インストール
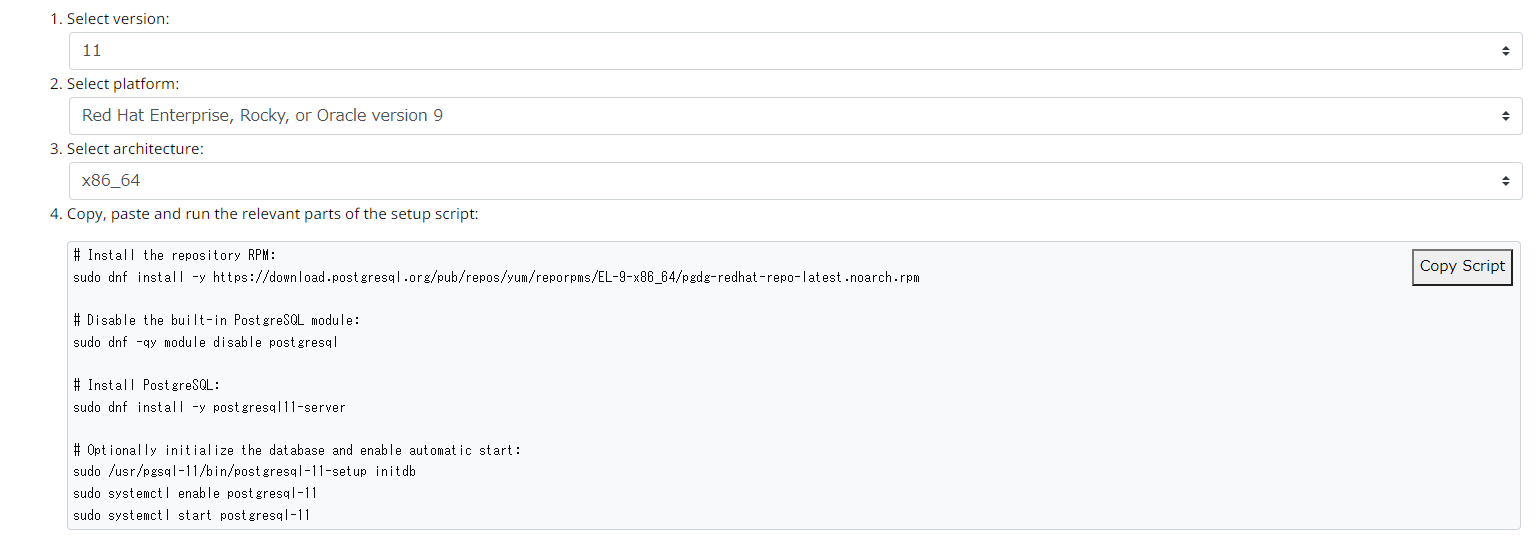
下記サイトにて自分の環境や要求するpostgresqlのバージョンを入力する。
今回はcentos9 streamにpostgresql11をインストールする。
https://www.postgresql.org/download/linux/redhat/

画像の項番4に沿って作業することでほぼほぼインストールは完了する。
まずは端末を立ち上げ、リポジトリの設定を行う。
dnf install -y https://download.postgresql.org/pub/repos/yum/reporpms/EL-9-x86_64/pgdg-redhat-repo-latest.noarch.rpm
インストール済み:
  pgdg-redhat-repo-42.0-24.noarch

完了しました!
一応/etc/yum.repos.dを確認してみる
ll /etc/yum.repos.d/
[root@localhost ~]# ll /etc/yum.repos.d/
合計 24
-rw-r--r--. 1 root root  4229  3月  3 03:30 centos-addons.repo
-rw-r--r--. 1 root root  2588  3月  3 03:30 centos.repo
-rw-r--r--. 1 root root 10268  3月 16 18:33 pgdg-redhat-all.repo
pgdg-redhat-all.repoがあればok
続いてdnf updateをしておく
dnf update -y
するとパッケージのアップデートと一緒にGPG鍵のインポートも始まる。
続いてmoduleを無効化する。。。前に、現在利用可能なmoduleを確認しておく。
dnf module list
[root@localhost ~]# dnf module list
メタデータの期限切れの最終確認: 0:28:09 時間前の 2022年04月12日 22時38分53秒 に 実施しました。
[root@localhost ~]#
すると特に何も表示されない。(2022/4/12現在)
下記サイトによるとcentos9 streamのモジュールはこれから追加されるらしい。
https://centosfaq.org/centos/centos-9-stream-modules/
なので、moduleの無効化は飛ばして、いよいよpostgresql11をインストールする
dnf install -y postgresql11-server
インストール済み:
  postgresql11-11.15-1PGDG.rhel9.x86_64
  postgresql11-libs-11.15-1PGDG.rhel9.x86_64
  postgresql11-server-11.15-1PGDG.rhel9.x86_64

完了しました!
これでpostgresql11のインストール自体は完了。
一応バージョンの確認をしておく。
psql --version
[root@localhost ~]# psql --version
psql (PostgreSQL) 11.15
ちゃんと11がインストールされている。
初期設定
続いて初期設定を行う。
postgresqlをインストールしたとこでpostgresユーザが作成されたことを確認する。
id postgres
[root@localhost ~]# id postgres
uid=26(postgres) gid=26(postgres) groups=26(postgres)
ちゃんとpostgresユーザが作成されていたので、パスワードを設定しておく。
passwd postgres
passwd: すべての認証トークンが正しく更新できました。
こんなのが出てきたらok
つづいてデータベースクラスタを作成する。
/usr/pgsql-11/bin/postgresql-11-setup initdb
[root@localhost ~]# /usr/pgsql-11/bin/postgresql-11-setup initdb
Initializing database ... OK
これでpostgresql-11.serviceが起動できるようになる。
自動起動の設定をして、サービスをスタートしてみる。
systemctl enable postgresql-11.service
systemctl is-enabled postgresql-11.service
systemctl start postgresql-11.service
systemctl is-active postgresql-11.service
[root@localhost ~]# systemctl enable postgresql-11.service
[root@localhost ~]# systemctl is-enabled postgresql-11.service
enabled
[root@localhost ~]# systemctl start postgresql-11.service
[root@localhost ~]# systemctl is-active postgresql-11.service
active
続いてFWの設定も行っておく。
postgresqlはデフォルトで5432/tcpを使用するためポートを開放しておく。
firewall-cmd --permanent --add-port=5432/tcp
firewall-cmd --reload
firewall-cmd --list-ports
[root@localhost ~]# firewall-cmd --permanent --add-port=5432/tcp
success
[root@localhost ~]# firewall-cmd --reload
success
[root@localhost ~]# firewall-cmd --list-ports
5432/tcp
これにて初期設定も終了である。
少し触る
せっかくなのでpsqlでちょこっとpostgresqlを触ってみる。
下記マニュアルに従いテーブルを作ってデータを挿入してみる。
https://www.postgresql.jp/document/11/html/dml-insert.html
postgres=# CREATE TABLE products (
    product_no integer,
    name text,
    price numeric
);
CREATE TABLE
postgres=#
postgres=# \dt
             リレーション一覧
 スキーマ |   名前   |    型    |  所有者
----------+----------+----------+----------
 public   | products | テーブル | postgres
(1 行)

postgres=#
postgres=# INSERT INTO products VALUES (1, 'Cheese', 9.99);
INSERT 0 1
postgres=#
postgres=# SELECT * from products;
 product_no |  name  | price
------------+--------+-------
          1 | Cheese |  9.99
(1 行)
問題なく実行できた。