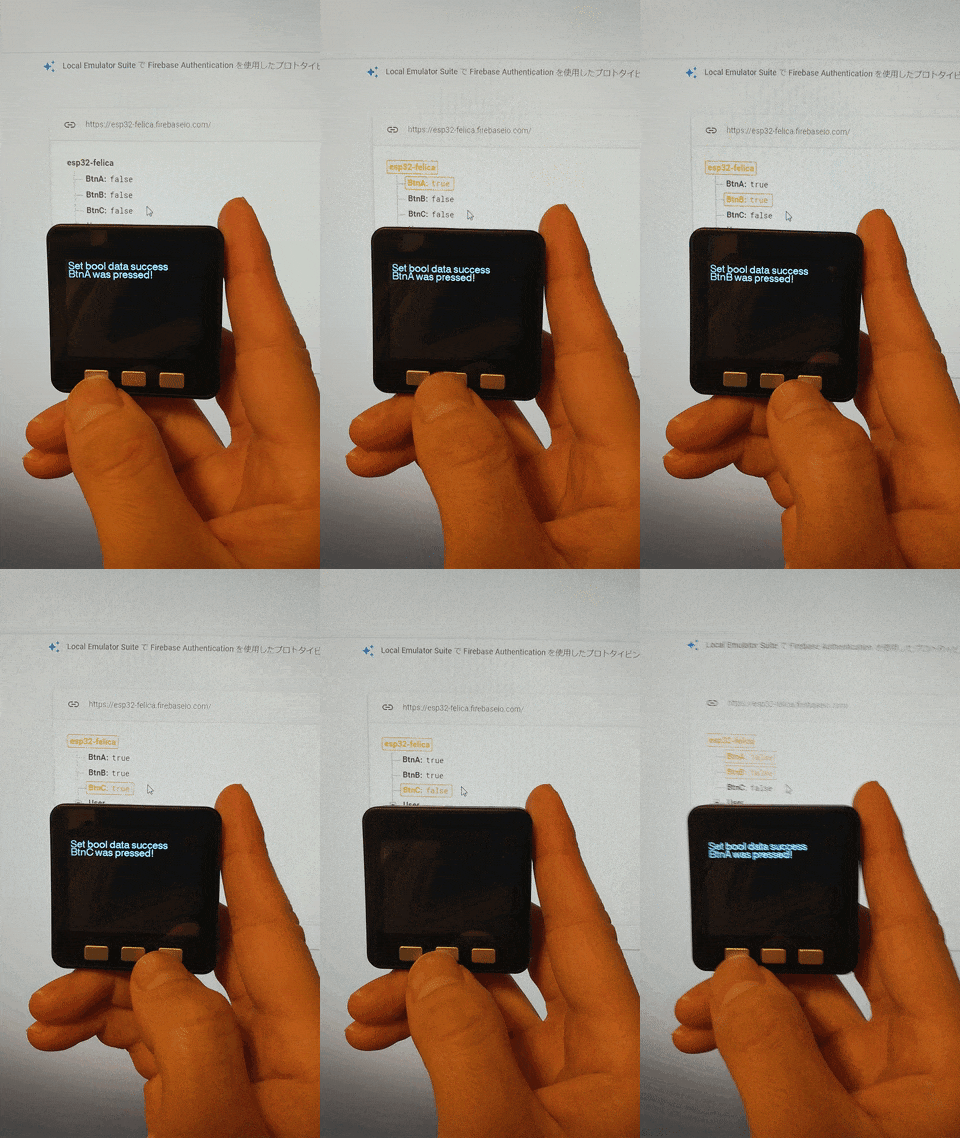
できあがるもの
はじめに
アドベントカレンダーも残るところ10日を切りました!
この連作ではM5StackとFeliCaリーダー・ライターRC-S620S、Firebaseを駆使して遠隔からもアンロック可能なスマートロックのベースとなる機構を作っていこうと思います。
本記事ではM5StackとFirebaseのリアルタイムDBを連携させる方法について書いていこうと思います。
この2つを連携させることができれば、IoTデバイスとWebの連携なんかができるので自宅をスマートホーム化も夢ではありません!
M5StackとFirebaseを連携してスマートロックみたいなものを作る!①
M5StackとFirebaseを連携してスマートロックみたいなものを作る!②
M5StackとFirebaseを連携してスマートロックみたいなものを作る!③
M5StackとFirebaseを連携してスマートロックみたいなものを作る!④
M5StackとFirebaseを連携してスマートロックみたいなものを作る!⑤
必要なもの・開発環境
- M5Stack(ESP32 Dev Module)
- Googleアカウント
- WiFi環境
M5Stackの方がスイッチとか内蔵されているので楽ですが、ESP32でも作製は可能です。
ESP32で作製していく場合に今作と同じ動作をさせるには、スイッチ等の入力できるパーツを用意して頂く必要があります。
開発にはVSCodeと拡張機能であるPlatformIOを使っていきます。
必要なライブラリ
- M5Stack.h
- FirebaseESP32.h
PlatformIOでライブラリをインストールする際は、左のリストから「Libraries」を選んで、

「Search libraries...」にインストールしたいライブラリ名を入れましょう。
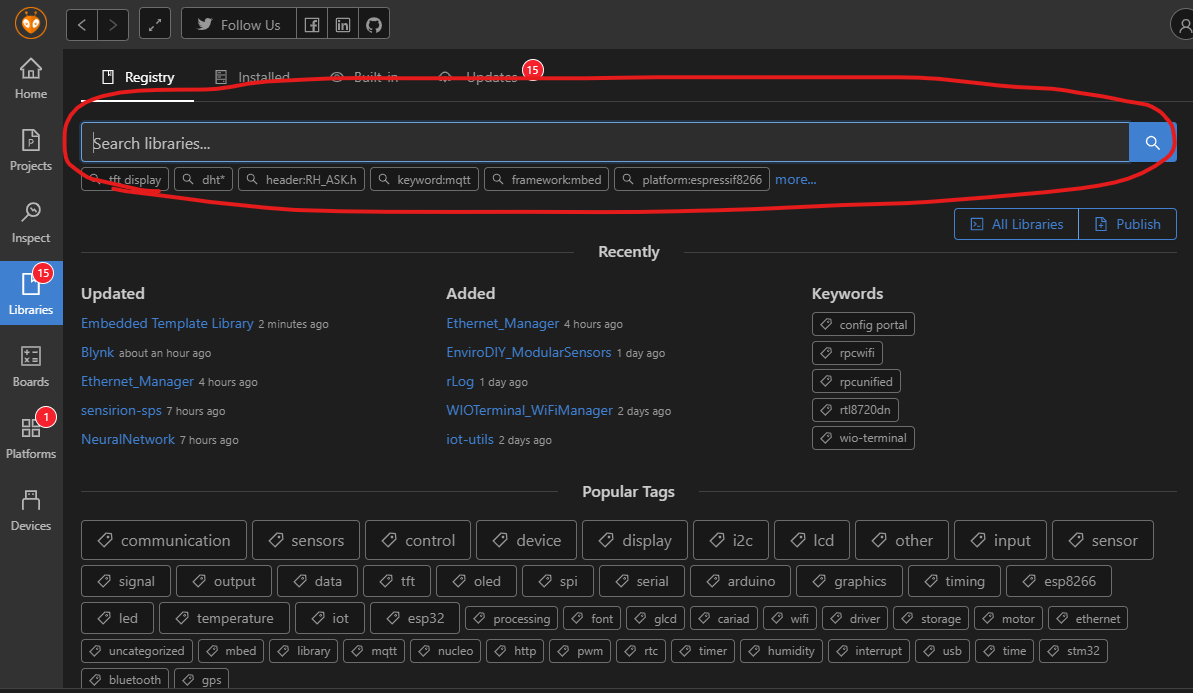
以下の2つです。


Firebaseでプロジェクトを作る
Firebaseのコンソールからプロジェクトを作りましょう。
作り方については、以下の記事が詳しいと思うのでそちらにお任せします。
Firebaseプロジェクト作成方法
プロジェクトを作ったら、hostnameと認証パスが必要になるので以下の場所から確認しましょう。
Hostname
まず、Realtime Databaseへ移動しましょう。
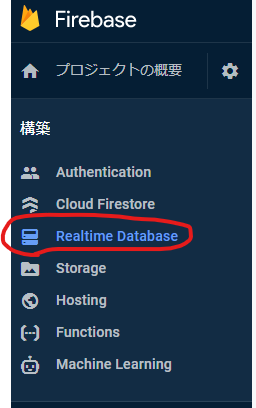
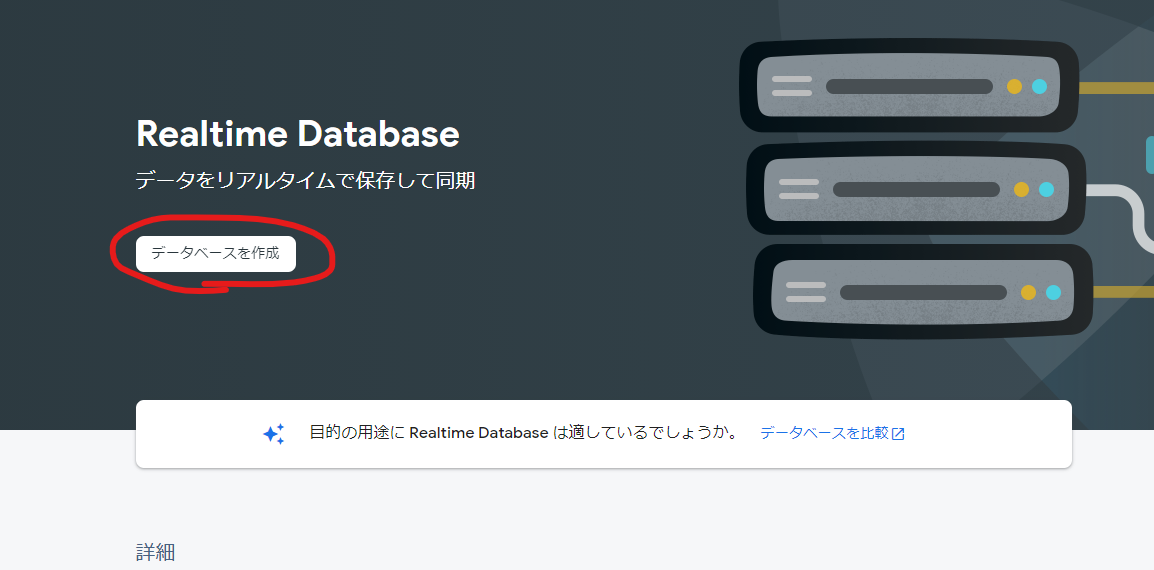
データベースを作成します。
今回はテストモードでOKです。
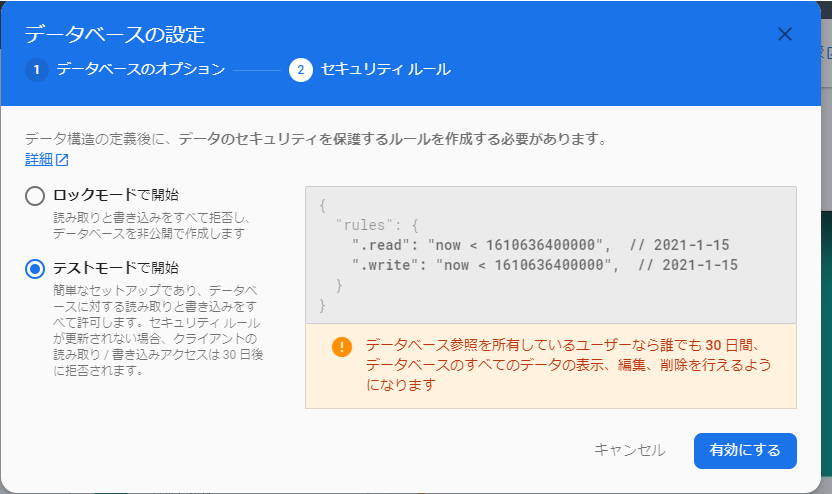
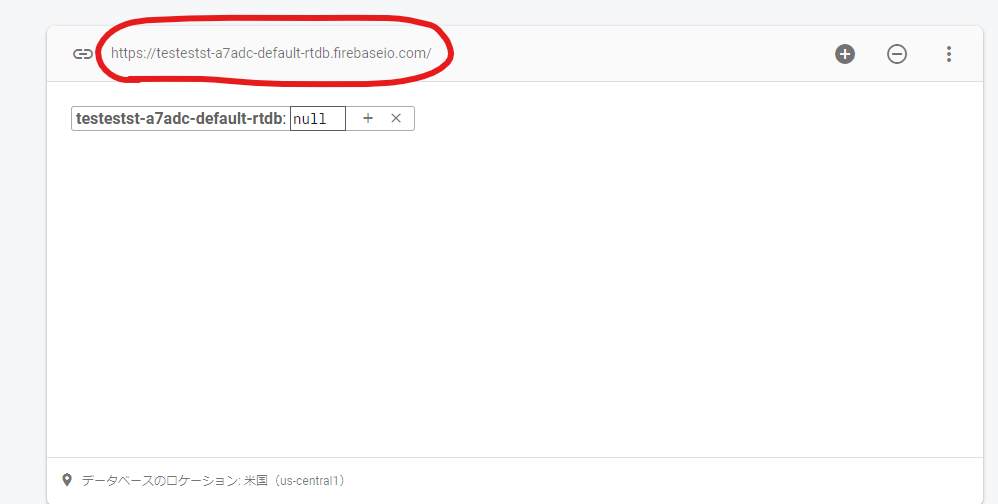
作製できたら、以下の赤丸部分の"https://"と最後の"/"を抜いた部分がhostnameになります。
今回だと"testestst-a7adc-default-rtdb.firebaseio.com"になりますね。
認証パス
歯車マークから、「プロジェクトと設定」を選択。
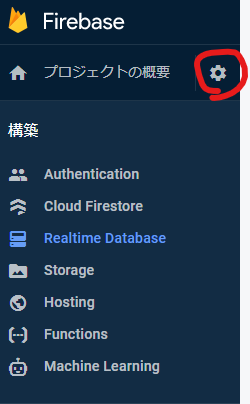
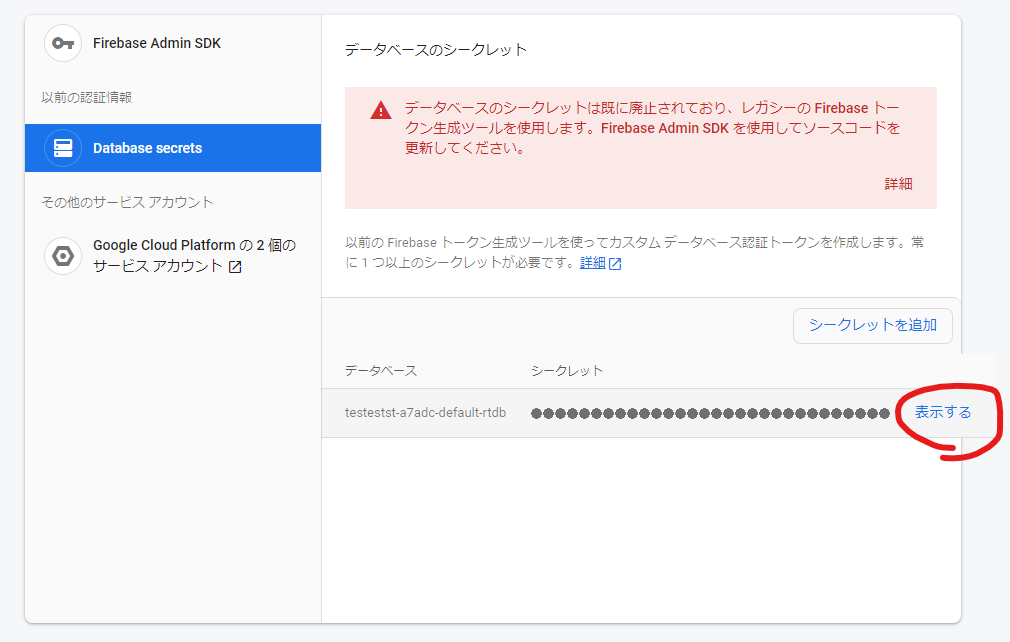
サービスアカウントをクリックし、

「Database secrets」をクリックして、シークレットの部分を表示すればパスを取得できます。
これでFirebaseのリアルタイムDBの準備は完了です!
コード全体
#include <Arduino.h>
#include <FirebaseESP32.h>
#include <M5Stack.h>

#define FIREBASE_HOST "FirebaseプロジェクトのHostnameを入れましょう"
#define FIREBASE_AUTH "Firebaseプロジェクトの認証パスを入れましょう"
#define WIFI_SSID "WiFiのSSID"
#define WIFI_PASSWORD "WiFiのパスワード"

FirebaseData firebaseData;

bool statusA = true;
bool statusB = true;
bool statusC = true;

bool buttonProcess(String buttonName, bool status)
{
  M5.Lcd.fillScreen(BLACK);
    if (Firebase.setBool(firebaseData, "/" + buttonName + "/", status))
    {
      //Success
      M5.Lcd.setCursor(0, 0);
      M5.Lcd.print("Set bool data success");
    }
    else
    {
      M5.Lcd.setCursor(0, 0);
      M5.Lcd.println("Error in setInt, ");
      M5.Lcd.print(firebaseData.errorReason());
    }
    M5.Lcd.setCursor(0, 20);
    M5.Lcd.print(buttonName + " was pressed!");
    return status = !status;
}

void setup()
{
  M5.begin();
  Serial.begin(115200);
  WiFi.begin(WIFI_SSID, WIFI_PASSWORD);

  int _cursorX = 0;
  M5.Lcd.setTextFont(4);
  M5.Lcd.setTextColor(WHITE);
  M5.Lcd.setCursor(0, 0);
  // WiFiに接続
  M5.Lcd.print("Connecting to Wi-Fi");
  while (WiFi.status() != WL_CONNECTED)
  {
    Serial.print(".");
    M5.Lcd.setCursor(0 + 5 * _cursorX, 30);
    M5.Lcd.print(".");
    delay(300);
    _cursorX++;
    if (_cursorX > 320)
    {
      _cursorX = 0;
    }
  }
  M5.Lcd.fillScreen(BLACK);
  M5.Lcd.setCursor(0, 0);
  M5.Lcd.print("Connected with IP:");
  M5.Lcd.print(WiFi.localIP());
  delay(1000);
  // Firebase関連
  Firebase.begin(FIREBASE_HOST, FIREBASE_AUTH);
  Firebase.reconnectWiFi(true);
}

void loop()
{
  M5.update();
  if (M5.BtnA.wasPressed())
  {
    statusA = buttonProcess("BtnA", statusA);
  }
  if (M5.BtnB.wasPressed())
  {
    statusB = buttonProcess("BtnB", statusB);
  }
  if (M5.BtnC.wasPressed())
  {
    statusC = buttonProcess("BtnC", statusC);
  }
}
WiFiとFirebaseへの接続
void setup()
{
  M5.begin();
  Serial.begin(115200);
  WiFi.begin(WIFI_SSID, WIFI_PASSWORD);

  int _cursorX = 0;
  M5.Lcd.setTextFont(4);
  M5.Lcd.setTextColor(WHITE);
  M5.Lcd.setCursor(0, 0);
  // WiFiに接続
  M5.Lcd.print("Connecting to Wi-Fi");
  while (WiFi.status() != WL_CONNECTED)
  {
    Serial.print(".");
    M5.Lcd.setCursor(0 + 5 * _cursorX, 30);
    M5.Lcd.print(".");
    delay(300);
    _cursorX++;
    if (_cursorX > 320)
    {
      _cursorX = 0;
    }
  }
  M5.Lcd.fillScreen(BLACK);
  M5.Lcd.setCursor(0, 0);
  M5.Lcd.print("Connected with IP:");
  M5.Lcd.print(WiFi.localIP());
  delay(1000);
  // Firebase関連
  Firebase.begin(FIREBASE_HOST, FIREBASE_AUTH);
  Firebase.reconnectWiFi(true);
}
setup()の中でWiFiとFirebaseへの接続を行います。特に複雑なことはする必要がなく、WiFi.begin()とFirebase.begin()で接続することができます。
Firebase.reconnectWiFI()で、もし接続が切れた場合は再接続することができます。
もしESP32で実装する場合は、M5.Lcd.print()の部分をSerial.print等に変更してください。
Firebaseへの書き込み
bool buttonProcess(String buttonName, bool status)
{
  M5.Lcd.fillScreen(BLACK);
    if (Firebase.setBool(firebaseData, "/" + buttonName + "/", status))
    {
      //Success
      M5.Lcd.setCursor(0, 0);
      M5.Lcd.print("Set bool data success");
    }
    else
    {
      M5.Lcd.setCursor(0, 0);
      M5.Lcd.println("Error in setInt, ");
      M5.Lcd.print(firebaseData.errorReason());
    }
    M5.Lcd.setCursor(0, 20);
    M5.Lcd.print(buttonName + " was pressed!");
    return status = !status;
}
Firebaseへの書き込みは非常に簡単です。今回の場合Firebase.setBool()を使うことで、
ボタンが押されたらボタンの状態をtrue/falseのbooleanで変更するというものになっています。
Firebase.setBool()には書き込み対象、書き込み先、書き込む内容を引数として渡します。
今回はbooleanを渡しているのでFirebase.setBool()を使っていますが、例えばセンサ値であればintのFirebase.setInt()、FloatのFirebase.setFloat、名前などの認証情報の書き込みであればStringのFirebase.setString()などset以降の部分を変更することでどの型式でも書き込みが可能です。
次回はFelicaを読み取れるカードリーダーとSuica/Pasmoを使っていきます!
