はじめに
前回のおまけです。
どんなおまけ?
前回、userテーブルにIDとなるroleカラムを追加して、
Userモデル内にenumを追加して無理やり権限を設定しました。
(ちゃんとするなら別テーブルでロールの種類を管理しようね!)
と言い放ったまま放置するのも気持ちが悪いので、
もう少し対応を進めてみようかと思います。
やること
・userテーブルからroleカラムを削除
・新しくロールのマスタテーブルと権限のマスタテーブルを作成
・合わせて中間テーブルを用意
・Abilityクラスの中を動的にする
といった感じで進めてみます。
検証環境
以下の環境で実施しました。
[client]
・MacOS Mojave(10.14.2)
・Vagrant 2.2.2
・VBoxManage 6.0.0

[virtual]
・CentOS 7.6
・Rails 5.2.2
・ruby 2.3.1
ご参考までに。
改修作業
1.テーブルの調整
何はともあれ、不要なカラムをロールバックで削除し、
新たにテーブルなどをマイグレーションで追加していきます。
$ bundle exec rake db:rollback
でuserテーブルからroleカラムを削除後、
必要なマイグレーションファイルを生成して、
マイグレーションファイル内に必要なカラムを定義。
class CreateUserRoles < ActiveRecord::Migration[5.2]
  def change
    create_table :user_roles do |t|
      t.bigint :user_id, comment: 'ユーザーID'
      t.bigint :role_id, comment: 'ロールID'
      t.timestamp :created_at
      t.timestamp :updated_at
      t.timestamp :deleted_at
    end

    add_index :user_roles, :user_id
    add_index :user_roles, :role_id
  end
end
class CreateRoles < ActiveRecord::Migration[5.2]
  def change
    create_table :roles do |t|
      t.string :name, comment: 'ロール名'
      t.timestamp :created_at
      t.timestamp :updated_at
      t.timestamp :deleted_at
    end
  end
end
class CreateRoleAuthorities < ActiveRecord::Migration[5.2]
  def change
    create_table :role_authorities do |t|
      t.bigint :role_id, comment: 'ロールID'
      t.bigint :auth_id, comment: '権限ID'
      t.timestamp :created_at
      t.timestamp :updated_at
      t.timestamp :deleted_at
    end

    add_index :role_authorities, :role_id
    add_index :role_authorities, :auth_id
  end
end
class CreateAuthorities < ActiveRecord::Migration[5.2]
  def change
    create_table :authorities do |t|
      t.string :name, comment: '画面名'
      t.string :permission, comment: 'パーミッション'
      t.timestamp :created_at
      t.timestamp :updated_at
      t.timestamp :deleted_at
    end
  end
end
んで、マイグレーションを実行。
$ bundle exec rake db:migrate
完成したテーブルを確認。
mysql> show columns from user_roles;
+------------+------------+------+-----+---------+----------------+
| Field      | Type       | Null | Key | Default | Extra          |
+------------+------------+------+-----+---------+----------------+
| id         | bigint(20) | NO   | PRI | NULL    | auto_increment |
| user_id    | bigint(20) | YES  | MUL | NULL    |                |
| role_id    | bigint(20) | YES  | MUL | NULL    |                |
| created_at | timestamp  | YES  |     | NULL    |                |
| updated_at | timestamp  | YES  |     | NULL    |                |
| deleted_at | timestamp  | YES  |     | NULL    |                |
+------------+------------+------+-----+---------+----------------+

mysql> show columns from roles;
+------------+--------------+------+-----+---------+----------------+
| Field      | Type         | Null | Key | Default | Extra          |
+------------+--------------+------+-----+---------+----------------+
| id         | bigint(20)   | NO   | PRI | NULL    | auto_increment |
| name       | varchar(255) | YES  |     | NULL    |                |
| created_at | timestamp    | YES  |     | NULL    |                |
| updated_at | timestamp    | YES  |     | NULL    |                |
| deleted_at | timestamp    | YES  |     | NULL    |                |
+------------+--------------+------+-----+---------+----------------+

mysql> show columns from role_authorities;
+------------+------------+------+-----+---------+----------------+
| Field      | Type       | Null | Key | Default | Extra          |
+------------+------------+------+-----+---------+----------------+
| id         | bigint(20) | NO   | PRI | NULL    | auto_increment |
| role_id    | bigint(20) | YES  | MUL | NULL    |                |
| auth_id    | bigint(20) | YES  | MUL | NULL    |                |
| created_at | timestamp  | YES  |     | NULL    |                |
| updated_at | timestamp  | YES  |     | NULL    |                |
| deleted_at | timestamp  | YES  |     | NULL    |                |
+------------+------------+------+-----+---------+----------------+

mysql> show columns from authorities;
+------------+--------------+------+-----+---------+----------------+
| Field      | Type         | Null | Key | Default | Extra          |
+------------+--------------+------+-----+---------+----------------+
| id         | bigint(20)   | NO   | PRI | NULL    | auto_increment |
| name       | varchar(255) | YES  |     | NULL    |                |
| permission | varchar(255) | YES  |     | NULL    |                |
| created_at | timestamp    | YES  |     | NULL    |                |
| updated_at | timestamp    | YES  |     | NULL    |                |
| deleted_at | timestamp    | YES  |     | NULL    |                |
+------------+--------------+------+-----+---------+----------------+
こんな感じにテーブルが出来ました。
2.各モデルの調整
上記テーブルに沿って、モデルも調整していきます。
現時点では特別にロジックを必要としていないので、
リレーションだけ。
class User < ApplicationRecord
  # Include default devise modules. Others available are:
  # :confirmable, :lockable, :timeoutable, :trackable and :omniauthable
  devise :database_authenticatable, :registerable,
         :recoverable, :rememberable, :validatable

  has_many :user_roles, foreign_key: :user_id
  has_many :roles, through: :user_roles
end
class UserRole < ApplicationRecord
  belongs_to :user, foreign_key: :user_id, optional: true
  belongs_to :role, foreign_key: :role_id, optional: true
end
class Role < ApplicationRecord
  has_many :user_roles, foreign_key: :role_id
  has_many :users, through: :user_roles
  has_many :role_authorities, foreign_key: :role_id
  has_many :authorities, through: :role_authorities
end
class RoleAuthority < ApplicationRecord
  belongs_to :role, foreign_key: :role_id, optional: true
  belongs_to :authority, foreign_key: :auth_id, optional: true
end
class Authority < ApplicationRecord
  has_many :role_authorities, foreign_key: :auth_id
  has_many :roles, through: :role_authorities
end
3.Abilityクラスを調整
ここまではあくまで準備的なもの。
今回の本題となるAbilityクラスの処理を変えていきます。
ちなみに前回までは以下のようになってます。
class Ability
  include CanCan::Ability

  def initialize(user)
    # ログイン/アウトはみんな許可
    can :manage, :session

    user ||= User.new

    if user.admin?
      can :manage, :all
    else
      can :read, :all
    end
  end
end
権限をチェックして、
if~elseしているところがありますが、
ここをDBの設定値を元に動的になるようにしていきます。
class Ability
  include CanCan::Ability

  def initialize(user)
    # ログイン/アウトはみんな許可
    can :manage, :session

    user ||= User.new
    authorities = user.roles.map{|o| o.authorities }.flatten

    # manage権限のユーザーを承認
    manage_users = authorities.select{|o| o.permission == 'manage'}
    manage_users.each do |auth|
      can auth.permission.split(',').map{|o| o.to_sym}, auth.name.to_sym
    end
    # manage権限以外のユーザーを承認
    not_manage_users = authorities.select{|o| o.permission != 'manage'}
    not_manage_users.each do |auth|
      can auth.permission.split(',').map{|o| o.to_sym}, auth.name.to_sym
    end

  end
end
もっとスマートなやり方はありそうですが、
manage権限者と、それ以外(readとか)をDBの情報をeachしてto_symしました。
4.データサンプル
ロジックだけだと、何が何やら・・・って感じだと思います。
ので、ダミーデータを突っ込んでみました。
こんな感じです。
mysql> select id from users;
+----+
| id |
+----+
|  1 |
+----+

mysql> select id,user_id,role_id from user_roles;
+----+---------+---------+
| id | user_id | role_id |
+----+---------+---------+
|  1 |       1 |       1 |
+----+---------+---------+

mysql> select id,name from roles;
+----+---------------+
| id | name          |
+----+---------------+
|  1 | Administrator |
|  2 | Common        |
+----+---------------+

mysql> select id,role_id,auth_id from role_authorities;
+----+---------+---------+
| id | role_id | auth_id |
+----+---------+---------+
|  1 |       1 |       1 |
|  2 |       2 |       2 |
+----+---------+---------+

mysql> select id,name,permission from authorities;
+----+------+------------+
| id | name | permission |
+----+------+------------+
|  1 | post | manage     |
|  2 | post | read       |
+----+------+------------+
ユーザーは一人。
今はAdministratorというロールが割り振られており、
postに対してmanage権限がある。
そういった状態になってます。
5.もうひと押しの微調整
これまで、routesでrootをposts#indexにしてましたが、
このままでは、
# 権限が無いページへアクセス時の例外処理
rescue_from CanCan::AccessDenied do |exception|
  # root_urlにかっ飛ばす。
  redirect_to root_url
end
非ログイン時に無限にリダイレクトされてしまいます。
そのための対応として、急遽共通で見れる画面を新たに用意します。
適当にダッシュボードとかにしてみましょう。
$ rails g controller dashboards index
    create  app/controllers/dashboards_controller.rb
    create  app/views/dashboards/index.html.erb
そしてAbilityクラスにdashboardsを追加します。
can :manage, :dashboard
トドメにroutesのrootをdashboardsのindexにします。
root 'dashboards#index'
これで調整は全て完了です。
動作確認
では実際に画面を見て確かめてみましょう。
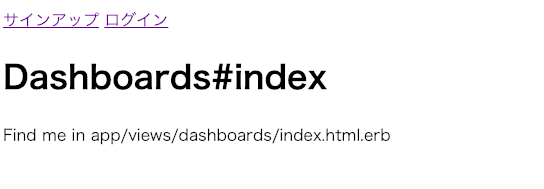
非ログインでもダッシュボードは見れました。
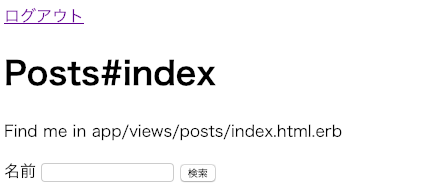
続けて、ログインをして、posts画面にアクセスしてみましょう。
manage権限を与えられているので、
indexもedit画面も見ることが出来ました。
では権限をreadにすると・・?
DBの値を直接イジってみます。
mysql> update user_roles set role_id = 2;
mysql> select id,user_id,role_id from user_roles;
+----+---------+---------+
| id | user_id | role_id |
+----+---------+---------+
|  1 |       1 |       2 |
+----+---------+---------+
これで、ロールがCommonとなり、
権限はreadと紐付きました。
この状態でpostのeditにアクセスすると・・・
リダイレクトされ、ダッシュボード画面になりました。
想定通り!完成!
所感
これで都度都度ユーザーに権限を付与したり外したりする時に、
わざわざコードをイジることなく、DB操作で完結するようになりました。
cancancan、ほんま神。
おわりに
何かお気づきの点がありましたら、
ご指摘やアドバイス等頂けると大変助かります!


