前回に続き、expressサーバーの開発環境をDocker+VScode Remote-Containerで構築し開発環境を共有してみた。
これで、1つのプロジェクトでフロントエンドとバックエンド両方の開発ができるようになる。
express環境作成
まずはexpressのスケルトンをexpress-generatorコマンドで作成する。
ただし、express-generatorはtypescriptを使用してないのでtscコマンドで設定ファイルを追加する。
vscodeで前回のプロジェクトを開き、ターミナルで以下のコマンドを実行する。
pnpx express-generator back

cd back

pnpm install typescript@4.7.4

pnpm tsc --init

echo node_modules/ >> .gitignore
echo build/ >> .gitignore
必要なパッケージを追加する。
pnpm install -D @types/node
pnpm install -D @types/express

pnpm install -D ts-node
pnpm install -D ts-node-dev
pnpm install -D tsconfig-paths
pnpm install -D cross-env
ディレクトリ構成
ディレクトリ構成を変更する。
デフォルトだとsrcディレクトリがないので、ソースコードはsrcディレクトリに移動する。
ファイルの拡張子は.tsに変更する。
mkdir src
mkdir src/routes

mv routes/index.js src/routes/index.ts
mv routes/users.js src/routes/users.ts
mv app.js src/app.ts
mv bin/www src/main.ts

rmdir bin
rmdir routes
ディレクトリ構成の変更後は以下のファイル配置になる。
/workspace/back
|--.gitignore
|--build
|--package.json
|--public
|--src
|  |--app.ts
|  |--main.ts
|  |--routes
|  |  |--index.ts
|  |  |--users.ts
|--tsconfig.json
|--views
typescript対応
typescriptにするとビルドが通らなくなるので設定ファイルとコードを修正する。
コードの修正が必要な個所は以下がある。
- typescriptでは変数の型の指定がないとエラーになる場合があるので、型を明示的に指定。
- requireを
import xxx from "mypackage"のようにしないとvscodeの補完が効かないので修正。 - ほかのコードをimportするのに、import対象のコードで
export xxxのようにエクスポートするクラス・変数を指定する必要がある。
package.json
npmのスクリプトを追加する。
これでpnpm startのようなコマンドが使えるようになる。
  "scripts": {
    "start": "env NODE_PATH=./build node ./build/main.js",
    "debug": "ts-node-dev -r tsconfig-paths/register ./src/main.ts",
    "build": "tsc"
  },
tsconfig.json
ディレクトリ構成の変更に合わせて設定を変更する。
    "rootDir": "./src",
    "baseUrl": "./src",
    	"paths": {
    		"*": [
    			"./*"
    		],
    },
    "outDir": "./build",
src/app.ts
requireをtypescript準拠のimportに修正する。
//var express = require('express');
import express from 'express';
ディレクトリ構成に合わせてパスを修正する。
app.set('views', path.join(__dirname, '../views'));

app.use(express.static(path.join(__dirname, '../public')));
型を指定してないとエラーになるので修正。
//app.use(function (err: any, req: express.Request, res: express.Response, next: express.NextFunction) {
app.use(function (err: any, req: express.Request, res: express.Response, next: express.NextFunction) {
importで読み込めるように修正。
//module.exports = app;
export default app
src/main.ts
ディレクトリ構成に合わせてimportを修正。
//var app = require('../app');
import app from 'app'
型の指定がないとエラーになるので修正。
//function normalizePort(val) {
function normalizePort(val: string) {

//function onError(error) {
function onError(error: NodeJS.ErrnoException) {
src/routes/index.ts
importを修正。
//var express = require('express');
import express from 'express';
src/routes/users.ts
index.tsと同様にimportを修正。
//var express = require('express');
import express from 'express';
動作確認
設定が終わったらターミナルでビルドしexpressを起動する。
pnpm build

pnpm start
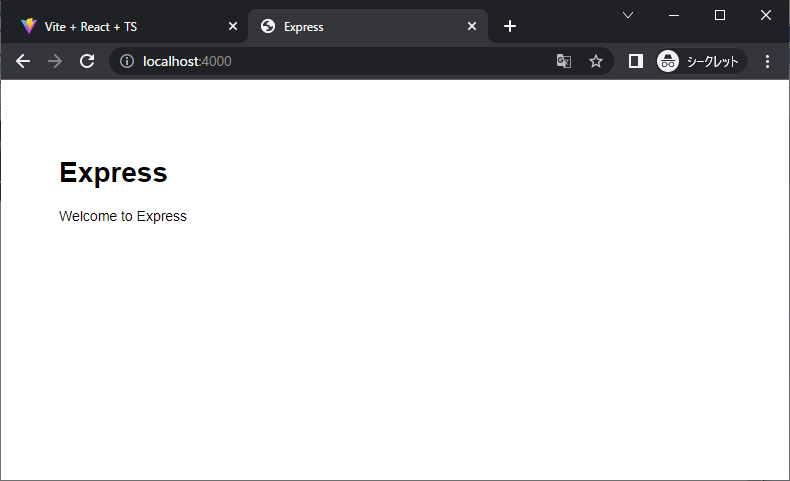
expressが起動したらブラウザで http://localhost:3000/ にアクセスしてExpressの画面が表示されれば成功である。
開発用に、typescriptのままビルドせずに起動することもできる。
pnpm debug
ポートの変更
expressとviteを同時に起動できるようにポートを変更する。
また、スクリプトとタスクを追加し開発しやすくする。
src/main.ts
express-generatorで生成したコードはデフォルトではtcpポート3000を使用するが、これだとreact(vite)の使用するポートと重複するため同時起動できないので、expressのポートを4000に変更する。
//var port = normalizePort(process.env.PORT || '3000');
var port = normalizePort(process.env.PORT || '4000');
.devcontainer/docker-compose.yml
新しいポートを使うためdockerの設定も追加する。
    ports:
      - 3000:3000
      - 4000:4000 #追加
タスクの追加
expressとviteを同時に起動できるようにスクリプトとタスクを追加し開発しやすくする。
.devcontainer/docker-entry.sh
環境を共有しやすいようにdocker起動時の初期化スクリプトを追加する。
起動時にpnpm installを実行するので、すぐにサーバを起動できるようになる。
vscodeでdockerの環境を使用するため、スクリプトの最後にはwhile sleep 1000; do :; doneを追加しコンテナが終了しないようにする。
#!/bin/sh

cd /workspace/front

pnpm install --frozen-lockfile

cd /workspace/back

pnpm install --frozen-lockfile

cd /workspace

while sleep 1000; do :; done
.devcontainer/docker-compose.yml
起動時のコマンドで初期化スクリプトを実行するようにする。
command: docker-entry.sh
.devcontainer/Dockerfile
初期化スクリプトをdockerに追加する。
COPY docker-entry.sh /usr/bin/
RUN chmod +x /usr/bin/docker-entry.sh
.vscode/launch.json
毎回コマンドで起動するのは面倒なので、vscodeから実行できるようにする。
{
    "version": "0.2.0",
    "configurations": [
        {
            "command": "pnpm dev",
            "name": "Debug Front",
            "request": "launch",
            "type": "node-terminal",
            "cwd": "${workspaceFolder}/front"
        },
        {
            "command": "pnpm debug",
            "name": "Debug Server",
            "request": "launch",
            "type": "node-terminal",
            "cwd": "${workspaceFolder}/back"
        },
    ]
}
起動
一度vscodeでプロジェクトを閉じた後、dockerのコンテナとイメージを削除する。
dockerの削除にはdockerプラグインをインストールしておくと便利である。
https://marketplace.visualstudio.com/items?itemName=ms-azuretools.vscode-docker
左のCONTAINERSとIMAGESから対象を選択し、右クリックして削除できる。
vscodeで再度プロジェクトを開くと設定変更を反映したプロジェクトが起動する。
左のアイコンからRun and Debugを選択し、左上の起動するコマンドを選んで『▶』を押すと実行できる。
Debug FrontとDebug Serverの両方を起動し、ブラウザで http://localhost:3000/ と http://localhost:4000/ の両方が開いて表示できれば成功である。


