なにこの記事
単純にdcoker-composeを使って、フロントとWEB APIを分けて、ついでにAPIをSwaggerで管理するテンプレートの紹介と、テンプレート作るまで手順を書いたザックリとした記事です。
たぶん爆速でできる、はず。
テンプレート
こちらのリポジトリからクローンしてください。 ./qs init で環境整うので、あとは http://localhost:8080 にアクセスすると、こんな感じで簡単なWEBアプリが作られてます。
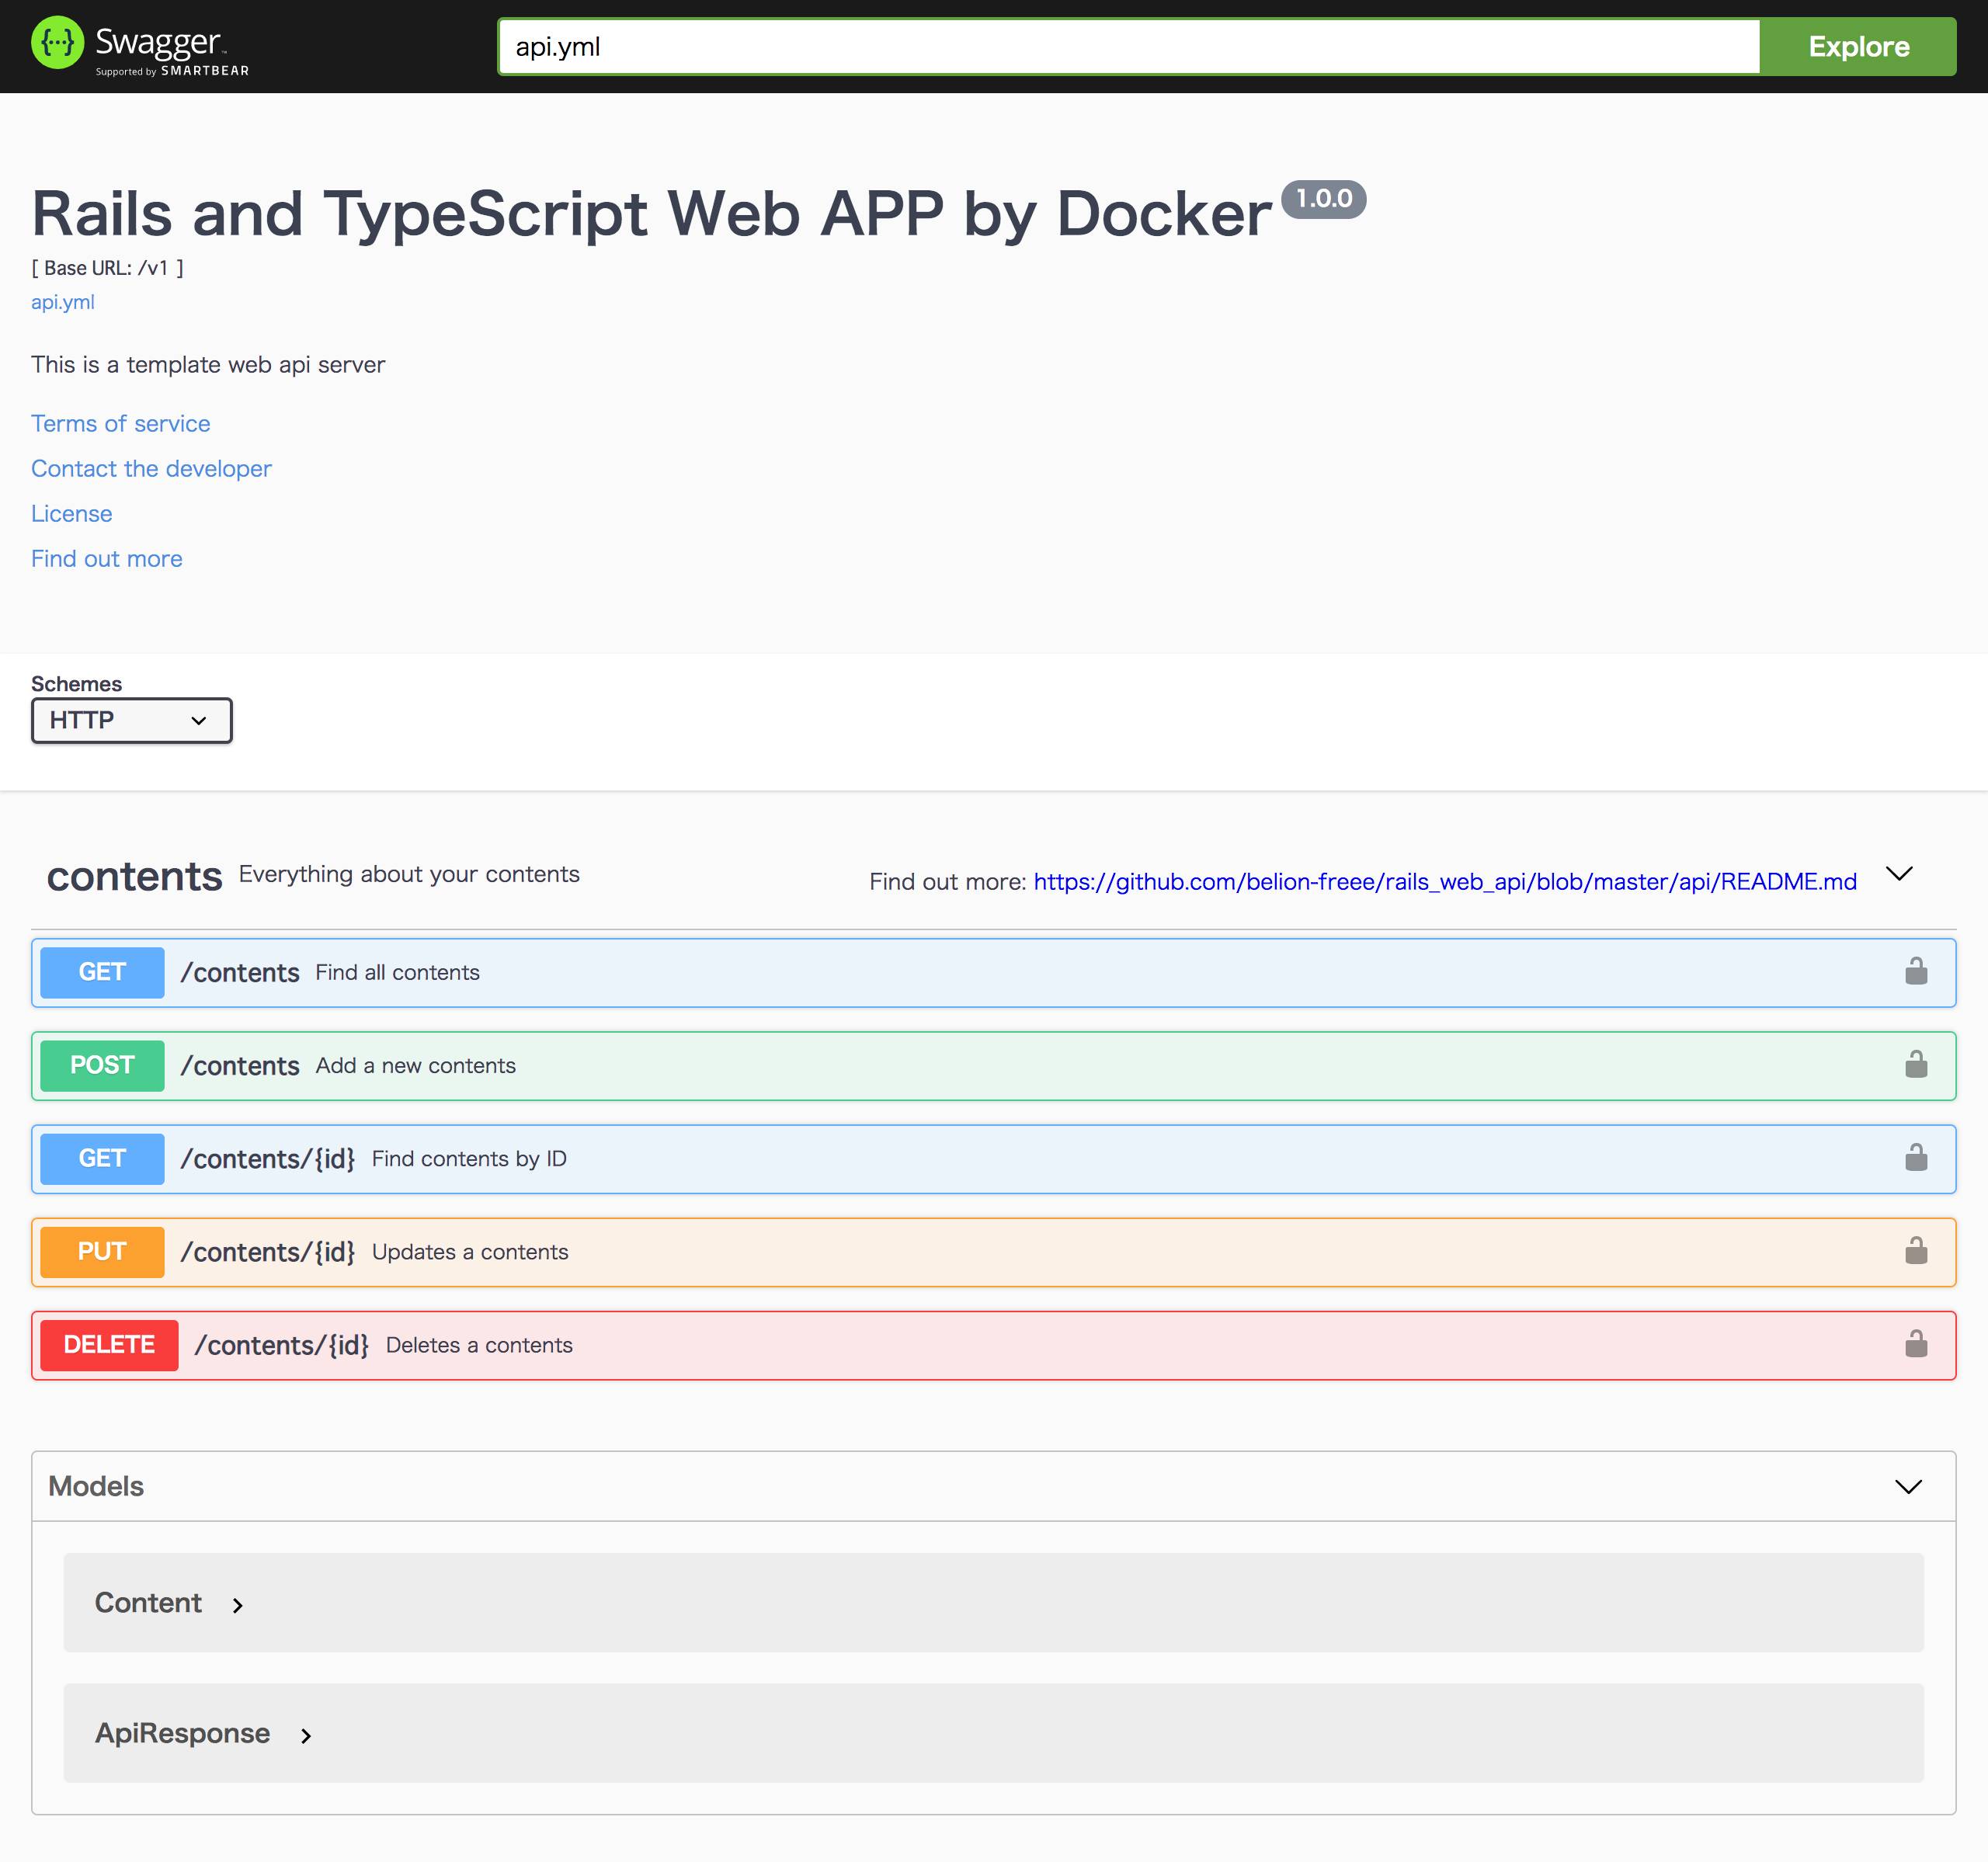
Swaggerを利用する際は、 ./qs up doc した後で、 http://localhost にアクセスするとAPIドキュメントを利用できます。
テンプレート作成までの手順
ここからはどうやって上記のテンプレート作ったかの手順を説明していきます。
構成
docker-composeのサービス構成としては下記のようにしました。
webがフロントエンドでTypeScriptにて処理を行います。
apiがWEB APIでRuby on Railsで作られてます。
フロントも含めて全てRailsで記述できますが、今回はフロントとAPIのプラットフォームが別という想定で構築しました。
APIドキュメントはSwaggerがイメージを配布してたのでサービスを分けました。
version: '3'
services:
  db:
    image: postgres
    ports:
      - "5432:5432"
    volumes:
      - data:/var/lib/postgresql/data:cached
  api:
    build: ./api
    command: bundle exec rails s -p 3000 -b '0.0.0.0'
    volumes:
      - ./api:/app:cached
      - bundle:/usr/local/bundle:cached
    environment:
      HOME: /app
      RAILS_ENV: development
    ports:
      - "3000:3000"
    tty: true
    links:
      - db
  web:
    build: ./web
    command: npm start
    volumes:
      - ./web:/app:cached
    environment:
      NODE_ENV: development
    ports:
      - "8080:8080"
    tty: true
    links:
      - api
  doc:
    image: swaggerapi/swagger-ui
    volumes:
      - ./api.yml:/usr/share/nginx/html/api.yml
    environment:
      API_URL: api.yml
    ports:
      - "80:8080"

volumes:
  bundle:
    driver: local
  data:
    driver: local
ディレクトリ構成は以下のようにしてます。各フォルダ配下にDockerfileを配置して、プロジェクトフォルダ直下のdocker-composeから管理しています。
projects # プロジェクトフォルダ
  - api # Railsのソースを配置
    - Dockerfile
    - Gemfile
  - web # TypeScriptのソースを配置
    - Dockerfile
    - package.json
  api.yml # Swagger定義
  docker-compose.yml
それでは各サービスの構築手順を解説していきます。
API
まずはAPIを立ち上げましょう。とは言っても簡単です。
コマンド打っただけで簡単に構築できました。やっぱりRailsって便利ですね。
アプリの立ち上げ
DockerfileとGemfileを配置して、下記のコマンドを実行していきます。 http://localhost:3000 にアクセスしてRailsのウェルカムページが表示されれば完了です。
$ docker-compose build api
$ docker-compose run --rm api bundle install
$ docker-compose run --rm api bundle exec rails new . -f -d=postgresql --api
$ docker-compose run --rm api bundle update
# database.ymlを下記の内容で手動で書き換える
$ docker-compose run --rm api bundle exec rails db:create
$ docker-compose up api
default: &default
  adapter: postgresql
  encoding: utf8
  min_messages: WARNING
  host: db
  port: 5432
  username: postgres
  password: postgres
  pool: 5
  timeout: 5000
  stats_execution_limit: 10

development:
  <<: *default
  database: development

test:
  <<: *default
  database: test

production:
  <<: *default
  database: production
Dockerfile
# use ruby version 2.6.5
FROM ruby:2.6.5

# using japanese on rails console
ENV LANG C.UTF-8

# remove warn
ENV DEBCONF_NOWARNINGS yes
ENV APT_KEY_DONT_WARN_ON_DANGEROUS_USAGE yes
ENV XDG_CACHE_HOME /tmp
EXPOSE 3000

# install package to docker container
RUN apt-get update -qq && apt-get install -y \
    build-essential \
    libpq-dev \
    vim \
    less

# install yarn
RUN apt-get install apt-transport-https
RUN curl -sS https://dl.yarnpkg.com/debian/pubkey.gpg | apt-key add -
RUN echo "deb https://dl.yarnpkg.com/debian/ stable main" | tee /etc/apt/sources.list.d/yarn.list
RUN apt-get update && apt-get install -y yarn

# install nodejs
RUN curl -sL https://deb.nodesource.com/setup_8.x | bash -
RUN apt-get install -y nodejs

# setting work directory
RUN mkdir /app
WORKDIR /app

# setting environment value
ENV HOME /app

# executing bundle install
COPY Gemfile /app/Gemfile
Gemfile
source 'https://rubygems.org'

gem 'rails', '~> 5.2.3'
エンドポイントの追加
文字列フィールドを1つもつModelのAPIを追加します。下記のコマンド打てば、API一式とテストを作ってくれます。素晴らしいいい。
Rspecを使うのでGemfileにgemを追加しておいてください。
$ docker-compose run --rm api bundle exec rails g scaffold Content body:string
$ docker-compose run --rm api bundle install
$ docker-compose run --rm api bundle exec rails g rspec:install
$ docker-compose run --rm api bundle exec g rspec:integration Content
これでほぼ完成ですが、なぜかapiフラグをつけるとストロングパラメーターを使わないので、下記のようにコントローラーを修正します。
  def content_params
    params.require(:content).permit(:body)
  end
あとは、適宜取得したいようにController、Modelの修正と、テストの追加はしておいてください。
面倒なんでここでは割愛します。リポジトリのコミットログ見てください。
rack_corsの導入
このままだとフロントからアクセスできないので、rack_corsを導入します。
Gemfileにrack-corsを追加して、docker-compose run --rm api bundle installしてください。
そして、下記の修正を config/application.rb に追記すれば完成です。
    config.middleware.insert_before 0, Rack::Cors do
      allow do
        origins 'localhost:3000', 'localhost:8080'
        resource '*', headers: :any, methods: [:get, :post, :put, :patch, :delete, :options]
      end
    end
疎通確認
これだけでAPIの構築が完了しました。最後に疎通確認を行います。
RailsコンソールからContentモデルに適当にデータを登録して、ブラウザから http://localhost:3000/contents を叩いて見ましょう。
[
  {
    "id": 1,
    "body": "hoge",
    "created_at": "2019-11-22T15:54:26.543Z",
    "updated_at": "2019-11-22T15:54:26.543Z"
  },
  {
    "id": 2,
    "body": "foo",
    "created_at": "2019-11-22T15:54:30.464Z",
    "updated_at": "2019-11-22T15:54:30.464Z"
  }
]
無事に取得できました。これでAPIの作成は終了です。
フロント
実際にユーザーがアクセスして使うフロントアプリケーションを作成します。
React、VueなどJSフレームワークを使ってもいいのですが、今回は超小さいアプリなのでTypeScriptを使ってサクッと作ろうかと思います。
アプリの立ち上げ
apiと同じようにDockerfileとpackage.jsonを配置して、下記のコマンドを実行していきます。
$ docker-compose build web
$ docker-compose run --rm web npm install
urlとかは適宜変えてください。パッケージは今回使うものを記載してあります。
{
  "name": "web",
  "version": "1.0.0",
  "description": "web app",
  "main": "index.js",
  "scripts": {
    "start": "http-server -o",
    "tsc": "tsc",
    "build": "webpack"
  },
  "repository": {
    "type": "git",
    "url": "git+https://github.com/belion-freee/rails_web_api.git"
  },
  "author": "belion-freee",
  "license": "ISC",
  "bugs": {
    "url": "https://github.com/belion-freee/rails_web_api/issues"
  },
  "homepage": "https://github.com/belion-freee/rails_web_api#readme",
  "devDependencies": {
    "axios": "^0.19.0",
    "http-server": "^0.11.1",
    "ts-loader": "^6.2.1",
    "typescript": "^3.7.2",
    "webpack": "^4.41.2",
    "webpack-cli": "^3.3.10"
  }
}
処理の記述
TypeScriptは初めてでしたので、下記の記事を参考にして作成しました。
API通信のために axios
Webサーバーとして立ち上げるために http-server
をそれぞれ使ってます。
tsconfig.jsonがTypeScriptの設定を記述するファイルです。自分は下記のように設定しました。もっといろんな設定ができるので公式リファレンスを読んでみてください。
{
  "compilerOptions": {
    "target": "ES2015",                       /* Specify ECMAScript target version: 'ES3' (default), 'ES5', 'ES2015', 'ES2016', 'ES2017', 'ES2018', 'ES2019' or 'ESNEXT'. */
    "module": "commonjs",                     /* Specify module code generation: 'none', 'commonjs', 'amd', 'system', 'umd', 'es2015', or 'ESNext'. */
    "outDir": "./build",                      /* Redirect output structure to the directory. */
    "rootDir": "./src",                       /* Specify the root directory of input files. Use to control the output directory structure with --outDir. */
    "strict": true,                           /* Enable all strict type-checking options. */
    "esModuleInterop": true,                  /* Enables emit interoperability between CommonJS and ES Modules via creation of namespace objects for all imports. Implies 'allowSyntheticDefaultImports'. */
    "forceConsistentCasingInFileNames": true  /* Disallow inconsistently-cased references to the same file. */
  },
  "include": [
      "src/**/*.ts"
  ],
  "exclude": [
      "node_modules",
      "**/*.spec.ts"
  ]
}
ソースコード
ここからは実際のソースコードです。下記のように記述しました。
index.html を用意して、DOMに要素を動的にjsで展開して行く構成です。
<!DOCTYPE html>
<html lang="ja">
  <head>
    <meta charset="utf-8">
    <meta name="viewport" content="width=device-width, initial-scale=1.0">
    <link rel="stylesheet" href="./style.css">
    <title>TS-Web</title>
  </head>
  <body>
    <h1>This is the template of Web APP</h1>
    <h2>created by TypeScript</h2>
    <h3>Those are contents from Web API</h3>
    <div id="contents-form">
      <form>
        <input type="text" value="" id="content-body">
        <button type="button" class="add-content">Add</button>
      </form>
    </div>
    <div id="contents"></div>
    <script src="./build/index.js"></script>
  </body>
</html>
srcディレクトリ配下にindex.htmlを操作するjsファイルを配置します。
-
index.ts: indexを操作するためのjs。 -
api.ts: Rails-APIと通信するための機能を備えたクラス。
ビルド
ここまで作成したら次にビルドする必要があります。ビルドにはwebpackを仕様します。すでにインストール済みなので、コマンドを実行してビルドしましょう。
$ docker-compose run --rm web npm run build
buildディレクトリにソースが作成されていれば成功です。
ここまででフロントの実装は終了です。
APIドキュメント
次にAPIドキュメントを作成します。とは言ってもすごい簡単です。
プロジェクト配下にapi.ymlを配置します。
サンプルは公式から拝借しました。
https://github.com/swagger-api/swagger-samples/blob/master/java/inflector-dropwizard/src/main/swagger/swagger.yaml
内容はこんな感じです。
https://github.com/belion-freee/rails_web_api/blob/master/api.yml
記述に関しては、API自体がシンプルなのもありますが、ドキュメント読まなくてもなんとなく書けるくらい分かり易かったです。
記述が終わったら、docker-compose up doc して http://localhost にアクセスすると読めるので、記述が正しいか確認してください。
これで全ての工程が終了です。
まとめ
いかがだったでしょうか。
API関連はすごい簡単に導入できましたが、TypeScriptはちょっと時間がかかりました。
TypeScriptに関してはもっとちゃんと書きたいなと思います。だいぶやっつけ感ある。
それでも、ものすごい早く複数プラットフォームのミニマムなWEBアプリを開発できたので、Dockerさんに感謝です。
流石にミニマムすぎるので、暇なときにAPI認証のエンドポイントを実装したいと思います。