この記事で行うこと
- React(フロント) + CodeIgniter4(バックエンド)を利用
- CodeIgniter4のインストール・設定から、Reactのインストール・設定、最終的にフロント側からバックエンド側へデータの送受信ができている状態までの環境を構築する
その他の環境
- macOS Monterey(macbook air 2020 ,M1チップ)
- VisualStudio Code
参考にしたサイト記事
英語の記事ですが書いてくださった方に感謝
構築スタート
バックエンド(CodeIgniter4/以下ci4)
プロジェクトを作成するディレクトリ移動
私の環境ではMAMPを利用していたのでhtdocsでプロジェクトを作成しました。
ここは自身の環境に合わせてディレクトリを移動してください
cd /Applications/MAMP/htdocs
そしたら、フォルダを作成してください。
任意名でOKです。(今回は、 myProject とします)
composerを利用してci4プロジェクトを作成する
今回、composerを利用しました。
下記でcomposerの有無が分かります。
composer -v
ci4のプロジェクト作成
composer create-project codeigniter4/appstarter backend
上記コマンドを実行すると、backendフォルダが作成されます。
その中にci4のパッケージを使ったプロジェクトができます
サーバーを起動&確認
cd backend
php spark serve
そしたら、 http://localhost:8080/ にアクセスし、ci4の画面が表示されているか確認しましょう。
データベース/テーブル作成
.envファイルで制御する方法もありますが、私はDatabase.phpを利用しました。
DBのツールは phpMyAdmin を利用しています。
他にも、MySQL、SQLyog、HeidiSQL などが利用できます。
Database.phpは,app/Config内にあります。
Database.php を開き、
下記の部分を自分の環境に合わせて変更してください。
public $default = [
        'hostname' => 'localhost',
        'username' => 'root', //DBのID
        'password' => '******', //DBのPW
        'database' => 'ci4_db', //利用するデータベース名
        'DBDriver' => 'MySQLi', //(phpMyAdmiを利用する場合は左内容でOK)
そしたら自身のDBツールで、入力した内容に対応する、データベースなどを作成しておきましょう
テーブルを作成するためのファイルを作成
backendのディレクトリで下記コマンドを実行します
php spark make:migration Products
すると、app/Database/Migrationsのフォルダ内にファイルが作成されます↓
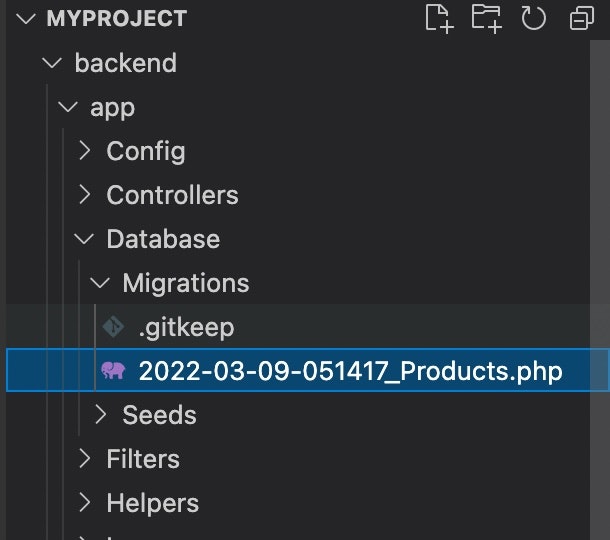
作成されていれば、ファイルを開き下記内容を入力しましょう
<?php
namespace App\Database\Migrations;
use CodeIgniter\Database\Migration;
class Products extends Migration
{
    public function up()
    {
        $this->forge->addField([
            'id'    => [
                'type'          => 'INT',
                'constraint'    => 11,
                'auto_increment'    => True
            ],
            'title'    => [
                'type'          => 'VARCHAR',
                'constraint'    => 200
            ],
            'price'    => [
                'type'          => 'INT',
                'constraint'    => 11,
            ]
        ]);
        $this->forge->addKey('id', true);
        $this->forge->createTable('products', true);
    }
    public function down()
    {
        $this->forge->dropTable('products');
    }
}
そうしましたら、下記コマンドをbackendディレクトリで実行し、テーブルを作成しましょう。
php spark migrate
すると、 product テーブルがされますので確認してください。
モデルファイルを作成する
php spark make:model ProductModel
上記コマンドを実行すると、app/Modelsフォルダ内に、 ProductModel ファイルが作成されます。
その中から、 protected $allowedFields の内容を下記の通りに変更します。
protected $allowedFields = ['title','price'];
コントローラファイルを作成する
backendディレクトリにて、
php spark make:controller Products --restful
app/Controllersフォルダに、 Products.php ファイルが作成されます。
内容を下記の通りに追記します。
<?php

namespace App\Controllers;

use CodeIgniter\RESTful\ResourceController;
use CodeIgniter\API\ResponseTrait;
use App\Models\ProductModel;

class Products extends ResourceController
{
    /**
     * Return an array of resource objects, themselves in array format
     *
     * @return mixed
     */

    use ResponseTrait;
    public function index()
    {
        $model = new ProductModel();
        $data  = $model->findAll();
        return $this->respond($data);
    }

    /**
     * Return the properties of a resource object
     *
     * @return mixed
     */
    public function show($id = null)
    {
        $model = new ProductModel();
        $data  = $model->find(['id' => $id]);
        if(!$data){
            return $this->failNotFound('No Data Found');
        }
        return $this->respond($data[0]);
    }

    /**
     * Return a new resource object, with default properties
     *
     * @return mixed
     */
    public function new()
    {
        //
    }

    /**
     * Create a new resource object, from "posted" parameters
     *
     * @return mixed
     */
    public function create()
    {
        helper(['form']);
        $rules = [
            'title' => 'required',
            'price' => 'required'
        ];
        $data = [
            'title' => $this->request->getVar('title'),
            'price' => $this->request->getVar('price'),
        ];

        if(!$this->validate($rules)){
            return $this->fail($this->validator->getErrors());
        }

        $model = new ProductModel();
        $model->save($data);
        $response = [
            'status'  => 201,
            'error'   => null,
            'message' => [
                'success' => 'Data Inserted'
            ]
        ];
        return $this->respondCreated($response);
    }

    /**
     * Return the editable properties of a resource object
     *
     * @return mixed
     */
    public function edit($id = null)
    {
        //
    }

    /**
     * Add or update a model resource, from "posted" properties
     *
     * @return mixed
     */
    public function update($id = null)
    {
        helper(['form']);
        $rules = [
            'title' => 'required',
            'price' => 'required'
        ];
        $data = [
            'title' => $this->request->getVar('title'),
            'price' => $this->request->getVar('price'),
        ];

        if(!$this->validate($rules)){
            return $this->fail($this->validator->getErrors());
        }

        $model = new ProductModel();
        $find  = $model->find(['id' => $id]);
        if(!$find){
            return $this->failNotFound('No Data Found');
        }
        $model->update($id,$data);

        $response = [
            'status' => 200,
            'error'  => null,
            'messages' => [
                'success' => 'Data updated'
            ]
        ];
        return $this->respond($response);
    }

    /**
     * Delete the designated resource object from the model
     *
     * @return mixed
     */
    public function delete($id = null)
    {
        $model = new ProductModel();
        $find = $model->find(['id' => $id]);
        if(!$find){
            return $this->failNotFound('No Data Found');
        }
        $model->delete($id);

        $response = [
            'status' => 200,
            'error' => null,
            'messages' => [
                'success' => 'Data deleted'
            ]
        ];
        return $this->respond($response);
    }
}
ルート構成を変更する
app/Config/Routes.phpの内容を変更します。
// $routes->get('/', 'Home::index');
$routes->resource('products');
CORS構成を変更する
ここが自分の中で一番難しく感じたところです。
そこで、とても助けになった記事がありました。
もし理解が乏しいなと感じる方がいれば、下記を是非読んでみてください。
では手順を進めていきます。
Cors.phpファイル作成。
backendディレクトリにて下記コマンド実行。
php spark make:filter Cors
app/Filtersにて、 Cors.php ファイルが作成されます。
下記の通り内容を変更します。
public function before(RequestInterface $request, $arguments = null)
    {
        header("Access-Control-Allow-Origin: *"); //セキュリティ的に良くないですが、今回は割愛しました。
        header("Access-Control-Allow-Headers: X-API-KEY, Origin,X-Requested-With, Content-Type, Accept, Access-Control-Requested-Method, Authorization");
        header("Access-Control-Allow-Methods: GET, POST, OPTIONS, PATCH, PUT, DELETE");
        $method = $_SERVER['REQUEST_METHOD'];
        if($method == "OPTIONS"){
            die();
        }
    }
内容を記載した後、app/Configフォルダ内にある、 Filters.php を開き、変更します。
public $aliases = [
        'csrf'          => CSRF::class,
        'toolbar'       => DebugToolbar::class,
        'honeypot'      => Honeypot::class,
        'invalidchars'  => InvalidChars::class,
        'secureheaders' => SecureHeaders::class,
        'cors'          => Cors::class, //ここ!
    ];

    /**
     * List of filter aliases that are always
     * applied before and after every request.
     *
     * @var array
     */
    public $globals = [
        'before' => [
            // 'honeypot',
            // 'csrf',
            // 'invalidchars',
            'cors', //ここ!
        ],
        'after' => [
            'toolbar',
            // 'honeypot',
            // 'secureheaders',
        ],
    ];
また、useを追加しておきます。
Filters.php の上部あたりです。
use App\Filters\Cors; //これを追加!
use CodeIgniter\Config\BaseConfig;
use CodeIgniter\Filters\CSRF;
use CodeIgniter\Filters\DebugToolbar;
use CodeIgniter\Filters\Honeypot;
use CodeIgniter\Filters\InvalidChars;
use CodeIgniter\Filters\SecureHeaders;
これで、バックエンド側(part1)は終了です。
お疲れ様でした。
フロントエンド側(part2)の記事はこちらです↓